Congratulations to our $500 VISA gift card winner!

Congratulations to Alex G. from QLD who has won our $500 VISA gift card competition (ending June 2023). We hope you enjoy your prize!


Congratulations to Alex G. from QLD who has won our $500 VISA gift card competition (ending June 2023). We hope you enjoy your prize!

When you are having your first baby, it is pretty common practice to create a baby registry. Having your first baby means you need a lot of things as you’ve never had a little one living in your home before. When a person has a second baby, many of the items received after the first can be used for the second child, so not everyone creates a baby registry the second time around.
Just because not everyone does a second registry, doesn’t mean you shouldn’t. Some mothers will tell you they highly recommend you do. While you won’t have as many people buying gifts for your second child, some will want to. It is a lot easier to direct family and friends to a link full of your needs and wants at different price ranges as opposed to answering the same questions numerous times.
Another significant reason to create a registry for your second baby is to use it as your ‘to-buy’ list. There are a lot of things needed when you are preparing for the birth of a child, no matter what number baby it is, and the list will make preparations much easier. These are other reasons you may want to create this registry.
A baby registry for your second child works great if your children are far apart in age. While you may be able to reuse your first child’s items, what happens is many of these items get passed along or purged after a few years. If there is a significant age difference between your children, you may no longer have everything you received or purchased for your first baby. A second registry will help you replenish the items needed to help care for your second child.
While it might sound counterintuitive to want some of the same items for your second baby as you did for your first when they are so close in age, the fact is, you probably will. Having children close in age, especially if they are within one or two years, your first baby is most likely not ready to part with some of their things.
Items such as crib mattresses, cribs, strollers, high chairs, or monitors are probably being used by your first child, and now a second child is going to need them as well. A second baby registry will help your family and friends know what to buy for you and your baby and get you items you will need and use.
One example of a baby item that should not be re-used is a car seat. Car seats expire after a certain amount of time, typically six to eight years from when they were manufactured. Another example is a crib mattress. While these mattresses don’t have an expiration date, they will begin to show wear and sag after about five years. Other items not to reuse are anything your first child has put into their mouth. Pacifiers and bottle nipples should always be in new condition for a new baby.
Even if you don’t plan on sharing your baby registry, they are still a great thing to create to keep yourself organized. A registry for your second child will keep track of things you know you’ll need, and keep track of things you’ve already purchased. If you receive gifts from family or friends and you had them on the list, it’s a great way to make a note that you no longer need to purchase them.
EasyRegistry makes it easy to create a registry for your second child, first child, travel, birthday, wedding, or any other event someone will want to gift you items. These registries are also great for keeping yourself organized and ensuring all your wants and needs are taken care of.
EasyRegistry allows you to create your list from items in any store. You can add an experience you’d like to have, or even if you need money over material gifts. The possibilities are endless as the registry becomes your wish list. By providing your family and friends with a link to your registry, you help them give you a gift they know you want and will appreciate.


Congratulations to Brad P. from NSW who has won our $500 VISA gift card competition (ending April 2022). We hope you enjoy your prize!

Congratulations to Leanne M. from Queensland who has won our $500 VISA gift card competition. We hope you enjoy your prize!

Guest post by Lucy from Framer.com.au
‘Enjoy every minute’ they said. Boy were they right! After so many months of planning my wedding, I remember feeling like the big day went by so fast. It was loved-up, happy blur of getting ready, riding to the venue, the walk, the vows, champagne, family, friends, more champagne and of course, dancing. Whilst my big day is over now, the memories are alive and kicking because I created a beautiful memory wall to celebrate the momentous occasion.
Photos are memories frozen in time, so it is sacrilege to keep your stunning wedding photographs buried on a USB stick or stored in digital dropbox folder somewhere. With very little effort, you can create a memory wall to bring back all the emotions of your wedding day – the quiet moments getting ready, the tears of joy as you walk down the aisle, the smiles after you exchange vows, and the dancefloor fun later in the evening.
Just like everyone’s wedding is different, your memory wall is a completely personal creation. So, the photos you choose to include should be the ones that make your own heart flutter. Don’t be afraid to extend your memory wall beyond your wedding day to include all the good times you’ve had together. Including photos of holidays, the engagement, your friends and families, your honeymoon and children tells a more complete story of your family. All beautifully printed, framed and hung together in striking wall arrangement.
Right now, you are planning your wedding – congratulations! You have probably already booked, or in the process of booking, a photographer to take photos of the big day. So why not get one step ahead and include a custom framing package to your gift registry too, which will allow you to have your magnificent photos printed, framed and delivered to your door right after your wedding. Not only is this a thoughtful gift your guests will love contributing to, it will help keep you on cloud nine a little longer once the big day has passed.
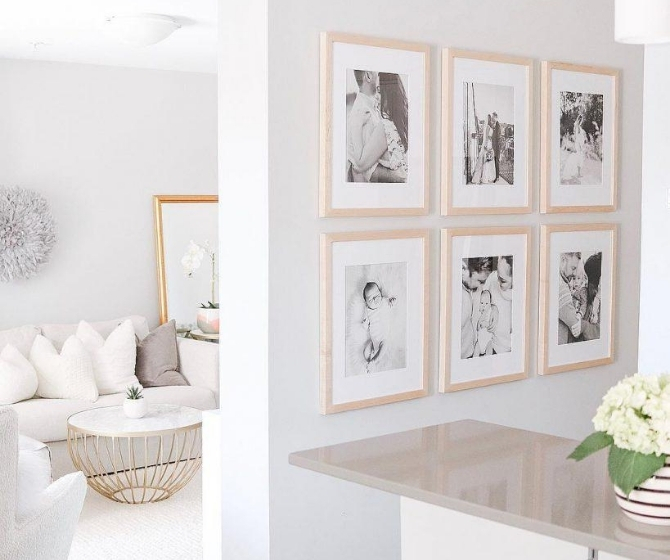
Once you have your photos printed and framed, you then need to choose a space for your memory wall. If you have a long hallway one idea is to create a uniform line of framed photos, with each frame marking a point in time from your engagement through to your honeymoon. Alternatively, a rectangular space above a couch or desk looks great with a neat grid of same-sized frames – we love grid with either four (2×2) or nine frames (3×3).
Next you need to select your photo frames. If you want a more cohesive look, it’s best to use the same size and colour for each frame in your memory wall. For wedding photos we recommend a clean white gallery frame and keeping them all the same size. If you want a more elegant look you can choose to print them in black and white. When using our online framing service, you can preview your wedding photos in a range of filters and frames and choose the style that looks best.
If you want to achieve a more eclectic look, be bold and mix different frame sizes or colours in your memory wall. When doing this, try and include 1-2 larger photos to anchor the layout, then offset them with a variety of smaller frames. Careful not to go too crazy – if you have different sized frames choosing a neutral pallet for your frames is best so you don’t distract the eye away from the photos. These organic layouts work really well going up and down a stairwell.
The great thing about memory walls is that they can grow with your family. So, while it might start off as a collection of wedding photos, over time you can add to it and include photos from your honeymoon and maybe in the future, some children! Just make sure you keep making the amazing memories and have adequate wall space to hang new frames as you get them.
Once you have your wedding photos printed and framed, it’s hang time! At this point, it pays to spend a few minutes planning out your layout. We recommend tracing your frames onto newspaper, then cutting them out and taping them to the wall. This will give you a really accurate indication of how your wall will look once hung.
Next, mark in pencil the points on the wall for where your nails should go (if you used the paper method above, you can nail right through the paper) and hang your photos. When using a professional framing service, like framer.com.au your frames will come ready to hang with all the hanging hardware you need.
So there you have it, with just a tiny bit of planning and plenty of help from an easy online framing service like Framer, you can create a beautiful memory wall for your wedding photos. Celebrating your best memories with family and friends, all whilst making a beautiful interior design statement.
Framer is the easy place to print and frame your photos online. Upload your digital photos and Framer will print, frame and deliver your photos ready to hang. Available now to add to your EasyRegistry!