You’re probably reading this with several tabs open, one baby store page showing a capsule, another showing a convertible seat, and a third full of reviews that somehow make everything less clear. One model looks safer. Another looks easier. A third seems cheaper until you realise you’ll need another seat sooner than expected. Then someone mentions ISOFIX, someone else says shoulder markers matter more than age, and suddenly buying a car seat feels heavier than buying the pram.
That pressure is normal. This isn’t a decorative baby purchase. It’s one of the few items you’ll use constantly, often when you’re tired, rushed, carrying bags, or trying not to wake a sleeping newborn. The best baby car seat australia search usually starts as a product hunt, but it quickly becomes a question of fit, routine, budget, and whether the seat will still make sense in your actual car six months from now.
Your Guide to Choosing a Baby Car Seat in Australia
I’ve watched plenty of parents walk into a retailer convinced they just need “the safest one”, then freeze when they see a wall of capsules, 0 to 4 seats, 0 to 8 seats, boosters, bases, inserts, and labels covered in technical language. A common pattern follows. They start with safety, get distracted by price, then get ambushed by a bigger issue: will it fit the car, and will they still like using it every day?
That’s why broad “top 10” lists often miss the mark. A great seat for a large SUV and one child may be a poor choice for a hatchback with two kids in the back. A capsule that’s brilliant for school-drop-off families might be wasted on parents who mostly drive short local trips and would rather buy one seat for longer use.
Australia isn’t a small niche market here. The local baby car seat market is valued at USD 150 million, and sales are projected to reach about 1.3 million units in coming years, according to Ken Research’s Australia baby car seat market overview. That tells you two things. Parents take this purchase seriously, and there’s a huge number of products competing for your attention.
If you’re also planning gifts, it helps to look at how other parents organise bigger essentials on sample registries from EasyRegistry. A car seat is exactly the kind of item that benefits from planning before the baby arrives, not after the first sleepless week.
Decoding Australian Car Seat Safety Standards
The first filter is simple. If a seat doesn’t meet AS/NZS 1754, it doesn’t belong in your shortlist. In Australia, that certification is the baseline for legal use and for the crash testing and design rules that approved restraints must meet.
What the standard means in practice
Parents often hear “Australian standards” as if it’s just a sticker. It isn’t. It affects how the seat is built, how it performs under testing, and what installation methods and markings it uses.
In practical terms, check for three things before you compare fabrics, recline settings, or cup holders:
Approval first: The restraint must be certified for Australian use under AS/NZS 1754.
Correct category: The seat type must suit your child’s current stage, not the one after it.
Usable design: The harness, marker system, and installation path need to be clear enough that you’ll use them correctly every trip.
A seat can be premium and still be the wrong seat for your child or your vehicle. I’d rather see a properly fitted, correctly used approved restraint than an expensive one installed badly.
The legal stages matter, but markers matter more
Australian law sets the broad rules. Children under seven must use approved child restraints appropriate to their stage. That legal framework matters, but in daily use the seat’s shoulder height markers are what stop many families moving too early.
Those colour-coded markers are one of the most useful features on Australian seats. They give you a physical reference point tied to fit, not guesswork. Parents often focus on birthday milestones because they’re easy to remember. Seats don’t care about birthdays. They care about how the harness and shell fit the child’s body.
Practical rule: Don’t move to the next stage because a child looks “big enough”. Move when the seat’s own markers and instructions say the current stage is no longer suitable.
Why this isn’t a small technical issue
A lot of restraint misuse isn’t dramatic. It’s the ordinary stuff. A child moved forward-facing too soon. A booster used too early. A legal restraint skipped on a short trip.
That’s why the latest Australian data is so sobering. A 2025 national poll from the Royal Children’s Hospital found one in ten children (10%) were not travelling in any legal restraint, and 55% of children around the 4 to 5 age range had been moved to forward-facing restraints before 18 months, according to the Royal Children’s Hospital National Child Health Poll report.
What works and what doesn’t
Some habits consistently help families get this right.
Works well: Buying the seat early, reading the manual before install day, and checking marker positions regularly.
Usually fails: Choosing by age label alone, accepting a hand-me-down without checking its details, and assuming installation is “close enough”.
Worth prioritising: Seats with straightforward harness adjustment and easy-to-read routing points. Ease of use is a safety feature if it helps you avoid mistakes.
The safest seat is the one that fits your child, fits your vehicle, and gets used correctly every single trip.
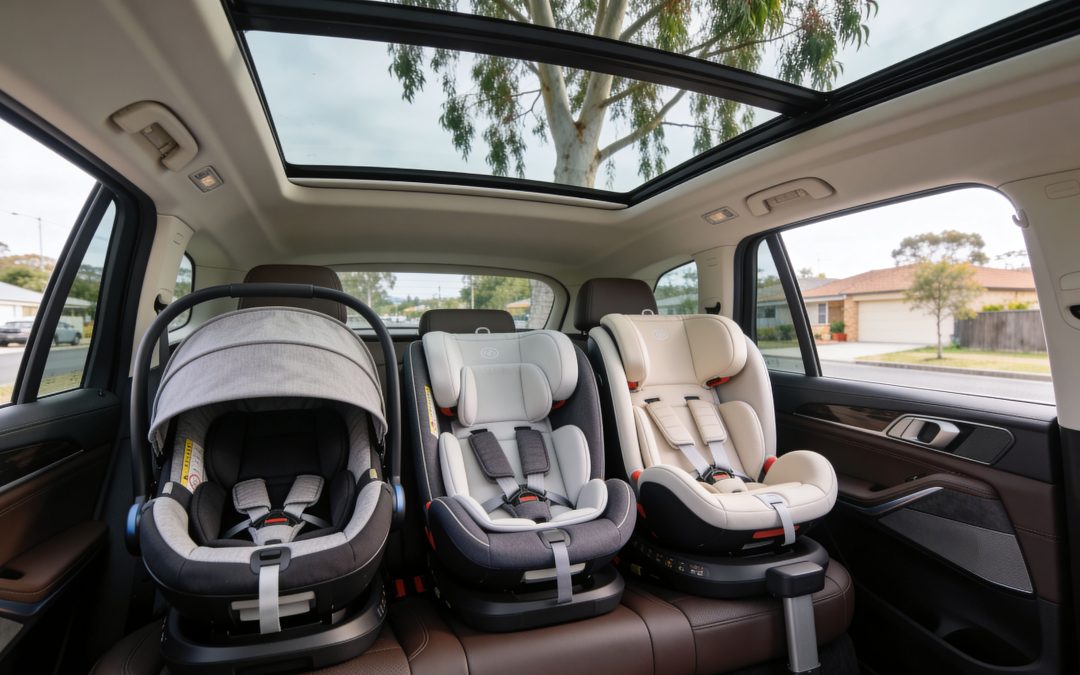
The Three Main Types of Car Seats Explained
Most Australian parents are really choosing between convenience now and value over time. The names can make it sound more complicated than it is, so it helps to think in three practical buckets.
Infant capsules
An infant capsule is built for the newborn stage and early months. The big appeal is portability. You can move a sleeping baby from car to house or pram without fully unstrapping and re-securing them somewhere else.
That convenience is real. For families doing frequent short trips, daycare runs with older siblings, or lots of in-and-out errands, a capsule can make daily life much smoother.
A capsule is at its best when your routine involves moving a sleeping baby often. If your driving is occasional and you’d rather avoid buying two early-stage seats, the value equation changes.
The downside is longevity. You’re paying for a specific stage, not the longest span of use.
Convertible seats
A convertible seat usually appeals to practical buyers. This is the option for parents who want one seat from birth through the early toddler and preschool years, depending on the model.
There are two common mindsets here. One is “skip the capsule and buy once”. The other is “use a capsule first, then move to a bigger convertible later”. Neither is automatically right. It depends on your budget, your vehicle space, and how much you value the convenience of carrying the whole seat.
Convertible seats often make the strongest long-term value case because they cover more than one stage and many support longer rear-facing use.
Booster seats
Booster seats come later, when a child has outgrown earlier harnessed stages and is ready for the next level of restraint support. This stage often gets treated too casually, but booster choice still matters for belt positioning, comfort, and how consistently children sit properly.
Some older kids accept a booster without fuss if it feels comfortable and gives them a better view out the window. Others resist because they see it as a “baby seat”. That’s where design and fit make a difference.
Quick comparison of the trade-offs
Seat type
Best for
Main strength
Main limitation
Infant capsule
Newborns and frequent short trips
Easy to move a sleeping baby
Shorter useful lifespan
0 to 4 convertible
Parents wanting longer use from birth
Good balance of safety and value
Less portable than a capsule
Booster stage seat
Older children moving beyond harnessed stages
Better belt positioning and comfort
Only suitable once earlier stages are outgrown
The best baby car seat australia decision usually gets easier once you clearly answer one question. Do you want the convenience of a capsule for the first stretch, or do you want to spend more carefully across the whole restraint journey?
Australia's Best Car Seats in 2026 A Detailed Comparison
School drop-off with a newborn, a toddler, and a week’s groceries is where glossy product rankings start to fall apart. The seat that looks best in a showroom can be the wrong buy if it eats too much back-seat space, is awkward to secure properly, or costs more over time than a better-planned alternative.
A useful shortlist starts with real family constraints. Child age matters. So do seat width, how many restraints need to fit across one row, and whether you are buying for six months of capsule use or for the next four years.
Here’s a practical snapshot before the detailed picks.
Model Name
Type
Suitable For
Installation
Key Feature
Cybex Cloud Q
Infant capsule
Birth to infant capsule stage
Capsule base system
Highest RACV protection score among capsules tested since 2021
Safe-N-Sound Safekeeper II
Convertible
Birth to four years
Convertible seat installation
Suitable from birth to four years and available under $200
Britax Safe-N-Sound B Grow+ Clicktight+
Booster-focused progression option
Families prioritising ease of use
Clicktight-style installation approach
Strong ease-of-use performance in recent evaluations
Maxi-Cosi Citi
Capsule
Families needing a smaller capsule footprint
Capsule installation
Often discussed as a compact capsule option
Best infant capsule for protection focus
The Cybex Cloud Q remains one of the clearest protection-focused capsule picks. It achieved a 3.9 out of 5 protection rating, the highest among capsules tested by RACV since 2021, according to RACV’s safest child car seats coverage.
That matters because capsule buying often drifts toward pram compatibility and carry convenience. Protection still comes first. RACV highlights the Load Leg base as part of the package, and says it reduces forward rotation in frontal impacts by up to 50%.
There is a trade-off. A premium capsule like this can suit families who want top-tier capsule performance for the newborn stage and are comfortable paying more for a product with a shorter use window. It is less compelling if your main goal is keeping total restraint spend down over several years.
Best 0 to 4 convertible for value
For many Australian families, the strongest value sits in the 0 to 4 convertible category. It covers the early years in one purchase and usually makes more financial sense than buying a capsule first and replacing it quickly.
The Safe-N-Sound Safekeeper II stands out because it keeps the brief simple. It is suitable from birth to four years, often sells for under $200, and is widely discussed as a capable budget restraint in the Australian market.
That combination matters in practice. A lower purchase price leaves room in the budget for professional installation help, a second seat for another car, or a later upgrade if your family size or vehicle changes.
This type of seat often suits:
Families skipping the capsule stage: Better long-term value from the first purchase.
Second-car buyers: A sensible approved option without a big spend.
Parents planning for two or three kids: Lower upfront cost can make the full restraint journey easier to manage.
Best option when easy daily use matters most
Correct use every trip matters more than a long feature list. If a seat is awkward to install, hard to tighten, or frustrating to adjust, error rates go up.
The Britax Safe-N-Sound B Grow+ Clicktight+ earns attention for that reason. It recorded an ease-of-use score of 4.4 stars in 2025 evaluations noted in broader Australian market discussion.
I pay close attention to seats like this for shared-care arrangements and multi-car families. Grandparents, carers, and parents swapping vehicles need a restraint that is straightforward to fit and straightforward to use properly. Paying more for easier operation can be a smart value decision if it reduces mistakes and saves time every day.
Best when space is tight
Space pressure changes the whole buying decision. A capsule or convertible that works beautifully for one child can become a poor fit once you add a second restraint or try to keep one usable seat for an adult.
The Maxi-Cosi Citi is worth considering because it is commonly mentioned as a compact capsule option. That does not automatically make it the best capsule overall. It does make it relevant for hatchbacks, smaller SUVs, and families already thinking ahead to a two-across or three-across setup.
This is one of the biggest misses in generic buying guides. They rank seats by brand reputation or features, then ignore the fact that Australian parents often need to make several restraints work inside one ordinary car.
What I’d choose by family scenario
The right seat depends on which compromise you can live with for the next few years.
For a first baby and lots of short trips: A premium capsule like the Cybex Cloud Q can be a strong choice if protection is your top priority and you want the convenience of removing the seat.
For the best long-term value from day one: A 0 to 4 convertible like the Safekeeper II usually gives a better cost-per-year result.
For shared use across different drivers or cars: The B Grow+ Clicktight+ makes sense if easier installation and adjustment will improve day-to-day consistency.
For compact cars or growing families: A smaller-footprint option like the Maxi-Cosi Citi deserves serious attention, even if it is not the flashiest product on the shelf.
The best baby car seat australia choice is rarely the seat with the most features. It is the one that fits your child properly, fits your car realistically, and still feels like money well spent after months of ordinary family use.
Installation and Vehicle Fit A Crucial Guide
The best restraint on paper can become a poor purchase if it doesn’t fit your car properly or if you dread reinstalling it. Many buying guides overlook these practical considerations. They talk about features but not about the width of the back seat, the shape of the door opening, or how hard it is to get your hand to the buckle when another restraint is next to it.
ISOFIX versus seatbelt install
Australian parents usually compare two installation paths. One uses ISOFIX anchor points where compatible. The other uses the vehicle seatbelt path with the approved restraint’s installation system.
In practice, neither method is “magic”. What matters is whether the seat is installed exactly as the manufacturer requires in your particular car. Some families prefer ISOFIX because it feels more straightforward and repeatable. Others get an excellent result with a seatbelt install, especially when the seat and vehicle work well together.
The practical question is this: can you achieve a tight, correct install consistently, not just once in the shop car park?
Why multiple-seat fit changes everything
A major problem for Australian families is fitting two or three restraints across one row. It’s a common question, but existing content still offers very little detailed guidance, as noted in Parenting Central’s discussion of narrow car seats in Australia.
That gap matters because “three across” isn’t solved by buying the three narrowest-looking seats online. Width is only part of the puzzle. You’re also dealing with:
Base shape: Some seats flare outward high up, which can clash with neighbouring restraints.
Buckle access: A setup can technically fit but still make buckling impossible.
Door clearance: A seat may fit the row but be awkward to load from the side.
Seat contour: Fixed bolsters and sculpted cushions can steal usable width.
Workshop habit: Measure the usable flat width of the back row, then compare that with the widest points of the restraints, not just the base.
What usually works in small and mid-size cars
When I’m helping families think through a tight back row, I look for combinations, not isolated products. Sometimes a narrower capsule next to a larger convertible works better than two matching seats. Sometimes staggering the most bulky seat behind the taller front passenger creates enough room to make the layout workable.
A few practical patterns tend to help:
Use one compact seat where possible. This creates breathing room for the whole row.
Mix seat profiles. Two identical restraints can clash more than two different shapes.
Test buckle access before buying. If your hand can’t reach the latch cleanly, daily use will be miserable.
Consider who sits where. The child who needs the most help should usually be in the position that gives the easiest adult access.
Later in the process, a visual installation guide can help you think through anchor points, top tether routing, and positioning in the car:
Red flags I’d take seriously
A setup isn’t good just because it can be forced into place. Watch for these signs:
The restraint leans unnaturally because another seat is pushing against it.
You can’t tighten or check the harness properly once neighbouring seats are installed.
The front seats must move into an unsafe or impractical position to make the child seat fit.
You avoid switching cars because reinstalling is too difficult.
If you expect two young children close together, or you already know a third seat may be needed, buy with that future layout in mind. That planning saves money and frustration later.
Budgeting Second-Hand Seats and Long-Term Value
A car seat is one of those purchases that looks expensive when viewed as a single checkout moment. It often looks more reasonable when viewed over the full years of use. That shift in thinking matters, especially if you’re choosing between a short-term capsule plan and a longer-span convertible.
Think in ownership years, not sticker shock
Most guides stop at purchase price. That’s not enough. Australian parents also need to think about how the seat holds up through heat, sun exposure, repeated cleaning, changing vehicles, and years of daily buckle use.
There’s also a genuine content gap here. Guidance often overlooks long-term cost and value, and there’s a lack of detailed data on resale value, climate durability, and total cost of ownership across the required years of use, as reflected in Raising Children Network’s broader car restraint guidance context.
That means parents have to make a practical judgement call. A more expensive seat may still be the better buy if it lasts through more stages, fits better in your vehicle, and is easier to use correctly.
My rule on second-hand seats
I’m not anti-budget. I am strict about unknown history.
A second-hand seat can look immaculate and still be the wrong choice. If you cannot verify its full history, age, and condition, I wouldn’t use it. A restraint that has been in a crash, stored badly, lost key parts, or sat for years in harsh heat may not be a risk worth taking.
Buy second-hand only if you know exactly where it came from, can confirm its details, and can inspect the full restraint, not just the fabric cover.
Where long-term value usually comes from
Value isn’t only about paying less. It’s about avoiding waste and avoiding the wrong upgrade later.
Look for these value drivers:
Longer useful stage coverage: A seat that spans more than one phase can reduce replacement pressure.
Straightforward daily use: If the harness and install are simple, you’re less likely to resent the seat.
Vehicle compatibility: A seat that fits your car avoids an expensive do-over.
Durable construction: Quality trim matters less than sturdy function in Australian conditions.
What doesn’t usually pay off? Fancy extras that don’t improve fit, use, or compliance. A seat isn’t better because the marketing sounds premium. It’s better if it keeps working well in real family life.
How to Add a Car Seat to Your Baby Registry
A car seat is one of the easiest big-ticket baby items to justify on a registry because it’s practical, safety-critical, and usually too important to leave to guesswork. Friends and family often want to contribute to something meaningful rather than buying a fifth muslin wrap or another soft toy.
If you’re creating a registry on EasyRegistry’s baby shower registry page, treat the car seat like a planned purchase, not a vague wish. Choose the exact model, colour if that matters to you, and any linked accessory that’s necessary, such as a base if the product requires one for your intended setup.
Make the listing specific
Add enough detail that guests understand why you picked it. Keep it simple and practical.
Include:
The full product name
Why you chose it, such as compact fit, longer use, or easy install
Whether contributions are welcome if the item is a larger purchase
Any essential requirements, such as Australian certification or compatibility with your car
That helps avoid well-meaning substitutions that don’t meet your needs.
Frame it as a group gift
Many parents feel awkward adding expensive essentials to a registry. They don’t need to. A car seat is exactly the kind of purchase people are happy to support together.
A short note works well, such as:
We chose this car seat because it fits our car properly and suits the stage we’ll need from birth. Group contributions are very welcome.
Keep the decision attached to your real life
Don’t add a seat just because it’s popular online. Add the one that makes sense for your vehicle, your budget, and your day-to-day routine. If you’ve done that thinking already, a registry becomes less about asking for something costly and more about giving people a clear way to help with an important purchase.
Frequently Asked Questions About Baby Car Seats
Can I use an overseas car seat in Australia
If it isn’t approved for Australian use, it shouldn’t be on your list. This is one of those areas where “similar” is not good enough. Buy a restraint designed and certified for the local standard.
How do I know when a car seat has expired
Check the manufacturer label and instructions on the seat itself. Don’t rely on memory, the seller’s word, or how new the fabric looks. Age, storage conditions, and missing parts all matter.
When can my child stop using a booster
Don’t treat this as a birthday decision. It depends on fit in the vehicle seat and whether the adult belt sits properly. The 5-step test is the practical guide families should use before moving out of a booster altogether.
Is the most expensive seat the safest
Not automatically. Premium seats can offer excellent features, but the better seat is the one that fits your child, fits your car, and gets used correctly every trip.
If you still have practical questions about managing a registry, guest contributions, or updating gift choices, the EasyRegistry frequently asked questions page is a useful place to check the details.
If you’re building a baby registry and want one place to organise practical gifts, group contributions, and the essentials you’ve researched, EasyRegistry makes it simple to create and share a registry that works for Australian families.
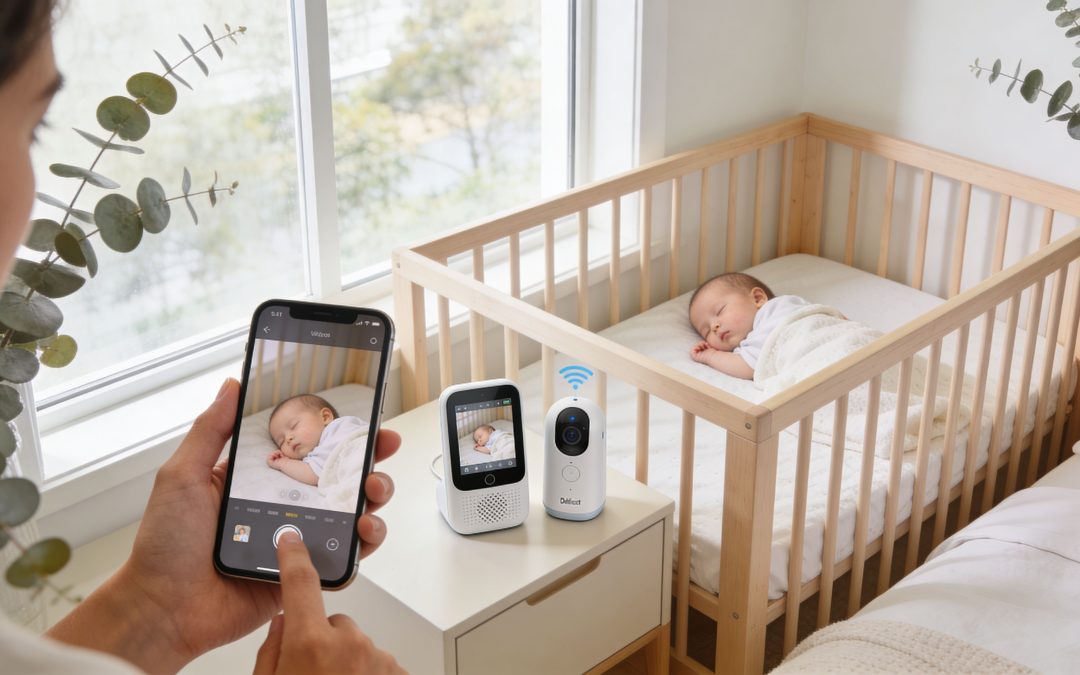
You’re probably doing what most Australian parents do at this stage. You open a few tabs, search best baby monitor australia, and suddenly you’re comparing app monitors, DECT units, wearable socks, cry alerts, split screens, subscriptions, and privacy warnings all at once.
That’s where the confusion kicks in. One monitor promises sharp video. Another promises fewer false alarms. A third looks simple and sensible until you wonder if you’ll regret not getting remote phone access later.
The right baby monitor isn’t the one with the longest feature list. It’s the one that works in your home, suits your risk tolerance, and still feels useful after the newborn haze wears off.
Choosing a Baby Monitor Can Feel Overwhelming
I’ve seen this play out the same way again and again. You start with a basic goal, usually just wanting to hear or see your baby from the next room. Then you realise there are local-only monitors, WiFi cameras, hybrid systems, movement sensors, and wearable health trackers. Suddenly a simple purchase feels oddly high stakes.
A lot of parents also buy a monitor while building out the rest of the nursery list. If you’re still sorting the basics, a practical resource like this ultimate baby shower registry checklist can help you make sure the monitor sits in the right priority tier instead of swallowing the whole budget. If you’re organising gifts from multiple shops, it also helps to keep everything in one place with a free Australian gift registry.
The real decision isn’t just brand versus brand
The big trade-offs are usually these:
Privacy versus convenience. WiFi models let you check your phone from anywhere, but they introduce account security and app dependence.
Budget versus premium extras. Some families use every advanced feature. Others end up relying on the same three functions every night.
Dedicated parent unit versus phone-only viewing. A parent unit is boring in the best possible way. It just sits there and does the job.
Local signal versus home internet. One is often simpler and steadier. The other can be more flexible.
The best monitor is the one you’ll trust at 2 am when you’re tired, not the one that looks most impressive on a product page.
That’s the lens I’d use for every pick below. Less hype. More what works.
Top Baby Monitors in Australia A Quick Comparison
If you want the shortlist first, start here. These aren’t random picks. They line up with strong Australian review performance, practical use cases, and the biggest buying split I see in real homes, which is privacy-first non-WiFi versus smarter connected systems.
Strong overall consumer ratings, 1080p HD video, cry detection
$$$
VTech VM5463
Non-WiFi
Best non-WiFi pick for many families, strong battery life
$$
Owlet Smart Sock 3
FHSS/App-linked wearable
Health tracking with heart rate and oxygen monitoring
$$$
Oricom SC870WH
Local monitor system
Common hybrid pairing for parents who want camera plus health tracking
$$
Nanit Pro
WiFi/App
Premium app-led monitoring and sleep-focused feature set
$$$
VTech audio models such as BM2150 or BM2220
Audio-only
Lower-cost, simpler monitoring
$
How to read this table properly
This comparison is most useful if you ignore the marketing names and focus on the category each model sits in.
Owlet Cam 2 suits parents who want a polished app experience and stronger video features. It makes sense when remote check-ins matter and your home internet is dependable.
VTech VM5463 suits people who want a monitor to work without relying on the cloud or their phone. It’s one of the easiest recommendations for privacy-conscious buyers who still want video.
Owlet Smart Sock 3 sits in a different lane. It isn’t just a camera. It’s for parents who want extra health monitoring and are comfortable using wearable tech as part of the setup.
The quickest way to narrow your options
Ask these questions first:
Need to check in while away from home? You’re likely looking at WiFi or app-connected options.
Don’t want the monitor touching your home network? Start with non-WiFi models.
Trying to keep spend under control? Audio-only and simpler non-WiFi video models are often the better buy.
Want health data, not just eyes on the cot? Wearable systems like Owlet deserve a separate look.
If two monitors seem evenly matched, choose the one with the simpler setup and fewer points of failure. That usually matters more than one extra smart feature.
Decoding Baby Monitor Features That Matter
Most baby monitor spec sheets are cluttered. The useful approach is to separate features into two groups. Things that change everyday use, and things that mostly look good in a comparison chart.
CHOICE baby monitor lab tests in 2026 found that only 45% of video monitors achieved perfect sound transmission over 300 metres, with Oricom models standing out, and 70% of recommended Australian monitors now use DECT technology for reliability.
Connectivity and what it changes at home
This is the biggest decision.
WiFi monitors stream through your home internet and usually to an app. Their advantage is obvious. You can check in from outside the house, share access with another carer, and often get richer features.
Non-WiFi monitors use a direct local connection, often with a dedicated parent unit. They’re simpler, more contained, and usually less fiddly once set up.
FHSS and DECT systems matter because they’re built around reliable local transmission. In practical terms, they’re often a better fit for homes where you want a stable nursery connection without relying on your router.
Here’s the simplest way to understand it:
Choose WiFi if remote access matters more than simplicity.
Choose non-WiFi if privacy and plug-and-play reliability matter more than phone access.
Choose hybrid or wearable add-ons if you want a mix of monitoring styles.
Video and audio quality you’ll actually notice
Sharp video isn’t just a luxury. It affects how often you walk into the nursery unnecessarily.
A grainy image can make every movement look concerning. A clearer feed helps you tell the difference between a baby resettling and a baby who needs you. The same goes for audio. Good sound saves you from staring at a screen constantly because you can trust what you’re hearing.
A few practical truths apply here:
Night vision matters more than daytime sharpness because that’s when you’ll rely on it most.
Wide-angle views reduce camera fiddling and can show both the cot and more of the room.
Good audio often beats flashy video in daily use, especially if you’re doing chores with the screen nearby.
Range claims versus real homes
The number on the box is almost never how the monitor behaves through walls, doors, and different levels of the house.
That’s why the CHOICE result on sound transmission matters. Range isn’t just about maximum distance in open space. It’s about staying clear and stable in the kind of home you live in, whether that’s a brick suburban house, townhouse, or apartment with interference all around you.
Practical rule: If your house has thick walls, multiple storeys, or a detached outdoor area, treat range claims as optimistic until proven otherwise.
A larger home often benefits from strong local transmission. Apartment dwellers can run into the opposite issue, where crowded wireless conditions make some systems less stable than expected.
Here’s a useful explainer if you want to see the difference between basic monitor types in action:
Battery life and why it shapes daily frustration
Battery life only feels boring until your parent unit dies halfway through the evening.
What matters isn’t just the quoted maximum. It’s whether the monitor fits the way you use it. If you carry a parent unit around all day, longer battery life is a real quality-of-life feature. If the unit mostly stays docked near the kitchen or bedside, battery becomes less critical.
Look for battery performance that matches your routine:
Moving room to room all day. Prioritise stronger parent-unit battery.
Mostly stationary use. Charging habits matter more than headline numbers.
Travel or weekends away. Simpler systems with easy setup often win.
Features that sound bigger than they are
Not every premium extra pays off.
Some parents love analytics, cry detection, and environmental readings. Others quickly ignore them once they learn their baby’s patterns. A feature is worth paying for only if it changes what you do, not just what you can look at.
The most useful premium features tend to be:
Remote access when someone else is caring for baby
Clear alerts that don’t overwhelm you
Health tracking for families who specifically want it
Multi-camera support if you’ll use it later
Everything else should earn its place.
In-Depth Reviews The Best Monitors for 2026
The shortlist becomes more personal. Different monitors solve different problems. The best pick for one family can be the wrong pick for another, even at the same budget.
Best overall for many families
The VTech VM5463 is one of the easiest balanced recommendations if you want a proper video monitor without turning your nursery into another app ecosystem.
Its appeal is straightforward. You get a non-WiFi setup, a dedicated screen, and the kind of reliability many parents want when the goal is to check the cot and hear what’s happening. If your main concern is stable day-to-night use, this style of monitor makes a lot of sense.
For many homes, the biggest upgrade isn’t smarter tech. It’s a monitor that connects fast and stays connected.
Who it suits:
Parents who want video without internet dependency
Families handing the monitor to grandparents or carers who don’t want apps
Buyers who care more about consistency than advanced tracking
What doesn’t suit everyone: If you know you’ll want to check in from work, dinner out, or while a sitter is handling bedtime, a local-only monitor can feel limiting.
Best for health tracking and reassurance
The Owlet Smart Sock 3 is the standout if your focus is health data rather than camera quality alone. According to Metro Baby’s Australian guide, the Owlet Smart Sock 3 tracks infant heart rate and oxygen with 99% accuracy against hospital standards, uses secure FHSS for app connectivity that avoids WiFi risks, and has seen 150% adoption growth in Australia by 2026.
That combination makes it appealing to a specific kind of parent. Not every family wants a wearable sensor. But for those who do, the value is obvious. It adds another layer of reassurance that a standard camera can’t provide.
Parents of babies where extra health monitoring feels especially reassuring
What to watch: This isn’t a full replacement for a camera in most homes. It’s usually strongest as part of a broader setup.
Best app-led video experience
The Owlet Cam 2 is the strongest consumer-rated all-rounder if you want a modern app-based monitor with sharp video.
Its strong point is convenience. It combines 1080p HD video, a 130° wide-angle lens, and cry detection with a 96% true positive rate per user benchmarks in the ProductReview summary already noted earlier. It also adds 2-way talkback with 0.3s latency, humidity and temperature sensors, and stable multi-room connectivity up to 50m through walls according to the same earlier ProductReview data.
That package works well for parents who live on their phones and want app access as the main control surface.
If your phone is already your planner, notebook, shopping list, and camera roll, an app-first baby monitor will probably feel natural.
Where it shines:
Checking in from outside the nursery
Parents who value clearer video and richer notifications
Homes where internet reliability is already solid
Where it can annoy: If you dislike relying on apps, permissions, charging your phone, and occasional connection troubleshooting, this style can feel like more admin than help.
Best premium option for urban parents who want data
The Nanit Pro sits at the premium end and appeals to a narrower audience. Based on the earlier ProductReview summary, it leads the premium segment at 4.8/5 and is known for AI breathing motion tracking and sleep analytics.
This is the monitor for people who don’t just want to see the baby. They want patterns, trends, and a stronger information layer around sleep. In a smaller city home or apartment, that can be appealing because the camera is doing more than acting as a digital peephole.
Best for:
Data-hungry parents
Urban households comfortable with app ecosystems
Families willing to pay more for analytics, not just visibility
The trade-off: If you won’t look at the analytics after the first few weeks, you may be paying for complexity you won’t keep using.
Best non-WiFi choice for privacy-first buyers
Outside the mainstream brands, there’s growing interest in privacy-first local monitors. One Fine Baby notes that non-WiFi baby monitors such as Peekyboo have been “taking the Australian market by storm” since 2024, which matches what a lot of parents are now asking for.
That demand makes sense. Plenty of families don’t want a nursery camera tied to internet accounts at all. They want an offline monitor with a parent unit and no cloud dependence.
This category suits:
Privacy-focused buyers
Parents tired of pairing, updates, and app alerts
Households where multiple carers need something intuitive
The main compromise is remote access. If the monitor stays local, you lose the ability to check in while you’re away.
Best budget path if you don’t need a screen
Not every family needs video. Some just need to hear clearly when the baby wakes.
Budget audio models remain a sensible buy when your home is smaller, your budget is tighter, or you already know video will feed your anxiety rather than reduce it. They’re also often easier to gift because they don’t require much setup or explanation.
A budget route makes sense if:
The nursery is close to your living space
You want a practical secondary monitor for travel or grandparents
You’d rather spend more on a pram, carrier, or cot mattress
A simple ranking by buyer type
Buyer type
Strong fit
Wants the simplest reliable video setup
VTech VM5463
Wants health monitoring and wearable data
Owlet Smart Sock 3
Wants the strongest app-led all-round camera
Owlet Cam 2
Wants premium sleep analytics
Nanit Pro
Wants privacy-first local monitoring
Peekyboo or similar non-WiFi models
Wants the lowest-cost functional option
Basic audio-only monitor
Choosing Your Perfect Monitor Use Case Scenarios
A baby monitor should match the way you live, not just the nursery aesthetic or the review score. The same model can feel brilliant in one home and annoying in another.
If you’re browsing what other Australian parents put on their lists, these sample registries for baby and family gifting are useful for seeing where monitors sit relative to bigger-ticket nursery items.
For large suburban homes
Range matters more here than flashy extras. If you’ve got a double-storey layout, brick internal walls, or you spend evenings out on the deck while the baby sleeps, local transmission quality matters.
A strong non-WiFi or DECT-style setup often works well in this situation. So do brands with a good reputation for holding signal over distance. The practical goal is simple. You don’t want dropouts when you move from bedroom to kitchen to backyard.
Best fit: VTech VM5463, Oricom systems, or another strong local-signal monitor.
For apartments and townhouses
Dense living changes the equation. You may not need huge range, but you can run into more wireless congestion and more reasons to care about privacy.
For many apartment families, a non-WiFi monitor is the easiest answer. It avoids another device living on your network and often gives steadier day-to-day performance. If remote access matters because you leave the baby with family or a sitter, a WiFi model can still make sense, but only if you’re comfortable managing the account side properly.
In smaller homes, simplicity usually beats over-specification. You don’t need farm-grade range to monitor a nursery ten metres away.
For families who travel or do overnight stays
Travel exposes weak setups fast. If a monitor takes ages to pair, depends on perfect internet, or has too many moving parts, you’ll notice the pain immediately.
Portable non-WiFi monitors often win for weekends away because they’re easy to pack and quick to restart. App-led systems can still work well if you’re moving between places with dependable internet and you really value remote viewing.
Good travel traits:
Fast setup
One obvious charging routine
Stable parent unit or app behaviour
No need to rebuild settings every trip
For parents who want more reassurance than a camera can give
A wearable monitor changes the conversation. If your main worry isn’t “Can I see the cot?” but “Can I get another layer of reassurance?”, a camera alone may not scratch that itch.
That’s the lane for the Owlet Smart Sock 3. It suits parents who know they’ll make use of the health tracking and feel calmer with that extra information.
For homes planning ahead for more children
Some parents buy the first monitor as if it only needs to solve the next six months. Then a second child arrives and the setup suddenly feels limited.
If you expect to want more than one camera later, think about expandability now. Split-screen or multi-camera capability is worth checking before you buy, especially if you want the same platform to handle nursery and toddler room use later.
Safety Privacy and Finding a Good Deal in Australia
It is 2am, the baby is finally asleep, and the last thing any parent wants is to troubleshoot a camera app, wonder who can see the feed, or realise the “bargain” monitor drops out every second night. This is the part of the decision that matters more than the spec sheet. Day-to-day reliability, privacy, and whether the monitor feels worth what you paid.
Privacy is one of the clearest dividing lines between monitor types. A non-WiFi model keeps things simple. No cloud account, no remote login, and fewer settings to maintain over time. That lower-tech setup is exactly why many Australian parents still prefer it, even when smart monitors offer sharper video and more alerts.
WiFi models still make sense for plenty of families. Remote viewing can be useful if one parent travels, if grandparents help regularly, or if you want to check in from outside the house. The trade-off is that a nursery camera connected to the internet needs the same care you would give other home security systems in Australia. Use a strong password, enable every security setting the app offers, keep updates current, and remove old users when access is no longer needed.
Physical setup matters just as much.
Keep cords well away from the cot, mount cameras securely, and check the viewing angle before the first night you rely on it. A clever monitor with poor placement is still a poor setup. The best result is a clear view of the sleep space without introducing a hazard or needing constant adjustment.
There is also a less talked-about safety issue. Some monitors create more checking, not more calm. Extra alerts, movement summaries, and app notifications can reassure one family and wind another one up. Premium features only have value if they reduce mental load in your house.
How to buy without overpaying
Good buying decisions usually come down to total ownership cost, not the ticket price on sale day. A cheaper monitor can end up costing more if the battery fades quickly, the range is poor, or adding a second camera later is overpriced.
A few practical checks help:
Compare warranty length and local support
Check return policies, especially for WiFi models that may behave differently in your home
Look at the price of extra cameras, mounts, or replacement power adapters
Watch major sale periods such as EOFY and other big retail events
Buy for the next few years of actual use, not every feature you might one day try
Where the value usually sits
For many Australian families, the sweet spot is in the middle. A dependable non-WiFi video monitor suits parents who want privacy and simplicity. A well-supported WiFi camera suits those who will actively use remote access and app controls.
The weakest value usually sits at the edges. Very cheap models often save money by cutting screen quality, battery life, or connection stability. Top-end models can be worth it, but only if you will use what you are paying for. If the advanced tracking, analytics, or subscriptions are likely to be ignored after the newborn stage, that extra spend rarely feels smart later.
Your Ultimate Baby Monitor Buying Checklist
The biggest gap in baby monitor advice is usually value, not variety. As this Australian guide discussion on price spread and feature trade-offs points out, the market runs from $55 audio models to advanced AI monitors, yet many round-ups still don’t help parents work out which premium features are useful and which are likely to be underused.
Use this checklist before you buy.
Ask yourself these questions first
What’s my real budget ceiling? Not the aspirational number. The actual spend you’re comfortable with after cot, capsule, pram, and feeding gear.
Do I need to see my baby when I’m away from home? If yes, WiFi or app access matters. If no, a local-only monitor may be the smarter buy.
How reliable is my home internet? If your WiFi already drops out in parts of the house, don’t expect a nursery camera to improve the situation.
Will extra health data calm me, or make me check the app more? This is the dividing line between a wearable monitor being useful or becoming another source of anxiety.
Will I use video every day, or is clear audio enough? Some parents assume video is essential and then mostly listen for wakeups anyway.
The shortlist test
Before hitting buy, run each monitor through this quick filter:
Question
If yes
Do I want the simplest day-to-day use?
Favour non-WiFi
Do I want remote viewing?
Favour WiFi or hybrid
Do I care strongly about privacy?
Favour local-only systems
Do I want extra health tracking?
Look at wearable options
Am I trying to stay lean on budget?
Consider audio-only or simpler video
If you’re also thinking about the broader difference between nursery tech and whole-home protection, it can help to read a separate guide on home security systems in Australia so you don’t end up expecting a baby monitor to solve a completely different security job.
Buy for the problem you have now. Don’t pay premium money for a hypothetical use case you may never need.
FAQs Adding a Baby Monitor to Your EasyRegistry
How do I add a specific monitor model to my EasyRegistry?
Use the product page from the retailer you prefer, then add it to your baby shower registry on EasyRegistry. That way, you’re not limited to one store, and guests can see exactly which monitor model, colour, or bundle you want.
This is particularly helpful with baby monitors because similar model names can hide very different connectivity types. You don’t want someone accidentally buying the WiFi version when you wanted the non-WiFi one, or vice versa.
Should I add a budget or premium monitor to my registry?
If the premium model is the one you want, add it. A registry should reflect what fits your home and parenting style, not just the cheapest acceptable option.
That said, it helps to think strategically. If a premium monitor feels like a stretch, you can include it while also adding a simpler backup option or a more affordable audio monitor. That gives guests flexibility and protects you from ending up with something that doesn’t suit your needs.
How can guests contribute to a bigger-ticket monitor?
For higher-priced items, contribution-style gifting is often the easiest path. Instead of one guest covering the full cost, several people can go in together.
That works well for baby monitors because they’re exactly the kind of purchase that relatives or close friends often like to buy as a practical group gift. It’s far more useful than receiving several smaller duplicate items you didn’t need.
If you’re building a baby registry and want one place to organise gifts, cash contributions, and product picks from any retailer, EasyRegistry makes it simple to add the exact baby monitor you want and share it with family and friends.
The nursery often starts as the spare room with the odd lamp, a stack of boxes, and a lot of possibility. Then the practical questions arrive fast: Where will the nappies go, what belongs near the change table, and how do you make a small room feel calm instead of crowded?
That is where wall shelves for nursery spaces earn their keep. Done properly, they free up floor space, keep everyday items close, and give the room some warmth before the cot, books, and soft toys fully move in. Done badly, they become cluttered, badly placed, or worse, unsafe.
For Australian parents, there is another layer to get right. You are often working with compact rooms, plasterboard walls, timber studs, and a real need to balance style with safety compliance. The good news is that a well-planned shelf setup is manageable, even if you are not a seasoned DIY person.
Creating Your Dream Nursery One Shelf at a Time
You get the cot position sorted, stand back, and notice the wall above the dresser is still doing no work at all. In a nursery, that empty wall is usually your best storage opportunity.
Wall shelves suit the way many Australian parents set up a nursery. Spare rooms are often compact, apartment bedrooms need to stay easy to move through, and plenty of homes use plasterboard over timber studs, which affects what you can safely mount and where. Shelves help you store the things you reach for every day without giving up precious floor space for another cabinet or trolley.
They also let the room feel finished early, even before every drawer is organised.
A well-placed shelf can hold books, creams, a small lamp, or the keepsakes people love giving at a baby shower. The trade-off is simple. The higher and lighter the styling, the safer and calmer the room tends to feel. The lower and heavier the shelf load, the more care the installation needs. That balance matters in a nursery more than in almost any other room.
I have found that parents are usually happiest with shelves when each one has a clear job. One ledge above the change area for items adults use. One display shelf well out of reach for framed photos or sentimental pieces. That approach keeps the room practical and stops it turning into a wall of decorations that collect dust.
If you are still settling on the look, browsing inspiring nursery ideas can help you narrow down finishes, colours, and shelf shapes before you buy. It also helps to review real baby registry examples from Australian parents so you can match shelf styling with the products you will use, gift, and store.
For Australian families, shelves also sit inside a bigger safety picture. The room needs to feel soft and personal, but it also needs hardware, finishes, and placement choices that support safe setup and align with the broader AS/NZS mindset many parents already apply to cots, furniture, and nursery products. Get that right, and shelves do more than fill a blank wall. They make the room easier to live in from day one.
Choosing the Perfect Shelves for Your Nursery
Not every shelf belongs in a nursery. Some look lovely online but warp, chip, or feel flimsy once you start loading them with board books and storage baskets.
The best choice usually comes down to three things: Safety, material, and use. Style matters, but it comes after those.
Start with materials that suit Australian homes
If you are buying or building shelves for a nursery, timber quality matters more than many parents expect. For Australian conditions, FSC-certified hardwoods such as Tasmanian Oak are a strong option. A custom shelf built with proper pocket-screw construction can support significant weight. Imported particleboard is far more prone to problems and can warp in humid coastal areas. A low-VOC polyurethane finish also supports compliance with AS/NZS child safety standards, based on the build guidance outlined in this nursery shelving resource.
That does not mean every family needs custom joinery. It means you should be cautious with bargain shelves made from thin engineered board, especially if the nursery gets afternoon sun or seasonal humidity.
Match the shelf type to the job
Different shelf styles do different work. Choosing one without thinking about what will sit on it is where disappointment starts.
A picture ledge is excellent for showing book covers. A bracket shelf is usually the safer choice if you know you want storage tubs or a heavier nappy caddy nearby.
The checklist I would use before buying
Some shelf listings make it hard to tell what you are really getting. This is the shortlist that helps most.
Rounded edges: Sharp corners are a poor fit for a baby’s room, especially once the nursery becomes a toddler room.
Low-VOC finish: Paints and sealants matter in small rooms.
Clear load guidance: If the product page is vague about weight, be cautious.
Solid timber or quality hardwood veneer: Better for durability than very light particleboard.
Mounting hardware worth using: Many included fixings are the first thing I replace.
Style still matters
Nursery shelves are not just storage. They help the room feel settled.
Light oak or ash works well in soft neutral rooms. Painted shelves can tie into wall colour, but I usually prefer timber in nurseries because it ages better as the room changes. A baby room with a cloud theme might later become a toddler book corner. Timber adapts without looking childish.
If you are torn between “prettier” and “stronger”, choose stronger. You can style a sturdy shelf beautifully. You cannot decorate around sagging.
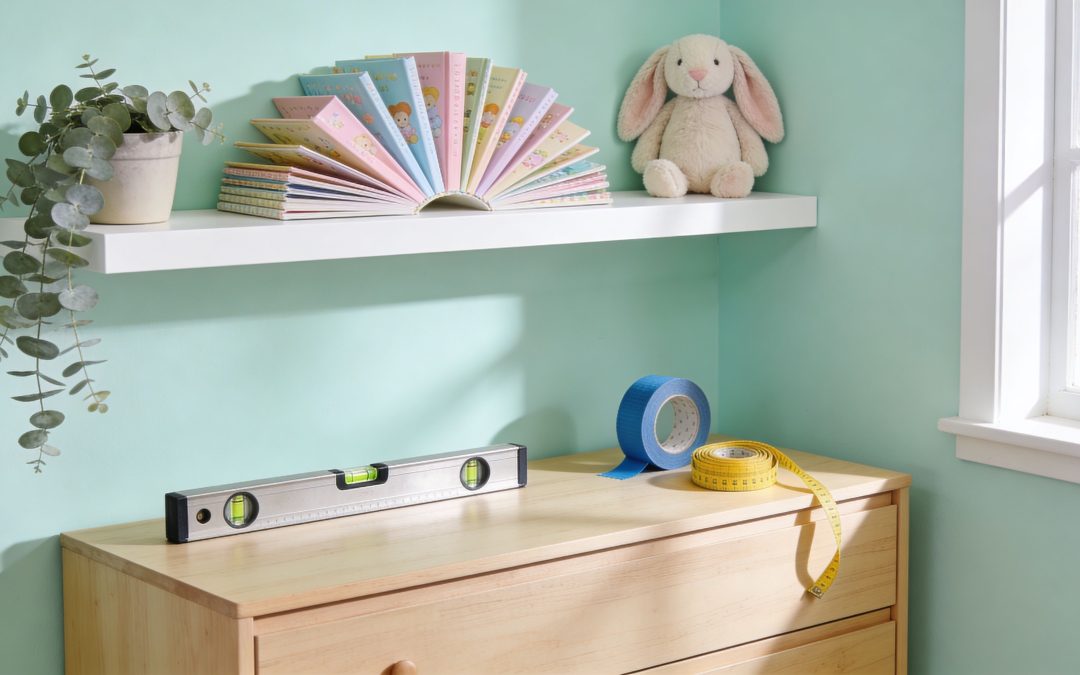
Measure Twice Drill Once Planning Your Shelf Layout
The easiest time to fix a bad shelf decision is before the drill comes out. In a nursery, a layout can look fine on paper and still feel wrong once the cot, chair, and change table are in the room.
Painter’s tape helps you test the plan at full size. Mark the shelf width and depth on the wall, then mark the main furniture too if it has not been delivered yet. I do this every time because it catches problems early. A shelf that seems centred can end up crowding the glider, clipping the visual line of the dresser, or sitting awkwardly once the mattress height changes.
Plan for the room your baby will grow into
A newborn cannot reach a shelf. A toddler can drag a toy over, climb, and surprise you in seconds. That is why shelf placement needs to work for both stages.
As a practical rule, keep shelves well clear of the cot and out of a child’s climbing zone. Product safety in Australia is handled through standards and mandatory requirements for specific nursery items, and suppliers are expected to provide safe installation guidance. If a shelf is intended to hold anything with real weight, place it where an adult can use it comfortably without creating a temptation above the cot, change table, or a piece of furniture that can be climbed.
In many Australian homes, that means checking more than just eye level. Older weatherboards can have uneven walls. Brick veneer homes often limit where fixings make sense. Newer builds with plasterboard can make a shelf look easy to place until stud locations force a different spacing.
Tape first, then test the room properly
Stand in the nursery and look at the taped layout from the places you will use every day.
From the doorway: Does the wall feel settled, or does one side look heavy?
From the change table: Can you reach the top shelf without stretching while holding a baby?
From the nursing chair: Is the shelf edge or bracket sitting where your head or shoulder might end up?
From cot height: Is anything positioned above the sleep space that should be moved elsewhere?
This step matters more than people expect. A shelf over a dresser often works well because the furniture below visually anchors it. A floating shelf on a blank wall can also work, but only if it does not look stranded halfway up the room.
Layouts that usually work
One longer shelf above a dresser is often the easiest option to live with. It gives you display space without scattering visual clutter around the room.
Two shorter shelves can suit a narrow wall, especially if there is a window, a wardrobe return, or a tall chest changing the sightlines. Keep the spacing intentional. If the gap looks accidental, the whole wall feels unsettled.
Front-facing book ledges are useful in nurseries and early toddler rooms, but placement matters. Low shelves can support independent book access. They also need more thought in homes where older siblings are likely to climb, pull, or treat them like a ladder.
Leave space for what comes next
Nurseries fill up fast. Gifts, books, keepsakes, wipes, creams, and soft toys all need a home, and your baby shower list often adds pieces at different times rather than all at once. Leave enough blank wall that you can adjust after the room starts being used.
That flexibility is especially helpful if you are adding shelves to your EasyRegistry list. You might begin with one well-placed shelf, then add a second matching piece later once you know whether the room needs more books, more storage, or less visual fuss.
A taped outline costs a few minutes. Patching bad holes and living with a poor layout costs much more.
A Practical Guide to Safe Shelf Installation
A good nursery shelf should feel boringly secure. No wobble, no creak, no quiet doubt every time you put a stack of books on it.
In many Australian homes, you are working with plasterboard over timber framing. That makes the stud finder your most important tool. A spirit level is close behind.
The rule that matters most
For a safe load capacity, brackets need to be fixed directly into timber studs using 75mm galvanised wood screws. Drywall anchors alone are a weak point. They can fail under typical loads, and they often fail under levering forces. When the bracket hits two studs, success rates rise to over 95%, as outlined in this installation guide.
That single point changes almost every installation decision. If a shelf location looks pretty but misses the studs, either change the shelf, change the bracket, or change the plan.
The basic tool kit
You do not need a workshop full of gear, but you do need the right few things.
Electronic stud finder: Essential for finding timber centres behind plasterboard.
Spirit level: A short torpedo level works, but a longer one is easier for multiple shelves.
Drill and drill bits: For pilot holes and driving screws cleanly.
75mm galvanised wood screws: For fixing into timber studs.
Pencil and painter’s tape: For marking without guesswork.
Heavy-duty steel bracket: Aim for proper strength, not decorative hardware first.
A straightforward installation sequence
Mark the studs
Run the stud finder slowly across the wall and mark both edges of each stud, then mark the centre. In many homes, studs are spaced at regular intervals, but do not assume. Check them.
Be careful around switches and power points. Avoid drilling near them.
Set the bracket position
Hold the bracket where it will sit and use a level to make sure it is true. Mark the screw holes only after the bracket is level.
If you are installing more than one shelf, mark the top line for all of them first. That helps you catch alignment issues before drilling starts.
Drill pilot holes
Pilot holes make the work cleaner and reduce the risk of splitting timber. They also help the screws bite properly instead of wandering.
Drive the screws in firmly, but do not over-tighten to the point that the bracket twists or the timber compresses unevenly.
Here is a useful visual walkthrough before you start the drilling stage:
Mount the shelf and test it
Once the bracket is fixed, slide or attach the shelf according to its design. Then test it before styling.
Use a controlled load test, not a dramatic yank. Press down gently, check for movement, and make sure the shelf stays level.
Common mistakes I would avoid
Some mistakes show up again and again with wall shelves for nursery rooms.
Relying on anchors only: Fine for very light décor in some rooms. Not what I would trust for nursery storage.
Ignoring wall type: Plasterboard over brick veneer behaves differently from straight stud walls.
Installing above the cot: Even a perfectly installed shelf does not belong there.
Using flimsy included hardware: Many packaged screws are not what I would use for a child’s room.
Skipping the load test: Better to discover a problem before the books and keepsakes go up.
When to call in help
If your wall construction is unclear, the bracket span does not line up with studs, or the shelf is especially heavy, a handyman or carpenter is worth it. Nursery shelving is not the place for a “good enough” install.
In a nursery, neat holes matter less than solid fixing. You can repaint a wall. You cannot negotiate with gravity.
Styling Your Nursery Shelves from Practical to Personal
Once the shelf is secure, the room starts to feel real. This is the part where function and sentiment can sit side by side.
A nursery shelf should not be styled like a display in a shop. It needs to work on a tired Tuesday night, not just in a photo. That usually means the lower shelf carries the practical load, while the upper one gets the softer touches.
A simple way to style them
On the shelf closest to your change area, keep useful things contained. A small basket for creams, a stack of muslin cloths, and a few board books work well. Closed or soft-sided containers keep the look tidy and stop small items from spreading.
Higher up, add the pieces that make the room feel personal. A framed ultrasound photo, a timber toy, a small ceramic keepsake, or a favourite book from your own childhood all work nicely.
If you need help balancing shape and spacing, this guide on how to decorate shelves in any room gives useful visual ideas that adapt well to nurseries too. For more baby-focused inspiration, the articles at https://blog.easyregistry.com.au/ are handy for seeing how practical nursery choices fit into the bigger setup.
What tends to look best
A few styling habits make shelves feel calm instead of crowded.
Mix heights: Lean a taller book or frame behind smaller items.
Repeat one material: Timber, woven baskets, or soft fabric bins help the arrangement feel intentional.
Leave some empty space: Full shelves rarely look better. They just look busy.
Keep fragile décor high: If it can break or be grabbed later, it belongs out of reach.
What I would skip
Very heavy décor, glass pieces on low shelves, and lots of tiny objects usually create more maintenance than charm. The same goes for styling every shelf edge-to-edge. In a nursery, visual quiet is part of the comfort.
Shelves also do not need to stay the same. The display that starts with a rattle and a birth announcement can later become a row of readers and toy animals. That flexibility is one of the best things about wall shelving.
Adding Nursery Shelves to Your EasyRegistry
Registry decisions feel a lot easier once you separate the nice-to-have items from the pieces you will use every day. Nursery shelves usually land in the second group. They help with storage, they shape the look of the room, and they are the kind of gift many Australian friends and family are happy to contribute to because they can see exactly where it will go.
From our own EasyRegistry trends, nursery organisation is a steady theme on baby shower lists, and shelves are one of the more common ways parents tackle it. That makes sense. A well-chosen shelf is practical from day one, then keeps earning its place as the room changes from newborn setup to toddler space.
Why shelves work well on a registry
Shelves suit registry gifting because they solve a real problem. Guests often want to buy something more lasting than consumables, but still useful. A shelf, picture ledge, or small set of wall-mounted book ledges hits that middle ground nicely.
They also work for different budgets. One guest might purchase a single ledge. A group might chip in for a matching set, or help cover better-quality timber shelving that will last beyond the baby years.
The two registry options that make the most sense
The practical choice is to add the exact shelf you want if you have already settled on the size, finish, and fixing style. That is the best option for parents who have measured the wall, checked stud locations, and know whether they need something light for plasterboard or a sturdier shelf for books and baskets.
The flexible choice is to add a contribution toward nursery shelving or room setup through your baby shower registry at EasyRegistry. I recommend this route if you are still deciding between a ready-made shelf and a custom solution, which is common in Australian homes where wall types, room sizes, and rental rules can change the plan quickly.
That flexibility matters more than many parents expect.
A shelf that looks perfect online may not suit double brick, older lath-and-plaster, or a rental where patching holes later is part of the deal. A registry fund gives you room to buy the right version once the practical details are clear, instead of locking in the wrong product too early.
If you do add a specific shelf, include a short note on the registry with the colour, quantity, or preferred retailer. That small bit of guidance helps guests choose confidently and cuts down the chance of ending up with mismatched pieces you cannot safely install or easily return.
Your Nursery Shelf Questions Answered
A few shelf questions tend to come up once the plan gets real and the drill comes out.
What is the best height for nursery shelves
A sensible guide is to keep shelves in the 120 to 150cm range, provided they are also well clear of the cot and any climbable furniture. Height is not just about reach. It is about how the room will function once your baby becomes mobile.
Are no-drill shelves a good nursery option
For lightweight decoration in some rooms, renters may be tempted. For nursery storage, I would be cautious. Books, baskets, and everyday use put repeated strain on fixings, and this is one area where a proper mounted shelf is usually the safer call.
How do I clean nursery shelves
Keep it simple. Dust with a microfibre cloth, and wipe marks with a soft damp cloth and a mild cleaner. Harsh sprays are unnecessary, especially around baby items.
How do I childproof them as my baby grows
Reassess the room every few months. The shelf might still be secure, but the nearby armchair, toy box, or dresser may suddenly become a climbing aid. Move furniture if needed, keep fragile objects high, and remove anything you would not want pulled down.
How many items should go on each shelf
Less than you think. A shelf that is easy to dust, easy to reach, and easy to glance at during a 2 am nappy change is the one that keeps working. If styling starts to interfere with storage, practicality should win.
A well-chosen nursery shelf does not have to be complicated. It needs safe fixing, sensible placement, and enough restraint that the room still feels restful.
If you’re planning your nursery and want friends and family to contribute in a way that’s useful, thoughtful, and easy to organise, EasyRegistry makes it simple to add specific gifts or cash funds for your shelf project, décor, and other baby essentials in one place.
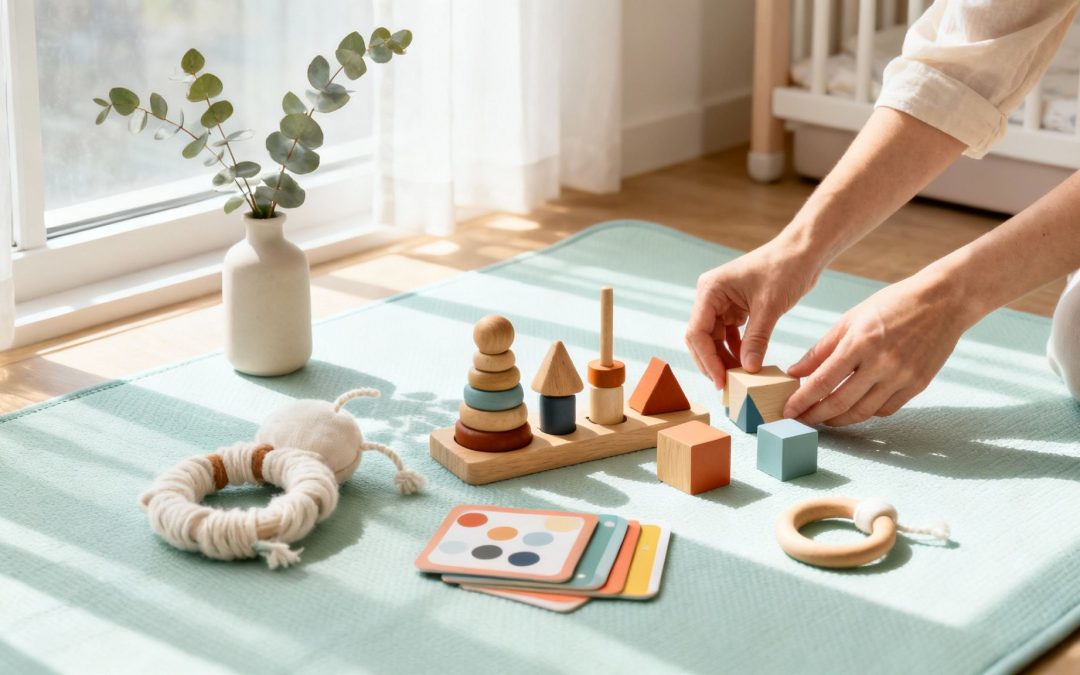
When you're looking for toys for a baby, the best ones are always safe, age-appropriate, and designed to support their development. Think of them as the very first tools your little one will use to learn about the world, helping them build sensory awareness, motor skills, and an understanding of how things work.
What is Purposeful Play?
Walking into a toy store or browsing online can feel completely overwhelming. The baby toy market is enormous—in Australia alone, it was valued at USD 1.55 billion in 2024 and is still growing. You can read more about the Australian baby toys market on TechschiResearch.com.
With so many choices, it helps to remember that the goal isn't just to keep your baby entertained; it's to enrich their development. Each toy is less of a distraction and more like your baby's first teacher.
That soft, crinkly book? It's an early lesson in texture, sound, and cause-and-effect. A high-contrast mobile hanging over the cot is more than just cute nursery decor—it’s a baby's first gym for strengthening their eye muscles.
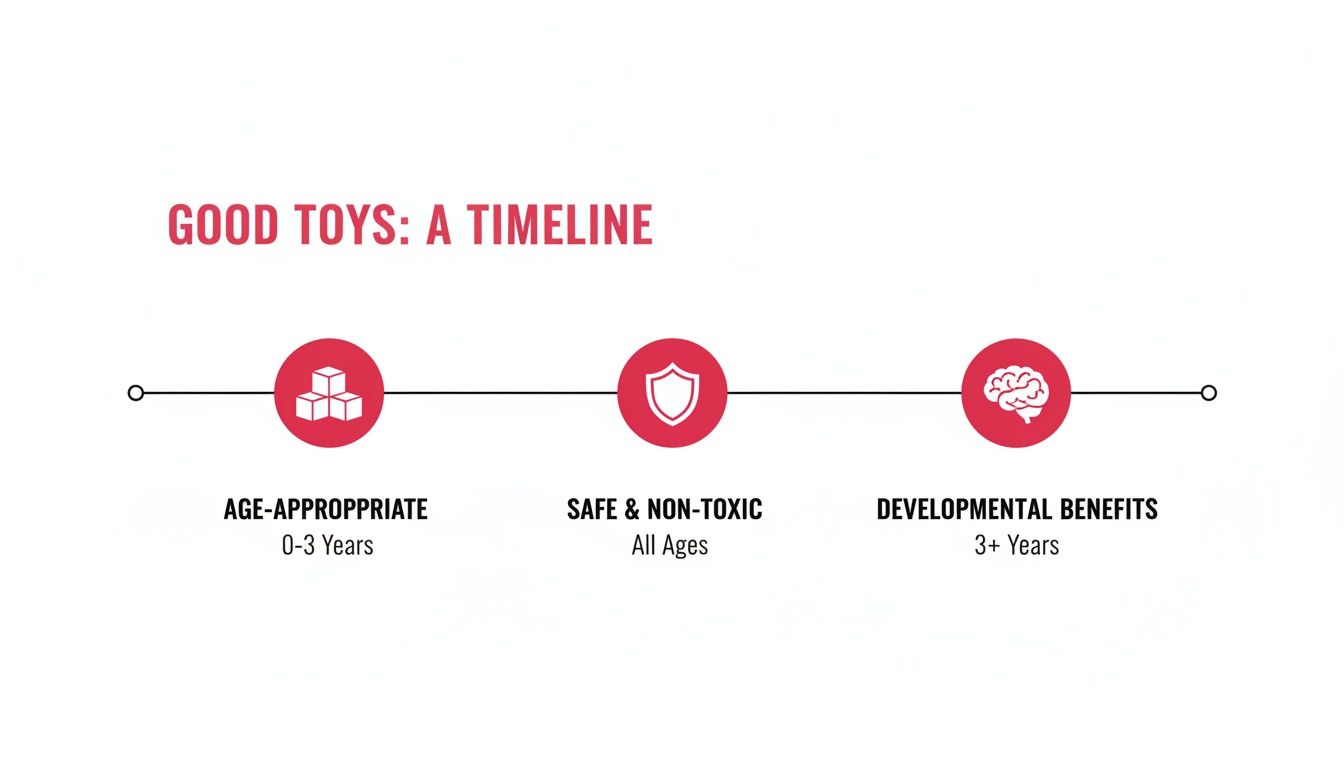
The Three Pillars of a Good Toy
To cut through the noise, you can filter your choices through three simple principles. Every toy you consider should tick these boxes to make sure it's genuinely helping your baby grow and thrive.
Developmental Value: Does it stimulate their senses, encourage them to move, or spark a little bit of curiosity? The best toys meet your baby where they are, helping them hit milestones like grasping an object, tracking it with their eyes, or realising their actions can make things happen.
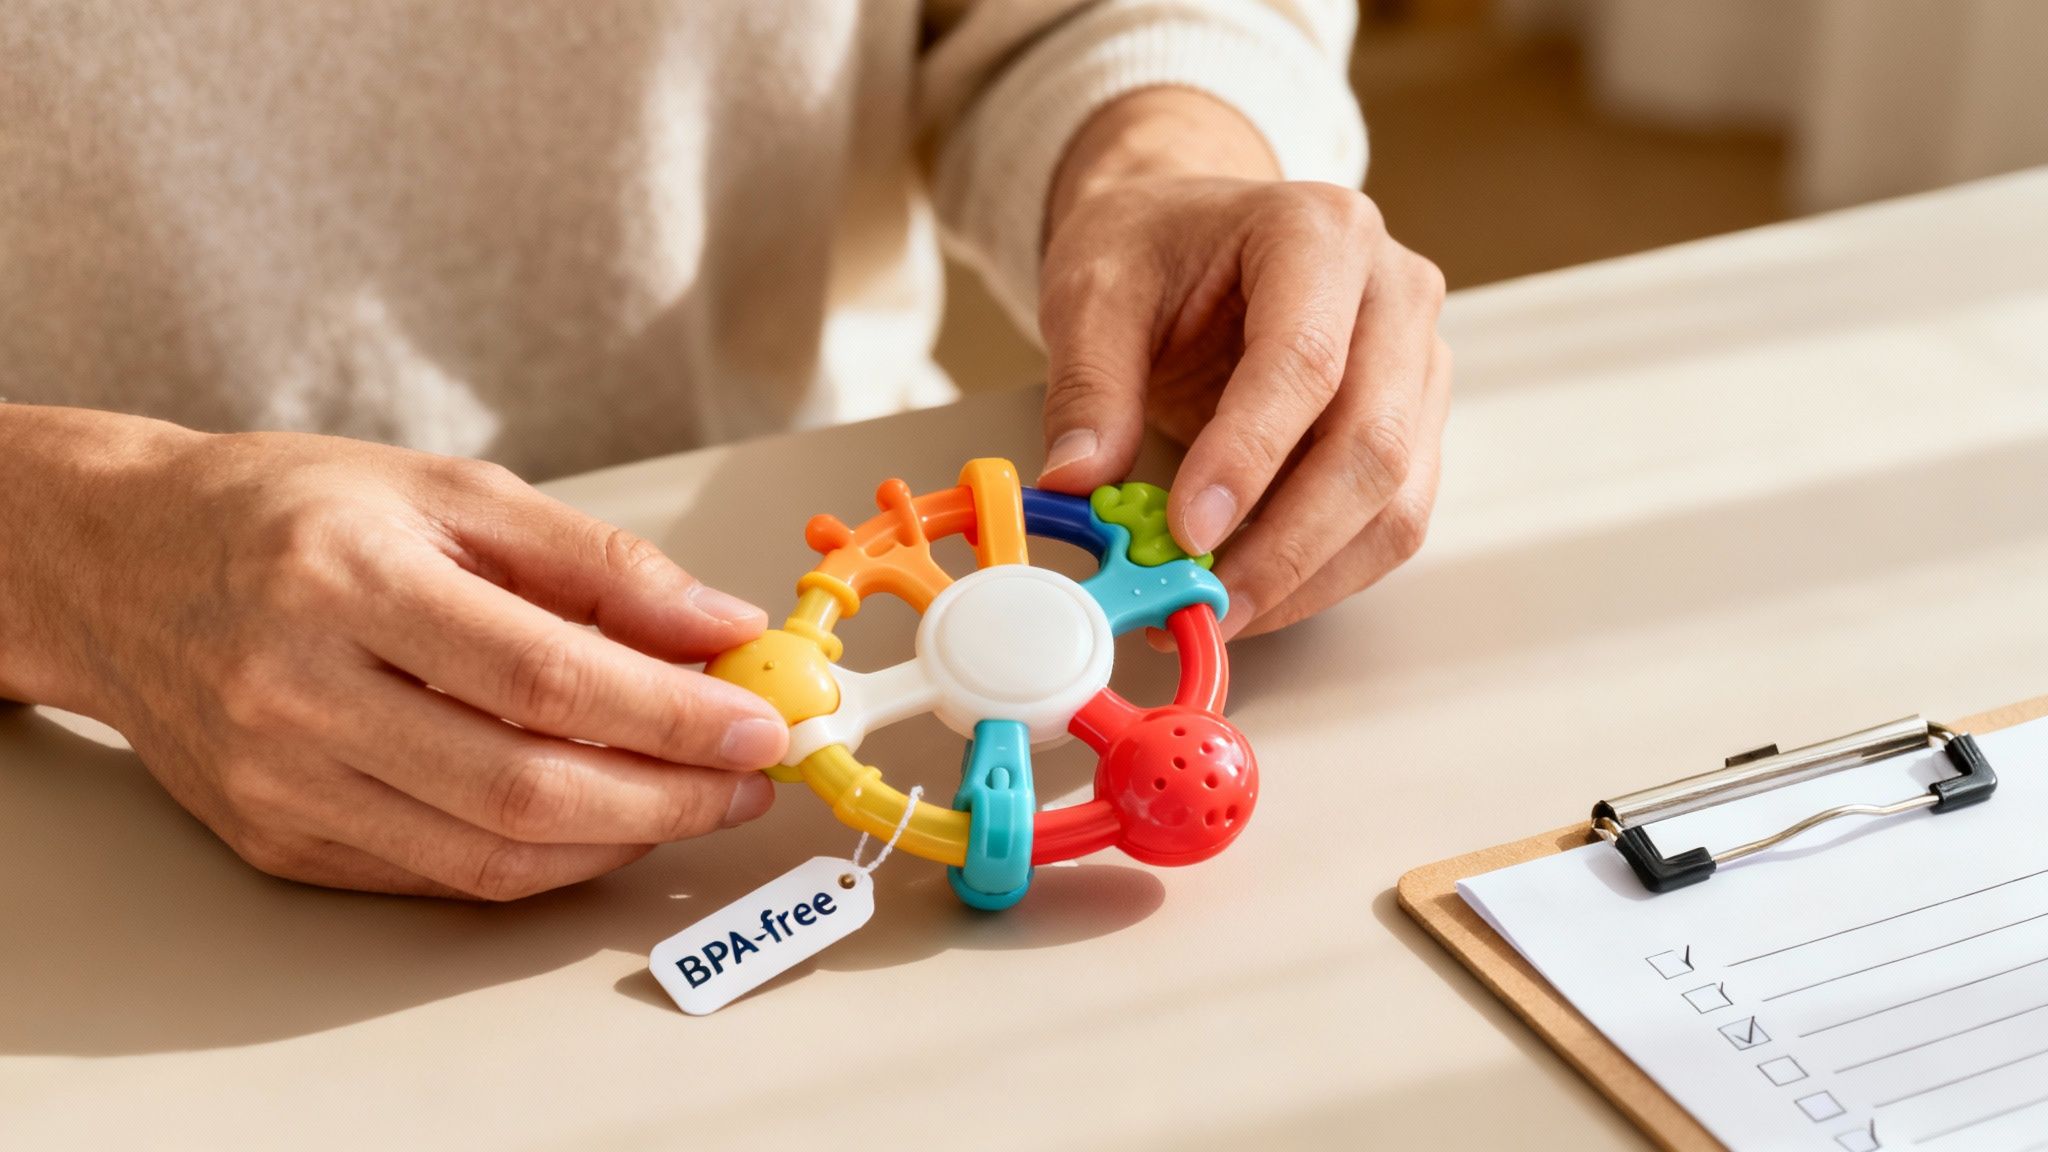
Safety First: Is it made from non-toxic materials? Are there any small parts that could be a choking hazard? Safety is the one area where there's no room for compromise—it always comes first.
Age-Appropriateness: A toy that’s too simple won't hold their interest for long, but one that's too advanced will just lead to frustration. The sweet spot is a toy that offers a gentle challenge, encouraging new skills without being overwhelming.
The most effective infant toys are often the simplest. They are the open-ended tools that invite curiosity and allow a baby to explore at their own pace, laying a strong foundation for future learning and discovery.
Keeping these fundamentals in mind changes how you shop for toys. It becomes less about guessing and more about intentionally supporting your child's journey. This approach also makes building a gift list much easier, as you can see from these sample baby shower registry ideas.
Playful Milestones: Matching Toys to Your Baby's Age and Stage
Choosing the right toy is like giving your baby the perfect tool right when they need it most. An infant's first year is an incredible whirlwind of growth, and their play needs change just as fast. When you match a toy to their developmental stage, you're not just keeping them busy—you're actively helping them master their next big milestone.
What fascinates a newborn is worlds away from what will capture the imagination of a 10-month-old. This journey from simple sensory exploration to more complex skills is a rapid one.
As you can see, the core ideas of choosing toys that are age-appropriate, safe, and beneficial for development are the cornerstones of a great toy box.
To make this easier, I've broken down the key stages of an infant's first year and suggested toys that really hit the mark for each one. This table offers a quick snapshot of what’s happening developmentally and which toys will support that growth.
Infant Toy Selection Guide by Developmental Stage
Age Range
Key Developmental Milestones
Recommended Toy Categories
0-3 Months
Developing vision (focuses on high-contrast), reflexive movements, tracking objects with eyes, beginning to process sounds.
Gaining motor control (grasping, reaching), exploring with hands and mouth (teething), rolling over, improved hand-eye coordination.
Activity gyms, teething rings, soft balls, crinkle books, tactile toys with various textures.
8-12 Months
Becoming mobile (crawling, pulling up), understanding cause and effect, developing object permanence, refining fine motor skills.
Stacking rings/cups, shape sorters, simple puzzles, push/pull toys, board books, large building blocks.
This table is a great starting point, but let’s dive a little deeper into what makes these toys so perfect for each stage of your baby’s incredible first year.
The First Three Months: A World of Sensation
In these early months, a baby's world is a gentle blur of shapes, sounds, and feelings. Their main job is simply learning to process all this new sensory information. Since their vision is still developing, they’re most drawn to bold, high-contrast patterns.
The best toys for this stage are wonderfully simple, designed to appeal directly to their budding senses.
High-Contrast Mobiles and Cards: The stark difference between black, white, and red is easiest for newborn eyes to see. Watching them helps strengthen their eye muscles as they learn to focus and track movement.
Soft Rattles and Wrist Shakers: A lightweight toy that makes a gentle noise is a brilliant first lesson in cause and effect. "When I shake my hand, I hear a sound!"—that's a huge cognitive connection being made.
Unbreakable Mirrors: Babies are absolutely captivated by faces, especially their own. A baby-safe mirror offers endless fascination and gently introduces the concept of self-awareness.
Four to Seven Months: The Little Explorer
This period is all about action and exploration. Your baby is gaining more control over their body—learning to grasp, reach, and maybe even roll over. And yes, everything they can get their hands on will probably end up in their mouth. This is a crucial way they explore textures and soothe their teething gums.
So, toys should now encourage these new physical skills and satisfy their oral curiosity.
A toy that encourages an infant to reach, grasp, and manipulate is doing more than just entertaining—it's building the neural pathways for fine motor skills and problem-solving that will last a lifetime.
Think about toys that give them a reason to move. An interesting object placed just out of reach can be the perfect motivation for a baby to attempt their first big roll. Activity gyms that invite kicking and batting are fantastic, as are a variety of safe, textured teething toys.
Eight to Twelve Months: The Little Scientist
By now, your infant is likely on the move, whether that’s crawling, pulling up to stand, or even taking those wobbly first steps. They've turned into little scientists, completely fascinated by cause and effect, object permanence (the idea that things still exist even when hidden), and how different objects fit together.
This is where educational toys really start to shine. In Australia, the market for pre-schooler toys is booming, with a projected 5.36% compound annual growth rate. It shows just how much parents value toys like shape sorters and stacking cups for building cognitive skills during this critical window of brain development. You can see more data on the Australian toy market at Mordor Intelligence.
Stacking Rings and Cups: These classics are perfect for developing hand-eye coordination and introducing early concepts of size and order.
Shape Sorters and Simple Puzzles: These challenge their problem-solving abilities and teach them about spatial relationships in a hands-on way.
Push and Pull Toys: As they become more mobile, toys they can push or pull along offer a bit of support and make practicing their new movement skills even more fun.
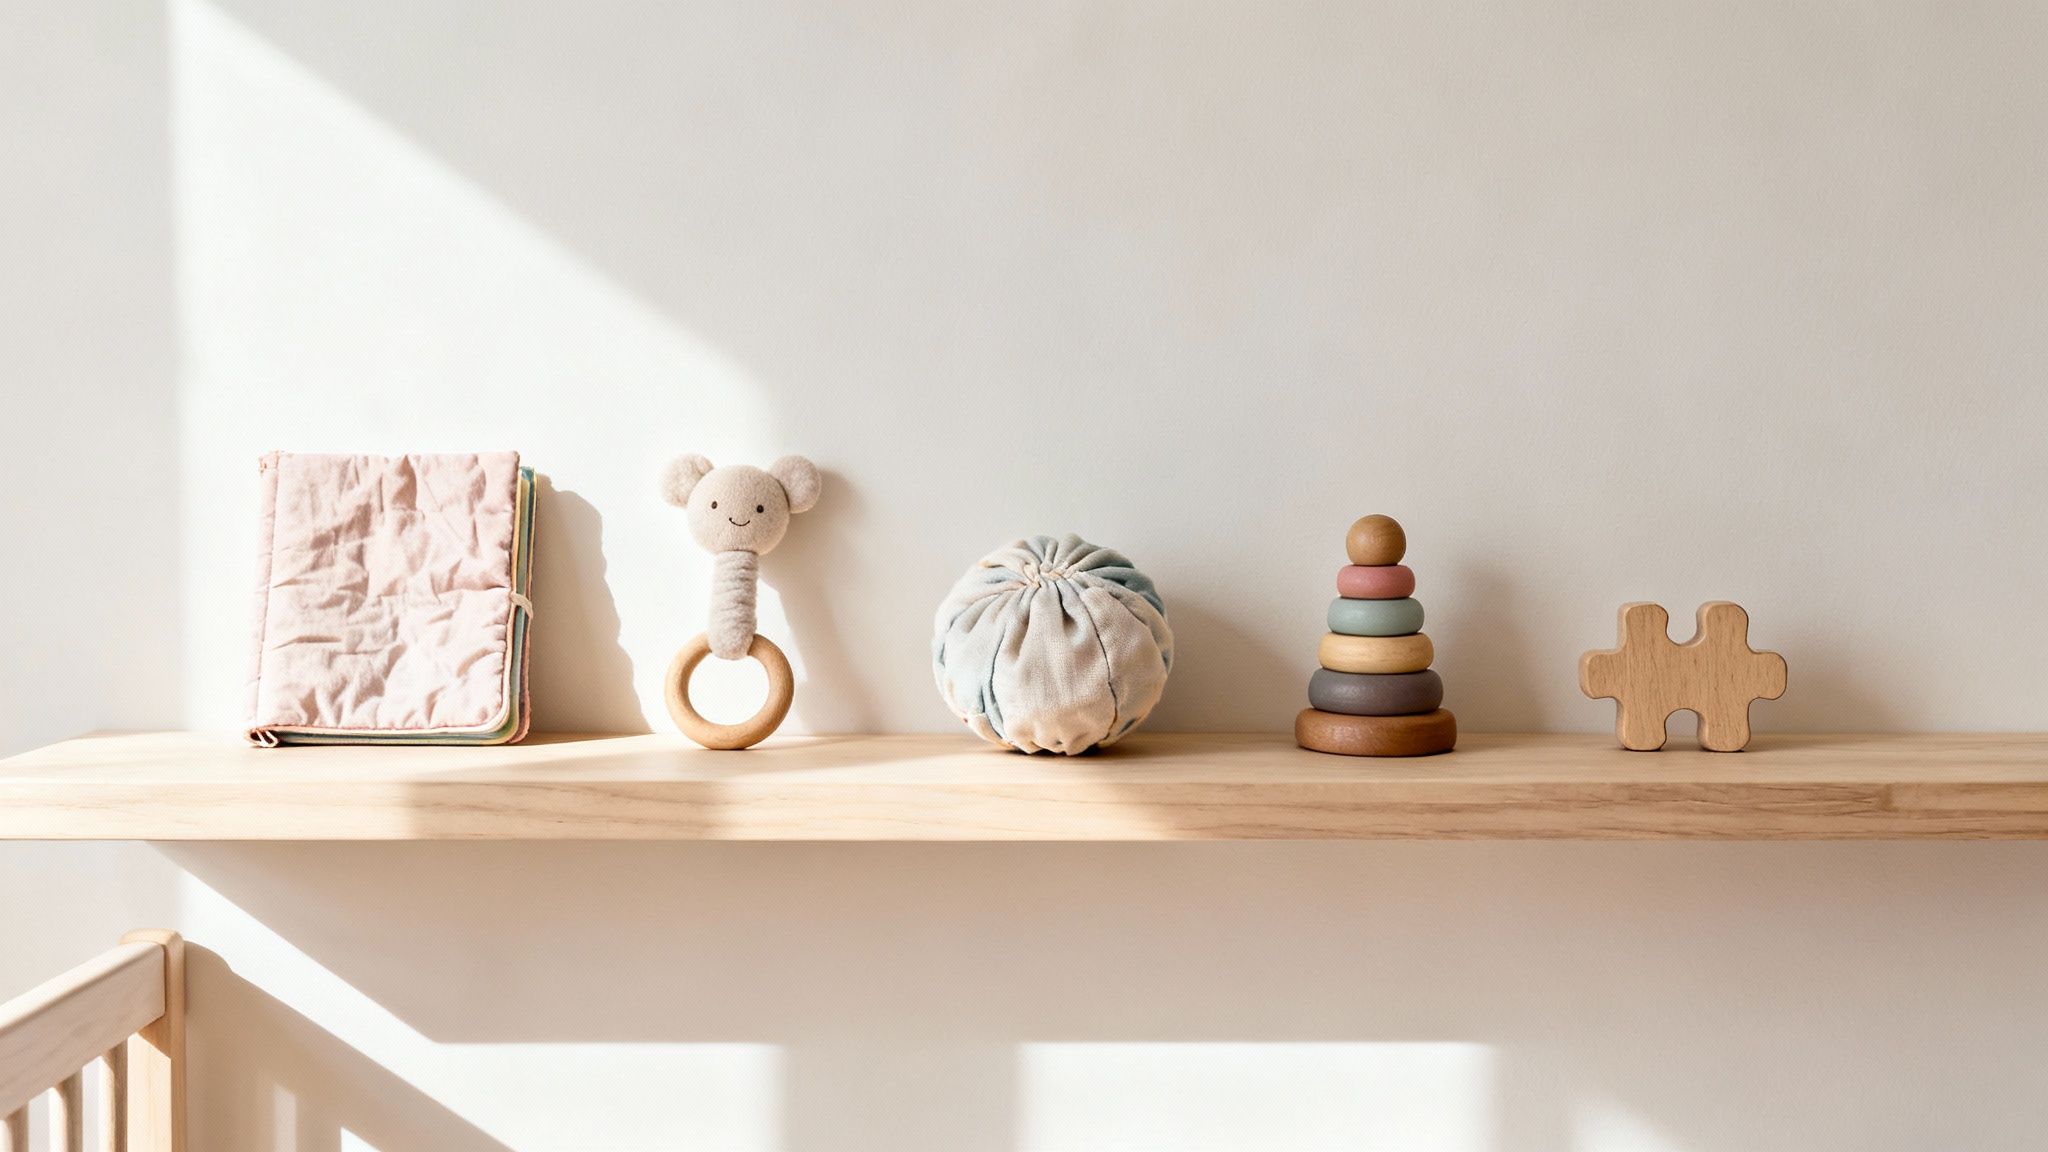
The Essential Infant Toy Categories for Every Nursery
While it's smart to match toys to a specific age, it’s even better to understand the types of toys that help your baby grow. Think of it like stocking your kitchen: instead of just buying ingredients for one specific recipe, you fill your pantry with staples you can use for all sorts of meals.
Having a good mix of toy categories ensures you're supporting all the different ways your baby is learning and developing. It keeps playtime fresh and interesting, covering all the bases from their tiny fingers to their growing brain.
Sensory Development Toys
From the moment they're born, babies are little explorers, learning about their world through sight, sound, and touch. Sensory toys are built to fire up these senses in a way that’s engaging but not overwhelming. They really are the building blocks of early learning.
Sight: A newborn’s vision is still fuzzy, which is why they’re so fascinated by high-contrast patterns in black, white, and red. Unbreakable mirrors are also a huge hit, helping them track movement and start to recognise that cute face staring back at them.
Sound: Simple toys like soft rattles or books with crinkly pages give instant feedback. This is your baby’s first lesson in cause and effect: "Hey, when I shake this, it makes a cool noise!"
Touch: Giving your baby a variety of textures is so important. Think smooth wood, bumpy silicone teethers, and soft, cuddly fabrics. All that touching and feeling is crucial for building their sensory processing skills.
Building a diverse sensory toy collection is like creating a small, safe laboratory for your baby. Each texture, sound, and pattern is a new experiment that helps them understand how the world works.
Motor Skill Development Toys
Motor skills fall into two main groups. Gross motor skills are the big movements, like rolling over, sitting up, and crawling. Fine motor skills are the more delicate ones, using the small muscles in their hands and fingers to grab and explore.
The best infant toys often work on both at the same time. A play gym, for instance, encourages a baby to kick their legs and reach with their arms (gross motor), but grabbing and holding onto the hanging toys is all about fine motor control. As they get older, things like stacking rings and simple shape sorters are perfect for honing those precise hand movements.
Cognitive and Communication Toys
These are the "thinker" toys. They get your baby's brain working by introducing big ideas like object permanence (peek-a-boo is more than just a game!) and problem-solving (how does this round block fit into the round hole?). Stacking cups and basic puzzles are classics for a reason—they build these foundational skills in a really fun way.
Don't forget communication! Soft cloth books or sturdy board books are powerful tools. Reading to your baby right from the start helps them tune into the rhythm and sounds of language. Pointing to pictures as you name them lays the groundwork for their very first words.
Once you have selected the essential infant toy categories for your nursery, a crucial next step is finding the best toy storage solutions to keep everything organised and accessible. A tidy play space not only reduces clutter but also helps prevent overstimulation, allowing your baby to focus on one or two toys at a time.
Safety First: Your Checklist for Non-Toxic Infant Toys
While it’s exciting to think about all the developmental benefits of toys, nothing trumps safety. Babies explore the world with their hands and, inevitably, their mouths. This means every single toy that comes into your home needs to be safe and non-toxic—an absolute non-negotiable for any parent or gift-giver.
Good toys for infants are designed with this in mind, but it’s still so important to know what to look for yourself. Building the confidence to quickly assess any toy, whether it's fresh out of the box or a treasured hand-me-down, brings incredible peace of mind. A simple mental checklist is all you need to spot potential hazards in a heartbeat.
Think of yourself as your baby's friendly detective. Your mission is to inspect the evidence before it ever enters the play zone. This doesn’t have to be a stressful task; once you know the key things to look for, it becomes second nature.
The Non-Negotiable Safety Checks
Before a toy ever gets near your baby, give it a quick once-over for physical hazards. These are the most common red flags, based on guidelines from safety authorities like the Australian Competition and Consumer Commission (ACCC).
Choking Hazards: This is the big one. A great rule of thumb is the old 35mm film canister test—if a toy or any part of it can fit inside, it’s too small for a child under three. Be on the lookout for loose buttons, tiny accessories, or any small pieces that could easily break off.
Strings and Cords: Any toy with a string, cord, or ribbon longer than 30 cm is a potential strangulation risk. Pay close attention to this on cot mobiles or pull-along toys.
Sturdy Construction: Give the toy a good squeeze and a firm tug. Does it feel flimsy? Could it crack under pressure and create sharp edges? Quality toys are built to handle the enthusiastic (and let’s be honest, sometimes rough) reality of infant play.
Decoding Materials and Labels
Beyond the physical structure, what a toy is made of is just as critical. Since babies will chew and suck on pretty much everything, you need to be confident the materials are safe.
Look for clear labels on the packaging that give you the all-clear on toxicity. Key terms to spot include:
BPA-Free: Bisphenol A is a chemical that has been linked to health concerns, so it's one to avoid.
Phthalate-Free: These chemicals are often used to make plastics more flexible but have no place in infant toys.
Non-Toxic Paint: For any painted toys, make sure they use water-based, non-toxic paint that won’t chip or flake off into your baby's mouth.
When in doubt, you can't go wrong with trusted brands known for their high safety standards. Or, even better, choose toys made from naturally safe materials like unfinished wood, 100% natural rubber, or food-grade silicone. This simple approach takes a lot of the guesswork out of the equation.
Getting a handle on these safety basics is empowering. It gives you the confidence to create a secure play environment and makes building out your gift list, like a thoughtfully curated baby shower registry, a much less daunting task.
How to Build the Perfect Baby Toy Registry with EasyRegistry
Now that you know what to look for at each stage, you can turn your baby registry from a simple shopping list into a brilliant roadmap for your little one's first year of play. A flexible platform like EasyRegistry makes this a breeze, helping you steer friends and family towards gifts that you’ll actually use and treasure.
Instead of just adding a dozen specific toys, think bigger. The secret is to organise your registry by developmental needs. This clever trick helps you avoid getting five of the same teether while making sure your baby has a great variety of toys as they grow.
As you build out your registry, it's always a good idea to cross-reference a guide on the best baby registry items to make sure you’ve covered all the essentials alongside these purposeful playthings.
Create Developmental Toy Categories
One of the smartest ways to set up your registry is to create custom categories. This approach gently guides your guests towards a type of gift rather than a specific product, ensuring your baby ends up with a wonderfully well-rounded collection.
Think about creating wish list items like these:
"Sensory Starters (0-3 Months)": Guests can contribute to this fund for things like high-contrast cards, gentle rattles, or a soft, textured play mat.
"Motor Skills Movers (6-9 Months)": This category could pool funds for stacking rings, simple shape sorters, or classic push-along toys.
"Our First Library Fund": What a beautiful way to ask for help building a collection of classic board books for bedtime stories!
This method gives your loved ones total flexibility in how much they want to spend, and you can rest easy knowing every gift is contributing to your baby's development. Here’s a little peek at how you can set up these categories on an EasyRegistry page.
You can see how a "wish" is created for a category like "Baby Toys" with a goal amount, which lets lots of people chip in.
Add a Toy Fund for Bigger Items
Let's be honest—some of the best developmental toys don't come cheap. A beautiful wooden play gym or a Pikler triangle can be a big ask for one person. That’s where group gifting really shines.
With EasyRegistry, you can create a dedicated "Toy & Play Equipment Fund." This is perfect for those big-ticket items, allowing friends and family to contribute whatever amount they feel comfortable with towards one amazing gift. It’s a wonderful way to get those investment pieces without putting the burden on a single person.
Pro Tip: When you set up a fund, add a short, sweet note explaining what it's for. Something like, "Help us create a safe and fun space for tummy time adventures with a beautiful play gym!" A personal touch makes guests feel so much more connected to their gift.
Setting up your registry this way makes the whole experience easier and more meaningful for everyone. To see all the features in action, you can learn more about how EasyRegistry works and get started on your own list today.
Your Top Questions About Baby Toys Answered
Even with the best advice, it’s normal to have a few lingering questions when you’re standing in a toy aisle (or scrolling online). Let’s tackle some of the most common queries I hear from new parents and well-meaning gift-givers.
How Many Toys Does a Baby Really Need?
Honestly, less is more. Babies don't need a mountain of toys to be happy and engaged. In fact, too many choices can be overwhelming for their developing brains. It’s all about quality over quantity.
A thoughtfully chosen collection of 5-8 age-appropriate, open-ended toys will do far more for your little one than a room full of flashy gadgets. A great tip is to rotate them. Keep a few out for a week, then swap them for others you’ve stored away. This simple trick keeps things feeling new and exciting without creating sensory overload.
Are Second-Hand Toys Safe for Babies?
Hand-me-downs and op-shop finds can be fantastic—they’re budget-friendly and sustainable. But when it comes to babies, safety is absolutely non-negotiable. Before you hand over a pre-loved toy, give it a thorough once-over.
Look closely for:
Cracks, splinters, or any sharp edges.
Small parts that have come loose or could easily break off.
A sticker or label indicating it meets current Australian safety standards, as very old toys might not.
Be extra cautious with painted toys, especially anything made before the 1970s, as the paint could contain lead. Hard, non-porous toys like plastic blocks or wooden rings are your best bet because you can sanitise them effectively.
My rule of thumb for second-hand items is simple: if you can't clean it properly, skip it. This is especially true for plush toys, which can hide dust mites and mould if they haven’t been stored or washed correctly.
When Should I Introduce Electronic Toys?
It’s tempting, I know. The shelves are packed with toys that light up, sing, and talk. But for early development, simpler is almost always better. The best toys are the ones that are 10% toy and 90% baby—meaning the baby has to do all the work.
Think about it: they have to shake the rattle to hear the noise, or figure out how to stack the rings. These simple actions are building crucial connections in their brain. Toys that do all the work with flashing lights and constant sound can teach a baby to just watch, rather than act. If you do opt for an electronic toy, look for one that teaches cause and effect, like a button that plays a simple, soft tune when pressed.
How Often Should I Be Cleaning My Baby’s Toys?
Since just about everything ends up in a baby’s mouth, keeping toys clean is a must. Your cleaning schedule really depends on the toy and how much action it sees.
Here’s a practical routine to follow:
Daily: Give teethers and any other "mouth-heavy" toys a quick wash.
Weekly: Wipe down hard plastic and wooden toys. A simple solution of vinegar and water or a baby-safe cleaning spray works perfectly.
As Needed: If a toy hits the floor at the supermarket, gets covered in drool during a playdate, or has a food-related incident, clean it right away. Soft toys can usually be tossed in the washing machine every couple of weeks.
Ready to create a wish list that’s as smart and thoughtful as you are? With EasyRegistry, you can build a flexible baby registry with categories for developmental toys, group gift funds, and anything else your growing family needs. Start Your Free Baby Registry Today
So, what exactly is a baby change table with a bath? It’s a clever piece of nursery furniture that pulls double duty, combining a changing station on top with a hidden baby bathtub underneath. Think of it as the Swiss Army knife for your nursery – one compact unit designed to handle two of the biggest daily tasks with a newborn.
Why a Change Table with a Bath Is a Nursery Game Changer
Bringing a newborn home is incredible, but it also throws your old routines out the window. You’ll be doing countless nappy changes and giving daily baths, which means a lot of time spent on baby care. This is where a combo unit really shines, creating a central command centre for all things clean and comfy.
It’s a bit like having a multi-cooker in the kitchen; it takes several functions and packs them into one efficient appliance. Instead of trying to find space for a separate change table and a bulky baby tub, you get both in a single, neat package.
Streamlining Your Daily Routine
The real magic of these units is just how convenient they are. Everything you need for a nappy change or a bath is right there, organised in one spot. No more frantic dashes to the bathroom to fill a tub or rummaging for wipes while keeping one hand on a wriggly baby. This all-in-one approach helps create a calmer, more predictable routine for both you and your little one.
This integrated design isn't just a clever idea; it's part of a growing trend in nursery furniture that focuses on multi-functionality and efficiency to save parents precious time and energy.
The demand for practical, hygienic baby gear is huge. The global market for baby changing stations is valued at USD 20.80 billion and is expected to keep growing, which shows just how much parents are looking for smart solutions. You can dig into more details on the nursery furniture market on Statista.
Maximising Your Nursery Space
For many Australian families, especially those in apartments or cosier homes, space is at a premium. A change table and bath combo is a brilliant way to tackle this. By merging two bulky items into one, you free up valuable floor space, making the nursery feel bigger and less cluttered.
Here’s how it helps:
Reduced Footprint: It takes up the room of just one piece of furniture, not two.
Centralised Storage: Most models come with built-in shelves or caddies, so all your nappies, creams, and towels have a home.
Back-Saving Design: The real winner. Both the change mat and the bath are at a comfortable height, which saves you from constantly bending over. Your back will thank you
The Non-Negotiables: What Makes a Great Change Table and Bath Combo?
When you’re picking out a baby change table with a bath, it's about so much more than just matching the nursery decor. Think of this piece of furniture as your daily command centre—the spot where countless nappy changes and bath times will happen. Getting this choice right from the start means less stress, smoother routines, and more peace of mind.
At first glance, most models can look pretty similar. But as any experienced parent will tell you, the devil is in the details. It's those small differences that separate a wobbly, frustrating station from a sturdy, reliable workhorse. Let's walk through exactly what you need to look for.
Safety First, Always
This is the big one. Nothing is more important than your baby's safety, and that starts with a rock-solid foundation. A wobbly change table is every parent's worst nightmare, so give any potential model a gentle shake. It should feel sturdy and robust, not like it might give way.
Many of these units come with wheels, which is fantastic for moving them between the nursery and the bathroom. But wheels need to be managed. Check that they have strong, easy-to-use locking mechanisms. This is crucial to prevent the station from rolling away mid-change.
Beyond the frame, the changing mat itself needs a close look:
Raised Edges: The mat should have high, contoured sides that act as a gentle barrier, helping to stop your little one from rolling.
Secure Fit: Make sure the mat is securely fastened to the table. It shouldn't slip or slide around when you apply a bit of pressure.
A quick but vital reminder: The golden rule is to always keep one hand on your baby. No safety feature, no matter how clever, is a substitute for your direct supervision.
Getting the Size and Fit Right
Before you click "add to cart," grab a tape measure. These combo units can be surprisingly bulky, and the last thing you want is a piece of furniture that overwhelms the room. Measure the space where you plan to put it, making sure you leave enough room to walk around it comfortably and access all the shelves.
The height of the table is just as important—for your sake! A station that’s too low will have you hunched over multiple times a day, which is a recipe for back pain. Look for a height that lets you stand comfortably without stooping.
Finally, think about the long haul. Check the manufacturer's recommended weight and age limits. Babies grow at an astonishing rate, so picking a model with a higher weight capacity means your investment will last well beyond those first few newborn months.
Smart Storage and Hassle-Free Cleaning
A well-organised change station is a game-changer. You need all your essentials—nappies, wipes, creams, towels—within arm's reach at all times. Look for designs that offer clever storage like tiered shelves, side caddies for lotions, or deep trays. When everything has its place, you’ll never have to turn your back on your baby to find something.
And then there's the clean-up. Let's be honest, things are going to get messy! The best change tables are made from materials that are easy to clean. Look for waterproof, non-porous surfaces on both the changing mat and the bath. This not only makes wiping up spills a breeze but also prevents mould and mildew from building up. A quick wipe with a baby-safe cleaner should be all it takes to keep it hygienic.
To make comparing your options a little easier, here's a quick checklist of the key things to keep in mind.
Checklist for Choosing Your Baby Change Table with Bath
This table is a handy reference to pull up when you're browsing online or in a store. It'll help you quickly evaluate each model to see if it ticks all the right boxes for safety, practicality, and longevity.
Feature
Why It Matters
What to Look For
Sturdy Frame
Prevents wobbling and ensures the unit is stable and safe for your baby.
Solid wood or durable metal construction. Give it a gentle shake to test for stability.
Locking Wheels
Stops the station from moving unexpectedly while your baby is on it.
At least two wheels with strong, easy-to-engage locks that click firmly into place.
High Safety Rails
Helps prevent your baby from rolling off the changing surface.
Contoured, raised edges on the changing mat, at least 10 cm high.
Appropriate Height
Protects your back from strain during frequent nappy changes and baths.
A surface height that allows you to stand upright without bending over (typically 85-95 cm).
Weight/Age Limits
Ensures the unit can safely support your baby as they grow.
A high weight capacity (e.g., 11-15 kg) to last through the first year and beyond.
Ample Storage
Keeps all your essentials within arm's reach so you never have to leave your baby.
Multiple shelves, side caddies, or trays for nappies, wipes, creams, and towels.
Waterproof Materials
Makes cleaning easy and prevents the growth of mould and mildew.
A vinyl or PVC-coated changing mat and a non-porous plastic tub.
Using this checklist will give you the confidence that you’re not just buying a piece of furniture, but a safe, practical, and long-lasting hub for your baby's daily care.
Setting Up Your Change Station for Safety and Convenience
So, you’ve picked out the perfect baby change table with bath. Great! Now it’s time to turn that flat-packed box into a safe, functional, and stress-free hub for you and your bub. Getting the placement and assembly right is just as crucial as the features you chose.
Think of it as setting up your command centre. Everything needs to be secure, stable, and within easy reach.
Finding the Right Spot
First things first, scout out the ideal location. This isn't just about what looks best in the nursery; it’s about creating a truly secure environment. The golden rule is to place the change table flat against a solid wall. This simple step adds a huge amount of stability and stops it from wobbling or tipping.
Make sure the spot you choose is well clear of any potential hazards. This means keeping it away from:
Windows and Blinds: Steer clear of windows to avoid drafts and, more importantly, to keep dangling blind cords well out of reach.
Heaters and Vents: Direct heat or air conditioning can make your baby uncomfortable during changes and baths.
Electrical Cords: Ensure there are no power cords nearby that a curious baby could grab.
Assembling for Stability
This is where you need to pay close attention. Proper assembly is the foundation of a safe change station. Follow the manufacturer's instructions to the letter, making sure every screw is tight and every piece is locked in securely. A wobbly table is a dangerous table, and this often happens when it's built on an uneven floor, so check that first.
Before you even think about putting your baby on it, give the assembled station a good, firm nudge from a few different angles. It shouldn't budge. If it wobbles at all, go back and double-check every connection.
This focus on stability and smart design is a big deal in the world of nursery furniture. It's interesting to see that while freestanding units are common, wall-mounted stations now make up 35-36.4% of the global market. This really shows how much parents value space-saving designs, especially here in Australia where rooms can be on the smaller side.
Mastering the Bath Component
The built-in bath is a game-changer, but it pays to have a plan for filling and draining it. Most models come with a handy drainage tube—this is your best friend for avoiding a mini-flood in the nursery. Before you start, pop a bucket underneath the tube so you can catch the water and dispose of it easily.
When it's time to fill the tub, a detachable shower head is a lifesaver if your station is near a bathroom. If not, a large jug or a clean bucket does the job just fine. A little prep work makes bath time a smooth, enjoyable experience instead of a chaotic, splashy mess.
Having everything you need organised and nearby is the key to a safe and functional area. Many parents find that learning how to organise kids' essentials effectively helps keep the whole nursery tidy and safe.
Is a Combo Change Table Right for Your Family?
Figuring out the perfect nursery setup is a really personal journey. What feels like a lifesaver for one family might not click with another. The baby change table with a bath is one of those clever inventions that can be a game-changer, but it’s worth taking a moment to weigh up the good against the not-so-good to make sure it’s a choice you'll be happy with.
Let’s get into the nitty-gritty to see if this all-in-one station is the right fit for your home and lifestyle.
The Big Advantages
The most obvious win here is how much space it saves. If you’re in an apartment or just have a cosy nursery, combining two pretty bulky items into one footprint is a massive plus. It instantly frees up floor space, making the whole room feel bigger and less cluttered.
Another huge pro is how much it saves your back. Anyone who has bathed a newborn in the family tub knows the pain of kneeling on a hard tile floor and hunching over. An elevated bath brings your little one up to a comfortable waist height, making bath time a far more pleasant, ergonomic experience for you.
Space Efficiency: It combines two large items, which is a dream for smaller rooms.
Ergonomic Design: The raised tub means no more sore knees or an aching back for you.
Centralised Care: Everything you need for nappies and baths is right there in one handy spot.
The Potential Drawbacks
On the flip side, there are a few trade-offs to think about. The biggest one is probably the limited lifespan of the integrated bath. Most babies will be too big for these little tubs by the time they’re 6 to 12 months old, or once they can sit up confidently on their own. After that, you're left with just a change table, which might not feel like the best value for your initial investment.
There's also a practical snag: you can't use both features at the same time. When the bath is in use, the change mat is flipped up and out of the way. This means you’ll need another safe, dry spot ready to go for drying and dressing your baby afterwards, which can kind of interrupt the seamless flow you were hoping for.
It's crucial to weigh the short-term convenience of an all-in-one unit against the long-term utility of separate, more adaptable pieces of furniture. This will help clarify what truly offers the best value for your family's needs.
Ultimately, the best choice really boils down to your priorities. If you’re tight on space and the thought of an easier, back-friendly bath time for those first few months sounds amazing, a combo unit could be a fantastic solution. But if you prefer furniture that will last longer or you have the space to spare, separate pieces might be the better way to go.
How to Add Your Perfect Nursery Items to a Baby Registry
So, you’ve done all the research and picked out the perfect baby change table with bath. Now for the fun part: adding it to your wish list so friends and family can celebrate with you.
Creating a baby registry should be an exciting part of the journey, not a stressful one. Using a platform like EasyRegistry lets you pull all your dream items from any Australian store into one simple, shareable list. It's a game-changer.
This means you aren't locked into one shop's selection. If you’ve found the ideal change table at one place but your dream car seat is somewhere else entirely, you can pop both onto the same list. This kind of flexibility is amazing because it means you get exactly what you’ve spent all that time choosing for your little one, without having to compromise.
Adding Gifts from Any Store
It’s actually incredibly simple to do. Just find the item you love online, copy the webpage address (the URL), and paste it straight into your EasyRegistry. The system then automatically grabs all the important details—like the product name, price, and a picture—and organises it neatly for your guests.
This takes all the guesswork out of it for your friends and family and makes sure you don't end up with three of the same bouncer!
Think of a registry as your own personalised baby shop. You're curating a list that guides your loved ones to the things you genuinely need, which makes their gift-giving easier and way more meaningful.
Creating Cash Funds for Big-Ticket Items
But what about those bigger investments, like the change table itself or a top-of-the-line pram? Sometimes asking for one big-ticket item can feel a bit awkward. This is where a cash fund is the perfect solution.
Instead of one person having to shoulder the whole cost, friends and family can chip in an amount they’re comfortable with. It’s a really lovely way for everyone to feel like they’re part of gifting you something significant and truly helpful.
This approach fits right in with how Aussie families are shopping these days. Online sales for baby gear, including changing tables, jumped by 34% after the pandemic as parents embraced the convenience of shopping from home.
When you're putting your list together, it’s always a good idea to create a comprehensive wishlist to make sure it’s easy for everyone to use.
Ultimately, a well-thought-out registry just makes life simpler for everyone, letting you focus on the most important thing: getting ready for your new baby. For more handy tips, check out our guide to creating the perfect baby shower registry.
Common Questions About Change Tables with Baths
Even after weighing up all the pros and cons, it’s completely normal to have a few questions buzzing around before deciding if a baby change table with a bath is right for your nursery. It’s a pretty unique piece of furniture, so let’s tackle some of the most common queries we hear from Aussie parents.
Think of this as your final checklist to help you feel totally confident in your choice.
How Long Can My Baby Use the Integrated Bath?
The built-in bath is really designed for those precious early months. It’s usually perfect for newborns up until they’re about 6 to 12 months old.
The big milestone to watch for is when your baby can sit up confidently by themselves. That’s generally the sign they’re ready to graduate to the big tub. Of course, always double-check the manufacturer’s specific age and weight limits. Once they’ve outgrown the bath, the unit simply carries on as a fantastic, spacious change station.
Are These Combination Units Considered Safe?
Yes, they are, provided they’re used correctly. Safety starts with a good design, so keep an eye out for models with a sturdy frame, high sides on the changing area, and wheels that lock firmly in place. These features are designed to create a stable, secure space for your little one.
The golden rule of safety, though, is constant supervision. Never, ever leave your baby unattended on the change table or in the bath—not even for a split second. Keeping one hand on your baby at all times is the best safety practice there is.
What Is the Best Way to Clean the Unit?
Keeping everything clean and hygienic is actually quite simple. After bath time, just drain the water completely and give the tub a quick wipe-down to make sure it’s dry. For the changing mat and the frame itself, a soft cloth with a mild, baby-safe cleaner is all you’ll need to handle any messes.
It's best to steer clear of harsh or abrasive chemicals, as they could damage the surfaces or irritate your baby’s sensitive skin. It’s also a good idea to periodically check that all the screws and fittings are nice and tight, just to make sure the unit stays solid and stable.
Ready to create a baby registry that’s as practical as it is personal? With EasyRegistry, you can add any item from any Australian store, all in one place.