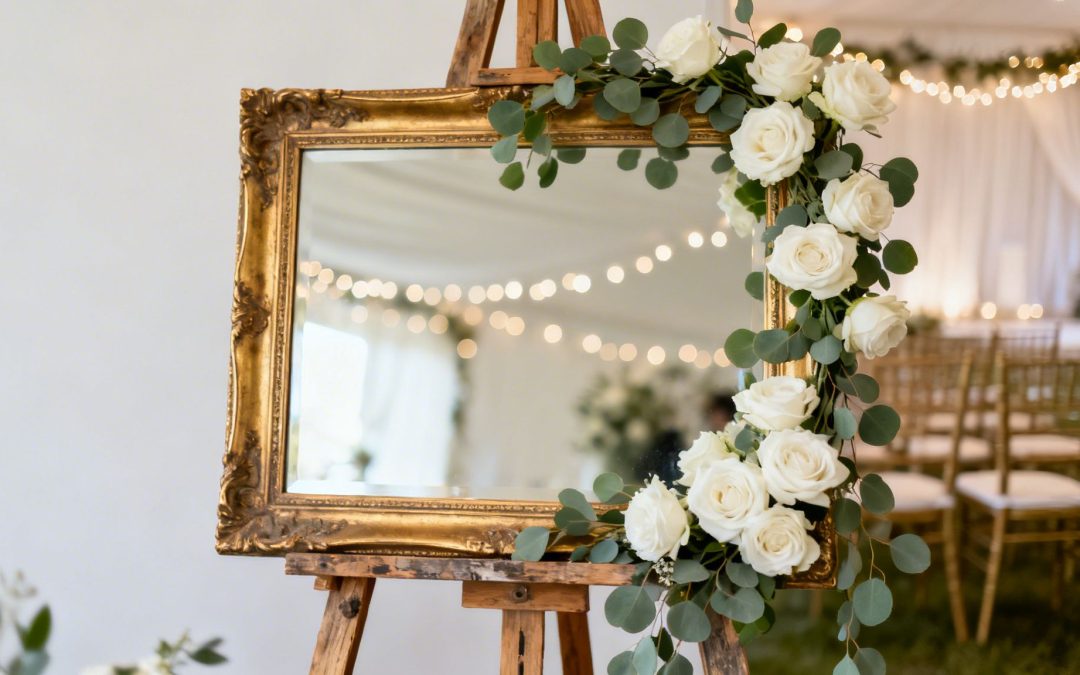
Wedding mirror signs are so much more than a fleeting trend. They're a truly chic, functional element that can elevate your entire celebration. Imagine a grand welcome message reflecting the glittering lights of a Sydney harbour venue, or an intimate bar menu tucked into a cosy corner of a Melbourne winery. These pieces are brilliant because they blend elegance with practicality, instantly transforming any space while adding a layer of sophisticated, personal decor.
Why We Love Wedding Mirror Signs
Wedding mirror signs have firmly established themselves as a staple in modern Australian weddings, and for good reason. They’re both beautiful decor and practical guides for your guests. Their reflective surfaces catch the light in the most stunning way, adding a touch of romance and dimension to your venue.
Whether you're leaning towards an ornate, vintage frame for a classic ballroom affair or a sleek, frameless design for a more minimalist theme, these signs always make a significant visual statement.
It’s no surprise they’ve become so popular. With 120,844 marriages registered in 2024, Australian couples are always looking for unique ways to tell their story. Event planners have noticed that incorporating stunning, Instagrammable elements like mirror signs creates more photo opportunities and social shares—a perfect fit for the 60% of newlyweds aged 25-35 who really value those details. You can find more of the latest marriage trends in Australia over on the ABS website.
Beyond the Welcome Message
While a "Welcome to Our Wedding" sign is a timeless classic, the versatility of mirrors goes far beyond the entrance. Thoughtfully placed wedding mirror signs can serve multiple purposes all through your celebration:
Seating Charts: Turn what is essentially a logistical necessity into a gorgeous focal point.
Bar Menus: Elegantly display your signature cocktails and drink selections.
Event Timelines: Guide guests through the day’s key moments, from the ceremony to the final send-off.
Meaningful Quotes: Share a favourite love quote or a personal message that really resonates with you as a couple.
By integrating mirrors into your signage plan, you’re not just providing information—you’re creating cohesive, memorable decor moments that tie your entire wedding aesthetic together.
This guide will walk you through everything you need to bring your vision to life, from choosing the right mirror and perfecting your wording to deciding between a DIY project and hiring a professional.
Finding the Perfect Mirror for Your Wedding Style
Before you even think about fonts or wording, you need to find the right mirror. This is your canvas, the very foundation of the beautiful sign you're about to create, and it plays a massive part in setting the entire mood.
Think of it as the first piece of decor your guests will see. A huge, ornate gold mirror immediately whispers classic romance, making it a perfect fit for a grand ballroom or historic estate. On the flip side, a sleek, frameless mirror feels right at home in a modern art gallery or a chic industrial warehouse. The mirror itself should feel like it belongs, a natural extension of your wedding’s personality.
Matching Frame and Shape to Your Theme
The real magic happens in the details, and the frame is where you can make a huge impact. It’s the element that connects your signage to your overall theme, making everything feel cohesive.
Here are a few popular styles I’ve seen work beautifully:
Ornate & Gilded: These are your go-to for anything vintage, classic, or glam. Look for intricate carvings and rich metallic finishes in gold, silver, or even a soft rose gold.
Rustic & Wooden: A must for barn, winery, or bohemian weddings. Raw, weathered wood or a dark, polished stain can completely anchor your decor.
Modern & Minimalist: Clean lines are key here. A simple black metal frame or a completely frameless mirror looks incredible for contemporary or industrial-chic events.
Don’t forget about the shape! An arched mirror adds instant elegance and a touch of softness. A classic rectangle is versatile and offers plenty of space for text. If you’re feeling a bit more adventurous, a round or even a geometric shape like a hexagon can be a fantastic, modern twist.
Your goal is cohesion. The mirror shouldn't just be an object with writing on it; it should look like it was always meant to be part of your venue’s decor, thoughtfully selected to harmonise with the space.
Sourcing Your Ideal Mirror
So, where do you find this perfect mirror? It’s easier than you think. Op-shops, antique stores, and online marketplaces are absolute treasure troves for unique, vintage frames that come with their own story. If you have a specific look in mind, home decor stores are a reliable source for new mirrors in every style imaginable. It’s worth taking some time to explore different mirror and specialty glass styles to see what’s possible.
As you hunt, think bigger than just the welcome sign. Could you find smaller, matching mirrors to use for your table numbers, bar menu, or seating chart? Using a consistent style across all your signage creates a high-end, professionally curated feel that truly elevates the guest experience. It’s this attention to detail that makes all the difference.
Getting the Wording Just Right
Your mirror signs are more than just pretty objects; they're the voice of your wedding day. The words you choose are the first handshake, the first warm welcome your guests receive. This is your chance to set the tone and show off a bit of your personality as a couple.
Think about the first thing your guests will see: the welcome sign. Are you a classic, formal duo? Something like, "Welcome to the Wedding of Sarah and James" is timeless. If you're more of a laid-back, fun-loving pair, you might go for, "We’re So Glad You’re Here!" or even a playful, "Finally! Let's Party." It immediately tells your guests what kind of celebration they're in for.
Finding Your Voice: From Formal to Fun
The real magic happens when you infuse your personality into even the most practical signs. A bar menu doesn't just have to list drinks; it can be an extension of your theme. Try a fun heading like "Sip, Sip, Hooray!" or get personal with "Our Favourite Drinks." It's these small, thoughtful details that make your wedding feel uniquely yours.
When it comes to the seating chart, the main job is to get people to their tables smoothly. But that doesn't mean it has to be boring. The heading can completely change the feel:
For a formal affair: "Please Find Your Seat"
For a touch of romance: "Your Seat Awaits"
For a fun, casual vibe: "Our Favourite People, Our Favourite Places"
The best wedding signs don't just give directions; they enhance the entire experience. They should feel intentional, look beautiful, and seamlessly blend into the atmosphere you’ve worked so hard to create.
This simple shift in mindset ensures your signs are not just helpful tools but memorable parts of your decor.
Making Sure Your Message Is Seen (and Read!)
Now that you have the words, let's talk about design. A stunning, intricate script font might look incredible on Pinterest, but if your guests have to squint to read their table number, it’s not doing its job. This is where the designer’s secret weapon comes in: font pairing.
The trick is to combine a beautiful, decorative font for your main heading with a clean, simple font for the all-important details. This gives you that perfect balance of jaw-dropping style and practical readability.
Layout is just as important. Don't be afraid of empty space on the mirror—it's what lets your design breathe and guides your guests' eyes to the important info. A cluttered sign is a confusing sign. For seating charts with a long guest list, always organise names alphabetically by last name, not by table. Trust me, it makes it infinitely faster for guests to find their spot and avoids a traffic jam at the entrance.
Finally, let’s talk colour. White, gold, and silver are classics for a reason; they pop beautifully against a mirror. But before you commit, test your chosen colour marker or vinyl in lighting that mimics your venue. A soft gold that looks stunning indoors might completely vanish in the bright afternoon sun. By thinking through your message, fonts, layout, and colours, you'll create wedding mirror signs that are as functional as they are breathtaking.
DIY vs Professional: Who Should Make Your Sign?
One of the first big questions you'll hit when planning your wedding mirror signs is a simple one: should you make them yourself or hire a pro? There’s no single right answer. It really comes down to your budget, your timeline, and honestly, how much you trust yourself with a paint pen after a long week of wedding admin.
Let's talk numbers for a second. With the average Aussie wedding costing $35,315 and couples admitting to going 28.6% over budget, every dollar counts. A custom mirror sign from a professional artist can set you back anywhere from $150 to $600. This is exactly why so many couples get creative with their funding. We see this all the time on EasyRegistry, where 70% of couples use their registry to manage cash funds for specific items, avoiding unwanted gifts. You could easily add "calligraphy services" or "DIY sign-making supplies" to your registry to let guests contribute to something truly meaningful.
Taking on your own wedding mirror signs can be such a rewarding project. It’s a fantastic way to pour a bit of your own personality into the day and can be a surprisingly fun, creative break from seating charts and spreadsheets. The secret to success? It’s all in the prep work.
First, you need to find your mirrors. I always tell couples to start at op-shops, Gumtree, or Facebook Marketplace. You can find some incredible vintage frames with so much more character than anything new.
Once you've got your mirror, it's time for the lettering. You've basically got two choices here:
Paint Pens: Oil-based paint pens give you that authentic, hand-drawn look. They’re perfect for freehand lettering, but you’ll want a steady hand and maybe a practice run (or three).
Vinyl Decals: If your handwriting isn't quite where you'd like it to be, custom-cut vinyl decals are a lifesaver. You get a crisp, flawless finish that looks incredibly professional, but you still get the satisfaction of putting it all together yourself.
My Go-To Tip: If you're using paint pens, don't try to freehand it from scratch. Print your design out on paper, tape it to the back of the mirror, and simply trace over the letters. This little hack is a game-changer for getting a polished result without the stress.
When to Call in a Professional
On the other hand, if the thought of weeding tiny vinyl letters or spotting a wonky "welcome" sign on your big day sends you into a cold sweat, hiring a professional is a brilliant, stress-free move. A talented calligrapher or sign writer brings a level of expertise and artistry that's tough to replicate. They handle the entire process, from designing the layout to the final, perfect stroke, ensuring you get exactly what you envisioned.
This flowchart is a great little tool for figuring out which direction to go based on the look you're after.
As the decision tree shows, things like formality and style often dictate the materials and techniques needed, which can quickly point you towards either a DIY-friendly project or one best left to an expert.
To help you weigh your options, this table breaks down the key differences between making your own signs and commissioning them.
DIY vs Professional Mirror Signs A Cost and Effort Comparison
Factor
DIY Mirror Signs
Professional Mirror Signs
Cost
$50 – $150. Includes mirror, pens/vinyl, and cleaning supplies. Very budget-friendly.
$150 – $600+. Price depends on size, complexity, and artist's experience.
Effort & Time
High. Involves sourcing the mirror, designing, practising, and creating the final piece.
Low. The artist handles everything from design consultation to final delivery.
Personalisation
Maximum. You have complete control over every detail, making it uniquely yours.
High. You collaborate with the artist, but the final execution is in their style.
Final Look
Handmade & Charming. The finish depends on your skill. Can be beautifully authentic.
Polished & Flawless. Guaranteed professional-grade quality, consistency, and precision.
Best For…
Crafty couples on a budget who want a hands-on project and a personal touch.
Couples prioritising a stress-free process, a high-end finish, or with limited time.
Ultimately, both paths lead to a beautiful result. Deciding to go with a pro just means your next step involves finding the right one. Getting familiar with wedding decor hiring tips and vendors will make that process much smoother and ensure the final piece is a perfect reflection of your day.
Styling Your Mirrors for Maximum Visual Impact
You’ve got your gorgeous mirror signs sorted, but the real magic happens when you decide where and how to display them. A stunning sign tucked away in a dark corner completely loses its impact. The key is to think like a stylist, transforming your mirrors from simple directions into breathtaking moments that will captivate your guests.
Think of your welcome sign as the very first "hello" of your wedding day. It needs to be placed somewhere prominent—a high-traffic, well-lit spot where it’s simply impossible to miss. This is usually just inside the entrance to your ceremony or reception venue, setting the tone immediately.
Creating a Stunning First Impression
To really make your signs pop, don't just prop them on an easel and call it a day. Frame the scene to create a complete visual story. It’s these thoughtful layers that give your display that polished, high-end feel.
Here are a few ideas I’ve seen work beautifully:
Floral Accents: A lush floral garland draped over one corner or a cluster of blooms at the base instantly connects the sign to your overall wedding aesthetic.
Flowing Drapery: Soft fabrics like chiffon or tulle, artfully draped around the easel, add a touch of romance and movement.
Candlelight: Grouping pillar candles of different heights or a collection of lanterns around the base creates a warm, inviting glow—an absolute must for evening events.
Ensuring Readability and Safety
While we all love a beautiful setup, we have to make sure it’s practical. This is especially true for your seating chart. One of the biggest mistakes I see couples make is placing their seating chart in a poorly lit area. Trust me, you don't want your guests squinting and using their phone torches to find their tables.
Position your seating chart where the light is excellent, or have a plan to light it yourself. A simple uplight aimed at the mirror or some elegant picture lights clipped to the top of the frame can make all the difference.
Logistics are just as important, particularly for heavy or oversized mirrors. Always use a sturdy, high-quality easel rated to hold the mirror’s weight. If your wedding is outdoors, you need a plan for the elements. Secure the easel with weights or stakes to stop it from toppling in a breeze, and try to find a sheltered spot to protect the lettering from any unexpected rain.
Making smart choices here can also help you stay on budget. You can find more inspiration in our article with amazing tips to save money on your wedding day. By balancing style with practicality, your mirror signs will be admired, functional, and perfectly secure throughout the celebration.
How to Fund Your Dream Decor with EasyRegistry
Let's be honest, those absolutely gorgeous, personalised mirror signs look incredible, but they also come with a price tag. Whether you're hiring a pro or going the DIY route, the costs for materials, stands, and florals can add up quickly.
The great news is you don't have to sacrifice your dream aesthetic or stretch your budget thin. A clever and increasingly popular trick is to use your gift registry to help cover these costs.
Setting Up a Wedding Signage Fund
With EasyRegistry, you can create a dedicated ‘Wedding Signage Fund’ right on your registry page. Think of it as a specific cash fund where your guests can chip in. They can contribute any amount they feel comfortable with, and it all goes directly towards making your venue look stunning.
It’s a fantastic way to cover the cost of hiring a talented calligrapher or simply to fund that trip to the craft store for all your DIY supplies.
How to Describe It to Your Guests
When you add this fund to your registry, the key is to help your guests feel connected to what they're giving. Instead of a generic description, tell them the story behind it. Explain how their contribution will help create a specific, beautiful moment on your big day.
A little note on your registry could say something like: "Help us create the perfect welcome! Your generous gift will go towards the beautiful mirror signs that will greet our family and friends and guide them through our special day."
This way, guests see their gift isn't just cash; it's a tangible part of your wedding day. They're helping to create the beautiful details you'll all remember.
Ready to get started? You can learn more and set up your own wedding gift registry right here with us.
Answering Your Wedding Mirror Sign Questions
Even the most organised couple has questions pop up, and that’s completely normal! When it comes to something as unique as a wedding mirror sign, a few queries are bound to arise. Let's walk through some of the most common ones we hear from couples just like you.
What Is the Best Way to Write on a Mirror?
This is probably the biggest question on everyone's mind. For a DIY project, you’ve really got two fantastic choices: oil-based paint pens or custom vinyl decals.
If you have neat handwriting (or a talented friend!), paint pens are brilliant for achieving that authentic, hand-lettered feel. We always recommend oil-based markers because they’re opaque and much more durable than water-based ones. For those of us who aren't so confident with freehand, vinyl decals are a lifesaver. You can design exactly what you want on a computer, have it printed, and then simply apply it to the mirror for a perfectly crisp and professional look.
Here's a pro tip for tracing: print your design to scale, tape it securely to the back of the mirror, and then trace over the letters on the front. It makes the whole process so much cleaner and less stressful.
Ultimately, the choice between pens and vinyl comes down to your desired aesthetic and comfort level. Pens give you that gorgeous rustic charm, while vinyl delivers flawless perfection every time.
How Do I Clean the Mirror Without Ruining the Lettering?
Ah, the fear of the final wipe-down! Keeping your mirror smudge-free without destroying your hard work is crucial.
If you've used vinyl decals, you can breathe easy. Just gently wipe the surface with a soft microfibre cloth and your usual glass cleaner. The only thing to watch for is catching the edges of the decals, so just be a little careful around them.
With paint pens, patience is key. You absolutely must wait until the paint is fully cured. Check the instructions on your pen, but this can often take a full 24 hours. Once it's set, you can lightly dust the surface. It's best to avoid spraying liquid cleaners directly on or near the paint, as the solvents in some cleaners can make the paint smudge or even dissolve.
For more helpful tips on managing all the moving parts of your wedding, our guide on frequently asked questions is a great place to find extra support.
At EasyRegistry, we make it simple for guests to contribute to the beautiful details that make your day special, like your dream wedding decor.
Planning your wedding is an exhilarating journey, filled with countless decisions, deadlines, and details. The excitement of saying "I do" can quickly be overshadowed by the sheer volume of tasks, leaving many couples feeling overwhelmed without a clear roadmap. That's why we've created the ultimate to do list for wedding planning, specifically tailored for Australian couples navigating this process. This is more than just a simple checklist; it's a strategic, timeline-based guide designed to break down the monumental task of organising your special day into manageable, actionable steps.
Our comprehensive list will guide you from the initial big-picture decisions made 12 or more months in advance, right through to the final post-wedding follow-ups. We will cover critical milestones such as setting a realistic budget, booking your dream venue, coordinating with vendors, and managing your guest list. You'll find practical advice on everything from selecting catering to arranging decorations, ensuring every element comes together seamlessly. For a comprehensive guide to organizing every detail of your special day, refer to this ultimate wedding planning checklist and timeline.
This guide is designed to be your central resource, keeping you organised, on-budget, and as stress-free as possible. We’ll also highlight how smart tools, like a well-structured online gift registry, can significantly streamline the experience for both you and your guests. By following this structured plan, you can confidently navigate the complexities of wedding planning and focus on what truly matters: celebrating your love and creating memories that will last a lifetime. Let's begin the journey to your perfect day.
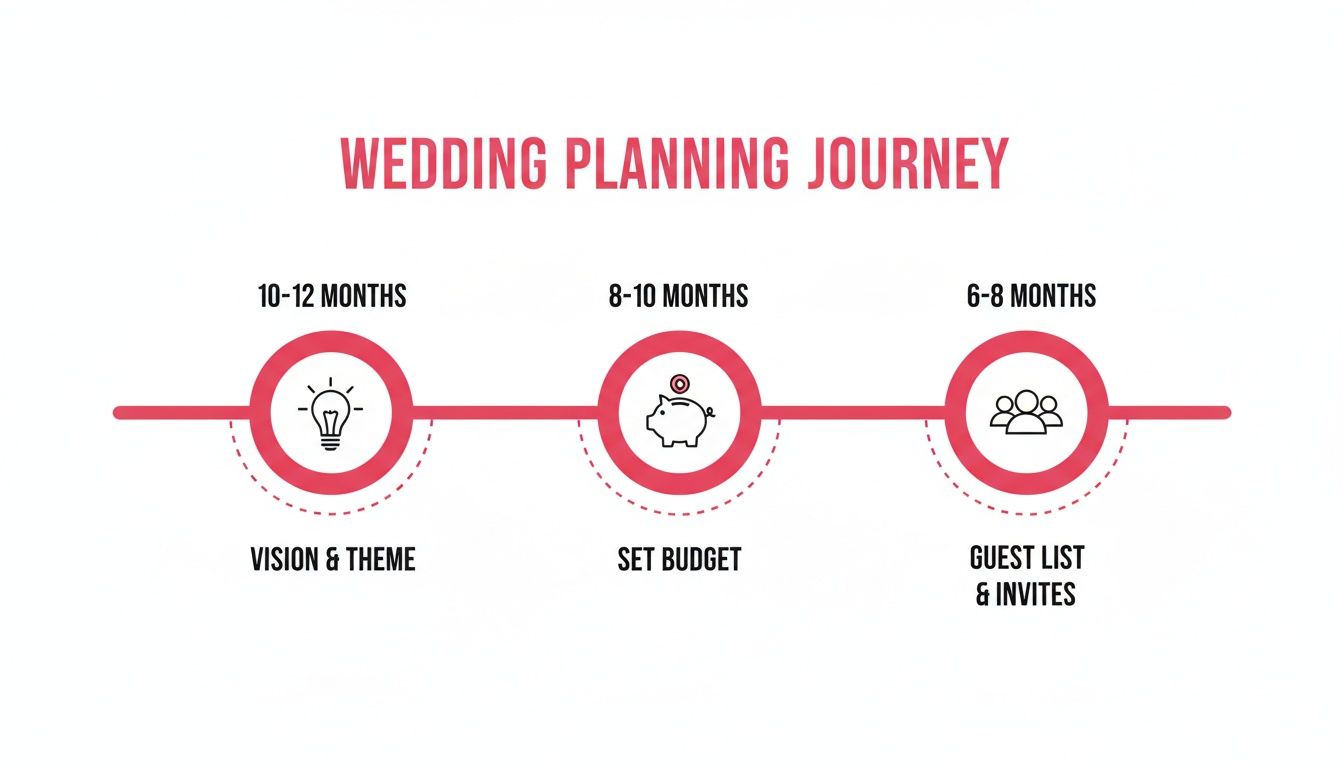
1. Set Your Wedding Budget and Financial Timeline
Before you dive into venue tours or taste-testing cakes, your first and most crucial task is to establish a clear wedding budget. This financial blueprint is the foundation for every decision you'll make, transforming your dream day from a vague idea into an actionable plan. It’s the most important first step on your to-do list for a wedding, as it dictates the scale, style, and scope of your celebration.
How to Create Your Budget
Start by determining your total available funds. This involves having honest conversations with your partner and any family members who have offered to contribute. Create a shared spreadsheet or use a dedicated wedding planning app to track all incoming funds and outgoing expenses in one centralised place. This transparency prevents misunderstandings and keeps everyone aligned.
Once you have a total figure, break it down into categories. A typical allocation might look like this:
Venue, Catering & Rentals: 45-55%
Photography & Videography: 10-15%
Attire & Beauty: 5-10%
Entertainment/Music: 5-10%
Flowers & Décor: 5-10%
Contingency Fund: 10-15%
Why It's a Priority
Finalising your budget before you start booking vendors is non-negotiable. It allows you to research and engage with suppliers who fit within your financial reality, saving you time and potential disappointment. It also empowers you to prioritise what truly matters. If incredible food is your top priority, you'll know you can allocate more to catering by perhaps simplifying your floral arrangements.
Pro Tip: Always build a contingency of 10-15% into your budget from the very beginning. This buffer covers unexpected costs like last-minute guest additions, vendor overtime, or price adjustments, ensuring you aren't financially stressed in the final weeks. For more expert advice, explore these 6 amazing tips to save money on your wedding day.
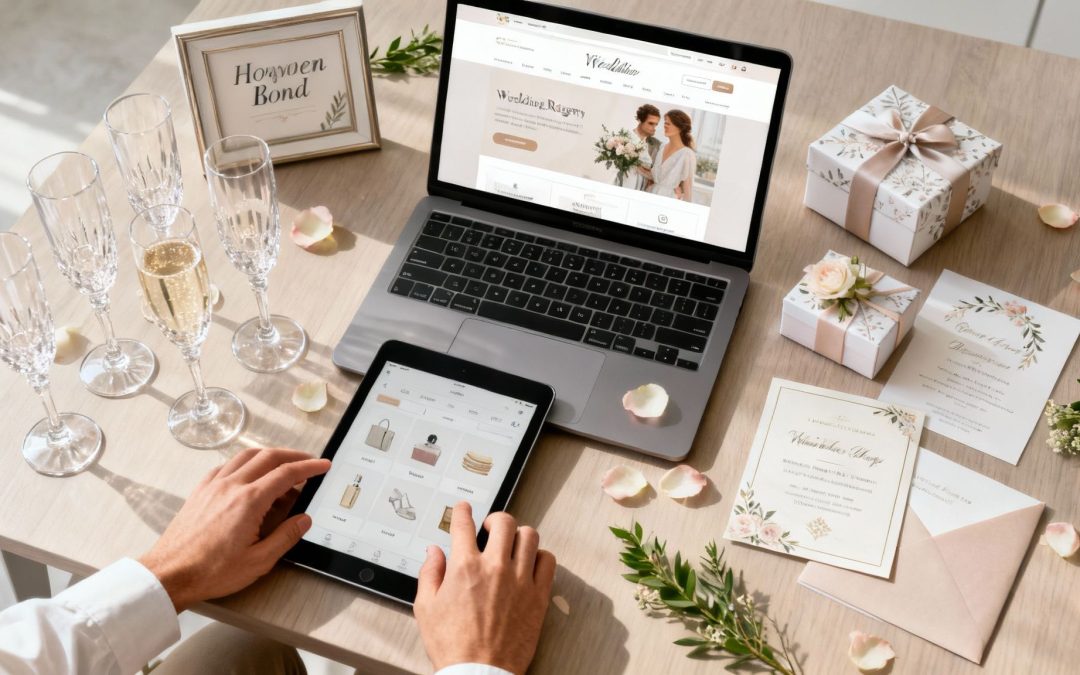
2. Create and Share Your Wedding Gift Registry
Once your budget is set, another exciting item on your wedding to-do list is creating your gift registry. A registry is a curated list of gifts, experiences, and cash funds that guides your guests, helping them choose something you genuinely want and need. It simplifies the gift-giving process for everyone, prevents duplicate presents, and ensures you start your married life with meaningful items.
How to Create Your Registry
Start by choosing a flexible registry platform like EasyRegistry, which allows you to combine items from various stores, create cash funds for a honeymoon or home deposit, and even add charity donations. This "universal" approach gives you ultimate freedom. Sit down with your partner and brainstorm a list that reflects your lifestyle, needs, and aspirations. Include a mix of practical homewares, personal items, and bigger-ticket goals.
A well-rounded registry caters to all your guests. Aim for a variety of price points:
Under $50: Small kitchen gadgets, elegant tea towels, or a contribution to a cash fund.
$50 – $150: Quality cookware, a set of wine glasses, or a contribution towards an experience.
$150+: Major appliances, artwork, or significant contributions to your honeymoon fund.
Group Gifting: Enable group gifting for larger items so multiple guests can contribute.
Why It's a Priority
Creating your registry early (around 4-6 months before the wedding) is crucial because guests will start looking for it as soon as they receive their save-the-dates or invitations. Having it ready avoids confusion and streamlines their experience. A thoughtfully prepared registry shows gratitude and consideration for your guests' generosity, making them feel confident their gift will be loved and used. It's a modern, organised approach to a timeless tradition.
Pro Tip: Share your registry link discreetly on your wedding website or via a details card in your invitation suite. Avoid putting it directly on the main invitation. For inspiration on what to include beyond the usual homewares, explore these unique wedding gift ideas to make your registry truly personal.
3. Book Your Venue and Secure the Date
With your budget and guest list established, the next monumental step on your to-do list for a wedding is booking your venue. This decision sets the entire scene, influencing everything from your wedding's style and date to your choice of vendors and guest capacity. In Australia, popular venues can be booked 12 to 18 months in advance, making this a time-sensitive priority.
How to Find Your Perfect Venue
Begin by researching locations that align with your vision and budget. High-demand spots like Sydney's Royal Botanic Garden or Melbourne's Royal Exhibition Building often require booking 18+ months ahead. Don't overlook regional options like wineries in the Yarra Valley or stunning coastal venues that offer a unique backdrop.
Create a shortlist of 3-5 venues and schedule in-person tours. Pay close attention to the following:
Capacity and Layout: Does it comfortably fit your guest list?
Inclusions: What is covered in the package (tables, chairs, linen, staff)?
Vendor Policies: Are you restricted to a list of preferred suppliers?
Accessibility: Is there adequate parking and access for all guests?
Contingency Plans: What are the options for wet weather?
Why It's a Priority
Securing your venue and date is the key that unlocks the rest of your planning. You cannot hire other vendors like a photographer, caterer, or florist without a confirmed date and location. It transforms your wedding from an idea into a tangible event on the calendar, providing momentum and a clear deadline for all subsequent tasks. Once the deposit is paid and the contract is signed, you can officially announce your date to friends and family.
Pro Tip: Before signing the contract, thoroughly read the terms, especially the cancellation and postponement clauses. Ask about peak versus off-peak pricing, as shifting your date to a weekday or a different season can sometimes lead to significant savings. For a complete checklist, review these essential wedding venue questions to ask before booking.
4. Determine Guest List and Send Invitations
Once your budget and venue are locked in, your next major task is finalising the guest list. This step is a critical part of any to-do list for a wedding because it directly impacts almost every other decision, from catering headcounts and seating arrangements to the number of invitations you need to order. Finalising your guest list brings your celebration to life, turning it from a concept into a gathering of your most cherished friends and family.
How to Finalise Your List
Start by creating a master list, often broken into an 'A-list' (must-invites) and a 'B-list' (if space and budget allow). This requires open conversations with your partner and contributing family members to ensure everyone feels represented. For example, Australian weddings often average between 80-120 guests, so be realistic about your venue’s capacity. Establish clear rules early on, such as your policy on plus-ones and children, to avoid awkward conversations later.
Once the list is set, it's time to send invitations. The standard timeline is to send them 6-8 weeks before the wedding day, or 8-12 weeks for destination weddings that require more travel planning.
Why It's a Priority
Your final guest count is the magic number that your caterer, venue, and rental companies need to give you accurate quotes. Booking vendors without a firm idea of your guest numbers can lead to overspending or, conversely, not having enough resources for your attendees. An organised approach also ensures a smoother RSVP process, allowing you to collect crucial information like dietary requirements and meal preferences well in advance.
Pro Tip: Set a clear RSVP deadline for 3-4 weeks before the wedding day. This gives you enough time to give final numbers to your vendors, chase up any late responses, and create a thoughtful seating chart without last-minute stress. Using digital RSVP tools can streamline this process significantly.
5. Plan and Book Catering and Menu Selection
Arguably one of the most memorable parts of any wedding celebration, your food and drink selection significantly shapes the guest experience. Catering often accounts for a large portion of the budget, so finalising your menu and booking a supplier is a major milestone in your to-do list for a wedding. This task involves everything from choosing a service style to curating a menu that reflects your tastes and accommodates your guests.
How to Plan Your Menu
Start by deciding on the style of dining that best suits your wedding's atmosphere. Will it be a formal seated dinner, a relaxed cocktail reception with canapés, or a trendy food truck experience? Modern Australian weddings are embracing extended aperitif periods, tapas-style share plates, and interactive food stations like wood-fired pizza or oyster bars. Research and shortlist 2-3 caterers whose offerings align with your vision and budget, then schedule tastings to make your final decision.
Once you’ve chosen a caterer, work with them to design a menu. Consider these key elements:
Dietary Needs: Discuss their process for managing allergies and dietary requirements (gluten-free, vegan, etc.) and any associated costs.
Service Style: Confirm if you want plated meals, a buffet, or family-style service.
Beverages: Decide whether to offer a full bar, a limited selection of beer and wine, or premium non-alcoholic options, which are becoming increasingly popular.
Why It's a Priority
Securing your caterer 9-12 months in advance (if they aren't included with your venue) is crucial, as the best suppliers book out quickly. This decision impacts other planning areas, including your timeline for the day, rental needs (tables, chairs, linens), and overall budget. Finalising the menu early allows you to accurately inform guests on your invitations and gives you peace of mind knowing a core element of your reception is locked in.
Pro Tip: When you receive a catering proposal, read it carefully to see what’s included. Clarify costs for staffing, bar service, equipment rentals, and cleanup to avoid any surprise fees. Request a detailed service timeline for the wedding day to ensure a smooth flow from cocktails to dessert.
6. Hire and Schedule Your Photographer and Videographer
Once your venue and date are locked in, your next high-priority task is to secure the professionals who will capture every moment. Your photos and videos are the tangible memories you'll revisit for a lifetime, making this a critical part of your wedding to-do list. The best photographers and videographers are often booked 9-12 months in advance, especially for popular dates and seasons across Australia, so acting quickly is key.
How to Secure Your Visual Team
Begin your search by exploring portfolios that match your desired aesthetic, whether it’s light and airy, moody and dramatic, or candid and photojournalistic. Top-tier professionals, like Sydney-based Josh Carrott or Cavanagh Photography, are in high demand and command premium rates for their expertise. It's crucial to review not just their highlight reels, but full wedding galleries to get a true sense of their storytelling ability and consistency throughout an entire day.
Once you've shortlisted your favourites, schedule consultations to discuss their packages, approach, and personality. A typical package includes 8-10 hours of coverage, which is usually sufficient to capture everything from getting ready to the main reception events. Be prepared to discuss key moments you want captured and ask about their communication style on the day.
Why It's a Priority
These vendors can only be in one place at a time, so their availability is extremely limited. Booking them early ensures you get your first choice and avoids the stress of scrambling to find a quality professional last minute. Finalising your photographer also allows you to schedule an engagement shoot, which is a fantastic way to get comfortable in front of the camera and get to know your photographer before the big day. It solidifies a crucial part of your wedding day timeline and vendor team.
Pro Tip: When reviewing contracts, look closely at the deliverables. Clarify the exact number of edited images, the delivery timeline for photos and video (which can be several months post-wedding), and what rights you have for sharing and printing. Also, confirm if a second shooter is included, as this can be vital for capturing multiple angles during key moments like the ceremony.
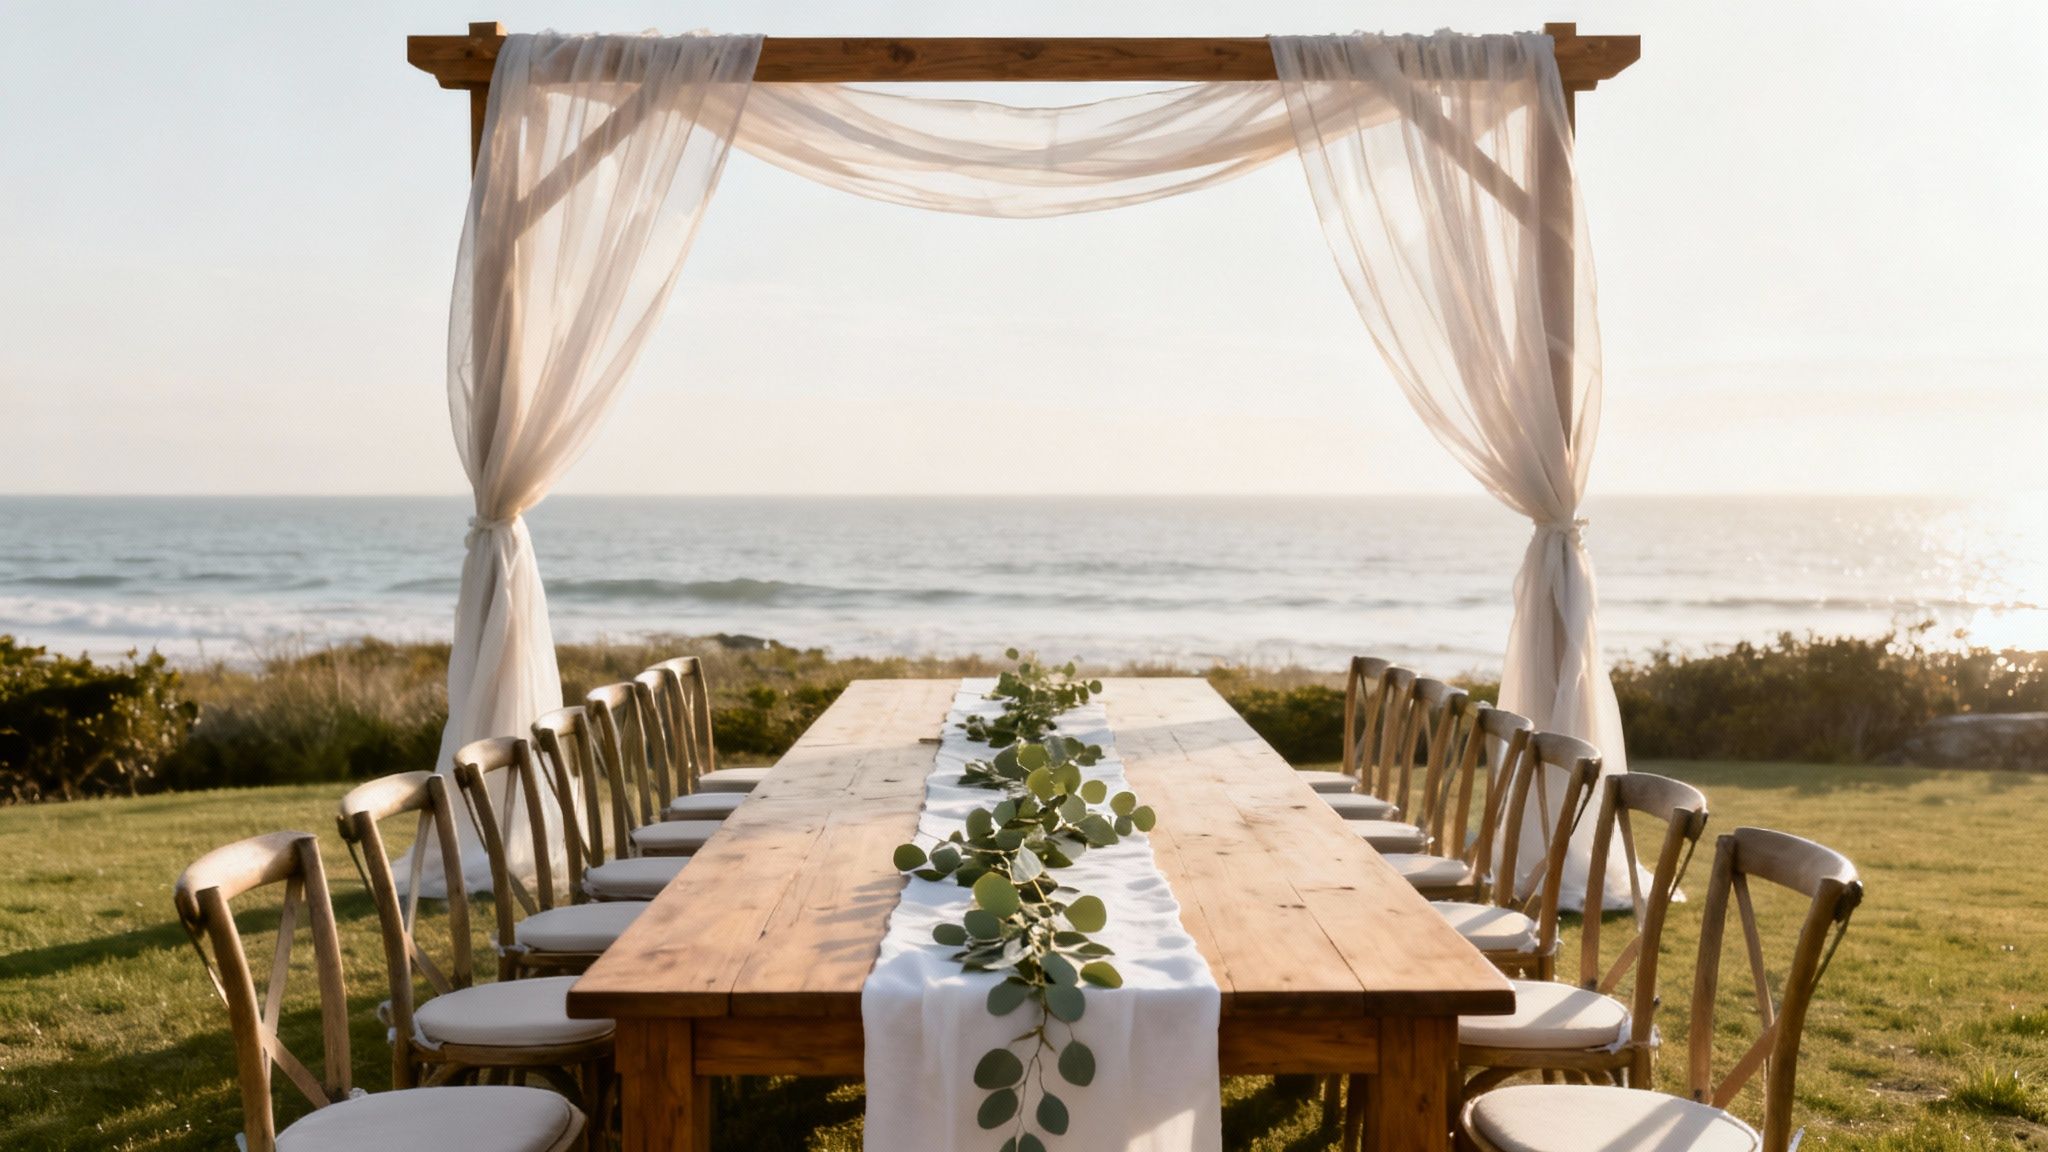
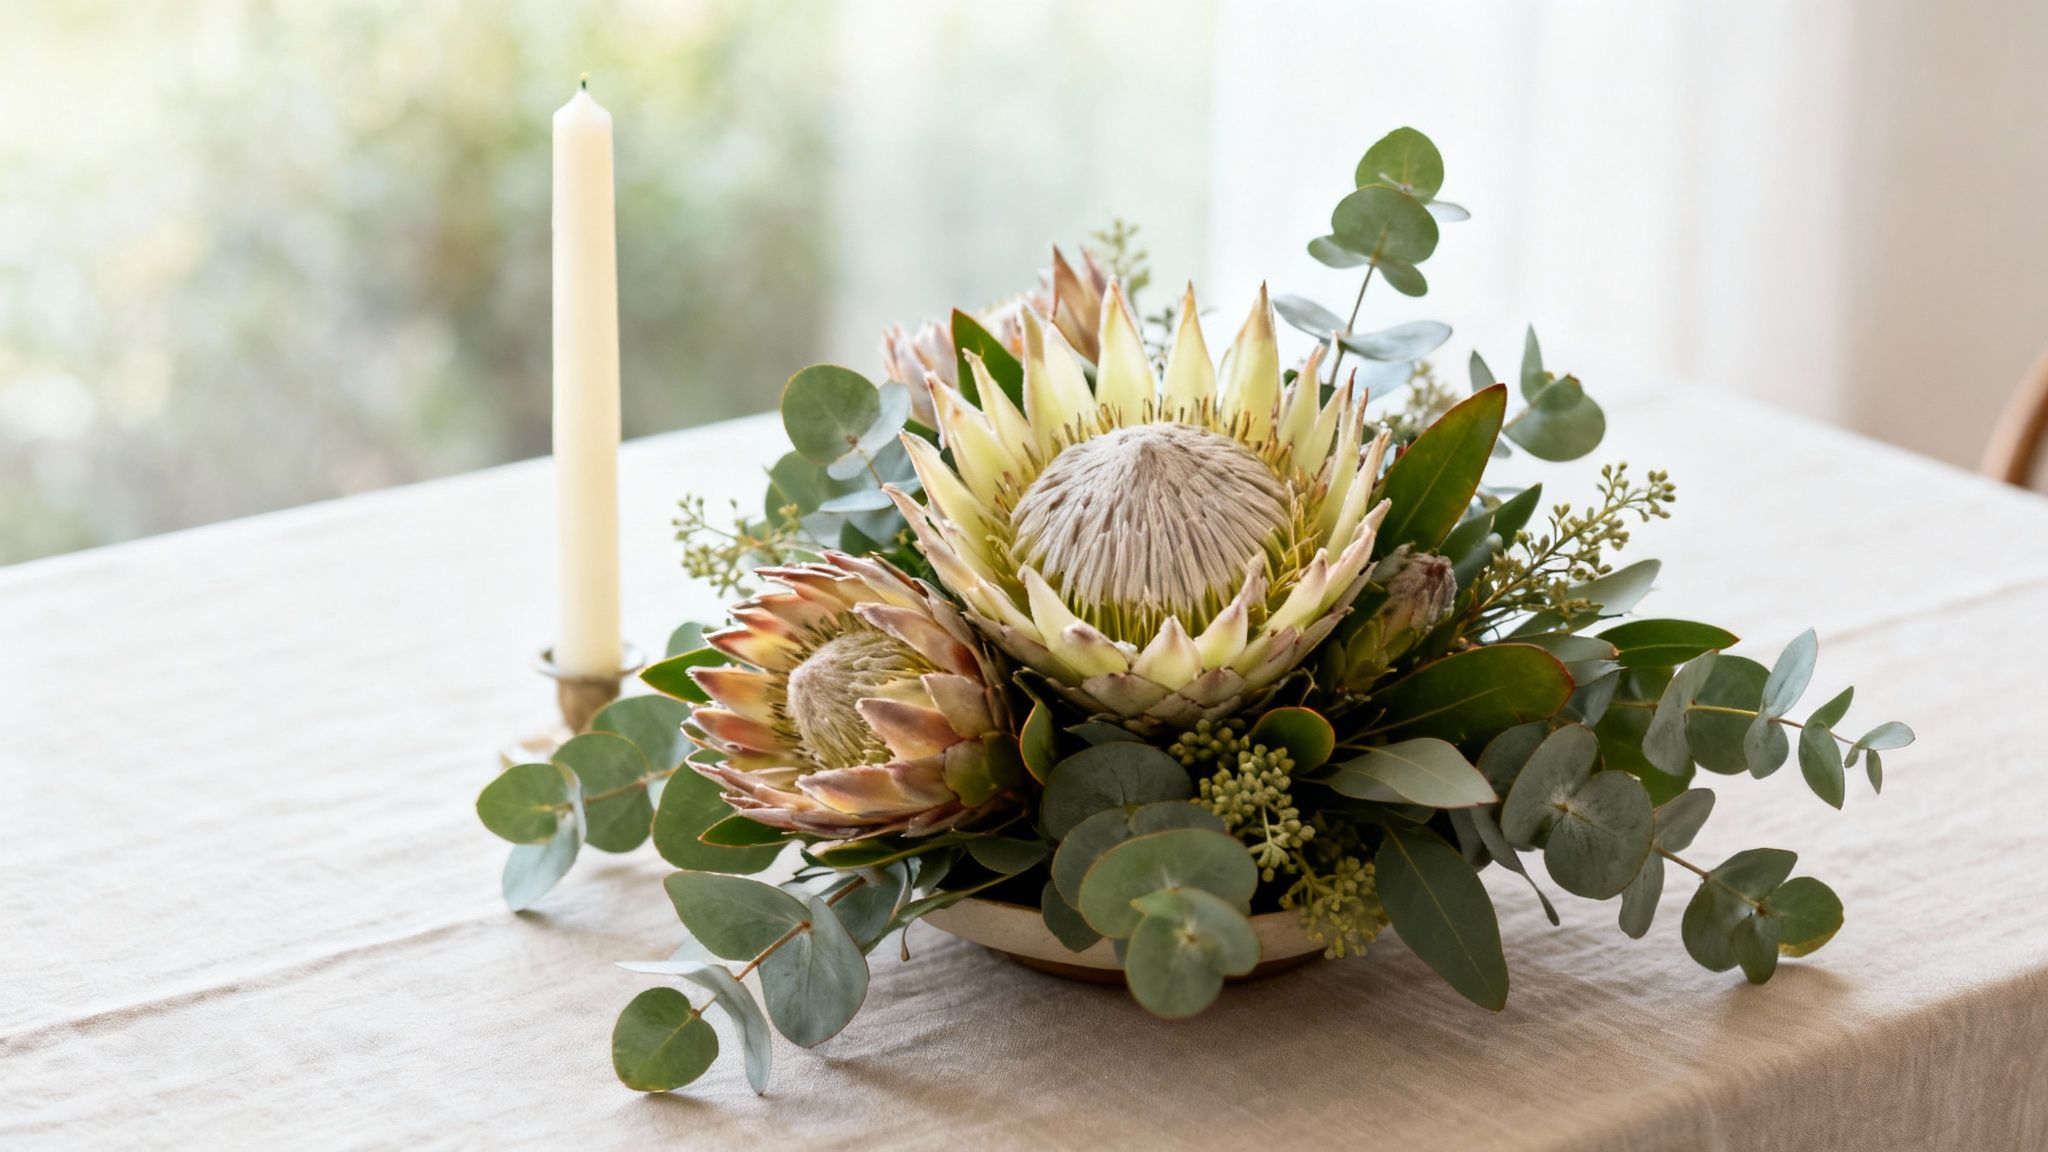
7. Arrange Flowers, Decorations, and Styling
Your flowers and decorations are the visual heart of your wedding day, transforming a venue into a personalised celebration space. This crucial step on your to do list for a wedding involves more than just picking pretty blooms; it’s about crafting an atmosphere and telling your story through colour, texture, and style. From the ceremony arch to the reception centrepieces, your styling choices create the backdrop for every moment and every photograph.
How to Plan Your Wedding Styling
Begin by creating a mood board with your partner. Use platforms like Pinterest to gather images that capture your desired aesthetic, colour palette, and overall vibe. This visual guide will be invaluable when communicating your vision to potential florists and stylists. Research vendors who specialise in the style you love, whether it’s modern minimalism, rustic romance, or bohemian chic. For a uniquely Australian feel, consider incorporating native flora like stunning king proteas, delicate waxflowers, and aromatic eucalyptus.
Once you’ve chosen your vendors, work with them to design a cohesive look that includes:
Personal Flowers: Bouquets, buttonholes, and corsages.
Ceremony Décor: Aisle markers, arch or backdrop arrangements.
Reception Styling: Centrepieces, table linens, lighting, and signage.
Sustainable Elements: Consider potted plants as centrepieces that double as take-home guest favours.
Why It's a Priority
Booking your florist and stylist 6-9 months in advance is essential, as the best professionals are often in high demand. Finalising your décor early allows you to coordinate other visual elements, such as invitations and bridesmaid dresses, ensuring a harmonious look. It also helps manage your budget effectively, as you can prioritise key floral moments and find creative solutions for other areas. Discussing seasonal flower availability with your florist can also lead to significant cost savings and fresher, more beautiful arrangements.
Pro Tip: When meeting with your florist, provide your mood board but also be open to their suggestions. They are experts in seasonality and can recommend beautiful, cost-effective alternatives if your first-choice blooms aren't available. Always ask them to have backup flower varieties in mind in case of unexpected supply issues.
8. Select and Coordinate Wedding Attire for Wedding Party
Selecting the attire for yourselves and your wedding party is one of the most exciting visual decisions in your wedding planning journey. This task solidifies your wedding’s aesthetic and ensures a cohesive look for your key photos. It’s a crucial item on your to-do list for a wedding that requires early planning, especially for custom garments and alterations.
How to Coordinate Attire
Begin with the couple's outfits, as they will set the tone. For bridal gowns, start shopping 9-12 months out, especially if you're considering premium Australian designers like Alex Perry or Suzanne Harward, whose creations often require long lead times. Once your attire is chosen, you can select complementary styles for your wedding party. Provide bridesmaids with a clear colour palette, fabric type, and deadline, giving them 6-8 months to order. For groomsmen, decide whether a classic tuxedo rental or a purchased suit aligns better with your budget and formality.
Here's a sample timeline to keep things organised:
9-12 Months Out: Start shopping for your wedding dress.
6-8 Months Out: Finalise and order bridesmaids' dresses.
5-6 Months Out: Choose and reserve groomsmen's suits or tuxedos.
2-3 Months Out: Schedule first fittings for all wedding party members.
1 Month Out: Coordinate shoes and accessories.
Why It's a Priority
Attire selection requires a long lead time. Wedding dresses can take 6-8 months to arrive after being ordered, and you must also factor in 2-3 months for alterations. Leaving this task too late can lead to rush fees, limited choices, and immense stress. Coordinating early ensures everyone has time to find their correct size, budget for the expense, and schedule necessary fittings without feeling pressured. It’s a foundational step that brings your wedding vision to life and ensures everyone looks and feels their best on the day.
Pro Tip: When choosing bridesmaids' dresses, consider giving your party a specific colour and fabric but allowing them to choose their own style. This approach ensures a cohesive look while letting each person select a silhouette that flatters their body type, increasing their comfort and confidence.
9. Plan Entertainment, Music, and Reception Activities
Your entertainment choices are the heartbeat of your celebration, setting the tone from the moment guests arrive until the final farewell. This part of your wedding to-do list for a wedding is all about crafting the atmosphere and energy of your day. It involves everything from the string quartet at your ceremony to the DJ who gets everyone on the dance floor and the activities that keep guests engaged throughout the reception.
How to Plan Your Entertainment
Start by deciding between a live band or a DJ, as this choice significantly influences the vibe. Live bands offer a dynamic, high-energy performance, while DJs provide a vast and versatile music library. Many couples in Australia opt for a combination, perhaps a live acoustic set for the ceremony and cocktail hour, followed by an experienced DJ for the reception who can read the crowd and cater to diverse age groups.
Once you’ve chosen your primary entertainer, create a detailed timeline of events. This includes:
Ceremony Music: Processional, signing of the register, and recessional songs.
Cocktail Hour: Background music to encourage mingling.
Grand Entrance: An upbeat track to announce your arrival.
Key Moments: Songs for the first dance, cake cutting, and bouquet toss.
Additional Activities: Plan for things like a photo booth, lawn games, or speeches.
Why It's a Priority
Booking your entertainment 6-9 months in advance is crucial, as popular vendors get snapped up quickly. Finalising these details early allows your chosen professional to prepare adequately and seamlessly integrate with your run sheet. A well-planned entertainment schedule ensures a smooth flow, prevents lulls in the celebration, and creates a memorable experience for you and your guests. This isn't just about music; it's about curating the entire guest journey.
Pro Tip: Provide your DJ or band leader with a detailed list of "must-play" and, just as importantly, "do-not-play" songs. Schedule a final meeting a few weeks before the wedding to run through the entire timeline and confirm pronunciations for bridal party names to avoid any awkward moments.
10. Manage Guest Accommodations, Invitations, and Communication
Once your guest list is finalised, a key part of your wedding to-do list is ensuring your guests have a seamless and enjoyable experience. This is especially crucial for friends and family travelling from interstate or overseas. Thoughtful planning around accommodations, clear invitations, and consistent communication demonstrates your appreciation for their effort and sets a welcoming tone for the entire celebration.
How to Coordinate Guest Logistics
Begin by researching and securing accommodation options for out-of-town guests around six to eight months before the wedding. Aim to provide three to four choices at varying price points, from budget-friendly motels to more luxurious hotels. Contact these venues to negotiate a group discount or a room block, which guarantees a set number of rooms at a fixed rate for your guests to book.
Create a dedicated page on your wedding website with all logistical details. This central hub should include accommodation recommendations with booking codes, travel advice, local transport options, and a clear schedule of events. Your formal invitations, sent out two to three months prior, should then direct guests to this website for all the essential information they need.
Why It's a Priority
Managing guest logistics proactively prevents last-minute stress for both you and your attendees. Clear, centralised information reduces the number of individual queries you'll receive and ensures everyone arrives on time and prepared. Arranging group transport, for example, is a considerate touch that significantly improves the guest experience. To streamline your wedding day, careful planning of transportation to and from wedding venues is a must for your guests, ensuring they can relax and celebrate without worrying about navigating an unfamiliar area.
Pro Tip: For destination or regional weddings, consider organising a welcome dinner or casual get-together the night before. It's a wonderful way to thank guests for travelling, help them mingle, and kick off the festivities in a relaxed setting before the main event.
Plan Entertainment, Music, and Reception Activities
Moderate — programming and technical coordination
Moderate: vendor fees, sound/lighting equipment
??? — increased guest engagement and mood control
Receptions prioritizing dancing and mixed-age appeal
Keeps guests engaged; manages event flow and timing
Manage Guest Accommodations, Invitations, and Communication
Moderate — hotel negotiation and logistics
Moderate: time, website tools, negotiation with hotels
?? — improved guest convenience and attendance
Destination/regional weddings with traveling guests
Eases travel logistics; centralizes info; can secure group rates
Bringing It All Together: Your Final Countdown to the Big Day
Navigating the journey from "yes" to "I do" can feel like an overwhelming odyssey of decisions, deadlines, and details. This comprehensive to do list for wedding planning has been designed to serve as your trusted roadmap, breaking down a monumental task into a series of manageable, timeline-based steps. From establishing your foundational budget and securing the perfect venue more than a year out, to managing the final guest communications and vendor confirmations in the week before, each stage has its own unique focus and set of priorities. By following this structured approach, you transform a potentially chaotic process into a controlled, organised, and even enjoyable experience. The goal is to move from one milestone to the next with confidence, knowing you have a clear framework guiding you.
The true value of a meticulous checklist isn't just about ticking boxes; it's about creating mental space. When you have a system for tracking everything from catering deposits and attire fittings to your gift registry and RSVP deadlines, you are free to focus on what truly matters: celebrating your love story with your partner, family, and friends. The most memorable weddings are not necessarily the most lavish, but the ones that authentically reflect the couple's personality. Your organised approach to planning is the backstage work that allows the main event to feel effortless, personal, and full of joy. Remember the key takeaways: start early, delegate effectively, and communicate clearly with both your vendors and your support network.
From Checklist to Celebration: Final Actionable Steps
As you enter the final phase of your planning, your focus should shift from broad decision-making to precise execution. This is the time to bring all the threads together into a cohesive, beautifully woven tapestry.
Final Vendor Lock-In: In the last month, schedule final confirmation calls or meetings with every vendor. This includes your venue coordinator, caterer, photographer, florist, and entertainment. Provide them with a finalised day-of timeline, contact lists for key people (like your maid of honour or wedding planner), and any last-minute logistical details such as specific photo requests or song choices.
Create Your Wedding Day Survival Kit: Assemble a small bag with essentials you might need. Think safety pins, stain remover pens, pain relief medication, a portable phone charger, and a copy of your vows. Entrust this kit to a reliable member of your wedding party.
Practice and Prepare: Take time to practice your vows out loud. If you're having a first dance, run through the steps a few more times. Feeling prepared with these personal elements will help calm any day-of nerves and allow you to be more present in the moment.
The Art of Letting Go: Perhaps the most crucial item on your final to do list for wedding planning is to consciously decide to let go. Once the day arrives, trust in your preparation, your vendors, and your support system. Your only job on the wedding day itself is to be present, savour each moment, and marry the love of your life.
Ultimately, this checklist is more than just a list of tasks; it is a strategy for peace of mind. By methodically addressing each component, from the financial groundwork to the post-wedding thank-you notes, you are investing in a seamless, stress-reduced celebration. You've laid the foundation for a day that is not only perfectly organised but also deeply meaningful, marking the beautiful beginning of your next chapter together.
Ready to simplify one of the most important items on your to do list for wedding? Create a truly flexible and user-friendly gift registry with EasyRegistry. Our platform allows you to add any gift from any store, include cash funds, or even request contributions for your honeymoon, all in one beautiful and easy-to-share list. Start your free registry with EasyRegistry today and give your guests the gift of choice.
So, you're engaged. Congratulations! It’s one of the most exciting times in your life, but it can also feel a little… overwhelming. Where do you even begin? Before you get lost in a sea of Pinterest boards and venue brochures, let's take a deep breath and start with what really matters: the two of you.
The secret to sane, successful wedding planning isn't about ticking off a million tasks at once. It's about building a solid foundation first. Get these initial big-picture decisions right, and everything else will fall into place much more easily.
Your Wedding Planning Journey Starts Here
Getting engaged is a whirlwind, and it’s tempting to jump straight into the fun stuff like cake tasting and dress shopping. But hold on for just a moment. The very first (and most important) phase of planning is all about sitting down together and dreaming up your perfect day.
What does it feel like? Are you picturing a huge party with everyone you know, dancing the night away? Or is it more of an intimate, relaxed dinner with your absolute nearest and dearest? Maybe it’s a rustic country vibe or a sleek, modern city affair. There are no right or wrong answers, but getting on the same page now will save you a world of headaches down the track.
As you can see, these first three pillars—your vision, your budget, and your guest list—are completely intertwined. You can’t really decide on one without considering the others.
Setting Your Priorities Together
Before you even think about a budget spreadsheet, have a chat about your non-negotiables. What are the top three things that are most important to each of you?
Seriously, try it. One of you might be all about the food and an amazing live band, while the other’s top priority is capturing every moment with a brilliant photographer. Knowing this from the get-go is a game-changer.
By deciding on your top priorities from the outset, you create a framework for your budget. This clarity helps you allocate funds effectively, ensuring you spend money on the aspects that truly matter to you both, rather than feeling pressured by tradition or trends.
To get the ball rolling, here are the absolute first things you need to tackle.
Wedding Planning Quick Start Checklist
This table summarises the essential first steps for planning your wedding, helping you prioritise key decisions from the beginning.
Action Item
Key Consideration
Recommended Timeline
Discuss Your Vision
What’s the overall vibe? Big party or intimate gathering? Formal or casual?
12+ Months Out
Set a Realistic Budget
Figure out your total spend and who is contributing.
12+ Months Out
Draft a Guest List
Create your 'A-list' and 'B-list'. This is the biggest budget driver.
11-12 Months Out
Pick a Date Range
Choose a season or a few potential weekends.
11-12 Months Out
Research & Book Venue
Your venue often dictates the date and style. Book this first!
10-12 Months Out
This simple checklist isn't about finalising every detail; it's about creating a master plan that gives your planning direction and purpose from day one.
Embracing a Modern Approach
Let’s be honest, the idea of a "traditional" wedding has changed a lot. In Australia, with the average age for getting married now in the early thirties, many couples are coming to the table with established homes, careers, and financial goals.
This means you have complete freedom to throw out the rulebook and design a day that’s authentically you. This could look like:
Opting for a mid-week wedding: Venues and key vendors can be significantly cheaper from Monday to Thursday.
Focusing on guest experience: Maybe you'd rather spend money on incredible food and an open bar than on elaborate floral installations.
Creating a flexible gift registry: Moving beyond traditional homewares to include cash funds for a honeymoon, a house deposit, or even a puppy fund through a service like EasyRegistry.
Ultimately, knowing how to plan a wedding isn’t about following a rigid script. It's about communication, compromise, and creating a process that feels right for your relationship. Start here, with these foundational steps, and remember to have some fun along the way. This is supposed to be enjoyable, after all
Drawing Up Your Wedding Budget and Guest List
Alright, you’ve got the vision. Now comes the part that grounds your wedding dreams in reality: the money and the people. Your budget and guest list are completely intertwined—every extra person you invite adds to the cost, especially when it comes to the venue and catering. Getting these two sorted out early is honestly the best thing you can do to keep the planning process stress-free.
The money talk can feel a bit awkward, but it's a conversation you need to have. Figure out what you can realistically spend by looking at your savings, talking about any potential family contributions, and deciding what you're both comfortable allocating to this one big day. Being open and honest right from the start will save you from some major headaches down the track.
It’s also wise to be realistic about how costs can add up. The average Aussie wedding now costs around $35,315. Interestingly, most couples kick off with a budget of about $27,455 and end up stretching it by nearly 28.5%. This "budget creep" is a real thing, so do yourselves a favour and build a 10-15% contingency fund into your numbers from day one. To get a better feel for current trends, you can explore some great Australian wedding industry insights on Easy Weddings.
Crafting a Realistic Financial Plan
Forget scribbling notes on a napkin—a detailed spreadsheet will be your best mate here. A shared digital document lets you both track every single dollar in real-time. This isn’t just about listing expenses; it's about consciously deciding where your money is going and what truly matters to you both.
Your biggest costs will almost always be the venue and catering, which can easily eat up 40-50% of your total budget.
Here’s a rough guide to help you get started with allocations:
Venue, Food & Drinks: 45%
Photography & Videography: 15%
Attire & Rings: 10%
Entertainment (Band/DJ): 10%
Flowers & Décor: 10%
Celebrant, Stationery & Other Bits: 10%
Of course, this is just a starting point. If you’re both huge music lovers, you might decide to splurge on an amazing band and find ways to be more creative (and thrifty) with your floral arrangements. For some brilliant ideas, have a look at these 6 amazing tips to save money on your wedding day.
Navigating the Guest List Dilemma
Figuring out who to invite can feel like solving an emotional Rubik's Cube. It's that tricky intersection where family expectations and financial reality collide, and it causes a lot of grief for many couples. The key is to have a system in place before you even think about writing down names.
The A, B, and C list method is a tried-and-true strategy for a reason. It helps you sort guests into clear categories, which makes those tough decisions much more straightforward if you need to trim the list later.
My biggest piece of advice: Finalise your guest list before you go venue hunting. There’s nothing worse than falling head over heels for a venue that’s too small for your non-negotiables or, conversely, way too big and expensive for the intimate day you had in mind.
The A, B, and C List Strategy
First, brainstorm a master list of absolutely everyone you could possibly invite. Then, sit down together and sort every name into one of three tiers. This simple process brings so much clarity and gives you a practical way to handle any cuts.
Here's how it works:
The A-List: These are your ride-or-dies. Think immediate family (parents, siblings), your bridal party, and your absolute closest friends. You simply can't imagine your day without them.
The B-List: This is for your extended family (aunts, uncles, cousins) and good friends you catch up with regularly. You'd really love for them to be there if the budget and venue allow.
The C-List: This list typically includes colleagues, parents' friends you haven't seen in years, and the optional plus-ones for single guests. If you need to cut numbers to meet your budget, this is where you start.
Using a tiered system like this takes a lot of the emotion out of the equation. By creating these lists as a team, you ensure you're on the same page about your priorities, setting a solid foundation that respects both your relationships and your bank account.
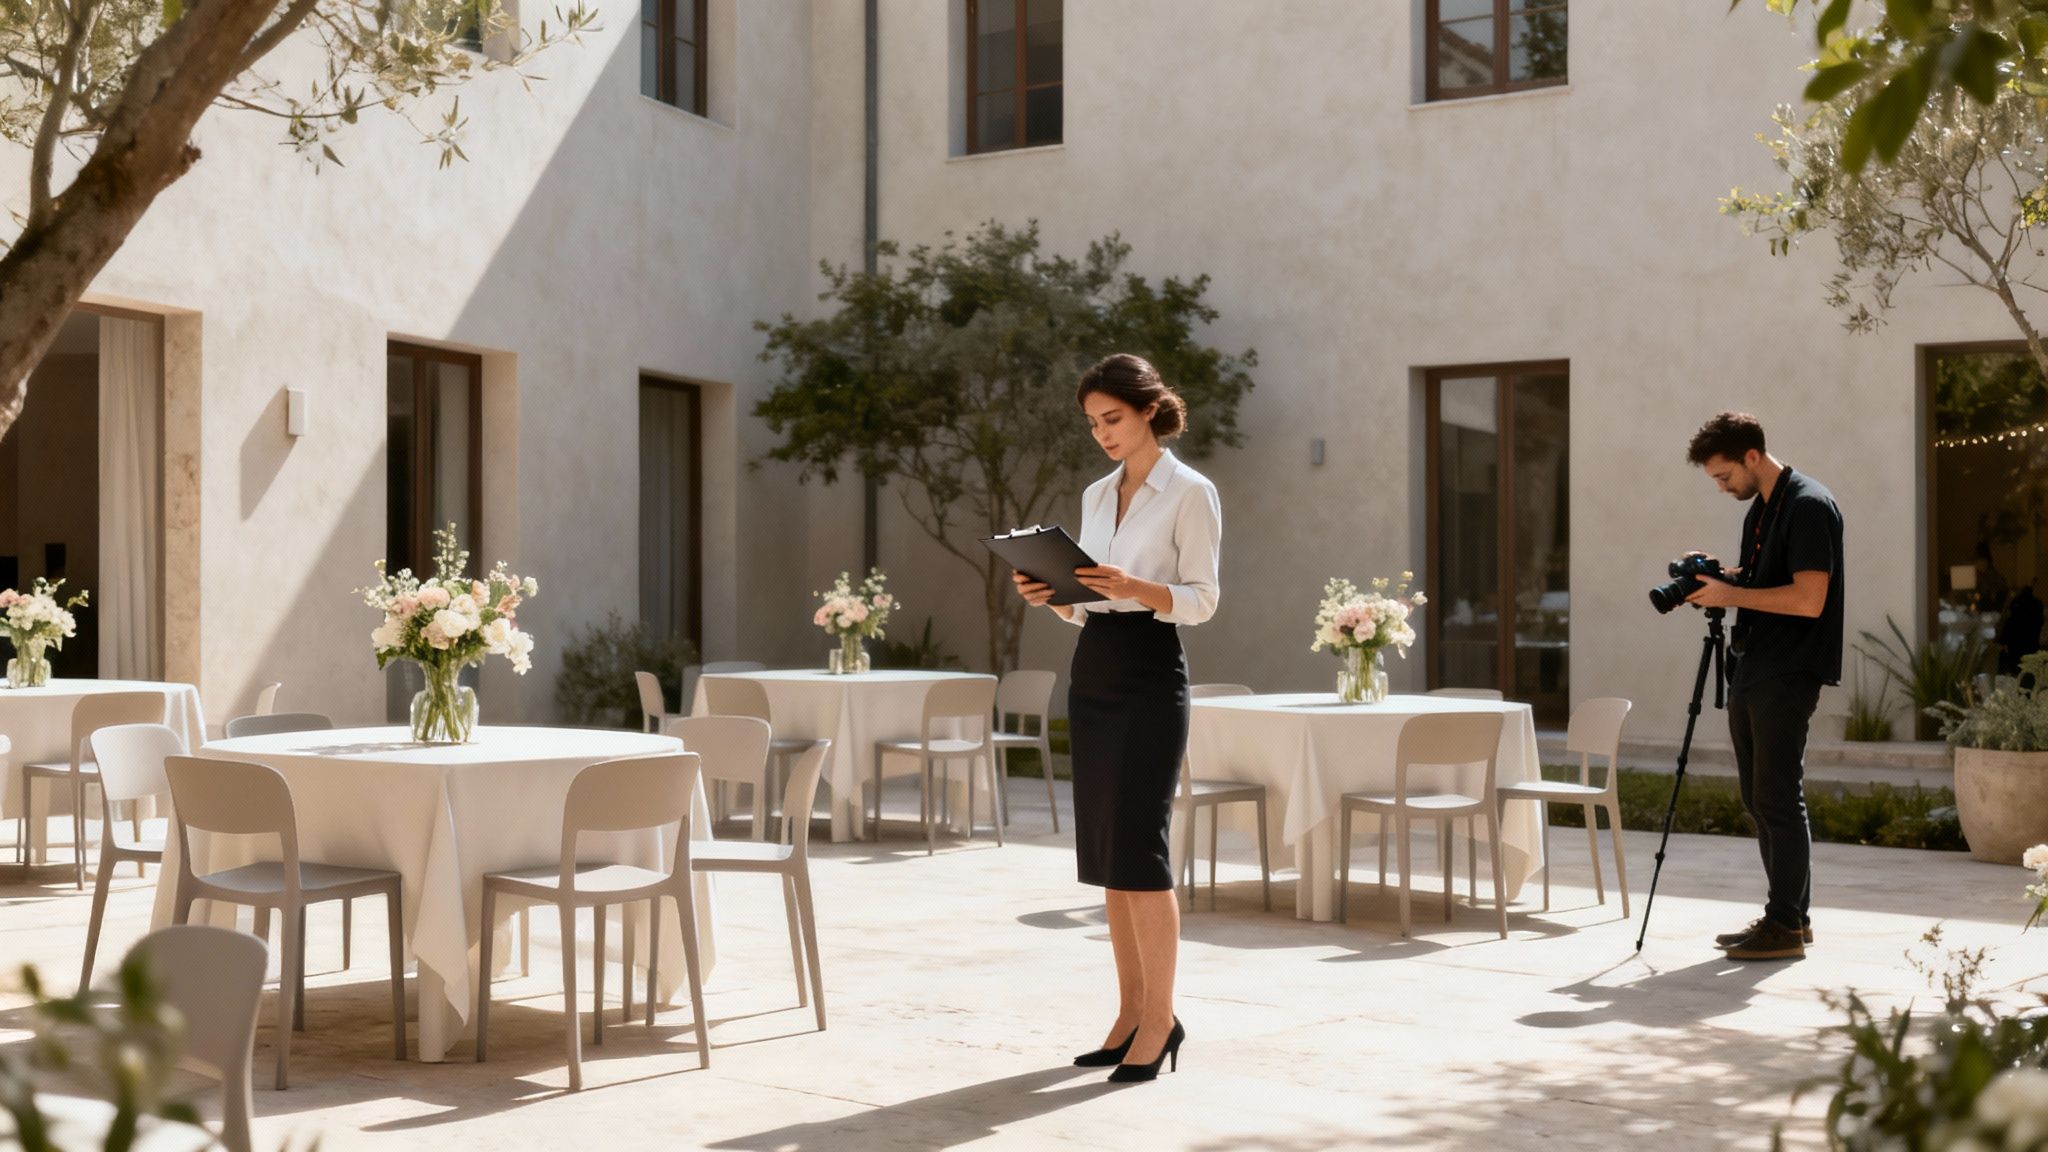
Choosing Your Venue and Key Vendors
Alright, this is where the fun really begins. With your budget and guest list starting to look like a solid plan, it’s time to choose the people and places that will bring your wedding day to life.
Your venue is so much more than just four walls and a roof; it’s the backdrop to every memory and sets the whole vibe for the day. At the same time, your key vendors—think photographer, celebrant, florist—are the creative team you’ll be trusting to get it all right.
Getting these big-ticket items locked in early is absolutely crucial. I’ve seen it time and again: the best venues and suppliers are often snapped up 12 to 18 months in advance, especially for those popular Saturday dates. This part of the process is all about building a team you can rely on, one that gets your style and makes you feel completely at ease.
Finding and Securing Your Perfect Venue
Think of your venue as the canvas for your big day. What kind of feeling are you going for? A relaxed afternoon at a winery? A glamorous city ballroom reception? Or maybe a rustic barn party under the stars? Your choice here will ripple through every other decision, from the food to the dress code.
Before you even think about booking tours, get a shortlist together. Here's what to focus on:
Capacity: Make sure it fits your guest list comfortably. A cavernous hall can feel empty, while a space that’s too tight can feel chaotic and stuffy.
Location and Accessibility: How easy is it for everyone to get there? You’ll want to consider parking, public transport options, and how close it is to accommodation for out-of-towners.
In-house Services: Does the venue handle its own catering and bar staff, or are you expected to bring in your own? This can make a massive difference to your overall budget and workload.
Wet-Weather Plan: This is a non-negotiable in Australia. If any part of your day is outdoors, you need to know their backup plan for rain. And you need to love it just as much as Plan A.
Once you have a few contenders, it’s time for site visits. Going in prepared with the right questions will help you compare apples with apples and avoid any nasty surprises down the track. To make sure you cover all your bases, our guide on essential questions to ask your wedding venue is a lifesaver.
Assembling Your Dream Team of Vendors
After you’ve locked in your venue and set the date, your next job is to book the vendors who can only be in one place at a time. This means your photographer, videographer, celebrant, and any entertainment like a band or DJ should be top of your list. These are the people who will capture the memories and create the atmosphere.
As you start your research, look for vendors whose style genuinely resonates with yours. Spend time scrolling through their portfolios and reading recent reviews from other couples. I always recommend having a quick chat or video call, too—you need to know if your personalities click. You'll be spending the entire day with your photographer, so you want to make sure you actually like them!
Key Takeaway: Never underestimate the power of a good connection. Your vendors should feel less like hired help and more like trusted partners who are genuinely excited for you. That collaborative energy is what takes a wedding from good to absolutely unforgettable.
When it comes to your creative team, finding the right florist is key to bringing your vision to life. A great one will take your colour palette and budget and create something truly beautiful. For some fantastic advice, this guide on how to choose a wedding florist is an excellent place to start.
The Importance of Timing and Contracts
When you're planning a wedding in Australia, timing is everything. While 55% of weddings are still held on a Saturday, more and more couples are choosing Fridays (21%) and even Thursdays (8%) to secure their dream team, often at a better price.
With the average Aussie wedding having 88 guests, competition for the best suppliers on peak dates is fierce. It's why booking well in advance is so important.
Finally, before you sign anything, read every word of the contract. Make sure it clearly spells out exactly what’s included, the payment schedule, and the cancellation policy. A solid contract protects both you and your vendor, ensuring everyone is on the same page from day one.
Navigating Australian Legalities and Logistics
With all the exciting creative decisions taking shape, it’s easy to push the paperwork to the bottom of the list. But trust me, getting the administrative side of your wedding sorted early is the secret to a day that feels effortless. When you nail the legal stuff and the logistics, you’re free to soak up every joyful moment instead of stressing about the behind-the-scenes details.
In Australia, getting married is more than just a beautiful ceremony. There are a few key legal steps to follow to make sure your union is officially recognised. They’re not complicated, but they are time-sensitive, so being organised is a lifesaver.
The Legal Essentials for an Australian Wedding
First things first: the Notice of Intended Marriage (NOIM). This is the big one. It's the official form that kicks off the legal process, and you'll need to lodge it with your authorised celebrant.
The timing on this is strict. You have to lodge the NOIM at least one month before your wedding date, and no more than 18 months out. That one-month waiting period is firm, so my advice is to get this sorted as soon as you've locked in your celebrant.
To fill out the NOIM, you and your partner will need to show your celebrant a few key documents.
Proof of birth: An original birth certificate or a current Australian passport works perfectly.
Proof of identity: A driver's licence or another government-issued photo ID will do the trick.
Evidence of any previous marriages ending: If either of you has been married before, you’ll need to provide the original divorce certificate or the death certificate of your late spouse.
Your celebrant will absolutely guide you through this, but it’s up to you to track down the correct documents. Getting this sorted early on will save you a world of last-minute stress and prevent any heartbreaking delays to your wedding day.
On the day itself, you'll sign three marriage certificates alongside your celebrant and two witnesses (who must be over 18). Afterwards, your celebrant handles the final step: submitting all the paperwork to the Registry of Births, Deaths and Marriages in your state or territory to make it all official.
Mastering Wedding Day Logistics
With the legal side sorted, it's time to think about the flow of information and people. This all begins with your invitations. They don't just ask people to come; they set the tone for your day and give your guests all the info they need to celebrate with you.
Timing your invitations is key. Tradition suggests sending them out six to eight weeks before the wedding. But if you're planning a destination wedding or have a lot of guests travelling from interstate or overseas, it’s a kind gesture to send them three to four months in advance. This gives everyone plenty of time to book flights and sort out accommodation.
Managing RSVPs and Guest Needs
Your invitations need a clear RSVP deadline, usually about four weeks before the big day. This gives you a final headcount to pass on to your caterer and enough breathing room to create a seating plan without any last-minute chaos.
A wedding website can make tracking RSVPs a breeze. Guests can reply online and easily note any dietary needs. I highly recommend keeping all this information in a central spreadsheet—it will become your best friend! And don't be shy about following up with anyone who hasn't replied by the deadline. An accurate headcount is absolutely critical for your budget and finalising arrangements with your venue.
Creating a Modern Gift Registry with EasyRegistry
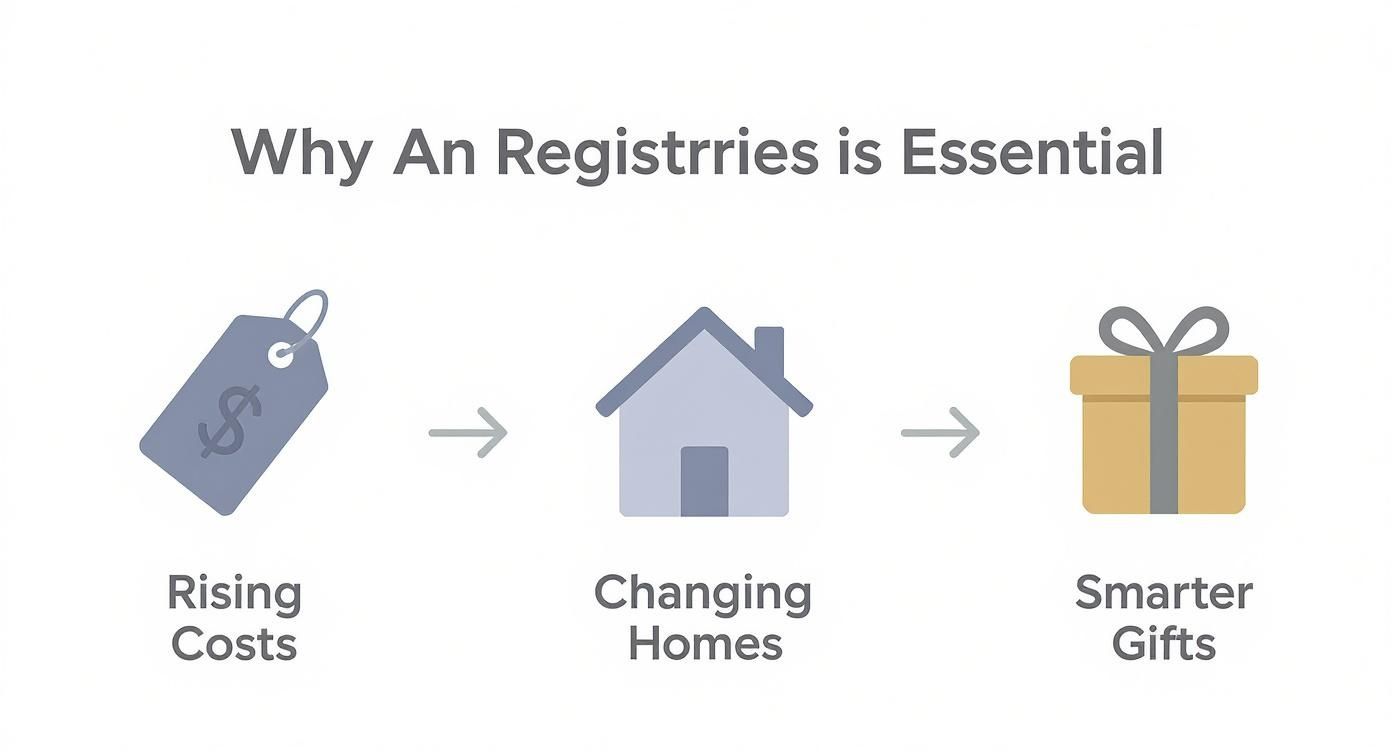
Let’s be honest, the days of needing a new toaster and a full set of towels are long gone for most couples. Modern weddings are all about celebrating the life you've already started building together, and your gift registry should absolutely reflect that.
Couples are tying the knot a bit later these days, with the median age now hovering in the early 30s. This often means you already have a well-established home by the time you're planning the wedding. So instead of more stuff, many Australian couples are hoping for experiences, contributions towards big-ticket items, or even a little help with a house deposit.
This is exactly where a flexible online registry shines. It steps away from the old-school department store list and gives you a single, elegant place for guests to contribute to the gifts that actually mean something to you.
Designing Your Personalised Registry Page
An online registry is so much more than a shopping list; it’s a little window into your story and your future plans for the people who care about you most. Getting started with EasyRegistry is incredibly simple, so you can focus on the fun part—curating your wish list.
The first thing you’ll want to do is make the page your own. Add a favourite photo of the two of you and write a warm, personal message. This small touch instantly transforms the page from a generic list into a genuine part of your wedding experience. You could briefly explain what you’re saving for, whether it’s your dream honeymoon in Italy or finally upgrading that tired old sofa.
You can see just how EasyRegistry works to create a page that feels completely authentic to you as a couple. That personal connection makes the act of giving so much more meaningful for your guests, too.
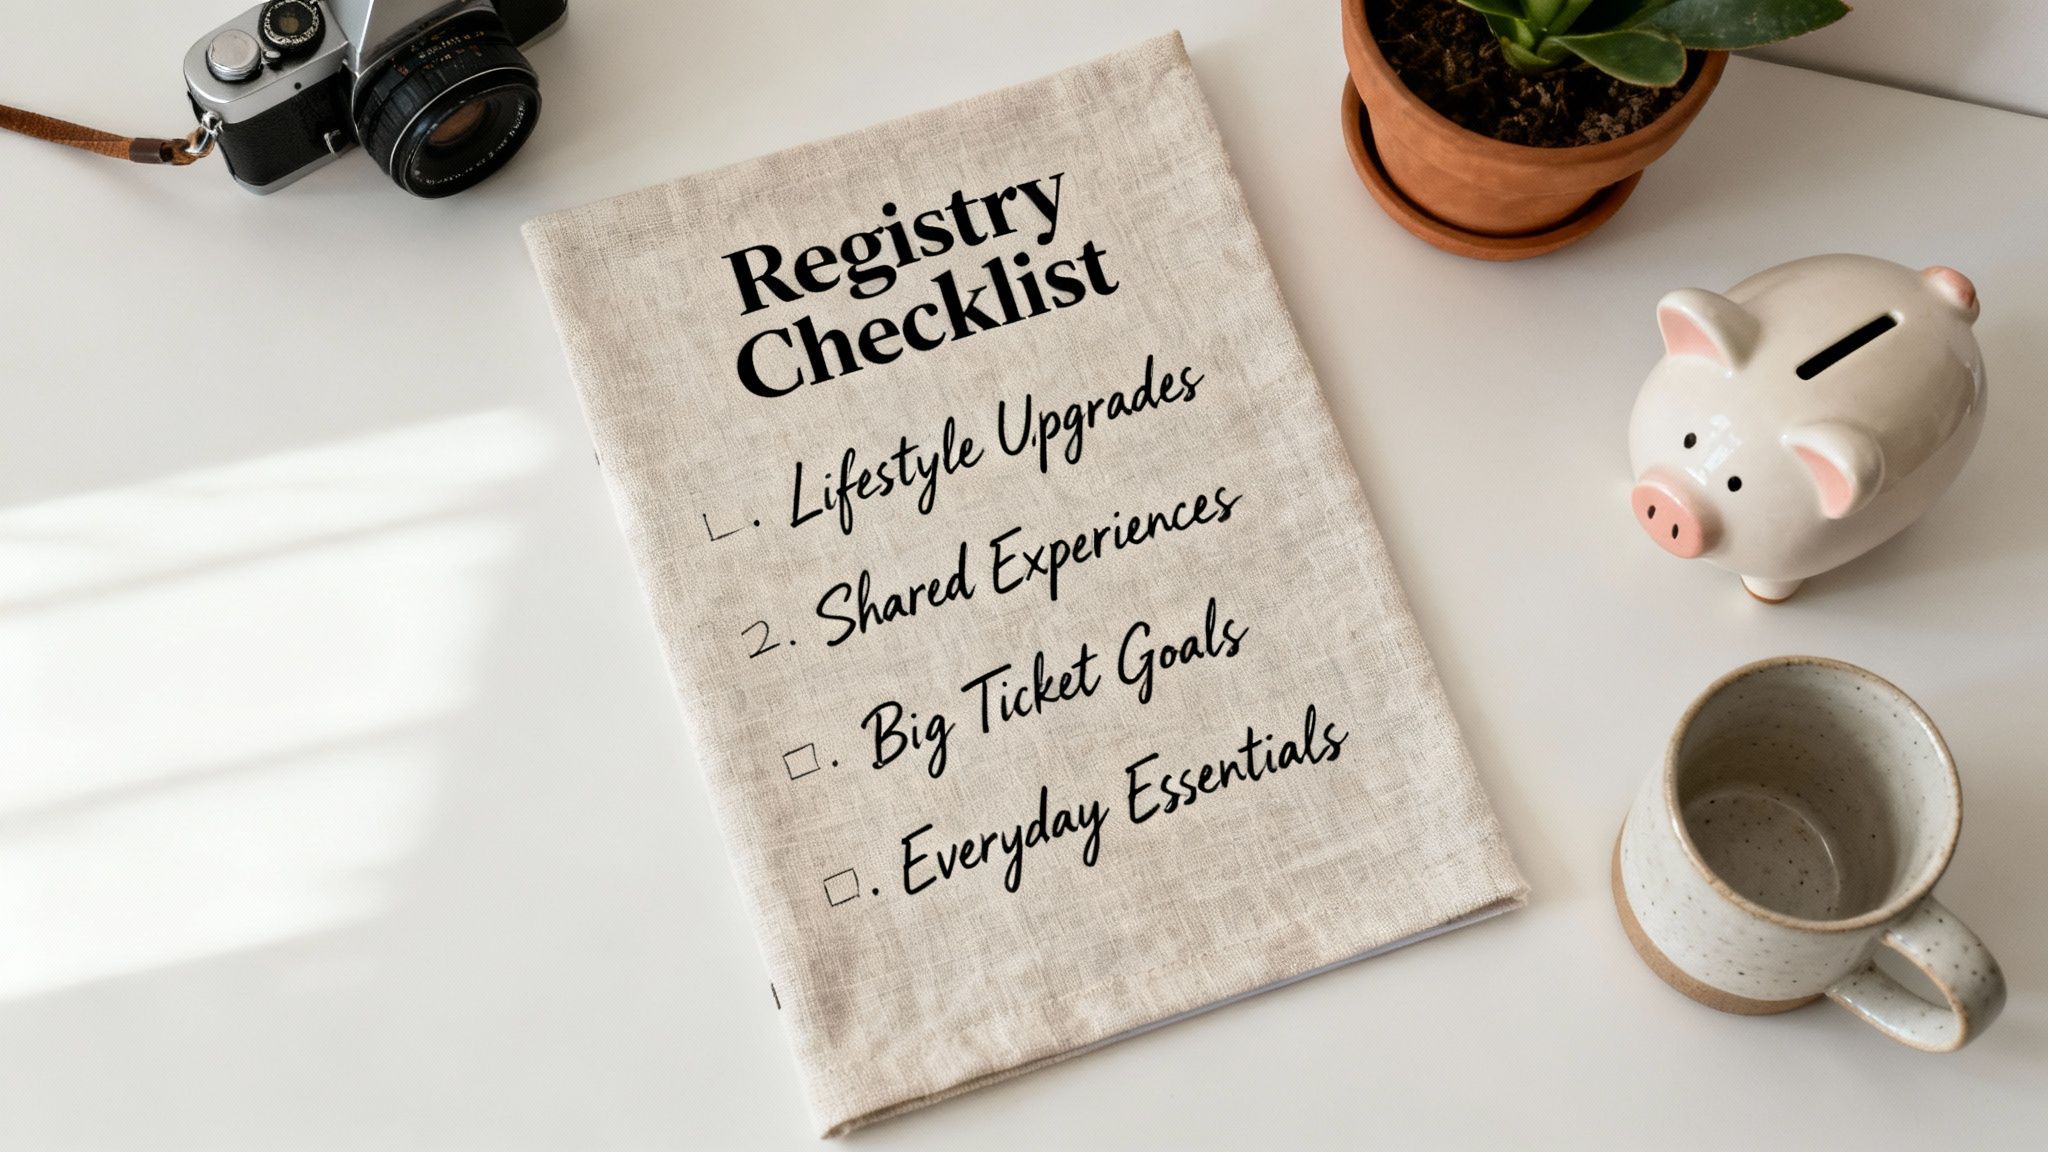
Mixing Traditional Gifts with Future Goals
The real beauty of a modern registry is its total flexibility. You're not stuck with just one type of gift. Instead, you can build a blended list that perfectly suits your life, mixing tangible items with your bigger goals. This approach is also fantastic for your guests, as it gives them plenty of choice at different price points.
Here’s a few ideas for how you could structure your list:
Cash Funds: Create funds for specific goals. Think a honeymoon fund, a house deposit fund, or even a "new puppy" fund! You can break it down so guests feel like they're contributing to something tangible, like "Cocktails on the beach in Fiji" or "Our first night's accommodation."
Big-Ticket Items: Eyeing a particular piece of furniture or a new appliance that’s a bit of a splurge? Let guests contribute a portion of the cost. This group-gifting approach makes expensive items feel more accessible.
Traditional Gifts: Of course, if there are specific homewares you still need, add them in! The best part is you can link to any item from any online store, giving you complete freedom.
Experience Gifts: Maybe what you’d really love is a fancy dinner out, a couples' cooking class, or tickets to see your favourite band. These gifts create lasting memories long after the wedding is over.
A well-curated registry tells the story of your future. It's not just about what you need; it's about what you dream of doing together. This makes your guests feel like they are investing in your happiness, not just buying an item off a shelf.
Sharing Your Registry with Guests
Once you're happy with your registry, sharing it is a breeze. You’ll get one clean, easy-to-remember link that you can pop onto your wedding website or a small information card sent with your invitations. This completely avoids any awkwardness and makes the whole process seamless for everyone.
Your guests can simply visit your page, browse your wishes, and make a contribution securely online from anywhere, anytime. It takes the guesswork out of gifting for them and ensures you receive things you’ll genuinely love and use as you start your married life together.
Managing the Final Countdown to Your Wedding
The last few months before your wedding are an absolute whirlwind. All those big-picture decisions you made ages ago are finally crystallising into the little details that will make your day unique. This is when it all starts to feel incredibly real! Staying on top of things now is the secret to walking into your wedding week feeling relaxed, excited, and truly ready to celebrate.
Don't look at this final stretch as one massive, scary to-do list. Instead, think of it as a series of smaller, totally manageable tasks spread over the last eight weeks. By breaking it all down, you can tick things off methodically, confirm every last detail, and tie up any loose ends without the stress. It’s time to switch from planning mode into execution mode.
Finalising Details and Confirming Vendors
With about two months to go, it's all about locking in those final details with your team of vendors. This is when you'll have your final walkthrough at the venue to go over the run sheet, lock in the menu, and finalise the floor plan. You'll also want to touch base with every single one of your suppliers to confirm their arrival times, what they need from you, and any last-minute questions.
A shared spreadsheet that you and your partner can both access is an absolute lifesaver here. You can track every conversation, note when final payments are due, and keep all their contact details in one spot.
Photographer & Videographer: Give them a clear "must-have" shot list and a copy of the day's timeline so they know where to be and when.
DJ or Band: Send over your final playlist. Make sure you include the key songs for your ceremony, first dance, and, just as importantly, your "do not play" list!
Celebrant: Schedule your last meeting to run through the ceremony from start to finish and sign off on all the legal paperwork.
Personal Touches and Wedding Party Prep
As you get closer, the focus shifts to more personal elements. Many couples find this is the perfect time for crafting your wedding vows, which is such a beautiful way to express your commitment. You’ll also be heading to your final dress or suit fittings to make sure everything fits like a glove.
This is also when you'll tackle the seating chart—a task that can feel a bit like a game of Tetris but is so important for a great reception vibe. Once your RSVPs are all in, sit down and group your guests thoughtfully to spark lively conversations. It’s also a great idea to create a simple "day-of" timeline for your wedding party, so they know exactly where they need to be for hair, makeup, photos, and transport.
My best advice? Delegate, delegate, delegate! Your wedding party and family are there to support you. Give them small, specific jobs like collecting the cake, looking after the guest book, or being the contact person for the florist. It frees you up to just be present and soak it all in.
The Final Week Checklist
The last seven days are all about final checks and taking care of yourself. This is not the time to start a new DIY project! Your job is to focus on the last few items and get plenty of rest.
Pack Your Bags: Get your honeymoon luggage ready to go. You should also pack a wedding day emergency kit with things like safety pins, Panadol, bandaids, and a mini sewing kit.
Confirm Final Numbers: Give your venue and caterer the final, confirmed guest headcount. This is usually due about a week out.
Prep Final Payments: Pop any outstanding cash payments into clearly labelled envelopes. Give them to a trusted person (like your best man or a parent) to hand out on the day.
Pamper Yourself: Book in for a manicure, pedicure, or a relaxing massage. Take a moment to breathe and connect with your partner before the big celebration.
Hand Over the Reins: Give your detailed timeline and vendor contact list to your maid of honour, day-of coordinator, or another responsible person. Your work is done. Now, all you have to do is enjoy it.
Your Top Wedding Planning Questions Answered
Even with the best checklist in hand, you're bound to run into a few specific questions along the way. I've been there! Let's clear up some of the most common queries I hear from Australian couples, so you can tackle those final details with total confidence.
What Does a Wedding in Australia Actually Cost?
This is the big one, isn't it? The classic "how long is a piece of string" question. While you'll see figures like the national average of around $35,000 thrown around, the honest answer is that your wedding budget is completely personal. It all comes down to what you prioritise, how many people you invite, and where you choose to celebrate.
The first, most crucial step is to figure out what you can genuinely afford, not what you feel you should spend based on averages. A gorgeous, meaningful wedding can happen at any price point. The secret is to align your budget with what truly matters to you both, whether that's incredible food, a legendary photographer, or that dream venue.
Who is Supposed to Pay for the Wedding?
The old tradition of the bride's family footing the entire bill is well and truly a thing of the past for most modern Australian couples. It’s just not how things are done anymore.
These days, it's far more common for the couple to fund their own wedding, often with some help from both sets of parents. The best thing you can do is have an open, honest chat with your families early on to see if they'd like to contribute. Knowing where you stand from the beginning makes setting a realistic budget so much easier.
Never assume anyone is going to contribute financially. A respectful conversation about money at the start of your planning journey is the best way to avoid awkwardness and make sure everyone feels included and on the same page.
Do We Really Need to Hire a Wedding Planner?
A wedding planner isn't a must-have, but for some couples, they are an absolute godsend. This is especially true if you're juggling busy careers or just feel completely swamped by the sheer number of decisions.
A full-service planner takes care of every single detail, from sourcing vendors to managing the budget. On the other hand, a "day-of" coordinator is perfect for organised couples who just want a professional to step in on the wedding day to make sure everything runs like clockwork.
Think about your budget and how much you want to be involved. If you're a spreadsheet whiz who loves organising, you can definitely plan an incredible wedding yourself. But if the thought of coordinating vendors and creating timelines makes you break out in a cold sweat, a planner is an investment in your own sanity.
Planning your gift registry is one part of the process that should be fun, not stressful. With EasyRegistry, you can create a beautiful, personalised registry that has it all—cash funds, honeymoon experiences, and traditional gifts—all in one easy-to-use place. Gifting becomes simple for your guests and truly meaningful for you. Start your free registry today!
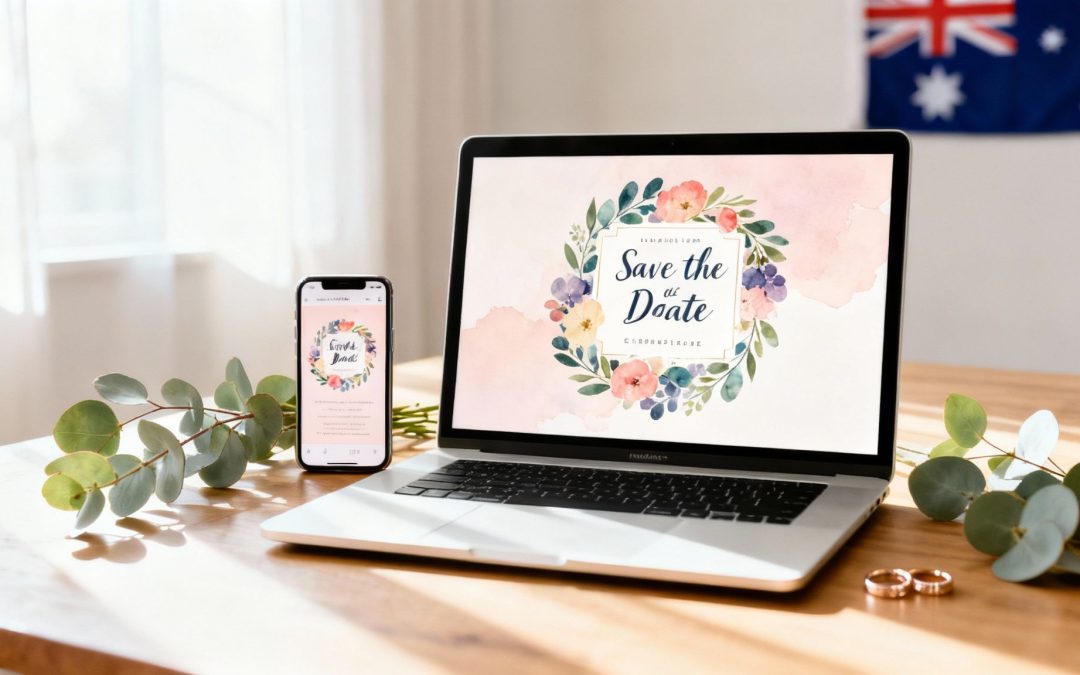
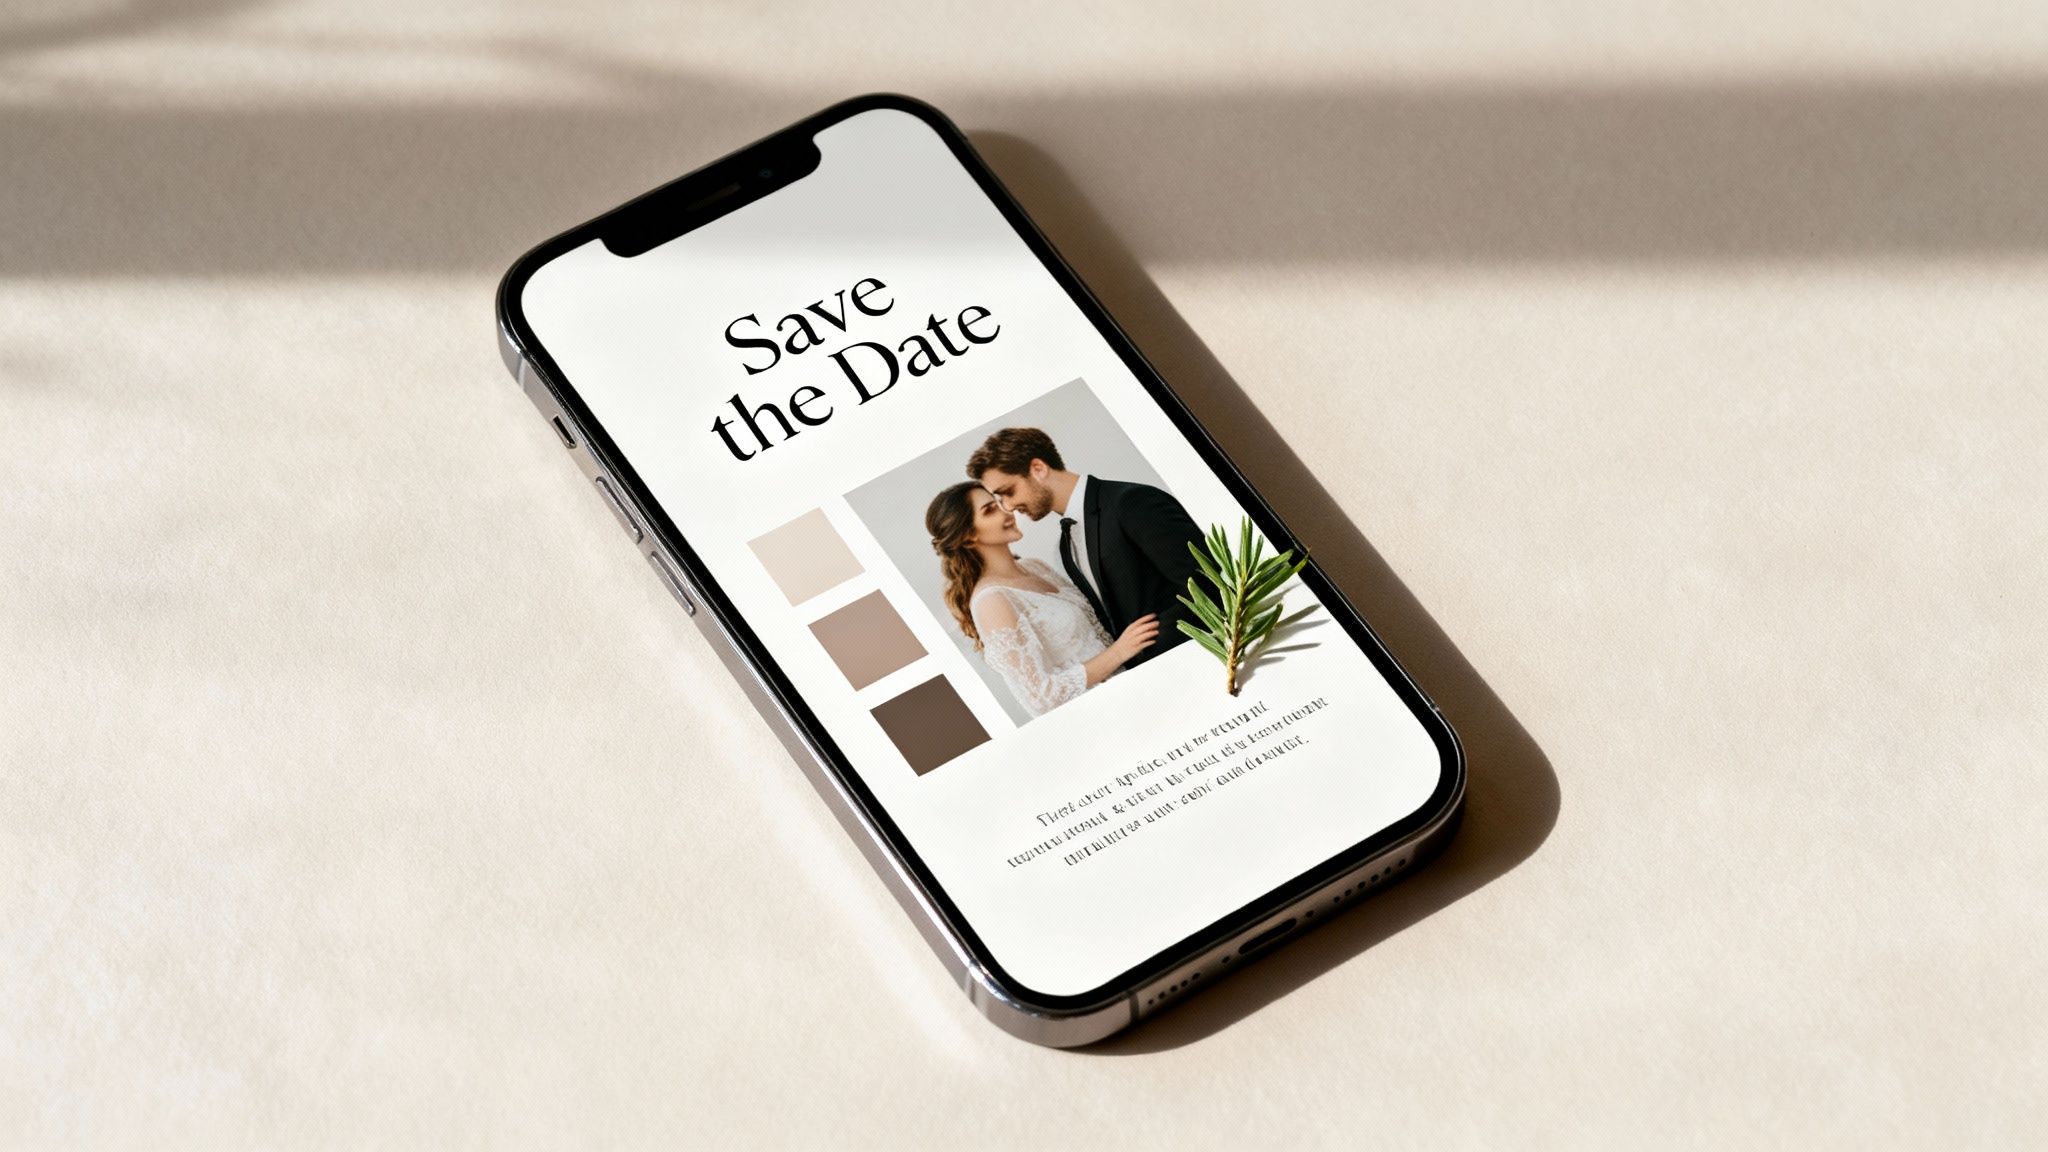
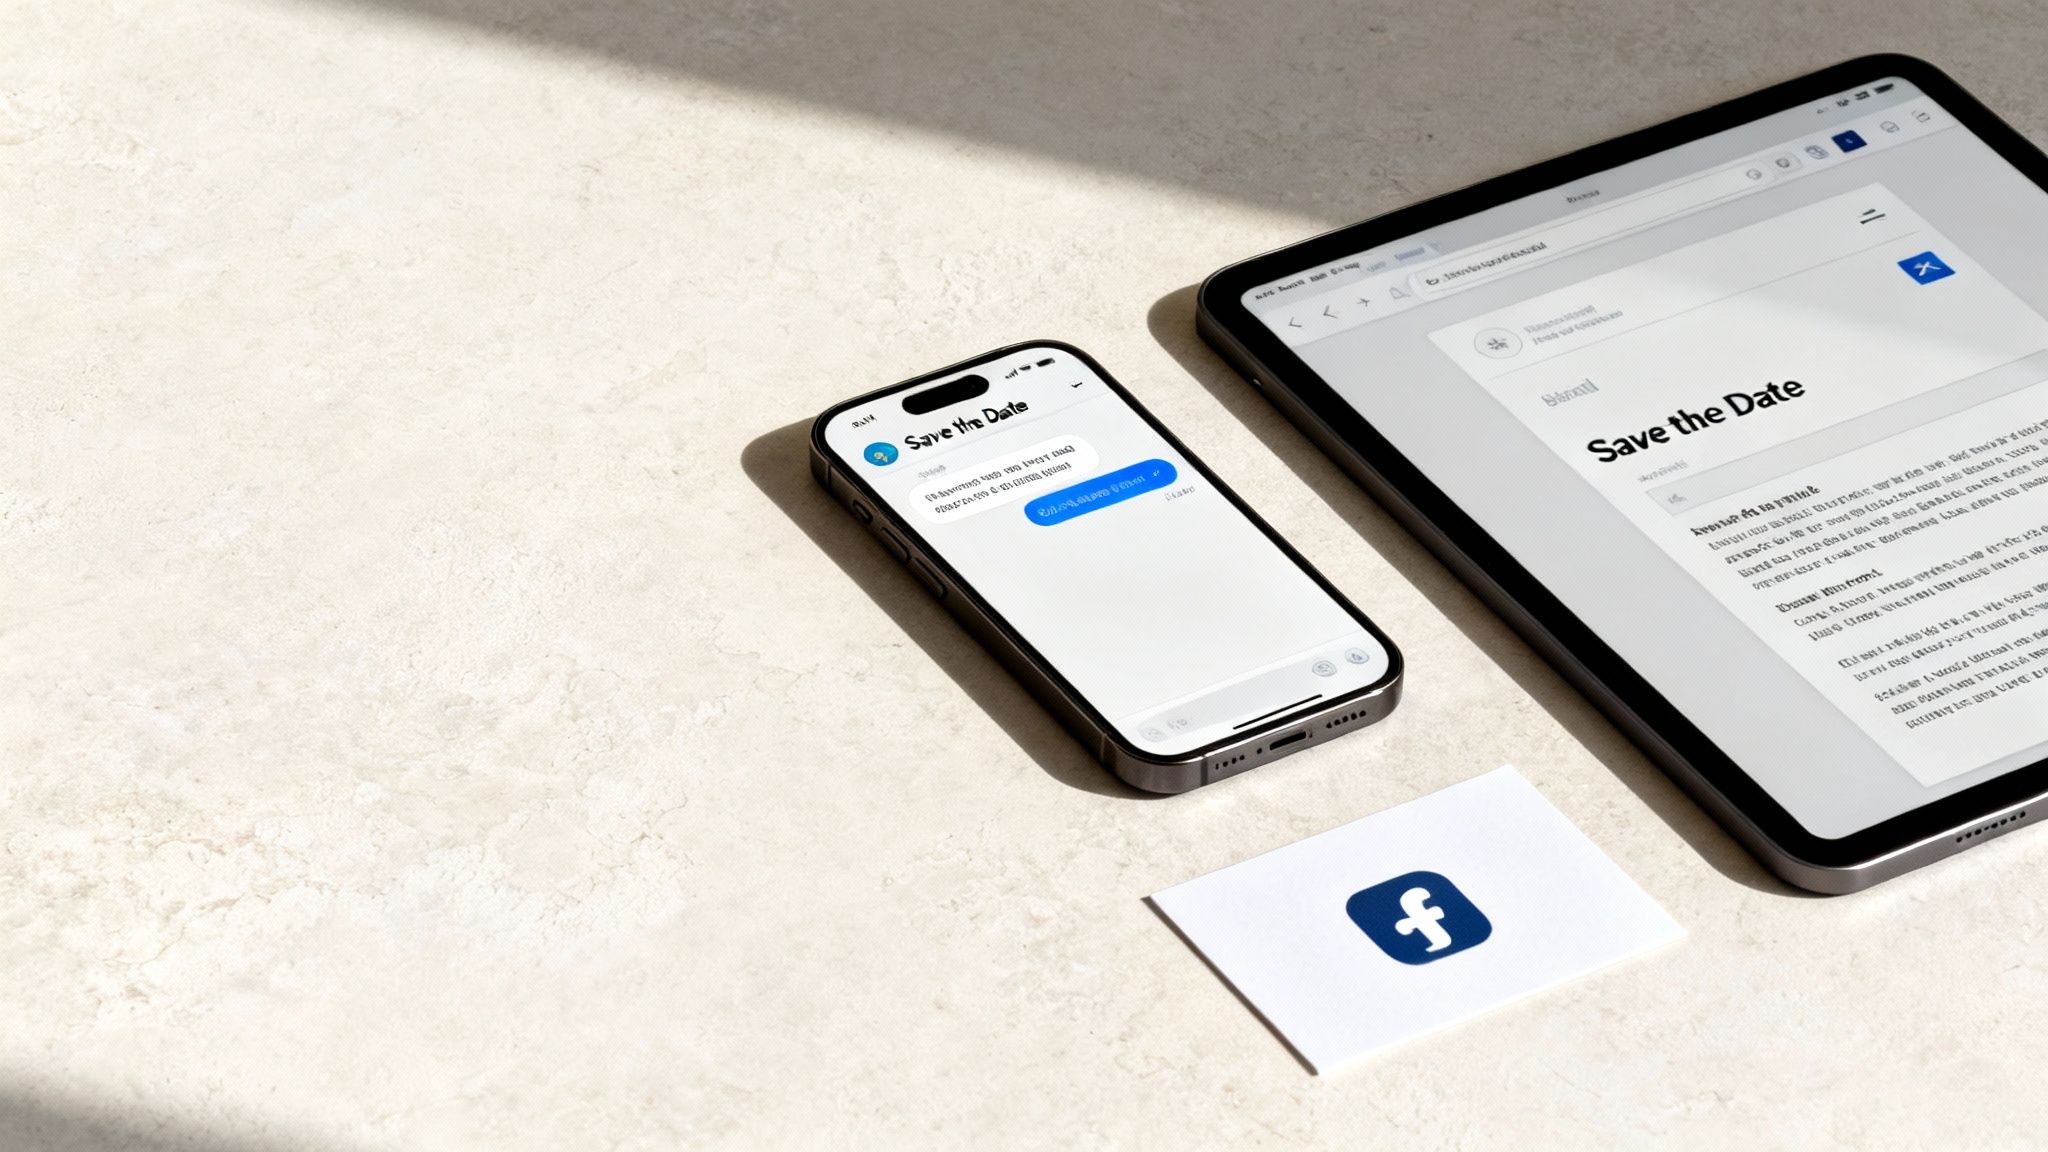
Digital save-the-dates are your first official nod to your guests that you're getting married. Think of them as the modern, eco-friendly cousin of the traditional paper card, sent straight to your guests' inboxes or phones to give them a heads-up and get them excited. For so many couples, it’s the perfect blend of convenience, creativity, and practicality.
Why Modern Australian Couples Love Digital Save the Dates
Let's be real—planning a wedding involves a mountain of logistics, spreadsheets, and decisions. It's no surprise that Aussie couples are looking for smart ways to simplify the process, and sending a digital save-the-date is one of the easiest first steps. This isn't just about saving money on postage; it's a savvy move that fits perfectly with our busy, modern lives.
Imagine hitting 'send' and knowing your announcement has instantly landed with friends and family, whether they're just down the road in Melbourne or halfway across the world. No nail-biting waits for Australia Post, no wondering if a card got lost in transit. It’s just fast, reliable, and gets the job done, which is a massive win when you have guests needing to book flights and accommodation.
More Than Just a Time-Saver
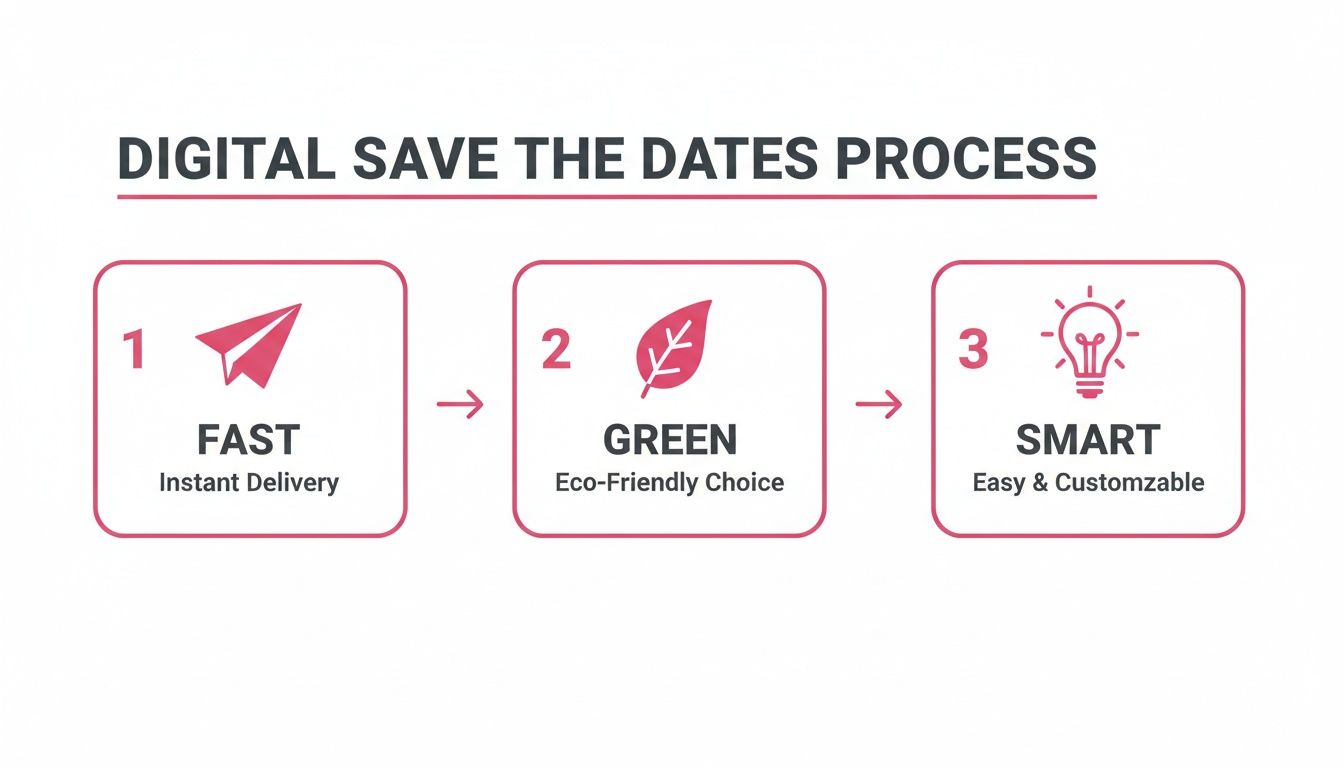
While the speed and cost savings are obvious perks, going digital is also a chance to get creative. You’re not stuck with the standard dimensions of a printed card. Instead, you can design something that truly reflects who you are as a couple.
Here’s why it works so well:
A Greener Choice: For many couples, minimising environmental impact is a big priority. A paperless announcement is a simple way to reduce waste and kick off your wedding planning with a sustainable mindset.
Everything in One Place: Digital invites link up beautifully with your other online planning tools. You can pop in a link straight to your wedding website, where guests can find all the juicy details, travel info, and even jump over to your EasyRegistry page.
Endless Creative Freedom: Want to include a cute animated GIF or a short video message? Go for it! Digital formats let you create an announcement that truly captures the energy and style of your big day.
A Smart Choice for a Connected Nation
Let's face it, we're a connected country. With Australia's online population expected to hit 97.1% in 2025, you can feel confident that almost everyone on your guest list will receive your digital save-the-date without a hitch. It means your announcement isn't just stylish, but also super accessible for your loved ones, making the whole experience smoother for you and them. If you're curious, you can discover more about Australia's online trends and how they're shaping event planning.
The real magic of a digital save-the-date is its simplicity. It cuts out the fuss and lets you focus on the excitement of the announcement, all while giving your guests an easy, modern experience right from the start.
Getting Your Timeline and Guest List Sorted
Before you even think about designs, colours, or that perfect engagement photo, there are two crucial things you need to lock down: your timeline and your guest list. Getting this groundwork done first will save you a world of headaches later and make the whole process feel much more manageable.
Think of it this way: the timing of your save-the-date is the first real hint your guests get about your wedding. For a wedding where most guests are local, sending your digital notice 6–12 months in advance is a pretty safe bet. It’s the sweet spot that gives them plenty of warning without it being so far off they forget.
When to Send for Different Kinds of Weddings
Of course, not all weddings are created equal. You'll want to adjust your timing based on how much effort your guests need to put in to be there.
Destination Weddings: For these, you absolutely want to aim for 8–12 months out. This gives everyone enough breathing room to scout for flights, book places to stay, and get their leave from work approved.
Holiday Weekend Weddings: If you’ve picked a long weekend or a popular holiday, sending your save-the-date closer to 12 months in advance is a really thoughtful move. It lets your guests book travel and accommodation before prices go through the roof.
Local Weddings: Sticking to a 4–6 month timeline is perfectly fine here. Your local mates and family will have more than enough time to pop it on the calendar.
The golden rule is simple: the more planning your guests have to do, the more notice you should give them. A well-timed save-the-date shows you're thinking of them and makes it more likely they'll be able to celebrate with you.
Finalise Your Guest List Before You Click Send
I know it's tempting to jump straight into the fun design part, but you absolutely must have your final guest list sorted before a single save-the-date goes out. Why? Because a save-the-date is a promise. It's an official heads-up that a formal invitation is coming their way, and you can’t really take that back without things getting awkward.
Your best friend here is a simple spreadsheet. Create columns for first names, last names, emails, and phone numbers. This little document will become your command centre for everything that follows—from the actual invitations to tracking RSVPs and eventually sending thank-you cards.
This is all about making the process fast, green, and smart from the very beginning.
Going digital isn't just about convenience; it's an eco-conscious and efficient way to kick off your wedding communications.
How to Gather Contact Info Without Being Awkward
Now for the part that can feel a bit like detective work: collecting everyone's contact details. For your closest friends and family, a quick text will do the trick. For others, a slightly more organised approach works wonders.
Try sending a friendly, low-pressure message. Something like: "Hey [Name]! We're starting to get our wedding plans in order and would love to send you a save the date. Could you flick me your best email address when you get a chance?"
One last tip: be crystal clear about who is invited. Address your messages and emails to the specific people, like "Aunty Carol and Uncle Bob" or "Sarah and Tom," to avoid any confusion about plus-ones or kids. That kind of clarity is a gift to your guests. By laying this foundation, you’re not just sending an announcement; you're building a system that will simplify your entire wedding planning journey. It's also the perfect time to explore how an online registry can integrate seamlessly into your plans.
Crafting Your Message and Including Key Details
Once your guest list is sorted and the timeline is locked in, you get to move on to the fun part: writing the actual save-the-date. Don't underestimate the power of your words here! This message is the very first glimpse your guests will get into the style and vibe of your wedding.
Think of it as the trailer for your big day. Is it going to be a formal, black-tie affair? Or are you planning a relaxed, barefoot ceremony on the beach? The tone you set now gives everyone a hint of what's to come, building excitement and helping them prepare.
The main job is simple: announce your names, the date, and the general location. But a great save-the-date does a little more. It feels personal, provides just enough info to be helpful, and gently guides guests to where they can find out more without overwhelming them.
Nailing the Wording for Your Wedding Vibe
Your message needs to sound like you. Forget stuffy, old-fashioned rules if that's not your style. The best way to find your voice is to think about how you’d share the news with your closest friends. Would it be formal and elegant, or totally casual and packed with exclamation marks?
Let that feeling guide your writing. A classic approach might use a phrase like, "Save the Date for the wedding of…," while a more modern couple might go for a punchy, "We're Tying the Knot!" or a simple, "Get Ready to Party With Us." The goal is to pick wording that makes your guests smile and instantly get a feel for the celebration you're planning.
To help you get started, here’s a look at how different tones can come to life in your wording.
Digital Save the Date Wording Style Comparison
Tone
Example Wording
Best For
Formal & Traditional
"Please save the date for the wedding of [Partner 1] and [Partner 2] on [Date] in [City, State]. Formal invitation to follow."
Classic, black-tie, or elegant ballroom weddings.
Modern & Minimalist
"[Partner 1] & [Partner 2]. [Date]. [City, State]. Save our date. Invitation to follow."
Chic, contemporary celebrations in an urban or minimalist setting.
Casual & Fun
"We're getting hitched! Join [Partner 1] and [Partner 2] on [Date] in [City, State]. Get ready to party—invitation to come!"
Relaxed, informal weddings like a backyard bash, beach ceremony, or brewery party.
Romantic & Whimsical
"Our greatest adventure begins! [Partner 1] and [Partner 2] are getting married. [Date] | [City, State]. More details to follow."
Bohemian, rustic, or destination weddings with a focus on storytelling.
No matter which style you choose, remember that the most important rule is clarity.
Get creative, but make sure the essential info—who, when, and where—is impossible to miss. This isn't the time for vague hints; be direct with the core details so your guests can mark their calendars with confidence.
What to Include Beyond the Basics
While your names, the date, and the location are the non-negotiables, a few other elements can make your digital save-the-date far more effective. Adding these details helps manage guest expectations from the start and will cut down on the number of questions you get later.
Here are the key components to work in:
A Clear Line About the Real Invite: Always, always include a sentence like "Formal invitation to follow" or "Invitation with more details to come." This little phrase does a lot of heavy lifting, making it crystal clear that this is just a heads-up and the official invite with RSVP info is on its way.
Your Wedding Website URL: Your website is your information command centre. Popping the link on your save-the-date is a must. It gives eager guests a place to find travel tips, accommodation suggestions, and your love story right away.
The City and State (or Country): You don't need the exact venue address just yet. But giving the general location is crucial for anyone who needs to book flights or accommodation. Simply stating "Byron Bay, NSW" or "Barossa Valley, SA" gives them enough to start planning.
Putting these pieces together ensures your announcement is both exciting and practical, giving your guests everything they need for now.
Gracefully Introducing Your Gift Registry
So, what about the gift registry? This is a question that trips up a lot of couples. Modern etiquette says it's best to avoid putting a direct link to your registry on the save-the-date itself. It can come across as a bit forward, especially since the main point of this first announcement is just to share your happy news.
The most elegant and accepted approach is to guide guests to your wedding website. That’s the perfect, low-pressure place to share information about your registry.
On your digital save-the-date, you can use simple, polite phrasing like this:
"For more details, please visit our wedding website: [YourWebsiteURL.com]"
"You can find travel information and more at [YourWebsiteURL.com]"
"Discover more about our story and wedding day plans on our website: [YourWebsiteURL.com]"
Then, on your website, you can create a dedicated page for your gifts. This creates a natural experience for your guests, allowing them to explore the details when they're ready. If you're looking for flexible and modern options, you can set up a wedding gift registry that allows for a mix of traditional gifts, experiences, and cash funds. This indirect method keeps your announcement focused on the celebration while still providing the info your guests will eventually be looking for.
Designing a Save the Date That Reflects Your Style
Your save-the-date is the very first glimpse your guests will have of your wedding's personality. Think of it as the movie trailer for your big day—it should be exciting, personal, and hint at what’s to come without giving everything away. This is your chance to go beyond just names and dates and create something that truly feels like you.
The best thing about digital save-the-dates is the creative freedom. You aren't stuck with a standard postcard size or a static design. You can build an experience that captures your story, whether it's through a gorgeous photo, a playful animation, or even a short, heartfelt video.
Choosing Your Format
Before you start getting lost in colour palettes and font choices, take a moment to think about the format. Each option creates a totally different vibe and level of engagement for your guests.
Static Image: This is the classic, go-to choice. It works just like a digital postcard and is the perfect way to show off a beautiful engagement photo. It’s clean, elegant, and super easy for everyone to view.
Animated GIF: If your style is more fun and playful, a GIF is a fantastic way to stand out. A simple animation—like your names swirling into place or a subtle sparkle effect—adds a touch of personality and makes your announcement feel much more dynamic.
Short Video Message: For a truly personal touch, nothing beats a short video. A quick clip (think under 30 seconds) of the two of you sharing your excitement is incredibly endearing. It makes your guests feel like you’re sharing the news with them personally.
Key Design Elements to Consider
Don't worry, you don't need to be a graphic designer to create something beautiful. Just focusing on a few key elements will make sure your design looks cohesive, stylish, and, most importantly, is easy to read.
First up, your colour palette. Pick two to three main colours that reflect your wedding's overall theme. Maybe that’s earthy tones for a rustic country wedding or rich jewel tones for a formal city affair. These colours will become the thread that ties everything together, right through to your final thank-you cards.
Next is typography. A good rule of thumb is to choose one decorative font for your names and a simple, clean font for all the essential details. The absolute number one priority here is readability, especially on a small phone screen. Steer clear of overly curly or thin fonts for the date and location.
Pro Tip: Always design for a mobile screen first. I can’t stress this enough. The vast majority of your guests will open your save-the-date on their phone. Keep the design vertical, use a font size that’s easy to read, and make sure the critical info is front and centre without any pinching or zooming.
Making the Most of Your Photos
Your engagement photos are the natural centrepiece for your design. Try to pick an image where you both look relaxed and happy, as this sets a warm, welcoming tone from the get-go. The photo should feel authentic to you as a couple.
If you’re aiming for a more whimsical or artistic aesthetic, you could explore tools that let you convert photos into watercolor art. This is a beautiful way to transform a favourite photo into something truly unique that sets a romantic mood.
User-Friendly Design Tools to Help
Thankfully, creating a professional-looking digital save-the-date has never been easier. There are heaps of user-friendly online tools that come packed with templates and simple drag-and-drop features, making the whole process a breeze.
Look for platforms with a good range of customisable wedding templates. They often come with pre-selected font pairings and colour palettes, which gives you a brilliant starting point. These tools really take the guesswork out of the design process, so you can focus on personalising the details and getting the message just right. You’ll end up with a stunning, cohesive announcement without needing any special design skills.
Alright, you’ve poured your heart into creating the perfect digital save-the-date, and it looks incredible. Now for the moment of truth: sending it out to your guests. How you choose to deliver your announcement is more than just a final step; it sets the tone and can make tracking RSVPs a breeze—or a headache.
Let’s walk through the most common ways to send your digital save-the-dates so you can pick the one that feels right for you and your guest list.
Go Pro With a Dedicated Email Service
For a polished, professional feel and some seriously helpful features, using a dedicated email service or an online invitation platform is my top recommendation. Think of it less like a simple email and more like a mini-newsletter celebrating your upcoming wedding.
These services offer some huge advantages that you just don't get from your personal inbox:
See Who's Seen It: Open-tracking is a game-changer. You’ll know exactly who has opened your announcement, which makes follow-ups so much easier. No more guessing games!
Stunning Templates: Most platforms come packed with gorgeous, mobile-friendly templates, ensuring your save-the-date looks fantastic whether it's viewed on a laptop or a smartphone.
Everything in One Place: Your guest list, all your communications, and the tracking data are kept neatly organised in one central dashboard.
This route gives you real peace of mind. One common worry with any mass email is that it’ll get lost in the digital void. It’s always a smart move to read up on how to prevent your digital save the dates from landing in spam to make sure your big news gets the attention it deserves.
Keep It Personal With a Standard Email
Sending your save-the-date from your personal email account (like your trusty Gmail or Outlook) is definitely the most straightforward approach. It feels direct and intimate, almost like you're sharing your news with each person one-on-one.
But this simplicity comes with a few catches. It can get messy trying to manage a large guest list, you won't have any idea who has actually opened the email, and sending a single email to dozens of people can sometimes get you flagged by spam filters.
If you’re having a smaller, more intimate wedding, this can work beautifully. Just be sure to use the BCC (Blind Carbon Copy) field to respect your guests' privacy.
Get Instant Attention With an SMS
For a casual, modern, and lightning-fast delivery, you can’t beat an SMS. It’s immediate, grabs attention, and is perfect for a guest list filled with friends and younger relatives who are glued to their phones.
An SMS works best when it’s short and sweet. Pair a great photo with a brief message and, most importantly, a clear link to your wedding website where they can get all the details. Just keep in mind this might feel a bit too informal for older guests, so you might want to use a hybrid approach and send them a more traditional email.
Whatever channel you choose, the end goal is to create a seamless experience for your guests. Always include a direct, easy-to-click link to your wedding website. It's the perfect place to share more information and introduce your registry in a relaxed, no-pressure way.
Tap Into Your Network With Private Social Media Groups
Social media is where we connect, so why not use it for your save-the-dates? A private Facebook group or a direct message on Instagram can be a great way to reach specific groups of friends quickly.
After all, social media is a huge part of life in Australia. As of 2025, a massive 77.9% of the population is active on these platforms—that's about 20.9 million people! So, you’re definitely meeting many of your guests where they already are.
Just be careful with this one. Not everyone checks their social media religiously, and a post can easily get buried in a busy newsfeed. It's probably best to use this as a secondary announcement for your tech-savvy friends rather than your main delivery method.
How to Add Your Links the Right Way
A seamless link to your wedding website and registry is crucial. You want to make it dead simple for your guests to find what they need.
Use Clear Link Text: Instead of just pasting a long, clunky URL, use friendly, descriptive text. Something like, "Visit our wedding website for all the details!" is much cleaner.
Test, Test, Test: Before you hit "send," click every single link yourself. Check it on your computer and your phone to make sure everything works perfectly.
Integrate Your Registry: Your wedding website is the ideal home for your registry. This indirect approach is considered better etiquette than sending a direct link. From your site, you can highlight the cool features of your online registry and show guests how it makes gift-giving easy and personal.
Ultimately, the best way to send your save-the-dates is the one that fits your wedding style and your guests' preferences. Don’t be afraid to mix and match! A beautiful email for most, a quick text for your close friends, and a personal phone call to your less tech-savvy relatives is a thoughtful strategy that ensures no one misses the big news.
Navigating Digital Save the Date Etiquette
Sending your save the dates online is a modern, smart choice, but it's natural to have a few questions about the "rules." Let's be honest, modern etiquette can feel a bit like guesswork. We've tackled the most common worries couples have so you can hit 'send' with total confidence.
This isn't just about what's "proper"—it's about making sure your guests feel informed and excited. From handling less tech-savvy relatives to sharing your gift registry gracefully, here’s our practical advice.
Is It Okay to Send Digital Save the Dates but Paper Invitations?
Absolutely! This is actually one of the most popular ways couples are doing things now, and it makes perfect sense. You get the best of both worlds.
Going digital first is quick, saves a heap on printing and postage, and is much kinder to the planet. Plus, it gives everyone a speedy heads-up, which is a lifesaver for guests who need to book flights or accommodation. Then, closer to the wedding, you can still have that wonderful moment of sending out a beautiful, traditional paper invitation.
Just pop a simple line like, "Formal invitation to follow," on your digital save the date. It’s a clear and simple way to let everyone know what’s coming next.
How Do We Handle Older Guests Who Are Not Tech-Savvy?
This is such a thoughtful question, and it comes up all the time. The whole point is to share your joy, and you want to make sure everyone feels included, no matter how they feel about computers or smartphones.
Honestly, a quick phone call is often the best and most personal way to go. Your grandparents, for example, will love hearing the excitement in your voice as you tell them the big news. Another lovely idea is to print just a handful of postcard-style save the dates for those few guests. It’s a small, kind gesture that shows you’ve thought specifically of them.
Your wedding announcement is a moment of pure joy. Taking a little extra time to personally connect with less tech-savvy guests ensures they feel just as special and celebrated as everyone else.
What if a Guest Doesn't Receive or Open Our Digital Save the Date?
This is where digital really has an edge over snail mail. Unlike putting a letter in the post box and hoping for the best, you’ve got data on your side. Most email platforms will show you if an email "bounced" (meaning the address was wrong) or if it hasn't been opened.
If an email bounces, your first move is to just double-check the address for a typo—it happens to the best of us! If you see that a week has gone by and a few key people haven't opened it, a gentle nudge is completely fine.
A casual text or a private message is perfect. Something low-key like, "Hey! Just wanted to make sure our save the date landed in your inbox okay?" sounds helpful, not pushy, and makes sure your announcement doesn't get buried.
Should We Put Our EasyRegistry Link Directly on the Save the Date?
It’s tempting, but modern etiquette suggests holding back just a little. The main job of a save the date is simply to announce your date and location so people can mark their calendars. Dropping a registry link on there can feel a bit forward to some guests.
The classiest way to handle this is to point everyone to your wedding website. Think of it as the central hub for everything—timelines, travel info, and yes, your gift registry. Your save the date can have one clear, simple link: "For more details and our gift registry, please visit our wedding website at [YourWebsite.com]." This keeps the announcement clean and positions your registry as helpful information for guests when they're ready for it.
Ready to create a beautiful, user-friendly registry that your guests will love? EasyRegistry makes it simple to build a gift list that truly reflects your style and needs. Get started today and see how easy it can be at https://www.easyregistry.com.au.
Let’s be honest, the whole wedding gift-giving tradition has changed. A wedding registry is no longer just a checklist for toasters and towels; it’s a brilliant way for your guests to pick out something you'll actually want and use as you start your new life together. It takes the guesswork out of gifting for them and saves you from ending up with three identical air fryers.
Why a Wedding Registry Is a Must-Have for Today's Couples
The landscape of getting married has shifted dramatically. Most couples aren't starting from scratch anymore, and the old-school gift list of fine china and silverware doesn't always fit. A modern registry is all about reflecting who you are as a couple—your story, your style, and what you’re genuinely excited about for the future.
Think about it: many of us already live together before the big day. In Australia, a whopping 83% of couples cohabitate before marriage, so their homes are usually pretty well-stocked with the basics. This is why a traditional registry can feel a bit redundant. Instead of another vase you don't have space for, your registry can point your loved ones toward gifts that will truly enhance your life together.
It's All About Modern Practicality
We can't ignore the financial side of things, either. With the cost of living on everyone's mind, both couples and guests are looking for more practical approaches to celebrating. The 2024 Easy Weddings Australian Wedding Industry Report revealed that the average wedding now costs $35,315. That’s a huge number, and it naturally makes everyone think smarter about money.
A thoughtfully created registry can help you direct contributions toward things that really matter. If you want to dive deeper into the latest stats, you can check out the full Australian wedding industry report.
This shift has opened the door for some fantastic, non-traditional registry ideas that are a much better fit for modern life. We're seeing more and more couples ask for things like:
Cash Funds: A little help towards a house deposit, a much-needed renovation, or even a future investment fund.
Honeymoon Contributions: Guests can chip in for your flights, a few nights in a beautiful hotel, or that scuba diving adventure you've been dreaming of.
Charity Donations: A beautiful option for guests to support a cause that’s close to your heart.
Experience Gifts: Think cooking classes, concert tickets, or a relaxing weekend getaway—gifts that create memories.
Your wedding registry is really a communication tool. It’s a polite and graceful way to let your guests know what would be most meaningful to you, taking the pressure off them and ensuring their generosity truly helps you build your future together.
Ultimately, having a registry makes the whole experience smoother and more personal for everyone. Your guests can give a gift with confidence, knowing it’s something you’ll cherish. And for you, it’s a wonderful way to start building your new life, one thoughtful gift at a time.
How to Build Your Perfect Gift Registry
This is where the real fun begins. Turning that shared wishlist into an actual, shoppable registry is one of the most exciting parts of planning a wedding. It's your chance to lay the foundations for your new life together, one thoughtful gift at a time.
First things first, you'll want to set up your registry page. Think of it as a personal little hub for your guests. Adding a warm welcome message and a couple of your favourite photos together immediately makes it feel less like a shopping list and more like a part of your story. It’s a small touch, but it really helps your guests feel more connected.
For your guests, a well-thought-out registry is a lifesaver. It helps them navigate everything from rising costs to understanding exactly what you need for your new home, so they can pick a gift that feels genuinely smart and wanted.
As you can see, a modern registry really does bridge the gap between old-school gift-giving traditions and the practical needs of today's couples. It makes sure every single gift counts.
Crafting a Balanced and Thoughtful List
The secret to a great registry? Variety. Your guests will all have different budgets, so offering a good mix of price points is a really considerate way to include everyone. A good rule of thumb is to have plenty of gifts spanning from under $50 to over $200 and beyond.
Try to include a good mix of things like:
Everyday Upgrades: Think a set of high-quality kitchen knives, those lush bath towels you’d never buy for yourselves, or that fancy coffee machine you've both been dreaming about.
Big-Ticket Items: Don't be afraid to add more expensive items! You'd be surprised how many guests love to chip in together for a group gift, like a new sofa or a smart TV.
Small and Sweet: These are perfect for guests on a tighter budget. Think specialty cookbooks, elegant serving utensils, or a set of beautiful wine glasses.
The best part about a universal registry like EasyRegistry is that you can add items from any online store. This gives you the freedom to create a wedding gift registry that is as unique as the two of you, mixing things from big retailers with special finds from small, independent shops.
Embracing Non-Traditional Gift Ideas
Let's be honest—many couples today already have a toaster and a set of plates. That's why modern registries have evolved to include so much more than just household goods. This is your opportunity to get creative and ask for things that truly reflect who you are and what you're planning for the future.
As you build your list, think beyond the kitchen. Consider the key pieces that will really make your house a home, which often starts with choosing the perfect living room furniture.
And don’t hesitate to set up funds for your bigger goals. These have become incredibly popular because they're a practical way for guests to contribute to your future together. You could create funds for:
A once-in-a-lifetime honeymoon adventure
A deposit for your first home
Contributions towards a home renovation project
Even a fund for your favourite charity
The options are truly endless. You can also add shared experiences like a local cooking class, a weekend getaway, or tickets to see your favourite band. By mixing traditional items with these more modern ideas, you give your guests a rich, diverse, and genuinely helpful guide to finding the perfect gift.
A Modern Australian Wedding Registry Checklist
Staring at a blank registry page can feel a bit overwhelming. Where do you even begin? What do you really need? Let's step away from the old-school, traditional lists for a second and think about building a registry that actually reflects the life you're creating together.
Think of this checklist as a starting point—a way to get the ideas flowing. It’s broken down into categories that make sense for modern Aussie couples, helping you think about your home, your passions, and your future in a fresh way.
Everyday Essentials and Lifestyle Upgrades
This is your chance to finally replace those hand-me-down items from your uni days with quality pieces that will stand the test of time. It’s not about accumulating clutter; it’s about investing in things you’ll genuinely use and appreciate every single day.
Luxe Bedding: Imagine upgrading to high-thread-count sheets, a beautiful quilt cover you both love, or some seriously supportive pillows.
Quality Cookware: A solid cast-iron skillet, a reliable non-stick pan, or a proper chef's knife can completely change the game in the kitchen.
Plush Towels: There’s nothing quite like a matching set of soft, absorbent bath sheets to make your daily routine feel a little more special.
Small Appliance Boost: Why not upgrade that dodgy kettle or toaster? Or maybe it's finally time to add that air fryer or stand mixer you've been dreaming about.
A great way to think about your registry is this: it's a tool to help you build your life together. Don't shy away from adding items that will make your daily routines simpler and more enjoyable.
Shared Experiences and Hobbies
For a lot of couples, making memories together is far more important than collecting more stuff. Adding experiences to your registry is a brilliant way for your guests to contribute to your next great adventure.
Weekend Getaway: Think a voucher for a night at a boutique hotel or a cosy cabin retreat somewhere in the country.
Cooking Classes: You could learn to make fresh pasta from scratch or finally master the art of sourdough.
Tickets to an Event: Whether you’re into live music, festivals, or a local theatre production, this is a perfect gift to share.
Hobby Gear: If you're both keen hikers, maybe you need new backpacks. If gaming is your thing, a new console or game could make an awesome group gift.
Modern Bridal Registry Gift Idea Matrix
To help you brainstorm, we've put together a quick-reference table. It's designed to spark some ideas across different categories and price points, making it easier to build a well-rounded registry that has something for everyone.
Gift Category
Low Price Point Example ($25-$75)
Mid Price Point Example ($75-$200)
High Price Point Example ($200+)
Kitchenware
Set of quality tea towels or a chef's knife
A reliable non-stick frypan or a new kettle
Stand mixer or a high-end coffee machine
Homewares
Scented candle or a set of photo frames
High-thread-count sheet set
A piece of artwork from a local artist
Experiences
Tickets to the cinema or a local food tour
A couples' cooking class
A weekend getaway voucher
Hobby/Leisure
A new board game or a good book
A quality backpack for hiking
A new BBQ or a high-tech tent
This matrix is just a guide, of course. The best part about a flexible registry is that you can tailor it completely to your own tastes and lifestyle.
Big Ticket Goals and Cash Funds
Let's be honest, cash funds are no longer a taboo subject—they're a common and very welcome part of a modern registry. This approach allows your loved ones to contribute to your biggest goals in a really meaningful and practical way.
You can easily set up dedicated funds for things like:
A Home Deposit: When you're saving for your first home, every single dollar helps.
Honeymoon Adventures: Guests can chip in for flights, accommodation, or even specific activities like a sunset dinner cruise.
Home Renovations: Planning on redoing the kitchen or landscaping the backyard? Let your guests help you bring that vision to life.
Marriage patterns in Australia have changed a lot. Many couples are tying the knot later in life and have often already been living together for years. This naturally shifts the focus of a registry away from traditional homewares and more towards practical contributions like cash funds.
At the end of the day, your registry should be a true reflection of you as a couple. For a bit more inspiration, it can be really helpful to see what others have done. Take a look through these sample registries from other couples to get a feel for how they've built lists that tell their unique stories.
Sharing Your Registry With Your Guests
You’ve spent all this time curating the perfect registry, and now comes the slightly tricky part: letting your guests know about it. It’s a common point of anxiety for couples—how do you share your gift list without sounding like you’re just asking for presents? The secret is all in the delivery.
The most natural and widely accepted place to put your registry information is on your wedding website. Think of it as your wedding's central command post. Your guests are already heading there for directions, dress code info, and accommodation suggestions, so adding a registry link fits right in. It’s helpful, not pushy.
Finding the Right Words
How you phrase your registry announcement on your website can make all the difference. You want it to come across as warm and optional, making it clear that their presence is what truly matters. It's about framing the registry as a tool to help those who want to buy a gift, rather than an expectation.
Here are a few wording ideas I've seen work beautifully for other couples:
"Your presence at our wedding is the greatest gift of all. However, if you'd like to honour us with a gift, we've put together a registry for your convenience."
"We can't wait to celebrate with you! For friends and family who have been asking for gift ideas, we’ve created an online registry."
"More than anything, we hope you can join us on our big day. Should you wish to give a gift, you can find our bridal registry here."
The golden rule of registry etiquette is simple: never include registry information directly on your formal wedding invitations. This can come across as presumptuous. Your invitation is for celebrating with you, not for gifts.
By keeping the focus on your guests and their attendance, you make the entire gift-giving process feel positive and respectful for everyone. It’s the perfect blend of modern convenience and timeless wedding etiquette.
Keeping Track of Gifts and Saying Thanks
Once your registry is out in the world, the real fun begins! But this doesn't mean your job is over. Keeping an eye on what's been purchased and getting ready for thank-you notes are the final pieces of the puzzle. Honestly, this is where a digital registry proves its worth.
With a platform like EasyRegistry, you get a central dashboard that shows you exactly what’s been bought in real-time. This visibility is a lifesaver, as it automatically updates your list so you won't get two of the same blender. Even better, it creates an organised list of who gave you what, which is an absolute game-changer when it's time to write those thank-you cards.
Tracking Gifts and Guest Details
Managing your registry shouldn’t add to your wedding planning stress. As your friends and family purchase gifts, your dashboard becomes a live, detailed record. You can easily see the guest's name, the specific gift they chose, and even any sweet personal messages they left for you.
This is especially brilliant for group gifts. The registry keeps track of every single person who chipped in for that big-ticket item, so you can be sure no one's generosity goes unnoticed.
Pro Tip: Set aside just 15 minutes each week to check your registry dashboard. It’s a lovely way to stay in the loop and feel the love from your friends and family as the big day gets closer.
Nailing the Thank-You Note
Let’s be honest, writing thank-you notes is a must-do, but it can feel like a mammoth task after the wedding whirlwind. The secret is having a good system from the start.
Here’s a simple way to tackle it:
Lean on Your Dashboard: Treat your registry dashboard as your source of truth. It has all the names and gift details you need, so there’s no frantic searching for who-gave-what.
Get Personal: A heartfelt thank-you note is always specific. Instead of a generic "Thanks for the gift," mention the item and how you envision using it. Something like, "Thank you so much for the beautiful serving platter! We can't wait to use it when we host our first dinner party as a married couple," feels so much warmer.
Timing is Everything: Try to get your notes in the mail within three months of receiving the gift. Don’t try to do them all at once! Breaking them into small, manageable batches makes the whole process feel less daunting.
This organised method doesn't just make your life easier; it also highlights a bigger benefit of a well-planned registry. It’s about more than just convenience—it’s about mindful consumption. Did you know that in Australia, it's estimated that one in five wedding gifts ends up in landfill? That statistic really puts things into perspective.
By creating a registry with items you’ll actually use and love, you’re not just personalising your home—you're actively cutting down on waste. It’s a small but powerful way to start your married life on a sustainable note. You can learn more about sustainable wedding registry trends in Australia to see how this thoughtful approach is becoming the new norm.
Answering Your Biggest Wedding Registry Questions
Once you start building your registry, a few questions are bound to pop up. How many gifts is too many? Is asking for cash okay? When do we even send this thing out? It's all completely normal. Let's walk through some of the most common queries we see from couples, so you can finish your registry feeling totally confident.
How Many Gifts Should We Actually Add?
This is probably the number one question we get. You want enough options for everyone, but you don't want to look greedy. It's a fine line!
A great little formula we’ve seen work time and time again is to take your guest count and multiply it by two. So, if you've invited 150 guests, aim for around 300 gift options. It might sound like a huge number, but this accounts for group gifts, smaller items, and gives everyone a wide selection to choose from, no matter their budget.
The last thing you want is for your late-RSVPing guests to be left with only the super-expensive items. This approach makes the whole experience better for them.
Remember, variety is your best friend here. A well-rounded registry should have gifts at all price points, from $25 kitchen gadgets to a $500+ group-funded sofa. This ensures every guest can find something they're excited to give.
Is It Tacky to Only Ask for Cash?
Let's be real: most couples these days already have a toaster. Asking for cash contributions towards a bigger goal is becoming incredibly common and, honestly, much more practical. The etiquette has definitely shifted.
The secret is all in the delivery. Instead of just a generic "cash fund," give it a purpose that tells your story. Think "Honeymoon in Italy Fund" or "Our First Home Deposit." This little change helps your guests feel like they're contributing to a tangible dream, not just covering a bill. It connects their generosity directly to your future together.
That said, it’s always a nice touch to add a small selection of physical gifts. Some guests, particularly from older generations, genuinely love the tradition of picking out a wrapped present. A little something for everyone is the perfect compromise.
When Should We Create and Share Our Registry?
Timing is key to making this easy for your guests. The best time to get your registry set up is right after you've sent out your save-the-dates.
Why so early? Well, you'll have guests who want to buy you a gift for your engagement party or wedding shower. Having the registry ready means they're not left guessing. And speaking of pre-wedding events, it can be helpful for guests to understand the difference between a wedding shower and a bridal shower.
As soon as your registry is ready, pop the link onto your wedding website. This makes it a central, easy-to-find spot for anyone looking for it. If you have more specific questions, we’ve probably answered them over on our complete frequently asked questions about registries page.
Ready to build a registry that perfectly tells your story? With EasyRegistry, you can add anything from any store, create cash funds, and make gift-giving simple and meaningful for everyone. Start your free registry today!