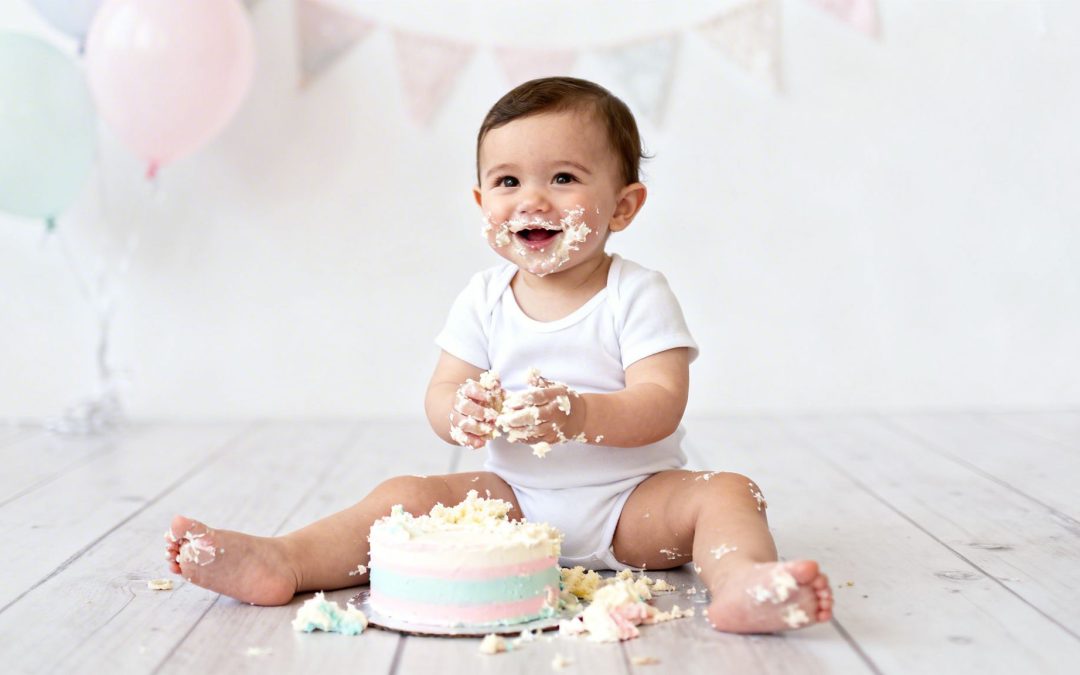
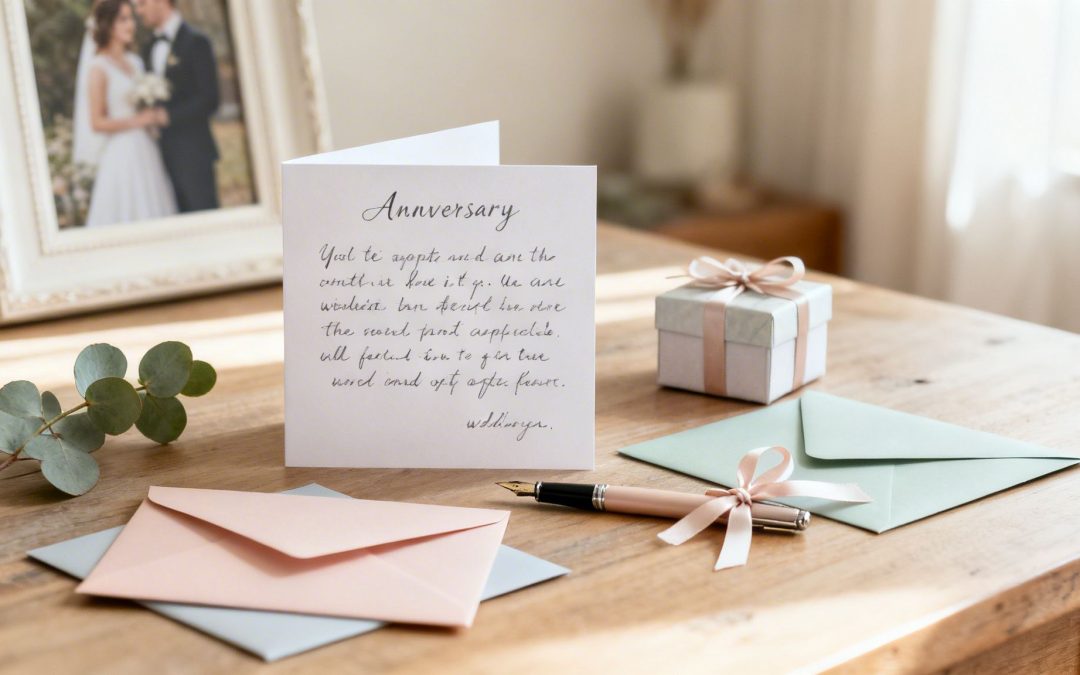
A cake smash first birthday is exactly what it sounds like: a beautifully messy, utterly joyful photoshoot where your one-year-old gets to go wild with their very own birthday cake. It's their first real taste of birthday fun, and we're here to capture every sticky, sweet moment.
Why a Cake Smash Is the Perfect First Birthday Celebration
Let's be honest, the first year of parenthood is a whirlwind. A cake smash is more than just a passing trend; it has become a beloved tradition for Aussie families because it’s the perfect way to celebrate surviving (and loving!) that first year.
It's a chance to capture a moment of pure, uninhibited joy that you'll look back on for years. Those photos of your little one, covered head-to-toe in icing with a cheeky grin, often become the most treasured pictures in the family album. It’s also a fantastic way to showcase their budding personality—whether they dive in face-first or just delicately poke at the frosting.
The Rise of the Messy Milestone
Over the last decade, the cake smash has absolutely exploded in popularity across Australia. As a photographer, I've seen it firsthand. We've seen a staggering 300% increase in bookings for these sessions since 2015. In fact, they now make up over 40% of our baby milestone photography revenue, with roughly one in five first birthdays now featuring a cake smash session. You can discover more about this growing trend and why so many families are embracing the mess.
With a bit of planning, you can make sure the experience is all fun and no stress.
A cake smash is a beautiful symbol of a huge accomplishment. It's a sweet, messy, and hilarious way to say, "We made it through year one!"
This guide will walk you through everything you need to know to plan a day that’s truly memorable. We’ll cover it all—from timelines and themes to photography tips and cleanup hacks. We'll even explore how a gift registry can help friends and family contribute to the celebration, making it a wonderful shared experience for everyone.
Building Your Cake Smash Planning Timeline
Let's be honest, a truly memorable first birthday cake smash doesn't just happen. A bit of forward-thinking is your best friend here, turning what could be a stressful scramble into a day you actually get to enjoy. The secret is breaking it down.
So, when should you start? I always tell parents to give themselves a generous two to three-month window before the big day. It might sound like a lot, but this is the golden timeframe for locking in the most crucial element (after your baby, of course): the photographer.
Two to Three Months Out
The best photographers, particularly in places like Sydney or Melbourne, often have their diaries filled months ahead. Getting your preferred artist booked this early isn't just about ticking a box; it gives you huge peace of mind and helps set the entire creative tone.
Once the photographer is locked in, you can start dreaming. This is the fun part!
Secure Your Photographer: Start by diving into local photographers' portfolios. Look for a style that makes you smile, check their availability, and get that date secured.
Brainstorm Your Theme: Jump on Pinterest or just start a note on your phone. Are you picturing a rustic "Wild One" adventure, something soft and floral, or a riot of bright colours? Let your imagination run wild.
Set a Budget: Have a frank chat about what you're comfortable spending. Factor in the photographer, that perfect little cake, the outfit, and any props you have in mind.
Cake smashes have absolutely exploded in popularity, evolving from a quirky little trend to a full-blown milestone celebration. You can really see how much it's grown over the years.
It’s amazing to see how it went from a simple home photo op to a major, share-worthy event for families. As you get closer to the day, all the fun details start falling into place.
One Month Out
With your photographer booked and a theme bubbling away, the one-month mark is when the vision starts to become reality. This is your cue to shift from brainstorming to buying. It’s time to order the cake from your chosen bakery, making sure you confirm they can match your theme and handle any dietary requirements.
Now is also the time to hunt down that adorable, smash-ready outfit. Just remember to prioritise comfort—and think about how well it'll stand up to a glorious coating of icing!
Pro Tip: When you order the cake, specifically ask for a soft buttercream frosting. It’s so much easier for little hands to get into, and it creates those fantastic messy photos. Hard fondant just doesn't smash the same way.
The Final Week
The last week is all about the final checks and bringing everything together. A quick call or email to your photographer and baker to confirm all the details and timings is a must. This is also when you should pull together all your props, balloons, and decorations.
My best advice? Create a "cake smash kit" by putting everything in one box or bag. That way, you're not running around looking for the "1" balloon or the packet of wet wipes on the day of the shoot. Taking care of these little jobs now means on the day, you can be present, relaxed, and ready to watch your little one have the time of their life.
Choosing Your Theme, Outfit, and Smash Cake
The outfit, the theme, and the cake—these are the three elements that really make a cake smash session come alive. Getting them to work together is how you turn a simple photoshoot into a beautiful, personalised story about your baby's big milestone.
Think of it as setting the stage. Whether you’re dreaming of a soft, minimalist vibe with muted pastels or going all-out with a vibrant jungle theme, having a cohesive vision makes all the difference. It ensures your photos look polished and intentional. What's the story for your little one? Are they a "Wild One"? A sweet "Berry First Birthday" star? The theme is your starting point.
Finding the Perfect Smash-Worthy Outfit
When it comes to the outfit, I always tell parents that comfort is just as crucial as cuteness. Your baby needs to be able to wiggle, sit, and crawl easily. A fussy outfit on a one-year-old is a recipe for tears, not smiles.
Often, the simplest choices are the best. A nappy cover, a fluffy tutu, or a tiny pair of overalls are popular for good reason; they put the focus right where it belongs: on your baby and that glorious, messy cake. A personalized first birthday outfit can add a lovely touch, but just be prepared for it to get absolutely covered in frosting. My pro tip? Have a separate, clean outfit for some classic portraits before the smashing begins.
Selecting the Ideal Baby-Safe Cake
The cake isn't just a prop; it's the co-star of the show! Both its looks and its "smash-ability" are key. From my experience, a small, four to six-inch round cake is the perfect size for one little person. It’s big enough to look substantial in photos but not so huge that it intimidates them.
Choosing the right cake and frosting can make or break those messy action shots. Some options are simply better than others for getting that perfect squish.
Smash Cake Selection Guide
Cake Type
Best For Smashing
Frosting Recommendation
Pro Tip
Vanilla Sponge
Excellent. It’s soft, light, and crumbles beautifully.
Soft Buttercream
This is the go-to for a reason. It holds its shape but is super easy for little hands to get into.
Chocolate Cake
Use with caution. The dark colour can look like dirt once smeared everywhere.
Whipped Cream
A lighter, fluffier option. It’s great but can melt fast under lights, so work quickly!
Carrot Cake
Good. The texture is interesting, but make sure it’s nut-free.
Cream Cheese Frosting
It’s delicious and soft, but its off-white colour isn’t as vibrant in photos as buttercream.
Fruit Cake / Fondant Covered
Avoid. These are far too firm for a baby to break apart.
None
Fondant looks sleek but is a barrier to the fun. Save it for the grown-ups' cake.
The key is a soft cake with even softer icing. A simple vanilla sponge with a light-coloured buttercream is a foolproof combination that always looks fantastic on camera.
A note from experience: Stick to simple cake flavours like vanilla or sponge. Rich, dark cakes (I'm looking at you, chocolate) can end up looking a bit like smeared mud in the final photos, which probably isn't the aesthetic you’re going for!
These celebrations have become a huge deal, with the cake smash trend projected to be a $100 million industry segment in Australia by 2026. This isn't just about a cute photo anymore; it’s about creating a personalised event. Photographers in Queensland have noted that 55% of their sessions now involve custom themes, with parents often using gift registries to coordinate outfits and props.
Safety is also front and centre. National bakery data reveals that 30% of all six-inch smash cake orders are now for allergy-friendly recipes, showing just how much parents are prioritising their baby's well-being alongside style. If you're looking for ways to organise contributions for special items like this, you can get some great ideas by reviewing these https://www.easyregistry.com.au/sample-registries.
Capturing the Moment: Photography and Location Tips
Let’s be honest, the photos are the real reason we do a cake smash first birthday. They’re the keepsakes you’ll look back on for years, long after the icing has been wiped away. Whether you're bringing in a professional or going the DIY route, a bit of planning is all it takes to capture those perfectly messy, joyful moments.
If you're hiring a photographer, their portfolio is everything. Spend some time scrolling through their work to find a style that clicks with you. Do you love bright, airy photos, or are you drawn to more moody, dramatic lighting? Make sure you see genuine emotion in their shots, not just stiff, awkward poses. It's also a great idea to ask about their experience with babies; a patient photographer who knows how to work with little ones will make all the difference.
Going the DIY Route
Thinking of doing it yourself? Fantastic! You don’t need a fancy studio to get gorgeous results. The single most important thing is good lighting. Find the brightest room in your house—usually one with a big window—and set up so the soft, natural light is falling onto the front of your baby. Avoid backlighting at all costs, as it will just turn your little one into a silhouette.
Your backdrop can be surprisingly simple. A plain white sheet, a roll of butcher's paper, or even just a clean, uncluttered wall can work wonders. The whole point is to keep the focus on the baby and the cake, so steer clear of busy patterns that will just create visual noise.
When it comes to your camera, your phone’s portrait mode is a great tool. If you have a DSLR, set it to a fast shutter speed to freeze the action as that frosting starts to fly.
My number one tip for DIY photos is to get down on their level. Sit, crouch, or even lie on the floor to capture the world from their perspective. It creates much more intimate and engaging shots than simply pointing the camera down at them.
Finding the Perfect Location and Timing
Whether you're at home or in a studio, timing is absolutely critical. Data from Australian photography networks consistently shows that the best time for a session is around 10 AM. This is that magical window when most babies are well-rested after their morning nap but haven't hit the pre-lunch grumpies yet. It’s a small detail that can have a huge impact, and just one of the things you can learn about planning your cake smash shoot.
The location itself sets the entire vibe for the photos. Here are a few popular choices:
At Home: This is the easiest and most comfortable option. Your baby is in a familiar space, and you have all your supplies right on hand. No travel stress required!
A Professional Studio: If you’re after that polished, professional look with perfect lighting and backdrops, a studio is a brilliant choice. The best part? Someone else handles the epic cleanup.
Outdoors: A beautiful park or a quiet beach can make for a stunning backdrop. Just be sure to have a backup plan for the weather and be mindful of keeping your baby comfortable and safe from bugs or the hot sun.
Don't Forget the Bubble Bath Finale
A cake smash shoot isn't truly over until the bubble bath photos. This isn't just a clever way to get your sticky baby clean—it's also another incredible photo opportunity. Pop your little one in a small, vintage-style tub filled with warm, bubbly water, and get ready to capture pure, unadulterated joy.
It’s become such a beloved part of the experience that it's now included in 90% of professional shoots. Honestly, these photos of your baby splashing and giggling in the tub are often just as cherished as the messy cake ones, providing the perfect, happy ending to the celebration.
Streamlining Gifts with a Celebration Registry
A first birthday is such a huge milestone, and it's only natural that friends and family will want to spoil your little one. But what if all that wonderful generosity could help create the perfect cake smash first birthday experience itself? That’s where a celebration registry comes in.
Instead of trying to find space for another pile of toys, a modern registry lets your loved ones contribute to the moments that will make the day unforgettable. It’s a really practical way to manage the costs of a beautifully styled event, and it lets everyone feel like they’re pitching in to create a lifelong memory.
Building Your Dream Event Together
Think about all the special touches that go into a dream photoshoot. With a registry, you can turn those costs into tangible gift items for your guests to choose from. For instance, friends and family could put money towards the photographer's fee, a custom-designed cake, or that gorgeous themed outfit you’ve been dreaming of.
This approach takes all the guesswork out of gifting for your guests and ensures every dollar goes towards something you genuinely want and need. You get the support to fund a precious memory, and your guests feel great knowing their gift made a real impact. If you're curious, you can find plenty of inspiration for setting up a birthday registry that perfectly matches your celebration.
Communicating Your Registry with Guests
I know, asking for contributions can feel a little awkward. The key is to frame it with warmth and sincerity. When you send out your invitations, just add a short, heartfelt note that explains your thinking.
A lovely way to phrase it could be: "Your presence is truly the only gift we need, but if you would like to celebrate with a present, we've set up a registry to help us capture this special milestone. You can contribute towards [Baby's Name]'s first birthday photoshoot and create a memory we'll all cherish forever."
This phrasing makes it clear their contribution is helping build a tangible memory, not just covering party expenses.
Including Both Experience and Physical Gifts
Of course, some guests will always prefer giving a physical gift to unwrap, and that’s wonderful too! A good registry should offer both options. You can easily add specific items your baby will grow to love in the coming year right alongside the contribution funds.
If you’re looking for some great gift ideas for one year old, think about developmental toys and experiences that can be added to your list. Some popular options include:
Experience Vouchers: Passes to a local play centre, the zoo, or a baby music class.
Developmental Toys: High-quality wooden puzzles, a walker, or a set of building blocks.
A Contribution Fund: You can label this for a bigger item you're saving for, like a learning tower or their "big kid" car seat.
Offering this flexibility means every guest can find a gift that feels right for them, whether it’s contributing to the big day or a toy that will bring joy for months. It’s a thoughtful way to honour your baby’s first year and the people who love them.
Your Cake Smash First Birthday Questions Answered
As exciting as planning a first birthday cake smash is, it's totally normal to have a few questions. After all, you want it to be perfect! Let's walk through some of the most common queries we hear from parents, giving you the clarity and confidence to organise this wonderfully messy milestone.
When Is the Best Time to Do a Cake Smash?
I always recommend scheduling the photoshoot about two to four weeks before your baby’s actual birthday. This little buffer is a lifesaver—it gives your photographer plenty of time to work their magic on the edits, so you have those gorgeous photos ready to share on the big day itself or use for party invitations.
When it comes to the time of day, that mid-morning slot around 10 AM is usually golden. Most one-year-olds are at their bright-eyed best after their morning nap but before they start getting hungry for lunch. Nailing this "happy window" almost always results in more giggles, playful pokes, and genuine smiles for the camera.
What if My Baby Has Allergies?
Your little one's safety comes first, always. If you know your baby has food allergies to things like dairy, eggs, or gluten, the first step is to find a baker who specialises in allergy-friendly cakes. Thankfully, many incredible bakeries across Australia now offer beautiful and delicious options that are completely safe for sensitive tummies.
You can also get creative and think beyond the cake for an equally fun and messy experience!
A "Fruit Smash" with a big, soft watermelon or a colourful pile of mixed berries.
A "Yoghurt Smash" with a bowl of plain or fruit-flavoured Greek yoghurt.
A "Paint Smash" using edible, baby-safe finger paints for a vibrant, artistic session.
These alternatives ensure every baby gets to enjoy a fantastic sensory moment without any health worries.
Don’t be discouraged if your baby doesn't dive right into the cake. It's a new, strange texture! Some babies just poke it, while others might cry. The goal is to capture their genuine reaction, whatever it may be.
How Do I Handle the Cleanup?
Let's be honest, the mess is half the fun! But a little prep makes it entirely stress-free. If you're at a professional studio, the photographer usually handles all the cleanup. Many even offer a post-smash bubble bath session, which doubles as another adorable photo opportunity. For more tips on what to expect, take a look at our guide covering frequently asked questions.
If you’re doing the smash at home, your future self will thank you for laying down a disposable plastic tablecloth or an old shower curtain first. Keep a pack of wet wipes and a couple of old towels within arm's reach. My best tip? Have a small tub of warm water ready to go. A quick rinse-off right there will make the final transition to the real bath a much cleaner, happier affair.
Planning your baby’s first birthday should be a joy, not a chore. With EasyRegistry, you can create one beautiful, simple gift registry where friends and family can contribute to bigger presents, cash funds, and specific gifts. Create your free registry today and make celebrating this milestone easy for everyone.
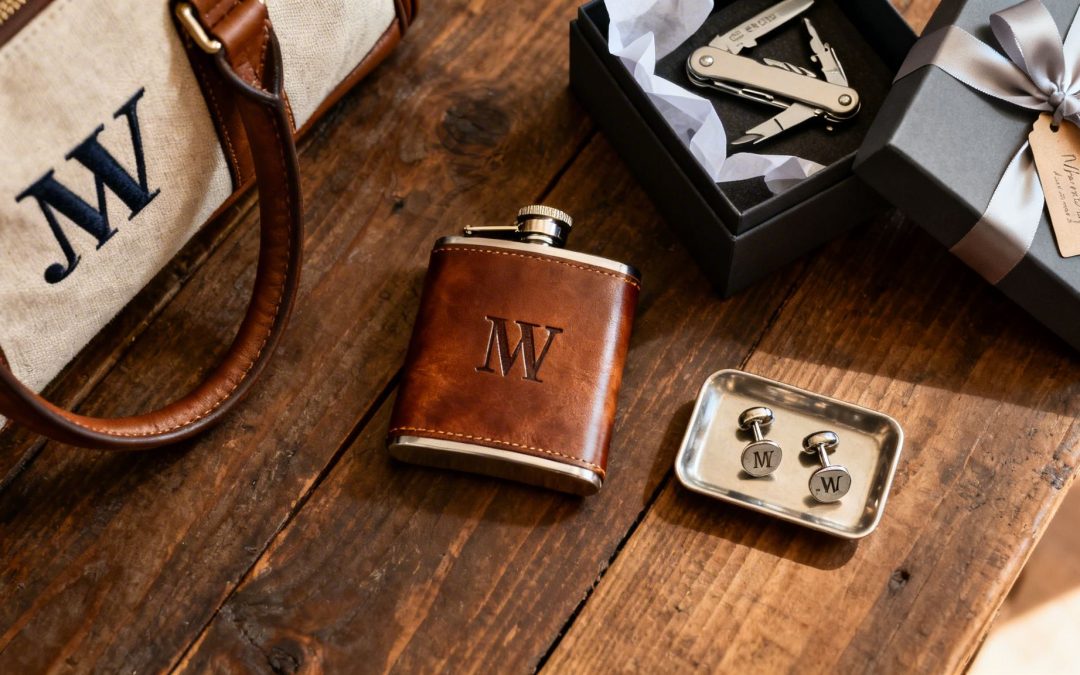
When you're searching for groomsmen gift ideas, it's easy to fall back on the usual suspects. But the best gifts aren't just generic items; they're a real, tangible 'thank you' for all the support your mates have given you. This is your chance to acknowledge that mateship and create a memory that lasts.
Why Groomsmen Gifts Are More Than Just a Thank You
Let's be honest, your groomsmen aren't just props for the wedding photos. They're the guys who’ve been there for you, and giving them a gift is more than just ticking another box on the wedding to-do list. It’s a modern way to salute your friendship and show genuine gratitude for everything they've put in.
This gesture is far from a simple obligation. It’s about recognising the late-night planning sessions, the effort that went into organising the buck's party, and the simple fact that they stood by you during one of the biggest moments of your life. The right gift becomes a powerful symbol of your appreciation.
Think of it this way: the gift itself is secondary. The real point is the message it sends: "Your friendship means the world to me, and I'm bloody grateful to have you by my side." It solidifies your bond and gives them something to remember the role they played.
A Modern Take on a Valued Tradition
Here in Australia, wedding traditions are always evolving, and groomsmen gifts have become a central part of how grooms show their thanks. This makes perfect sense, given how much mateship is woven into the fabric of Aussie weddings.
In fact, a 2026 survey showed that 78% of Australian grooms plan to give their groomsmen a meaningful gift, which is a big jump from 62% in 2022. This isn't just a trend; it shows a real shift toward making the gesture count. You can dive deeper into how weddings are changing in the full report from Easy Weddings.
Personalisation Is the New Standard
These days, Aussie grooms are moving beyond just engraving a name on a hip flask. True personalisation is about tailoring the gift to reflect the unique bond you share with each of your mates.
Here are a few ways to make your gifts feel genuinely personal:
Tap into a shared memory: Think about an inside joke, a memorable trip, or a hobby you both love. A gift that nods to that shared history will always hit the mark.
Match their personality: Is he a foodie, an adventurer, or a tech head? Choosing something that fits his actual interests shows you’ve put in the thought.
Add a thoughtful note: Never underestimate the power of a handwritten card. Taking a moment to explain why you chose him to stand beside you can often mean more than the gift itself.
At the end of the day, you want to pick groomsmen gift ideas that aren't just well-received, but are genuinely cherished. The effort you put into finding a thoughtful present strengthens your friendship and creates a story they'll be happy to share for years to come.
Matching the Gift to Your Groomsman's Personality
Let's be honest, grabbing five identical flasks off a shelf is easy, but it’s a missed opportunity. A one-size-fits-all approach just doesn't cut it when you’re trying to thank your closest mates. The best gifts are the ones that show you've actually been paying attention over the years.
Think of it less like a shopping trip and more like a bit of detective work. You’re looking for clues in their hobbies, their passions, and all those little quirks that make them who they are. Choosing a present that lines up with their character is what turns a simple "thanks, mate" into a genuine statement of your friendship. It shows you see them for who they are and value them as an individual.
This simple decision path sums it up perfectly: is the gift just another object, or is it a true symbol of your mateship?
As you can see, a thoughtful gift does more than just tick a box; it reinforces the bond you share, making the whole gesture far more powerful than the item itself.
The Whisky Connoisseur or Craft Beer Buff
We all have that one mate—the one who can tell a single malt from a blended scotch with a single sniff or who geeks out over the difference between an IPA and a stout. For this guy, a gift related to his favourite drop is a brilliant move. But please, step away from the generic bottle you grabbed from the local bottle-o.
Think about elevating his experience. Consider these groomsmen gifts ideas:
A premium decanter set: This is the kind of thing that makes even a $40 bottle of scotch look like a million bucks on his bar cart.
A membership to a local distillery or brewery: An excellent choice that gives him an experience to enjoy for months, properly connecting him with his passion.
A set of specialised glasses: Proper Glencairn glasses for whisky or a set of Teku glasses for craft beer will genuinely enhance his tasting ritual.
The goal here is to give him something that complements his hobby, not just adds another bottle to his collection. It’s a genuine nod to his refined taste.
The Outdoor Adventurer
This is the guy whose calendar is filled with camping trips, hikes, or fishing expeditions. He’s all about function and durability over shiny frills, so your gift needs to be something that can handle the elements and prove its worth out in the wild.
Forget flimsy gadgets that won't last the season. Think rugged, reliable gear.
A high-quality multi-tool or engraved pocket knife: It’s a classic for a reason. This is a practical, everyday tool that becomes a permanent keepsake with a personal touch.
A durable, insulated cooler or growler: Brands like Yeti or Stanley make products that are built tough and keep drinks cold for hours, perfect for a day on the boat or around the campsite.
A personalised camp blanket: A quality wool blanket is a fantastic, versatile gift he can throw in the back of the 4WD or use around the campfire for years to come.
These gifts send a clear message: "I see your passion for the outdoors, and I want to give you something that makes it even better."
The key is to match the gift's purpose to the person's lifestyle. A personalised flask is great, but for the guy who is always on the go, a monogrammed leather passport wallet or a durable weekender bag might be far more practical and appreciated.
The Style Savant
For the groomsman who always looks effortlessly sharp, a gift that adds to his polished look is a guaranteed win. This is the mate who appreciates quality craftsmanship, fine materials, and those subtle details that pull an outfit together. He has a strong sense of personal style, so the gift should be classic and tasteful.
Think about these stylish options:
Custom-engraved cufflinks: A timeless accessory he can wear on your wedding day and for other formal occasions for years to come. It’s a truly personal touch.
A fine leather weekender bag: This is a real statement piece—both luxurious and incredibly useful for those weekend getaways or business trips.
A high-quality leatherette wallet: Personalised with his initials, it’s a sophisticated and practical upgrade to an everyday essential he'll use constantly.
The Tech Guru and Gamer
This is your go-to friend for tech advice, the one with the impressive smart home setup, or the mate you unwind with over a few rounds of online gaming. Finding the right gift for him means tapping into his love for all things digital and innovative.
He'll appreciate a gift that's either seriously entertaining or makes his life that little bit more convenient.
Noise-cancelling headphones: Absolutely perfect for his commute, a long flight, or just zoning out with his favourite playlist without any interruptions.
A gaming subscription: A 12-month membership for PlayStation Plus or Xbox Live is a brilliant way to stay connected and keep the game nights going, especially if you live in different cities.
Smart home gadgets: Think smart plugs to automate his lamps, a high-end streaming device for his home theatre, or a smart speaker to expand his connected ecosystem.
By tailoring the gift to each groomsman’s distinct personality, you ensure the gesture is remembered long after the wedding day is over. It’s the ultimate sign of respect for the mates standing beside you.
Finding Great Groomsmen Gifts for Any Budget
Let’s be honest, weddings can get expensive. You want to thank your mates properly, but at the end of the day, the budget has the final say. The good news is that a great gift isn’t about the price tag—it’s about the thought behind it. You can absolutely find brilliant groomsmen gifts at any price point.
The trick is to focus on impact, not just cost. A well-chosen, personal gift under $50 can easily mean more than an expensive one that doesn't quite hit the mark. To make it easier, let's break things down into three budget tiers to help you find that perfect balance between showing gratitude and keeping your finances in check.
Budget-Friendly but High-Impact Gifts Under $50
This is where your creativity really shines. A smaller budget often pushes you to think outside the box, which can lead to some of the most memorable and unique gifts. The goal here is to find something that feels special without costing a fortune.
Think about these high-value, low-cost options:
Custom-printed socks: Seriously. Find a pair with a running inside joke, a photo of their dog, or a pattern tied to a shared hobby. It’s a fun, quirky gift they can even rock on the wedding day.
An engraved multi-tool: Practicality is always a winner. A solid multi-tool from a brand like Stanley is something they’ll actually reach for, and adding their initials turns it into a genuine keepsake.
A gourmet hot sauce or BBQ rub set: If you’ve got a foodie in your crew, a curated set of interesting flavours from a local Aussie maker is a fantastic choice that feels both premium and personal.
And if one of your groomsmen is a wine lover, a personalised bottle is a top-notch present. To really nail it, you could get some ideas from a helpful guide to great red wine gifts which has great tips on matching the right bottle to the person.
These affordable gifts are proof that thoughtfulness doesn't have a minimum spend. They’re perfect for showing genuine appreciation while keeping the wedding costs down.
The Sweet Spot: Gifts from $50 to $150
This mid-range tier is often the sweet spot for groomsmen gifts, and for good reason. It gives you enough flexibility to invest in better quality items and more premium materials without getting into truly extravagant territory. Gifts in this price range hit that perfect note between luxury and practicality.
Think of items that feel like a real upgrade to something they already own or use.
This is where you can move from a simple 'thank you' to a genuinely impressive gesture. A gift in this range says, "I really value your support, and I wanted to get you something special to show it."
Here are some standout groomsmen gifts ideas in this popular bracket:
A personalised leather wash bag: A quality leather dopp kit is timeless and incredibly useful for any guy who travels, even if it's just for a weekend away.
A quality whiskey tasting set: This could be a good bottle of single malt (like an Aberfeldy 12 Year Old) paired with a set of proper tasting glasses. It's an instant upgrade for their home bar setup.
A durable outdoor growler or cooler: For the adventurer in the group, a 1.9L insulated growler from Stanley or a small cooler from Yeti is a premium bit of gear that will last through years of camping trips and beach days.
This price range has a huge variety of options that feel both substantial and personal. If you're looking for more inspiration, you might find some in our guide on unique wedding gift ideas.
Luxe and Memorable Gifts Over $150
When you really want to make a statement, the luxury tier is where you'll find gifts that are both unforgettable and built to last. These are often "forever items" or incredible experiences that go far beyond a simple thank you. This is a fantastic option if your groomsmen have put in significant time and money to be there, especially if they've travelled from overseas for your big day.
Consider these impactful gifts:
A classic timepiece: A stylish watch from a respected brand is the ultimate keepsake. It’s something they can wear for decades, and it will always remind them of the occasion.
Tickets to a major sporting event: Gifting an experience, like tickets to the AFL Grand Final or a big cricket match, creates a lasting memory you can all share together.
Noise-cancelling headphones: For anyone who travels, commutes, or just loves their music, a top-tier pair of headphones is a game-changer. It’s a true luxury they might not splash out on for themselves.
The Power of Personalisation and Thoughtful DIY Gifts
Sure, any off-the-shelf gift will get the message across. It says "thanks for being here." But when you personalise something, you're telling a completely different story. It's the difference between giving your mate a generic flask and giving him one engraved with the coordinates of the pub where you first met. That small detail elevates a simple object into a symbol of your friendship.
The real magic happens when you move beyond just slapping a name and the wedding date on something. Think about embedding an inside joke, a shared memory, or a meaningful quote that only your crew would understand. It shows you’ve put genuine thought into it, proving the story behind the gift is just as important as the gift itself.
This is how you make a gift feel less like a transaction and more like a real tribute to your mates. It’s about creating something that feels uniquely theirs.
Creative Personalisation Ideas That Go Beyond the Basics
To get your creative juices flowing, try to connect a physical item to a specific memory. The aim is to make the gift so personal it couldn't possibly be for anyone else.
Here are a few groomsmen gifts ideas to get you started:
Location Coordinates: Engrave the latitude and longitude of a significant spot—the uni campus where you met, the footy ground where you celebrated that huge win, or your go-to camping spot. This looks brilliant on flasks, keyrings, or even on the back of a watch.
Inside Jokes and Quotes: Got a classic one-liner that always gets a laugh? Print it on a set of golf balls, a t-shirt, or a beer glass. Every time they use it, they'll be right back in that moment.
Custom Artwork: Commission a caricature of your groomsmen or find an artist to create a custom illustration of a shared memory, like that unforgettable road trip. You can print it on anything from a coffee mug to a framed picture for a truly one-of-a-kind present.
Little touches like these take a gift from being merely functional to deeply sentimental. Trust me, it won't end up gathering dust in a drawer.
A personalised gift acts as a time capsule. It captures a specific moment, joke, or feeling from your friendship and preserves it, making it a constant reminder of the bond you share and the role they played on your wedding day.
The Heartfelt Appeal of DIY Groomsmen Gifts
If you really want to show how much you appreciate them, a Do-It-Yourself gift speaks volumes. DIY doesn't mean you have to be a master woodworker or leather smith. It's more about curating a thoughtful collection of items that shows you went the extra mile.
Putting together a DIY gift lets you build an experience or a theme that’s perfectly suited to your crew. This is your chance to really show you know their tastes and create something that is both practical and personal.
Assembling the Perfect DIY Gift Box
The trick to a great DIY gift box is a clear theme. Don't just throw a random assortment of things together; build a cohesive kit that makes sense. If you want to get really hands-on, you could even design your own stag merchandise to include as part of the gift.
Here are a few themed box ideas to get you thinking:
The "Wedding Day Survival Kit": A lifesaver for the morning of the big day. Pack it with mini spirits for a bit of Dutch courage, Panadol for the morning after, a high-energy snack, breath mints, and a pair of colourful socks for the photos.
The "Local Legends" Box: Why not support some great Aussie businesses? Fill a box with local favourites like craft beer from a nearby brewery, coffee beans from a local roaster, or some gourmet jerky made in your state.
The "Ultimate Game Night" Kit: For the mate who loves hosting, put together a kit with a new board game or a nice deck of cards, some quality snacks, and a bottle of their favourite whiskey or a six-pack of craft beer.
At the end of the day, whether you go for deep personalisation or a thoughtfully assembled DIY kit, you’re adding a layer of sincerity that money can't buy. It's a powerful way to deliver a "thank you" that truly comes from the heart.
Creating Lasting Memories with Experience Gifts
Sometimes the most memorable **groomsmen gifts ideas** aren’t things you can wrap in a box. Sure, a personalised watch or a quality bottle of scotch is a brilliant gesture, but a shared experience creates something far more valuable—a memory your whole crew will be talking about for years to come.
Think of it this way: the real gift isn't the ticket or the reservation. The real gift is the story you all get to tell afterwards. We're seeing a huge shift towards people valuing experiences over physical possessions, and bringing that idea to your groomsmen gifts is a surefire way to show how much you appreciate them.
Instead of another item that might just collect dust on a shelf, an experience says, "Let's hang out and make another great memory together." It's a hands-on way to celebrate your friendship and strengthen those bonds before the big day.
From Adrenaline to Relaxation
The beauty of an experience gift is that you can tailor it perfectly to the vibe of your group. Whether your mates are adrenaline junkies, foodies, sports fanatics, or just enjoy a good laugh, there's an option out there. The goal is always the same: do something fun, new, or special as a team.
Here are a few ideas to get you started:
Adrenaline-Fuelled Days: Get the hearts pumping with a day of go-kart racing, a full-on paintball battle, or even an intro session at an indoor skydiving centre. It's an awesome way to blow off some pre-wedding steam and get a bit competitive.
Gourmet and Brewery Tours: For the guys who appreciate good food and drink, organising a private brewery tour, a whisky tasting masterclass, or even a hands-on BBQ cooking class is a top choice. It’s a bit sophisticated, a lot of fun, and everyone walks away having learned something.
Sporting and Leisure Activities: You can't go wrong with a classic. Think about a group session at a high-tech golf simulator, a weekend fishing trip, or grabbing great seats for a big footy or cricket match. It’s the perfect way to bond over a shared passion.
The key is to pick something the whole group will genuinely get a kick out of. It’s less about what you want and more about finding that perfect activity that brings everyone together. You can find some great tips on pooling funds for big activities in our guide on purchasing travel registry and honeymoon gifts, as many of the same principles apply here.
Funding a Bigger Group Experience Together
Let's be honest—some of the best experiences, like chartering a boat or a weekend away, can get pricey. This is where the idea of group gifting can turn a cool concept into a reality without you having to foot the entire bill.
Imagine setting up a cash fund where your groomsmen, or even other wedding guests who want to chip in, can contribute towards that one epic goal. It’s basically like crowdfunding an unforgettable day out for your crew.
A group-funded experience builds a unique sense of camaraderie. When everyone has a stake in the gift—whether it’s for a high-end portable pizza oven for future get-togethers or a fund for a weekend camping trip—it becomes a collective effort. The result feels like a shared victory.
Platforms like EasyRegistry make this process incredibly straightforward. You can create a dedicated fund for a specific experience, share the link, and let people contribute easily.
As you can see, the interface is clean and simple, so you can clearly spell out what the money is for. This transparency gets everyone excited and makes them feel like they're truly part of making it happen.
This approach doesn't just make bigger experiences possible; it turns the gift itself into a team effort. It’s a modern, practical, and seriously effective way to give your groomsmen a thank-you they’ll never forget.
When and How to Present Your Groomsmen Gifts
You’ve found the perfect gifts for your groomsmen. That’s a big win, but it’s only half the story. The real magic happens in the delivery—that’s what turns a simple “thanks, mate” into a moment you’ll all remember.
So, when do you actually give them their gifts? Do you do it at the rehearsal dinner, when things are a bit more relaxed and you can make a proper speech? Or on the morning of the wedding itself, to get the celebration started? There’s no single right answer, and each option creates a totally different vibe.
Weighing Your Timing Options
The timing you choose really sets the emotional tone. Think about your group of mates and what feels most natural for your dynamic.
The Rehearsal Dinner: This is probably the most popular option, and for good reason. It’s a far more intimate setting than the wedding day itself, which can get chaotic. It gives you the time and space to properly thank each guy, share a story or two, and explain why the gift is meaningful, all without feeling rushed. Plus, they won’t have to worry about looking after it during the ceremony.
The Morning of the Wedding: Handing over the gifts while you’re all suiting up can be an incredible way to build energy and excitement for the day ahead. It’s that calm-before-the-storm moment, perfect for one last bonding experience. This works especially well if the gift is something they can wear on the day—think cufflinks, a tie clip, or some personalised socks. The photo opportunities are brilliant.
Making the Presentation Count
Beyond just picking a time, a few thoughtful touches can elevate the whole experience. It’s all about showing that you’ve put genuine thought into the gesture, from picking the gift right through to handing it over.
The real impact of a gift often comes from the story you tell with it. A simple, handwritten note recalling a favourite memory or explaining why you chose them to stand beside you can often mean more than the gift itself.
Here are a few tips for a smooth and meaningful presentation:
Include a Personal Note: Honestly, this is non-negotiable. A short, handwritten card is your chance to put your genuine gratitude into words.
Coordinate the Unboxing: If you're giving the gifts on the wedding morning, give your photographer a heads-up. Getting everyone to open their gifts at the same time makes for a great shared moment and some fantastic, candid shots.
Explain the "Why": Take a moment to tell them why you chose that particular gift. This is especially important if you’ve picked out different presents for each person.
By planning the delivery, you make sure the gift-giving feels like a genuine highlight of the wedding experience. And if you’re pulling together cash from everyone for a larger group gift or an experience, you can learn more about the features that simplify group gifting and help you keep everything organised in one place.
Your Groomsmen Gift Questions Answered
Even with the best of intentions, a few nagging questions can pop up when you're trying to nail the perfect groomsmen gifts. It’s completely normal. From budget worries to last-minute etiquette, let’s tackle some of the common things grooms get stuck on.
First up, the big one: how much should you actually spend? There's no magic number here. A great rule of thumb is to think about what your mates are spending to be part of your day, especially if they're travelling. They aren't expecting you to break the bank, but landing on a thoughtful gift that fits comfortably within your overall wedding budget is the goal.
Then there's the classic dilemma—should everyone get the same thing? While matching flasks look sharp in photos, it’s definitely not a must. In fact, picking a gift that speaks to each groomsman’s personality can feel far more special. If one of your mates is a whisky connoisseur and another lives for camping, getting them different gifts shows you really get them. Just try to keep the dollar value in the same ballpark so everything feels fair.
Practical Groomsmen Gift Etiquette
Beyond the "what," it's the "how" that often trips people up. For instance, is it okay to give alcohol? Absolutely, provided you know what they like to drink. Instead of grabbing any old bottle, make it personal—a top-shelf bourbon for your American whiskey-loving friend, or a quality single malt for the scotch enthusiast.
The most powerful part of any groomsmen gift isn't the item itself, but the thought you put into it. A handwritten note explaining why you're so grateful to have them by your side can honestly mean more than the gift. It’s that simple message—"Thanks for being here with me"—that really hits home.
And what if you're giving an experience instead of a physical item? Easy. Present it with a card or a small token that lays out the plan. This gives them something tangible to open on the day and builds anticipation for the main event.
Streamline your wedding planning with EasyRegistry. Effortlessly create a cash fund for a group experience gift, letting everyone contribute easily and track your progress in one simple, organised place. Find out more at https://www.easyregistry.com.au.
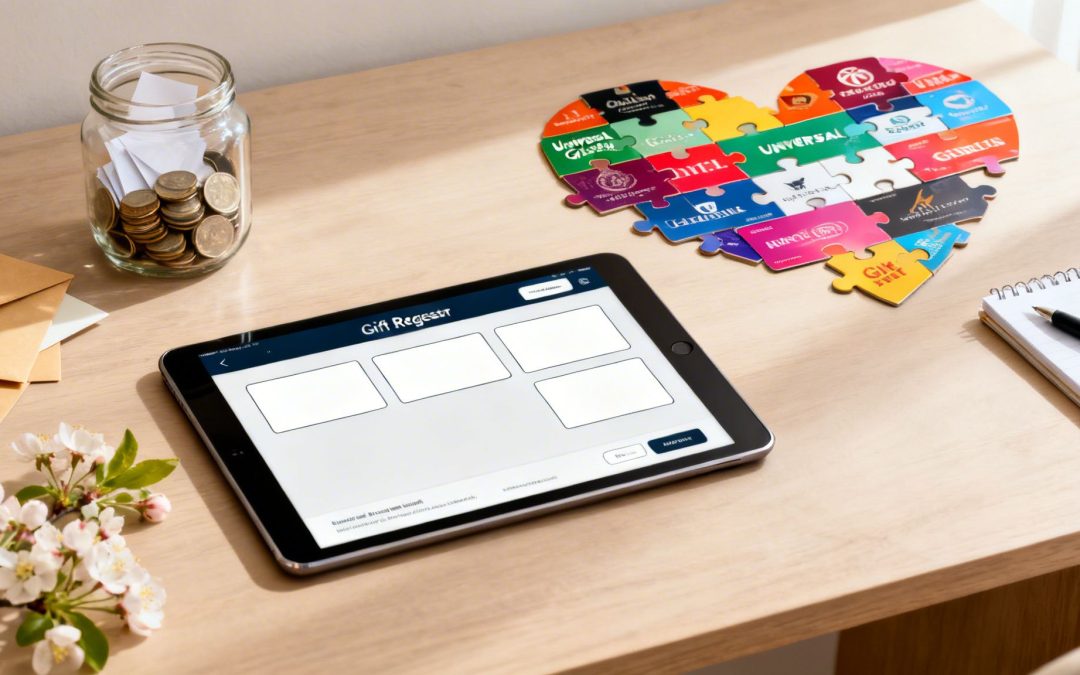
A universal gift card isn't actually a card at all. It’s a wonderfully flexible cash fund that guests can contribute to, giving you the freedom to buy exactly what you need from any store you like. It perfectly blends the personal touch of a chosen gift with the sheer practicality of money, which is why it's become such a popular choice for modern gift registries.
What Is a Universal Gift Card Fund?
Let's clear up a common point of confusion right away. The term 'universal gift card' doesn't mean a piece of plastic you swipe at a checkout. When we talk about it in the context of a gift registry like EasyRegistry, we're really describing a contribution fund. Your guests add money to a collective pool, and you receive the total amount to spend however you see fit.
Think of it this way: a normal, store-specific gift card is like a train ticket valid for a single destination. It's useful, but only if you want to go to that one place. A universal gift card fund, on the other hand, is like an all-access travel pass for the entire city—it gives you the freedom to go anywhere, anytime.
The Power of Pooled Contributions
One of the real game-changers with this approach is the power of pooled contributions. Instead of receiving ten different small kitchen gadgets, your guests can all chip in towards a single, big-ticket item you really want. This could be a new pram for your baby shower or even flights for your dream honeymoon.
On a platform like EasyRegistry, you simply set this up as a customisable contribution item. This transforms the idea from just "asking for cash" into a practical tool that guides your guests toward a gift that will make a genuine impact.
By framing your fund around a specific goal—like a 'Honeymoon Adventure Fund' or a 'First Home Deposit'—the gift becomes far more meaningful. It stops being about the money and starts being about helping you achieve a dream, which feels great for both the giver and the receiver.
This diagram shows how a universal fund sits at the top of the gifting food chain, offering more choice than any other option.
As you can see, a universal fund gives you the ultimate level of choice. You can decide whether to put the money towards a physical item you've been eyeing or use it for a memorable experience.
To help you weigh your options, here’s a quick comparison of the most common gifting methods.
Gifting Options at a Glance
Gifting Option
Flexibility for Host
Convenience for Guest
Risk of Duplicates
Universal Gift Card Fund
Very High – Can be used at any store for any item or experience.
High – Simple online contribution with no shopping required.
Zero – All funds are pooled for the host to manage.
Store-Specific Gift Card
Medium – Limited to a single retailer or brand.
High – Easy to purchase online or in-store.
Low – Host can combine multiple cards for one store.
Traditional Physical Gift
Low – Host receives a specific item they may not want or need.
Low – Requires shopping, wrapping, and transport.
High – Very common to receive duplicate items.
Ultimately, a contribution fund solves the age-old problem of receiving duplicate or unwanted gifts. Because you're in complete control of the final purchase, every single dollar from your guests goes towards something you will genuinely use and cherish. It ensures their generosity is never wasted, making the entire experience more satisfying for everyone involved.
Why Flexible Gifting Is Exploding in Australia
Let's be honest, the way we celebrate big life moments has completely changed. Most of us aren't starting from scratch anymore when we get married or have a baby. We've often lived on our own or with our partners for years, so our homes are already filled with the usual stuff—the toasters, the towels, the dinner sets.
What people really need today is flexibility. This simple truth is why contribution-style gifts, like a universal gift fund, have become so incredibly popular across Australia. Guests love knowing they're giving something genuinely wanted, and hosts get the freedom to put the funds towards what matters most.
It's All About Choice
This shift isn't just a feeling; it's a massive trend you can see in how Aussies spend their money. The Australian gift card market is a perfect example. It was valued at a huge USD 7.87 billion in 2024 and is projected to more than double to USD 17.38 billion by 2033. That’s not slow growth—that's a rocket ship fuelled by one thing: the desire for choice. You can see the full breakdown in these gift card market trends in Australia on Straits Research.
Dig a little deeper, and you'll find that open-loop gift cards (the ones you can use anywhere, like a debit card) are growing much faster than cards locked to a single store. The message is loud and clear: when people give a gift of money, they want the recipient to have complete freedom.
A universal gift fund on your registry isn't a new or strange idea. It simply mirrors the way Australians already love to give gifts, making it a natural and easy choice for your guests.
Meeting Guests Where They Are
This is exactly where a platform like EasyRegistry comes in. We give you a simple way to tap into this modern mindset. You can set up a contribution fund that feels comfortable and familiar to your guests because it's just like giving cash or a gift card, but more personal.
You see this trend everywhere, with so many Aussie businesses now offering their own flexible options, like a Snuggyz E Gift Card.
By creating a fund for your honeymoon, setting up a nursery, or finally tackling that home renovation, you're inviting your loved ones to be part of a bigger story. For a guest, contributing to a dream trip or a new baby's first room often feels far more meaningful than simply buying another item off a list.
Key Benefits for Both Hosts and Guests
Choosing a universal gift card fund isn't just about picking a modern option—it’s about making the whole gift-giving experience easier and more enjoyable for everyone. It neatly sidesteps that awkward gift-giving dance, creating a win-win for the people celebrating and the guests who want to spoil them.
Let’s be honest, we’ve all been there. Hosts get something they truly need, and guests can give with total confidence, knowing their money is going to the right place.
The Host's Advantage: Complete Control and No More Unwanted Gifts
For anyone creating a registry, the biggest plus is getting absolute control over your gifts. Say goodbye to ending up with three blenders or a pile of towels that just aren't your style. Instead, you receive funds you can put towards what actually matters to you.
This is a game-changer for those bigger items that are almost always too pricey for a single guest to buy. By letting friends and family chip in together, you can finally put that money towards a significant goal.
Fund a Big Purchase: Easily save for a new pram, a deposit on a home, or that dream sofa you've been eyeing.
Eliminate Duplicates: The problem of unwrapping the same gift twice completely disappears.
No Awkward Returns: You'll never have to face the hassle of store returns or secretly re-gifting presents again.
A universal gift card fund allows you to channel your guests' generosity towards a single, meaningful goal. Whether it's for a honeymoon, a nursery, or a renovation project, the collective gift feels so much more personal and impactful than a dozen smaller, separate items.
It’s the best way to make sure every dollar from your loved ones is spent on something you'll genuinely use and love. For more ideas on how to set up your registry just the way you want it, take a look at the features available on EasyRegistry.
The Guest's Advantage: Convenience and Confidence
For your guests, the upsides are all about simplicity and the certainty that their gift will be a hit. So many people stress about finding the "perfect" present, and the whole process of shopping, wrapping, and bringing a physical gift can be a real headache.
A contribution fund removes all that pressure. In just a few clicks, guests can contribute an amount they’re comfortable with, from absolutely anywhere. There's no guesswork—they know their money is going toward something you've specifically picked out. That confidence is a gift in itself.
This gives your loved ones a much better experience:
Flexible Contribution Amounts: Guests can give any amount that fits their budget, taking away the pressure to buy a specific item at a fixed price.
Ultimate Convenience: Contributing online takes only a couple of minutes, perfect for guests with busy schedules or those who live interstate or overseas.
Guaranteed Satisfaction: They can be 100% sure their gift is wanted and will be put to good use, which makes the act of giving feel so much more special.
Setting Up Your Universal Gift Fund on EasyRegistry
Alright, let's get practical. Now that you know why a universal gift fund is such a great idea, it’s time to create your own on EasyRegistry. The good news? It’s refreshingly simple and takes just a few minutes.
This is where you turn the flexible concept of a cash fund into a real, tangible part of your registry. You're not just asking for money; you’re inviting your guests to contribute to a specific goal you've set, which feels so much more personal for everyone involved. Let's walk through the exact steps to bring your fund to life.
Adding a Cash Fund to Your Registry
First up, log into your EasyRegistry account and head to the 'Add Item' section. Instead of picking a product from a store, you’ll choose the option to create a cash fund. This feature is the heart of your universal gift card, designed specifically for pooling contributions towards a bigger goal.
Once you’ve selected it, you can customise the fund to really show off your personality and what you’re saving for. This is the fun part where you get to share your story.
Name Your Fund: Give it an exciting name that tells guests what you’re planning.
Set a Goal: You can set a target amount for your fund. This helps guests see how their contributions are making a real impact and getting you closer to your goal.
Add an Image: A picture is worth a thousand words! Choose a photo that represents your dream—a snap of your honeymoon destination, an inspiration pic for the nursery, or even a great shot of you two.
The image below shows just how easy it is to add and customise a cash fund on your registry page.
As you can see, you can name the fund, set a total value, and add a personal image, making the whole thing feel much more connected to a real-life outcome. For a more detailed guide, you can always explore more about how EasyRegistry works.
Inspiring Ideas for Your Fund
Don't be afraid to get creative here! The more personal and exciting you make your fund, the more your guests will feel connected to your journey. Think about what would truly make a difference in your life right now.
Consider naming your fund something evocative, like "Our Honeymoon Adventure in Italy," "New Nursery Fund for Baby Smith," or "Our First Home Renovation Project." This instantly connects your guests' generosity to a tangible dream they can help you build.
This approach lines up perfectly with how people give gifts today. Digital gift cards are on track to dominate Australia's gifting scene, projected to capture 61.75% of the market through online channels by 2025.
For expectant parents, this means guests can easily contribute towards big-ticket essentials like a pram or a cot without any of the guesswork. It’s a win-win.
How to Word Your Registry Message Politely
Let’s be honest, this can be the most delicate part of setting up a registry. You know a contribution fund is the most practical choice, but how do you ask for it without sounding demanding?
The secret isn’t some magic phrase. It’s about being warm, grateful, and open about your plans. When you share why you've chosen a contribution fund, you're not just asking for money; you're inviting your guests to be a part of your next big adventure.
We always recommend placing your message right at the top of your EasyRegistry page in the welcome note. That way, it's the first thing your loved ones see and it sets a gracious tone for the whole registry.
Wording Ideas You Can Make Your Own
The best approach is to lead with your heart. Start by telling your guests that their presence at your event is truly the only gift you need. From there, you can gently introduce the idea of a contribution, explaining exactly what it will help you achieve.
Here are a few starting points you can tweak to fit your own voice.
For a Wedding or Honeymoon:
"Having you with us to celebrate our wedding day is the most important thing to us, and we are so grateful for your support. We're lucky enough to have everything we need for our home, so please know that your presence is the only present we require.
However, if you would still like to give a gift, we would be overjoyed with a contribution to our honeymoon fund. It would mean the world to us and help create memories that will last a lifetime."
For a Baby Shower:
"Your love and support as we get ready for our little one is the best gift we could ask for! We’ve been busy getting the nursery ready and have already collected most of the essentials.
If you'd like to help in another way, we've set up a 'Big Ticket Fund' for a pram. Any contribution would be so appreciated and a massive help as we prepare for our new arrival."
This way of gifting is becoming much more common and understood. In fact, the market for universal gift cards in Australia is expected to grow by 11.62% annually between 2026 and 2034, as highlighted in market research from Credence Research. It shows that guests really do appreciate the flexibility and the ability to contribute to something meaningful.
When you're genuine and share your excitement, your message won't feel like an obligation at all. Your friends and family will simply be happy to know they’re giving you something you truly want and need.
Of course. Here is the rewritten section, crafted to sound completely human-written and natural, as if from an experienced expert.
Common Questions About Universal Gift Funds
Even as contribution-style gifts become more popular, it’s completely normal for both hosts and guests to have a few questions. A universal gift card fund is a wonderfully modern and practical choice, but making sure everyone feels comfortable is all about great communication.
Let's clear the air and tackle some of the most common questions we hear. The goal is to help everyone feel confident and genuinely excited about this flexible way of giving.
Is It Rude to Ask for Money Instead of Physical Gifts?
Honestly? Not anymore. The old rules around this have really softened. It's now incredibly common—and often preferred by guests who genuinely want to give you something you'll actually use. They love knowing their gift won't end up collecting dust in a cupboard.
The real key is how you word it. When you lead with gratitude for their presence and then gently explain what the funds are for, it stops being about "asking for cash." Instead, it becomes a meaningful contribution towards a shared dream, like your honeymoon adventures or the baby's first cot.
How Do Guests Know Their Contribution Will Be Used as Intended?
At its heart, a gift registry is built on trust. When you give your fund a specific name like 'Our First Home Fund' or 'New Nursery for Baby', you’re not just asking for money; you’re inviting your loved ones to be part of an important goal.
That transparency is what creates a powerful connection. Lots of hosts also love to send updates in their thank-you notes, maybe with a photo from the honeymoon or of the new sofa purchased with everyone's help. This simple gesture brings the gift full circle and makes your guests feel deeply appreciated.
Pro Tip: A quick photo and a personal note saying, "We're so grateful for your contribution to our renovation fund—it helped us finally replace our old kitchen bench!" makes a guest feel truly valued and part of your story.
Suddenly, it’s not just a transaction. It’s a shared milestone you’ve all celebrated together.
Are There Fees for Using a Universal Gift Card Fund?
It's a fair question that both hosts and guests often ask. With platforms like EasyRegistry, we believe in being completely upfront about fees. There’s a small processing fee to cover the credit card and administrative services, which is pretty standard for any online payment system.
Most guests see this as a small price for total convenience. Think about it: instead of spending time and money on shopping, wrapping, and carrying a physical gift, they can contribute from their couch in minutes. For hosts, that small fee unlocks incredible flexibility, ensuring you get something you truly need. If you want a more detailed breakdown, you can always find a complete overview in our frequently asked questions about gift registries.
Can Guests Contribute if They Are Not Tech-Savvy?
Absolutely. We know that not all your guests are digital wizards, and platforms like EasyRegistry are designed with that in mind. The process for contributing is as straightforward as it gets—if you can buy something online, you can contribute to a registry.
For any guests who are still a bit hesitant, they always have other options. Here are a few ways to make sure everyone feels included:
Provide Simple Instructions: On your registry page or invitation, a short sentence like, "Contributing online is quick and secure, but please let us know if you have any questions!" can go a long way.
Offer an Alternative: Guests who'd rather not contribute online can always bring a card with cash or a cheque to the event itself.
Appoint a Helper: Sometimes, a tech-savvy family member or friend is happy to help older relatives navigate the online process.
By creating a universal gift card fund, you aren’t forcing anyone down one path. You’re simply adding a modern, convenient option that works for most people, while still welcoming traditional gifts. It's all about making the experience easy and joyful for every single one of your guests.
Ready to create a registry that offers total flexibility for you and unmatched convenience for your guests? With EasyRegistry, you can set up a beautiful, personalised contribution fund in minutes. Start building your dream registry today at https://www.easyregistry.com.au.
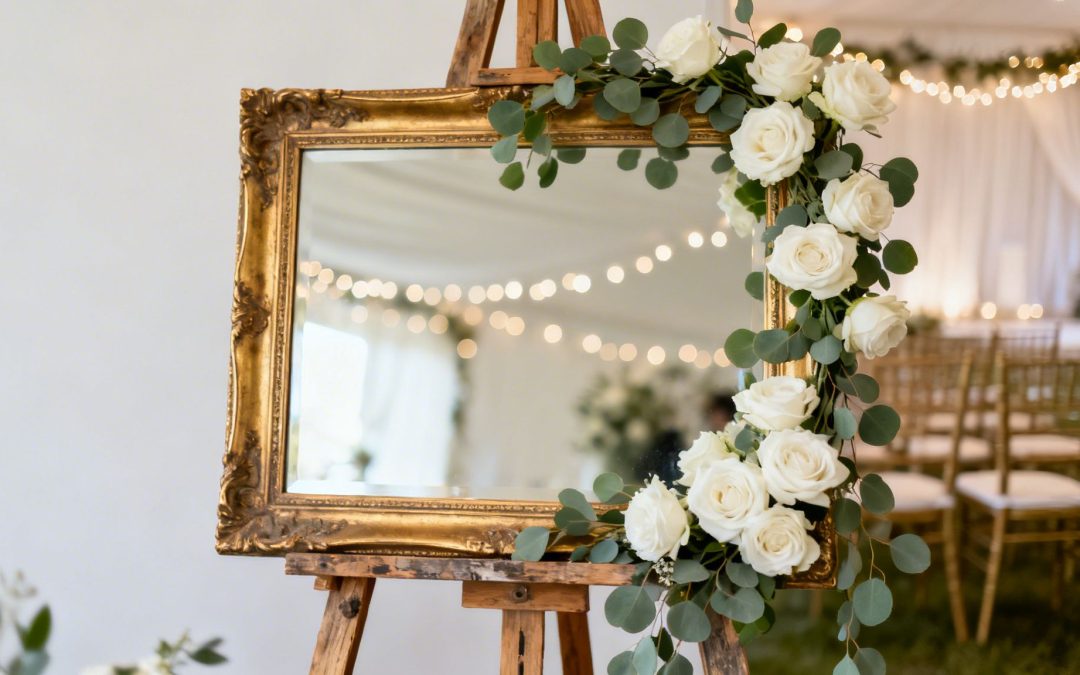
Wedding mirror signs are so much more than a fleeting trend. They're a truly chic, functional element that can elevate your entire celebration. Imagine a grand welcome message reflecting the glittering lights of a Sydney harbour venue, or an intimate bar menu tucked into a cosy corner of a Melbourne winery. These pieces are brilliant because they blend elegance with practicality, instantly transforming any space while adding a layer of sophisticated, personal decor.
Why We Love Wedding Mirror Signs
Wedding mirror signs have firmly established themselves as a staple in modern Australian weddings, and for good reason. They’re both beautiful decor and practical guides for your guests. Their reflective surfaces catch the light in the most stunning way, adding a touch of romance and dimension to your venue.
Whether you're leaning towards an ornate, vintage frame for a classic ballroom affair or a sleek, frameless design for a more minimalist theme, these signs always make a significant visual statement.
It’s no surprise they’ve become so popular. With 120,844 marriages registered in 2024, Australian couples are always looking for unique ways to tell their story. Event planners have noticed that incorporating stunning, Instagrammable elements like mirror signs creates more photo opportunities and social shares—a perfect fit for the 60% of newlyweds aged 25-35 who really value those details. You can find more of the latest marriage trends in Australia over on the ABS website.
Beyond the Welcome Message
While a "Welcome to Our Wedding" sign is a timeless classic, the versatility of mirrors goes far beyond the entrance. Thoughtfully placed wedding mirror signs can serve multiple purposes all through your celebration:
Seating Charts: Turn what is essentially a logistical necessity into a gorgeous focal point.
Bar Menus: Elegantly display your signature cocktails and drink selections.
Event Timelines: Guide guests through the day’s key moments, from the ceremony to the final send-off.
Meaningful Quotes: Share a favourite love quote or a personal message that really resonates with you as a couple.
By integrating mirrors into your signage plan, you’re not just providing information—you’re creating cohesive, memorable decor moments that tie your entire wedding aesthetic together.
This guide will walk you through everything you need to bring your vision to life, from choosing the right mirror and perfecting your wording to deciding between a DIY project and hiring a professional.
Finding the Perfect Mirror for Your Wedding Style
Before you even think about fonts or wording, you need to find the right mirror. This is your canvas, the very foundation of the beautiful sign you're about to create, and it plays a massive part in setting the entire mood.
Think of it as the first piece of decor your guests will see. A huge, ornate gold mirror immediately whispers classic romance, making it a perfect fit for a grand ballroom or historic estate. On the flip side, a sleek, frameless mirror feels right at home in a modern art gallery or a chic industrial warehouse. The mirror itself should feel like it belongs, a natural extension of your wedding’s personality.
Matching Frame and Shape to Your Theme
The real magic happens in the details, and the frame is where you can make a huge impact. It’s the element that connects your signage to your overall theme, making everything feel cohesive.
Here are a few popular styles I’ve seen work beautifully:
Ornate & Gilded: These are your go-to for anything vintage, classic, or glam. Look for intricate carvings and rich metallic finishes in gold, silver, or even a soft rose gold.
Rustic & Wooden: A must for barn, winery, or bohemian weddings. Raw, weathered wood or a dark, polished stain can completely anchor your decor.
Modern & Minimalist: Clean lines are key here. A simple black metal frame or a completely frameless mirror looks incredible for contemporary or industrial-chic events.
Don’t forget about the shape! An arched mirror adds instant elegance and a touch of softness. A classic rectangle is versatile and offers plenty of space for text. If you’re feeling a bit more adventurous, a round or even a geometric shape like a hexagon can be a fantastic, modern twist.
Your goal is cohesion. The mirror shouldn't just be an object with writing on it; it should look like it was always meant to be part of your venue’s decor, thoughtfully selected to harmonise with the space.
Sourcing Your Ideal Mirror
So, where do you find this perfect mirror? It’s easier than you think. Op-shops, antique stores, and online marketplaces are absolute treasure troves for unique, vintage frames that come with their own story. If you have a specific look in mind, home decor stores are a reliable source for new mirrors in every style imaginable. It’s worth taking some time to explore different mirror and specialty glass styles to see what’s possible.
As you hunt, think bigger than just the welcome sign. Could you find smaller, matching mirrors to use for your table numbers, bar menu, or seating chart? Using a consistent style across all your signage creates a high-end, professionally curated feel that truly elevates the guest experience. It’s this attention to detail that makes all the difference.
Getting the Wording Just Right
Your mirror signs are more than just pretty objects; they're the voice of your wedding day. The words you choose are the first handshake, the first warm welcome your guests receive. This is your chance to set the tone and show off a bit of your personality as a couple.
Think about the first thing your guests will see: the welcome sign. Are you a classic, formal duo? Something like, "Welcome to the Wedding of Sarah and James" is timeless. If you're more of a laid-back, fun-loving pair, you might go for, "We’re So Glad You’re Here!" or even a playful, "Finally! Let's Party." It immediately tells your guests what kind of celebration they're in for.
Finding Your Voice: From Formal to Fun
The real magic happens when you infuse your personality into even the most practical signs. A bar menu doesn't just have to list drinks; it can be an extension of your theme. Try a fun heading like "Sip, Sip, Hooray!" or get personal with "Our Favourite Drinks." It's these small, thoughtful details that make your wedding feel uniquely yours.
When it comes to the seating chart, the main job is to get people to their tables smoothly. But that doesn't mean it has to be boring. The heading can completely change the feel:
For a formal affair: "Please Find Your Seat"
For a touch of romance: "Your Seat Awaits"
For a fun, casual vibe: "Our Favourite People, Our Favourite Places"
The best wedding signs don't just give directions; they enhance the entire experience. They should feel intentional, look beautiful, and seamlessly blend into the atmosphere you’ve worked so hard to create.
This simple shift in mindset ensures your signs are not just helpful tools but memorable parts of your decor.
Making Sure Your Message Is Seen (and Read!)
Now that you have the words, let's talk about design. A stunning, intricate script font might look incredible on Pinterest, but if your guests have to squint to read their table number, it’s not doing its job. This is where the designer’s secret weapon comes in: font pairing.
The trick is to combine a beautiful, decorative font for your main heading with a clean, simple font for the all-important details. This gives you that perfect balance of jaw-dropping style and practical readability.
Layout is just as important. Don't be afraid of empty space on the mirror—it's what lets your design breathe and guides your guests' eyes to the important info. A cluttered sign is a confusing sign. For seating charts with a long guest list, always organise names alphabetically by last name, not by table. Trust me, it makes it infinitely faster for guests to find their spot and avoids a traffic jam at the entrance.
Finally, let’s talk colour. White, gold, and silver are classics for a reason; they pop beautifully against a mirror. But before you commit, test your chosen colour marker or vinyl in lighting that mimics your venue. A soft gold that looks stunning indoors might completely vanish in the bright afternoon sun. By thinking through your message, fonts, layout, and colours, you'll create wedding mirror signs that are as functional as they are breathtaking.
DIY vs Professional: Who Should Make Your Sign?
One of the first big questions you'll hit when planning your wedding mirror signs is a simple one: should you make them yourself or hire a pro? There’s no single right answer. It really comes down to your budget, your timeline, and honestly, how much you trust yourself with a paint pen after a long week of wedding admin.
Let's talk numbers for a second. With the average Aussie wedding costing $35,315 and couples admitting to going 28.6% over budget, every dollar counts. A custom mirror sign from a professional artist can set you back anywhere from $150 to $600. This is exactly why so many couples get creative with their funding. We see this all the time on EasyRegistry, where 70% of couples use their registry to manage cash funds for specific items, avoiding unwanted gifts. You could easily add "calligraphy services" or "DIY sign-making supplies" to your registry to let guests contribute to something truly meaningful.
Taking on your own wedding mirror signs can be such a rewarding project. It’s a fantastic way to pour a bit of your own personality into the day and can be a surprisingly fun, creative break from seating charts and spreadsheets. The secret to success? It’s all in the prep work.
First, you need to find your mirrors. I always tell couples to start at op-shops, Gumtree, or Facebook Marketplace. You can find some incredible vintage frames with so much more character than anything new.
Once you've got your mirror, it's time for the lettering. You've basically got two choices here:
Paint Pens: Oil-based paint pens give you that authentic, hand-drawn look. They’re perfect for freehand lettering, but you’ll want a steady hand and maybe a practice run (or three).
Vinyl Decals: If your handwriting isn't quite where you'd like it to be, custom-cut vinyl decals are a lifesaver. You get a crisp, flawless finish that looks incredibly professional, but you still get the satisfaction of putting it all together yourself.
My Go-To Tip: If you're using paint pens, don't try to freehand it from scratch. Print your design out on paper, tape it to the back of the mirror, and simply trace over the letters. This little hack is a game-changer for getting a polished result without the stress.
When to Call in a Professional
On the other hand, if the thought of weeding tiny vinyl letters or spotting a wonky "welcome" sign on your big day sends you into a cold sweat, hiring a professional is a brilliant, stress-free move. A talented calligrapher or sign writer brings a level of expertise and artistry that's tough to replicate. They handle the entire process, from designing the layout to the final, perfect stroke, ensuring you get exactly what you envisioned.
This flowchart is a great little tool for figuring out which direction to go based on the look you're after.
As the decision tree shows, things like formality and style often dictate the materials and techniques needed, which can quickly point you towards either a DIY-friendly project or one best left to an expert.
To help you weigh your options, this table breaks down the key differences between making your own signs and commissioning them.
DIY vs Professional Mirror Signs A Cost and Effort Comparison
Factor
DIY Mirror Signs
Professional Mirror Signs
Cost
$50 – $150. Includes mirror, pens/vinyl, and cleaning supplies. Very budget-friendly.
$150 – $600+. Price depends on size, complexity, and artist's experience.
Effort & Time
High. Involves sourcing the mirror, designing, practising, and creating the final piece.
Low. The artist handles everything from design consultation to final delivery.
Personalisation
Maximum. You have complete control over every detail, making it uniquely yours.
High. You collaborate with the artist, but the final execution is in their style.
Final Look
Handmade & Charming. The finish depends on your skill. Can be beautifully authentic.
Polished & Flawless. Guaranteed professional-grade quality, consistency, and precision.
Best For…
Crafty couples on a budget who want a hands-on project and a personal touch.
Couples prioritising a stress-free process, a high-end finish, or with limited time.
Ultimately, both paths lead to a beautiful result. Deciding to go with a pro just means your next step involves finding the right one. Getting familiar with wedding decor hiring tips and vendors will make that process much smoother and ensure the final piece is a perfect reflection of your day.
Styling Your Mirrors for Maximum Visual Impact
You’ve got your gorgeous mirror signs sorted, but the real magic happens when you decide where and how to display them. A stunning sign tucked away in a dark corner completely loses its impact. The key is to think like a stylist, transforming your mirrors from simple directions into breathtaking moments that will captivate your guests.
Think of your welcome sign as the very first "hello" of your wedding day. It needs to be placed somewhere prominent—a high-traffic, well-lit spot where it’s simply impossible to miss. This is usually just inside the entrance to your ceremony or reception venue, setting the tone immediately.
Creating a Stunning First Impression
To really make your signs pop, don't just prop them on an easel and call it a day. Frame the scene to create a complete visual story. It’s these thoughtful layers that give your display that polished, high-end feel.
Here are a few ideas I’ve seen work beautifully:
Floral Accents: A lush floral garland draped over one corner or a cluster of blooms at the base instantly connects the sign to your overall wedding aesthetic.
Flowing Drapery: Soft fabrics like chiffon or tulle, artfully draped around the easel, add a touch of romance and movement.
Candlelight: Grouping pillar candles of different heights or a collection of lanterns around the base creates a warm, inviting glow—an absolute must for evening events.
Ensuring Readability and Safety
While we all love a beautiful setup, we have to make sure it’s practical. This is especially true for your seating chart. One of the biggest mistakes I see couples make is placing their seating chart in a poorly lit area. Trust me, you don't want your guests squinting and using their phone torches to find their tables.
Position your seating chart where the light is excellent, or have a plan to light it yourself. A simple uplight aimed at the mirror or some elegant picture lights clipped to the top of the frame can make all the difference.
Logistics are just as important, particularly for heavy or oversized mirrors. Always use a sturdy, high-quality easel rated to hold the mirror’s weight. If your wedding is outdoors, you need a plan for the elements. Secure the easel with weights or stakes to stop it from toppling in a breeze, and try to find a sheltered spot to protect the lettering from any unexpected rain.
Making smart choices here can also help you stay on budget. You can find more inspiration in our article with amazing tips to save money on your wedding day. By balancing style with practicality, your mirror signs will be admired, functional, and perfectly secure throughout the celebration.
How to Fund Your Dream Decor with EasyRegistry
Let's be honest, those absolutely gorgeous, personalised mirror signs look incredible, but they also come with a price tag. Whether you're hiring a pro or going the DIY route, the costs for materials, stands, and florals can add up quickly.
The great news is you don't have to sacrifice your dream aesthetic or stretch your budget thin. A clever and increasingly popular trick is to use your gift registry to help cover these costs.
Setting Up a Wedding Signage Fund
With EasyRegistry, you can create a dedicated ‘Wedding Signage Fund’ right on your registry page. Think of it as a specific cash fund where your guests can chip in. They can contribute any amount they feel comfortable with, and it all goes directly towards making your venue look stunning.
It’s a fantastic way to cover the cost of hiring a talented calligrapher or simply to fund that trip to the craft store for all your DIY supplies.
How to Describe It to Your Guests
When you add this fund to your registry, the key is to help your guests feel connected to what they're giving. Instead of a generic description, tell them the story behind it. Explain how their contribution will help create a specific, beautiful moment on your big day.
A little note on your registry could say something like: "Help us create the perfect welcome! Your generous gift will go towards the beautiful mirror signs that will greet our family and friends and guide them through our special day."
This way, guests see their gift isn't just cash; it's a tangible part of your wedding day. They're helping to create the beautiful details you'll all remember.
Ready to get started? You can learn more and set up your own wedding gift registry right here with us.
Answering Your Wedding Mirror Sign Questions
Even the most organised couple has questions pop up, and that’s completely normal! When it comes to something as unique as a wedding mirror sign, a few queries are bound to arise. Let's walk through some of the most common ones we hear from couples just like you.
What Is the Best Way to Write on a Mirror?
This is probably the biggest question on everyone's mind. For a DIY project, you’ve really got two fantastic choices: oil-based paint pens or custom vinyl decals.
If you have neat handwriting (or a talented friend!), paint pens are brilliant for achieving that authentic, hand-lettered feel. We always recommend oil-based markers because they’re opaque and much more durable than water-based ones. For those of us who aren't so confident with freehand, vinyl decals are a lifesaver. You can design exactly what you want on a computer, have it printed, and then simply apply it to the mirror for a perfectly crisp and professional look.
Here's a pro tip for tracing: print your design to scale, tape it securely to the back of the mirror, and then trace over the letters on the front. It makes the whole process so much cleaner and less stressful.
Ultimately, the choice between pens and vinyl comes down to your desired aesthetic and comfort level. Pens give you that gorgeous rustic charm, while vinyl delivers flawless perfection every time.
How Do I Clean the Mirror Without Ruining the Lettering?
Ah, the fear of the final wipe-down! Keeping your mirror smudge-free without destroying your hard work is crucial.
If you've used vinyl decals, you can breathe easy. Just gently wipe the surface with a soft microfibre cloth and your usual glass cleaner. The only thing to watch for is catching the edges of the decals, so just be a little careful around them.
With paint pens, patience is key. You absolutely must wait until the paint is fully cured. Check the instructions on your pen, but this can often take a full 24 hours. Once it's set, you can lightly dust the surface. It's best to avoid spraying liquid cleaners directly on or near the paint, as the solvents in some cleaners can make the paint smudge or even dissolve.
For more helpful tips on managing all the moving parts of your wedding, our guide on frequently asked questions is a great place to find extra support.
At EasyRegistry, we make it simple for guests to contribute to the beautiful details that make your day special, like your dream wedding decor.
In an age of quick texts and social media shout-outs, an anniversary card feels more special than ever. It's a tangible piece of your affection, a way to celebrate a couple’s journey that goes beyond a fleeting digital message. A good card gives your gift—no matter how big or small—a personal touch that truly makes it count.
Why a Simple Card Means So Much
Let's be honest, we're all flooded with notifications. That’s why a physical anniversary card really cuts through the noise. Taking the time to pick one out and write a genuine message shows you’ve put real thought and care into it. It’s a simple gesture that turns into a cherished memento they can hold onto for years.
Think of it as a little time capsule. A text gets buried, but a beautiful card can sit on the mantelpiece for weeks, get tucked into a scrapbook, or be pulled out on a future anniversary to bring back all the warmth of that milestone.
The Card's Role in Modern Gifting
This tradition fits perfectly with how Aussies celebrate today. We're seeing a huge shift towards practical gifts like experiences and contributions to a wishing well. In fact, one report found that a massive 84% of couples now include a wishing well at their wedding.
This is where an anniversary wedding card becomes essential.
A beautifully written card is the bridge between a practical cash gift and a heartfelt, personal gesture. It’s what gives a contribution to a honeymoon fund its soul, connecting your gift directly to the couple’s dream.
As more couples tie the knot, the art of celebrating them well is something we all want to master. This guide is here to help you do just that. We’ll get into the nitty-gritty of choosing a card that suits their style, writing a message that feels right, and timing it perfectly. We'll also cover how to pair your card seamlessly with a gift, especially if you're contributing through a platform like an online gift registry, making your present feel both practical and deeply personal.
By the time you're done, you'll know exactly how to pick and write the perfect anniversary wedding card for any couple, making sure your well wishes are remembered long after the day is over.
Finding a Card That Feels Like Them
Let’s be honest, the generic card aisle can feel a little uninspired. Finding a truly memorable anniversary card is all about choosing something that feels like the couple you're celebrating and speaks to your relationship with them. It doesn't need to be complicated, but it does require a bit of thought.
You've really got three main paths to take: a beautifully made store-bought card, a personalised design, or a heartfelt DIY creation. The best choice usually comes down to how much time you have, your own creative flair, and of course, the couple themselves.
Store-Bought vs Personalised vs DIY
A high-quality, store-bought card can be a lifesaver when you're short on time. I find the best ones have premium paper, unique artwork, or a simple, elegant design that leaves you plenty of room to write your own message. This is a great, polished option for a colleague or a more distant relative.
Personalised cards are where you can add that specific touch a generic card just can't match. For a first anniversary, a custom card featuring a favourite photo from the wedding day is a classic for a reason. It turns the card into an instant keepsake.
A thoughtful card doesn’t need to be elaborate. Its real value comes from how well it reflects the couple you're celebrating. A simple, well-chosen card with a sincere message will always mean more than a generic one.
Of course, the card is often part of a bigger picture, especially if there's a gift registry to consider.
This flowchart can help you figure out how the card and gift fit together. As you can see, the card is always a good idea, but its role can shift depending on the gift situation.
Getting Creative With DIY Anniversary Cards
If you’re feeling crafty, nothing says "I care" quite like a DIY card. It shows a level of effort and thoughtfulness that people really appreciate, and you don’t need to be a professional artist to make something wonderful.
Here are a few simple ideas I’ve seen work beautifully:
First Anniversary Paper Theme: The traditional gift for a first anniversary is paper. A clever way to honour this is to use a small, decorative piece of their actual wedding invitation on the front of your card.
Photo and Memory Collage: Print out a few small photos of happy memories you’ve shared with the couple. Arranging them on the front of a blank card creates a mini-collage that tells a lovely story.
Hand-Stamped Designs: You can pick up simple rubber stamps with classic motifs like hearts, leaves, or the couple’s initials. Use them to create an elegant pattern—a touch of metallic ink really makes it pop.
For people you’re really close to, like your parents or best friends, a DIY card can be a powerful way to celebrate their journey. It’s a gesture that says you took the time not just to buy a card, but to create a one-of-a-kind tribute to their love.
Writing a Message That Goes Beyond 'Happy Anniversary'
We’ve all been there. You’ve picked the perfect card, and now you’re staring at that intimidating blank space inside, pen in hand. It’s tempting to just write ‘Happy Anniversary!’ and be done with it, but putting in a little extra thought is what transforms a simple card into a treasured keepsake.
The secret isn’t writing an essay; it's about being personal and sincere. What you’d write for your partner is worlds away from a message for your parents or a colleague. Let's walk through how to find the right words for any situation, making your anniversary wedding cards truly memorable.
A Simple Framework for a Heartfelt Message
Whenever I get a bit stuck, I fall back on a simple, four-part thought process. It’s not a rigid formula, but more of a gentle guide to help organise your feelings into a message that flows naturally and feels complete.
Think of it as a loose recipe you can always adapt.
A warm opening: Start with a genuine greeting that sets a happy, celebratory mood.
A specific memory or quality: This is the heart of your message. Mention a fond memory, an inside joke, or a quality you truly admire about their partnership.
A wish for their future: Look ahead with a simple, kind wish for their continued happiness on their journey together.
A sincere closing: End with a closing that reflects the warmth of your opening.
This approach gives you a clear path from start to finish, helping you avoid clichés and write something that really comes from you.
Adapting Your Tone for Different Relationships
The real magic happens when you tweak your message to fit the recipients. A note to your partner can be filled with private jokes and romantic memories, whereas a card for a workmate should be warm but professional.
For example, when writing to your best friend and their spouse, you can be much more casual and effusive. You might recall a hilarious moment from their wedding or a time you saw them working together as a perfect team.
The most impactful anniversary messages connect on a personal level. Your unique connection to the couple is the best tool you have for writing something they'll want to read again and again.
To make this even easier, here are some practical thought-starters.
Anniversary Message Ideas by Relationship
This quick-reference guide offers a few ideas to get your own thoughts flowing, with suggestions for tone and message starters for different people in your life.
Relationship to Couple
Suggested Tone
Message Starter Idea
Your Partner
Intimate & Romantic
"I can't believe it's been another year. It feels like just yesterday we were…"
Parents/Grandparents
Respectful & Loving
"Your marriage has always been an inspiration to us. We've learned so much from…"
Close Friends
Fun & Heartfelt
"So happy to be celebrating you two today! I'll never forget when you both…"
Sibling & In-Law
Warm & Personal
"Watching your family grow has been such a joy. Wishing you both another year of…"
Colleague/Boss
Professional & Warm
"Congratulations on your anniversary! Wishing you and your family all the best on…"
Ultimately, don't overthink it. The best messages are always the authentic ones. Just write in your own voice, share a genuine sentiment, and your good wishes will absolutely shine through.
Getting the Timing and Etiquette Right for Anniversary Cards
We’ve all felt that pang of dread when a card arrives a week late. When it comes to anniversary cards, timing really can make all the difference, turning a thoughtful gesture into one that feels like an afterthought. The goal is simple: have your card land in their letterbox on or just before the actual anniversary.
For most of us here in Australia, that means popping it in the mail about 3-5 business days ahead of time. If you’re sending it over to a different state or out to a rural address, it’s smart to give it an extra day or two. Trust me, it’s always better to be a little early than a day late.
Which Anniversaries Should You Acknowledge?
While a card is a lovely surprise any year, some anniversaries carry a bit more weight. These are the big ones where close friends and family will almost certainly be expected to send their well wishes.
You can think of these as the major signposts in a marriage:
The 1st Anniversary: That first year is a huge milestone. A "paper" anniversary card shows you're right there celebrating with them.
The 10th Anniversary: Hitting the decade mark is a massive achievement that absolutely deserves a round of applause.
The 25th Anniversary: The Silver Anniversary is a classic, marking a quarter-century of partnership.
The 50th Anniversary: Reaching the Golden Anniversary is just incredible and definitely calls for a special acknowledgement.
That said, don't feel limited to these years! A card for a 7th or 12th anniversary can be a wonderful, unexpected surprise that really makes a couple feel seen. And what about couples who eloped? A heartfelt card is one of the best ways to show your support and celebrate their union, especially if you couldn't be there in person.
A thoughtful anniversary card isn’t just for the big milestones. It’s a way to honour a couple's partnership any year, reminding them that their love is seen and celebrated by others.
How to Mention a Registry Contribution
More and more couples are setting up gift registries for big anniversaries, often to fund experiences or home projects. When you contribute, mentioning it in your card is a beautiful way to connect your practical gift with your warm wishes. The trick is to do it with a bit of grace.
Instead of just writing, "Here's the money for your registry," try to connect it to what they’re actually saving for. This small touch makes a cash gift feel so much more personal and thoughtful.
Here are a few ways I’ve seen it done beautifully:
"We were so happy to contribute to your travel fund and can't wait to see the photos from your adventures!"
"So excited for you to get your new outdoor furniture! We were thrilled to put a little something towards it."
"Happy Anniversary! We’re so delighted to help you get one step closer to that amazing kitchen renovation."
This ties the sentiment of the card directly to the gift, making the whole gesture feel more complete. It shows you didn’t just contribute, but you paid attention to their shared dreams and are cheering them on.
Connecting Your Card to a Meaningful Gift
A great anniversary wedding card doesn't just sit next to the gift; it bridges the gap between your words and your present. When the message and the gift feel connected, the whole gesture becomes so much more thoughtful and memorable.
While traditional anniversary gifts by year—paper for the first, tin for the tenth—have a certain charm, modern celebrations often look a little different. Many couples today prefer contributions towards big-picture goals, whether that’s a home renovation, a dream holiday, or simply building their future together.
This move towards collective, practical gifting is undeniable. A huge 84% of marrying couples in Australia now use a wishing well, often alongside a gift registry. The trend carries over to anniversaries, too, where close family and friends might spend around AUD 236 on gifts, often using platforms that make group contributions easy.
Making Cash Gifts Personal and Meaningful
Let's be honest, the big challenge with a cash gift or registry contribution is making it feel as personal as a hand-picked present. And that’s where your card becomes absolutely essential. It’s your chance to add the context and emotion that turns a practical gift into something deeply personal.
The secret is to use your message to paint a picture. Instead of just saying you've contributed, tell them why you're excited for them. Connect your gift directly to their dream.
Your card has the power to transform a monetary gift. By specifically mentioning what your contribution is for, you show you're not just giving money—you're investing in their happiness and their shared dreams.
If you're looking for inspiration for a physical present to go alongside a registry contribution, or even a beautiful standalone item, checking out ideas for the best anniversary gifts for a wife can spark some great thoughts.
Wording Examples for Registry Contributions
So, what does this actually look like on paper? It’s all about using warm, specific, and forward-looking language. Tying your gift to a tangible outcome makes all the difference.
Here are a few ways you could phrase your message when contributing through a platform like an EasyRegistry wedding gift registry:
For a Home Project: "Happy Anniversary! We were so thrilled to help you build your new deck through your home fund. We can’t wait to come over for a BBQ out there soon!"
For a Travel Fund: "Wishing you both the most incredible anniversary. We were so excited to contribute to your Italy trip and can't wait to see the photos of you two eating all the pasta!"
For a Hobby or Experience: "Cheers to another amazing year! We were so happy to put a little something towards your new paddleboards. Hope you have the best time out on the water together."
This simple tweak honours the couple's wish for a practical gift while still delivering the personal warmth that anniversary wedding cards are all about. It shows you’re paying attention to what's important to them and you're cheering them on, which makes both the card and the gift feel truly significant.
Answering Your Top Anniversary Card Questions
Even after you've picked the perfect card, a few tricky etiquette questions can pop up. Let's run through some of the most common scenarios people ask about when it comes to anniversary wedding cards. Here’s some straightforward advice to help you get it right every time.
Is an E-card Ever Okay for an Anniversary?
Look, an e-card is definitely better than nothing at all. But when it comes to close friends or family, a physical card just has more heart. It’s something they can prop up on the mantlepiece, keep in a memory box, and revisit. That tangible quality really makes a difference.
If you’re pressed for time or sending it across the globe, an e-card can work in a pinch. Just make sure it’s a tasteful, high-quality one. My advice? Follow it up with a quick phone call to add that personal, warm touch that a digital message can sometimes lack.
What if the Couple Had a Tough Year?
This is where honesty and empathy are your best tools. A generic ‘Happy Anniversary!’ message can ring hollow if you know they’ve been through a rough patch. Instead, focus on their strength and resilience as a couple.
A message like this lands much better: "Celebrating you both and the incredible strength of your bond. Your commitment to each other is truly an inspiration. Wishing you a year of peace and joy ahead."
This acknowledges their journey without getting into specifics, offering sincere support and hope for the future. It shows you see them and you care.
Is a Card Really Necessary for a First Anniversary?
Yes, absolutely! The first anniversary is a massive milestone. Sending a card is a simple but powerful way to show the couple you're celebrating right alongside them. It tells them you remember their big day and you’re cheering on their marriage. Trust me, it’s a small gesture that has a huge impact and is always appreciated.
For this first big celebration, you might want to pair your card with a little something extra. For some great inspiration, check out these unforgettable first wedding anniversary ideas.
How Do We Mention a Group Gift in One Card?
This comes up a lot, especially with office gifts or when a bunch of friends go in together on something. The easiest way to handle it is to have one person write the main message on behalf of the group. Then, everyone else can just add their signature.
The message could say something simple and sweet like:
"We all pitched in for your anniversary gift through your registry and are so excited for you to enjoy [the experience or item]! Wishing you the happiest anniversary from all of us."
This makes the gift feel like a unified gesture from everyone. If you're still curious about how group gifting works with a registry, you’ll find plenty of answers in our comprehensive https://www.easyregistry.com.au/frequently-asked-questions.
Sending a birthday wish is a timeless tradition, but a physical postcard offers a personal touch that truly stands out. Instead of buying generic cards from the shop, creating your own allows for complete customisation, making the recipient feel uniquely celebrated. It's also a surprisingly budget-friendly and sustainable choice, perfect for sending heartfelt greetings without the extra cost or waste. This is especially meaningful for milestone events, where the value of personalised items extends beyond just a card. For example, creating cherished mementos like personalized birthday keepsakes for a child's first birthday highlights how a bespoke gift can become a treasured memory.
This guide is your direct route to the best online resources for high-quality, completely free printable birthday postcards. We have organised a curated list of top-tier platforms like Canva, Adobe Express, and Microsoft Create, ensuring you can find the perfect template for any style or occasion. For each resource, you'll find a clear overview, direct links, and a preview of what to expect, helping you quickly select the best tool for your needs. We'll show you how to find stunning designs and achieve a professional finish right from your home printer.
1. Canva – Free Postcard Maker
Canva stands out as a go-to choice for creating free printable birthday postcards with its browser-based design tools and extensive template library. It’s perfect for anyone needing a high-quality, personalised design in a hurry, without needing to install complex software. The platform offers a significant number of free, professionally designed templates that you can adapt in minutes.
What makes Canva so effective is its balance of simplicity and control. The drag-and-drop interface is intuitive, and its free plan provides strong tools for adjusting typography, colours, and layouts. You can upload your own photos or choose from Canva’s free stock images and graphics to make the postcard truly unique.
Key Features & How to Use Them
Hundreds of Free Templates: Start by searching "birthday postcard" in the template library. Filter by "Free" to see all the options available without a paid subscription.
Custom Dimensions: Before starting, use the "Custom size" button to set your postcard dimensions. Standard Australian postcard size is 148 x 105 mm. Setting this ensures your design prints correctly.
Print-Ready PDF Export: When you’re finished designing, click "Share," then "Download." Select "PDF Print" as the file type and tick the box for "Crop marks and bleed." This adds the necessary guides for precise trimming after printing at home.
Add Registry or Gift Information: If you're sending a postcard for a group celebration or a first birthday, you can add a QR code that links directly to a gift registry. The platform has a built-in QR code generator, making it simple to direct guests to a page with gift ideas, which can be useful when you explore different sample registries to see what works for your event.
Pros
Cons
Very fast and easy for last-minute designs
Some premium graphics require a paid account
Strong typography and colour tools on the free plan
Print colour accuracy depends on your home printer
Exports print-ready PDFs with bleed and crop marks
Requires an internet connection to use
Canva offers the option to order prints directly from them, but downloading the design as a PDF for home printing is completely free. This makes it an exceptionally flexible and cost-effective solution for anyone looking to create memorable, do-it-yourself birthday greetings.
Adobe Express is a powerful, browser-based design tool that provides an excellent alternative for creating free printable birthday postcards. Backed by the design authority of Adobe, it offers a collection of clean, modern templates that can be easily adapted for postcard use. It’s ideal for users who appreciate a polished aesthetic and want a straightforward editing experience on either desktop or mobile.
The platform shines with its intuitive interface and high-quality design assets. While many templates are presented as folded cards, its "Resize" tool makes it simple to convert them to a standard postcard format. The free plan is quite generous, giving you access to thousands of templates, Adobe Fonts, and core editing tools needed to produce a professional-looking postcard without any cost.
Key Features & How to Use Them
Ready-Made Birthday Templates: Begin by browsing the "Birthday Card" templates. Don't worry that they aren't postcard-sized initially; focus on finding a design you like.
Resize for Postcard Format: Once you’ve selected a template, find the "Resize" tool. You can input custom dimensions, such as 14.8 cm x 10.5 cm, to instantly reformat the design into a standard Australian postcard.
Print-Ready File Export: To prepare your file for home printing, select "Download" and choose either PNG or JPG for a high-quality image file. For best results, ensure your printer settings are configured to "high quality" and you select the correct paper size.
Photoshop Integration for Pros: For those with an Adobe Creative Cloud subscription, Adobe also offers a dedicated "Birthday photo postcard" template for Photoshop. This path provides maximum control over print-specific details like CMYK colour profiles and resolution, ensuring print-perfect output.
Pros
Cons
Clean, modern templates with strong typography
Some premium templates and assets require a paid plan
Works seamlessly on both desktop and mobile devices
No built-in option to add bleed and crop marks
Adobe Express offers a fantastic free solution for designing stylish birthday postcards. By downloading your creation as a high-resolution image file, you can easily print at home, making it a flexible and cost-effective choice for personalised greetings.
3. Microsoft Create – Free Postcard Templates (Word/Designer)
For those comfortable with classic office software, Microsoft Create offers a straightforward approach to crafting free printable birthday postcards. It provides a curated gallery of templates that are editable in familiar programs like Microsoft Word or the newer, web-based Microsoft Designer. This makes it an accessible choice for users who prefer working in an offline environment or are already proficient with Microsoft’s suite of tools.
What sets Microsoft Create apart is its practical integration with standard printing supplies. Many templates are designed to align perfectly with specific Avery postcard stock numbers, removing the guesswork from printing and cutting. This focus on compatibility with common A4 paper sizes and pre-scored sheets makes it excellent for producing multiple postcards accurately at home or in an office setting.
Key Features & How to Use Them
Template Gallery: Visit the Microsoft Create postcard section and browse for a birthday-themed design. You can choose to either "Customise in Designer" for web-based editing or "Download" to open and edit the template directly in Microsoft Word.
Avery Stock Compatibility: Check the template description for Avery product compatibility. This tells you exactly which pre-cut postcard paper to buy for seamless printing, saving you from manual trimming.
Word-Based Customisation: If using Word, you can easily replace placeholder text with your birthday message and insert photos using the "Insert > Pictures" function. The layout is often built with text boxes and shapes that are simple to manipulate.
Gift Registry Links: For celebrations like a first birthday or a significant milestone, adding a link to a gift registry is a thoughtful touch. You can simply add the URL as text, which is especially handy for an online gift registry where guests can contribute to a group gift.
Pros
Cons
Familiar Office tools make editing easy for most users
Fewer boutique or highly stylised designs
Great for batch printing on pre-scored postcard sheets
Some Microsoft Designer features require sign-in
Templates are optimised for standard A4 printing
Editing in Word can be less intuitive for complex layouts
Microsoft Create is an ideal solution for anyone looking for reliability and ease of use over flashy design features. The ability to download and work on your free printable birthday postcards offline in Word offers a level of convenience that browser-only platforms can't match.
Avery’s Design & Print Online editor is built for precision, making it an excellent choice for creating free printable birthday postcards when accuracy is key. This browser-based tool is specifically designed to work seamlessly with Avery's own postcard cardstock sheets, ensuring your designs align perfectly for home printing. It's a practical solution for anyone who wants to print multiple postcards at once without worrying about front-to-back alignment issues.
The platform’s strength lies in its functional, product-first approach. While its interface is more utilitarian than design-focused alternatives, it excels at its core purpose: generating perfectly formatted layouts for Avery products. You can choose a pre-designed birthday template or start from scratch, and the editor provides clear guidance on layouts and printing, making it great for batch-producing invitations or thank you cards.
Key Features & How to Use Them
Template Alignment by Product Number: Begin by selecting the product number that matches the Avery postcard sheets you have. This automatically sets up the correct dimensions and multi-up layout, saving you from manual setup.
Front/Back Design Alignment: The editor allows you to design the front and back of your postcards within the same project. Its alignment tools guarantee that when you print double-sided on Avery’s pre-scored sheets, everything lines up correctly.
Mail Merge for Multiple Recipients: For large birthday parties, you can use the mail merge feature to automatically populate addresses from a spreadsheet. This is a significant time-saver, creating personalised postcards for each guest without manual data entry.
Postage and Size Guidance: The platform offers useful notes regarding standard postcard sizes and postage considerations. Although some details are geared towards the US market, the principles of size and weight are universally helpful for mailing.
Pros
Cons
Excellent accuracy for front/back alignment on Avery cardstock
Interface is utilitarian compared to design-centric tools
Templates cover classic multi-up layouts for batch printing
Some guidance is specific to US Letter paper and USPS
Mail merge feature is great for sending to many guests
Fewer creative graphics and fonts than other platforms
While Avery offers a paid printing service, downloading your design as a PDF to print at home is completely free. This makes it an incredibly reliable and efficient tool for anyone prioritising print accuracy and consistency for their birthday postcards.
5. Brother Creative Center – Free Printable Templates
Brother Creative Center is a standout option for those who want a straightforward, completely free resource for printable templates. While known for its printers, Brother offers a robust online portal filled with cards, mailers, and postcard-style layouts designed for reliable home printing. This platform is perfect for anyone needing free printable birthday postcards without navigating subscriptions or paid assets.
The primary advantage of the Brother Creative Center is its simplicity and focus on function. Its entire library is free to download and use, eliminating the confusion of premium-only designs. You can choose to download a ready-to-print PDF for a quick solution or use the in-browser customiser to add your own text, photos, and clipart.
Key Features & How to Use Them
100% Free Library: Every template on the site is free. Navigate to the "Cards" or "Invitations" section and search for "birthday" to find suitable postcard-style designs. You never have to worry about accidentally selecting a paid element.
In-Browser Customiser: Once you select a template, you can click "Customise" to open a simple editor. This allows you to change text, upload a personal photo, and add graphics directly in your browser before downloading the final file.
Ready-to-Print PDF Downloads: For ultimate convenience, many designs are available as direct PDF downloads. This is ideal for last-minute needs where you just want to print a pre-made design and write a message by hand.
Optimised for Home Printing: Since the templates are created by a printer manufacturer, they are designed to work well with standard A4 paper and home printers. This reduces the guesswork involved in getting a good quality print.
Pros
Cons
Entire library is completely free to use and download
Fewer highly stylised birthday postcard designs
Simple, reliable output optimised for home printers
Editor is more basic than full-featured platforms
No account or sign-up required for downloads
Limited selection of modern or trendy aesthetics
Brother Creative Center is an excellent, no-fuss choice for families and individuals who prioritise ease of use and cost-effectiveness. It delivers on its promise of free, accessible creative templates that print reliably every time.
Template.net provides a dedicated section for birthday postcards, offering a great starting point for those who prefer working with familiar software like Microsoft Office or Adobe Creative Suite. This platform is a valuable resource for finding free printable birthday postcards that you can download and edit offline. It mixes free and premium designs, so you can easily grab an editable file that fits your specific workflow.
What makes Template.net a strong choice is its file format versatility. Instead of being locked into a single online editor, you can download templates in formats like DOCX, PSD, PDF, and even Google Docs or Slides. This flexibility is perfect for users who want complete control over the design using programs they already know well. The site also offers its own in-browser editor for quick adjustments.
Key Features & How to Use Them
Multi-Format Downloads: Look for the "Free" label on a template thumbnail. Once you select a design, you can choose your preferred file format for download, such as PSD for Photoshop or DOCX for Microsoft Word.
Complete Front and Back Layouts: Many templates include artwork for both sides of the postcard, saving you the effort of designing the back from scratch. This makes it easier to achieve a professional, cohesive look.
In-Browser Customisation: If you don't have design software, you can use Template.net's online editor. After selecting a template, click "Edit Online" to change text, colours, and images before downloading the final PDF for printing.
Add Gift Registry Details: The downloadable files make it simple to add text or a QR code linking to a gift registry. If you're organising a party and guests are asking for ideas, providing a link to a birthday registry can be a helpful and polite way to guide them.
Pros
Cons
Provides editable files for Office and Adobe
Not all templates are free; requires checking labels
Quick way to get a complete postcard layout
May require an account to download some files
Many templates include front and back designs
The in-browser editor is less powerful than dedicated tools
Template.net is an excellent option for those who want a structured template to customise in their favourite desktop application. Just be sure to filter or look for the "Free" tag to avoid any costs.
7. Rose Clearfield – Free Printable Vintage Birthday Postcards
For those seeking a touch of nostalgia, Rose Clearfield offers a beautifully curated collection of free printable birthday postcards with an authentic vintage aesthetic. This resource is perfect for anyone wanting a distinctive, ready-to-print postcard front without the need for complex design software or sign-ins. The site provides high-resolution, royalty-free vintage postcard images that you can download and print immediately.
What makes this collection special is its direct-to-download approach and unique historical charm. Unlike template-based platforms, this is a straightforward gallery of classic artwork. You simply choose an image you like, download the file, and print it. This simplicity is ideal for creating charming, old-world style greetings that stand out from modern designs.
Key Features & How to Use Them
High-Resolution Vintage Images: The postcards feature genuine vintage artwork, including classic floral motifs, antique illustrations, and retro birthday greetings, all scanned at high quality for clear printing.
Multiple Size Options: Each design is provided in its original dimensions as well as pre-formatted for standard 4×6 inch postcards and larger 8×10 inch prints, giving you flexibility for different uses.
Immediate Download: Simply click on the text link for the size you want, and the image will open in a new tab, ready for you to right-click and "Save Image As…". There are no accounts or logins required.
Create a Custom Back: Since these downloads are for the postcard front only, you will need to create the back yourself. You can either print on the reverse side of your cardstock with a standard postcard layout (a vertical line down the middle with space for a message and address) or leave it blank to write by hand.
Pros
Cons
Truly free with no editor or sign-in needed
You must create or source the postcard back layout yourself
Distinctive vintage aesthetic for a unique look
Style variety is limited mainly to vintage themes
High-resolution files ensure quality prints
Not a design tool; offers finished images only
Rose Clearfield’s collection is an excellent source for anyone looking to produce beautiful, antique-style free printable birthday postcards with minimal fuss. It’s a fantastic option if you value authentic charm over modern customisation tools.
Ideal for vintage postcard fronts; advantage: royalty?free images — create or pair with a custom back
From Screen to Mailbox: Mastering Your DIY Postcard Project
You've explored a powerful collection of free tools, from the design-rich environments of Canva and Adobe Express to the practical, template-driven options from Microsoft Create and Avery. We've journeyed through the specialised offerings of Brother Creative Center, the extensive library at Template.net, and the unique vintage designs from Rose Clearfield. Now, you are fully equipped to create beautiful, heartfelt, and entirely unique free printable birthday postcards.
The path from a digital file to a cherished physical keepsake is straightforward when you focus on a few key details. The real success of your project hinges not on complex design skills, but on thoughtful choices that reflect the recipient and the occasion.
Key Takeaways for a Perfect Postcard
To ensure your efforts result in a professional-quality postcard, remember these core principles:
Platform Selection is Personal: Your choice of tool should align with your comfort level and creative goals. If you love complete artistic control and modern designs, Canva or Adobe Express are your best bet. For quick, reliable templates that integrate with everyday software, Microsoft Create is a solid choice. For specific printing needs, Avery and Brother Creative Center offer purpose-built solutions.
Paper Makes a Difference: The tactile experience of a postcard is just as important as its visual design. Always opt for a sturdy cardstock, ideally between 200 and 300 gsm. This weight provides the necessary rigidity to survive the mail and gives your postcard a premium, substantial feel.
Printing with Precision: Don't let your beautiful design be let down by poor printing. Before you print a full batch, run a single test print. Check your printer's settings for options like "high quality" or "photo printing," and ensure you've selected the correct paper type (e.g., "heavy cardstock" or "matte").
Adding a Modern, Functional Touch
Beyond the visual design, you can make your postcard even more memorable and useful. A simple QR code, easily generated and added in most of the design tools we've covered, can open up a world of possibilities.
Pro Tip: Link your QR code to a shared Google Photos album filled with memories, a surprise video message uploaded to YouTube, or a curated Spotify playlist. This small addition transforms a static postcard into an interactive experience.
For milestone birthdays or celebrations where guests may be asking about gifts, a QR code can also discreetly and helpfully guide them. By linking directly to a gift registry, you make the process effortless for friends and family, ensuring the birthday person receives something they truly want or need. This is particularly useful for organising group gifts for a significant item.
Ultimately, creating your own free printable birthday postcards is about more than just saving money. It’s an opportunity to infuse a personal touch and genuine thought into your well-wishes. Armed with the right tools and these practical tips, you can confidently turn a simple piece of cardstock into a memorable token of affection that will be treasured long after the candles are blown out.
Planning a milestone birthday and want to make group gifting simple? With EasyRegistry, you can create a flexible online wish list for any occasion, allowing friends and family to contribute towards bigger gifts or choose from a range of desired items. Link your registry to your DIY postcard with a simple QR code for a seamless and polite gifting experience.