Before you even dream about fonts, foils, and fancy paper stocks, let's talk about the essentials. A little bit of planning upfront is the single best thing you can do to make printing your wedding invitations a breeze, not a frantic, last-minute nightmare. Getting these fundamentals sorted first saves you from stress and costly mistakes down the track.
Laying the Groundwork for Your Wedding Invitations
Think of this early stage as building the foundation for your house. It’s not the most glamorous part, but without it, everything else falls apart. A clear plan acts as your blueprint, guiding every decision and keeping the process enjoyable rather than overwhelming.
First up: your budget. Be honest with yourselves about what you can comfortably spend. The cost of wedding stationery can swing wildly, from a couple of hundred dollars for a beautiful DIY project to several thousand for a custom-designed, letterpress suite. Knowing your number from the get-go immediately narrows your choices and makes decisions about printers, paper, and finishes much easier.
Finalising Your Guest List and Timeline
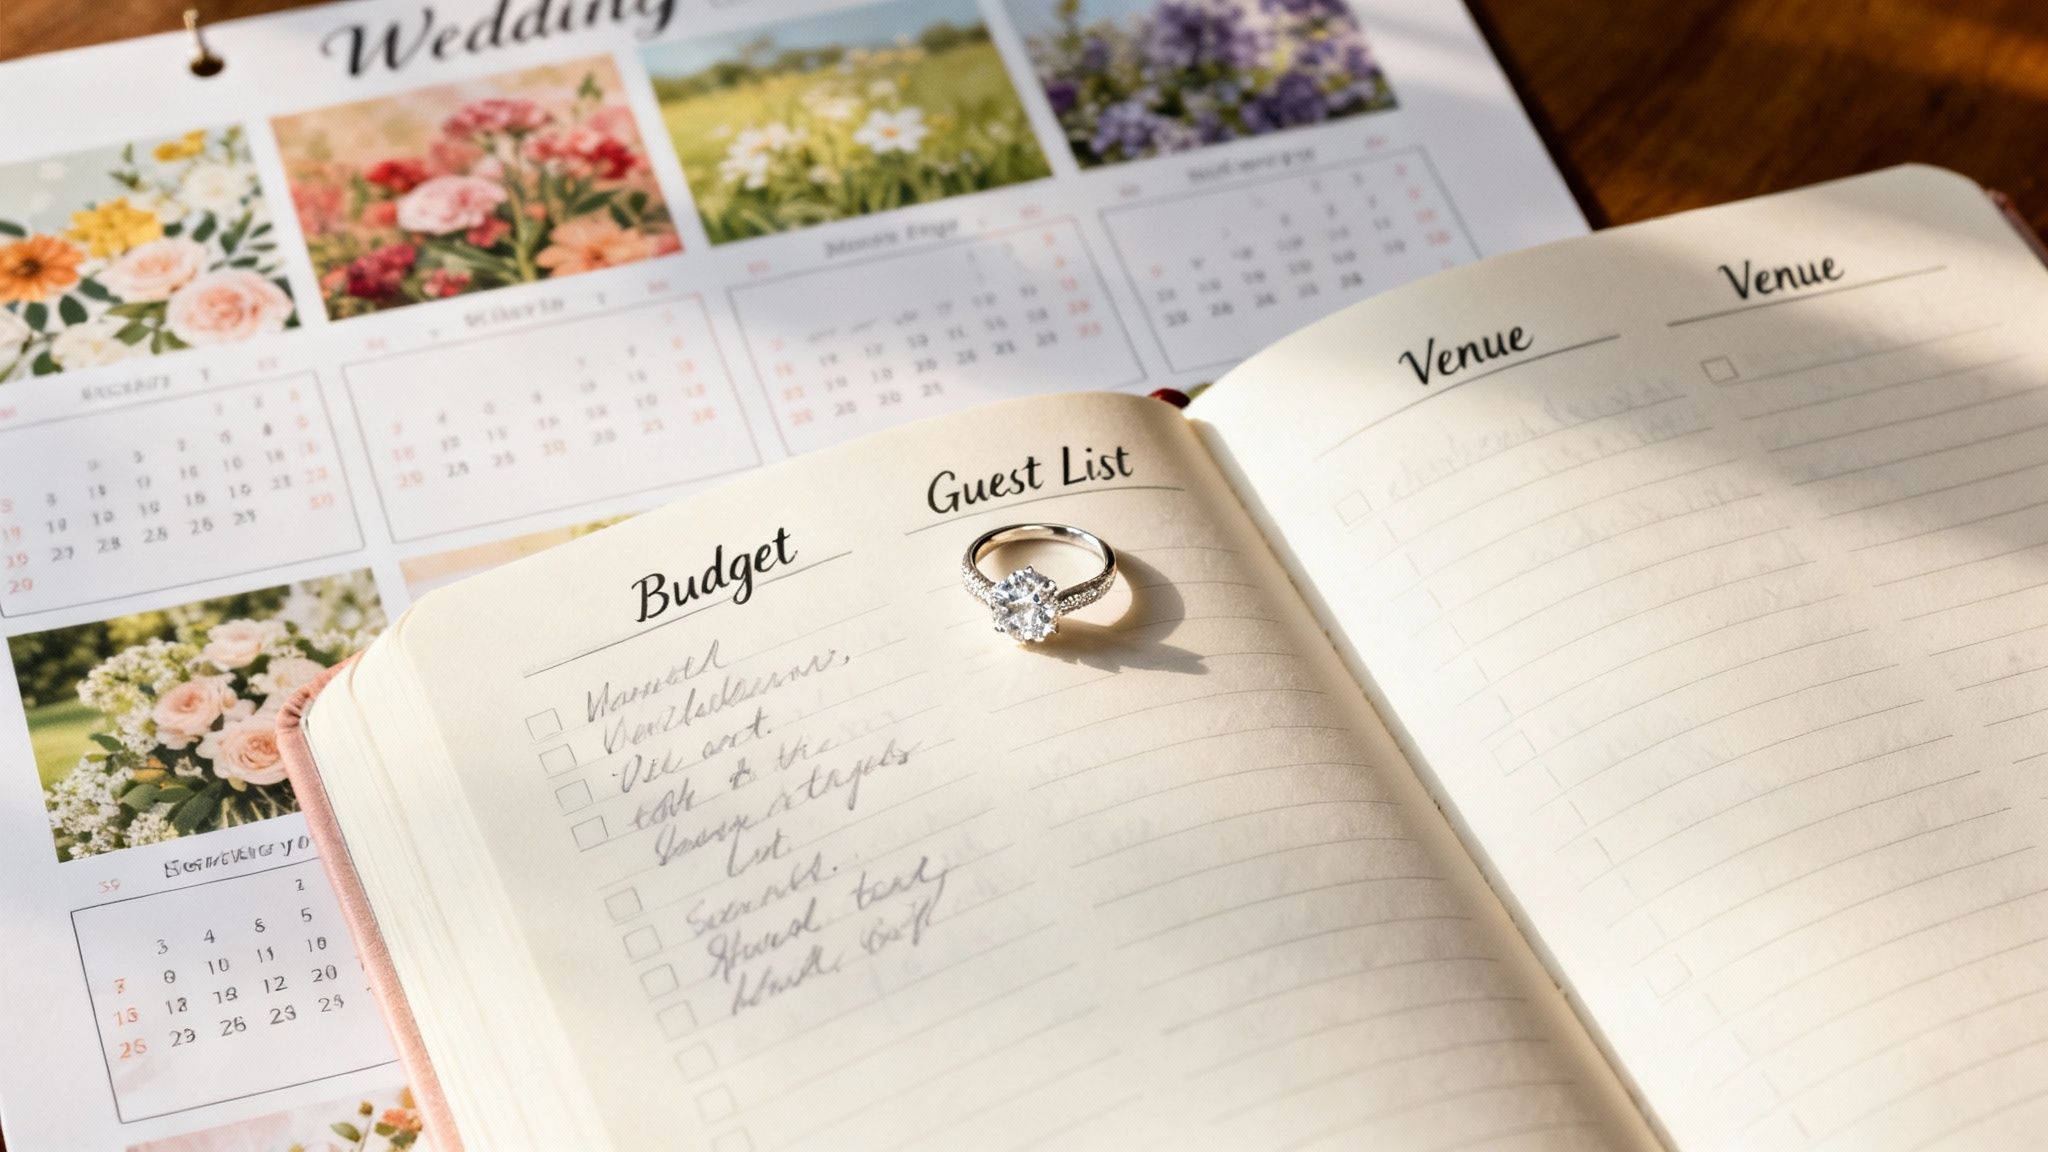
Once you've got a budget, it's time to lock in that guest list. This is non-negotiable, as your final numbers dictate how many invitations you actually need to print. The key here is to count households or couples, not individual people. Most families or couples living together will only need one invitation.
My go-to advice? Always order 10-15% extra. You’ll want a few for keepsakes, a couple for your photographer to capture on the day, and a buffer for any last-minute additions or post office mishaps. Trust me, it’s much cheaper to order a few extra upfront than to do a small, expensive reprint later.
With your quantity sorted, you can work out a realistic timeline. The trick is to work backwards from your wedding date. As a rule of thumb, you want to pop your invitations in the mail 8-12 weeks before the big day. This gives your guests plenty of notice, especially anyone travelling from interstate or overseas. That means you need to have them designed, printed, and addressed well before that deadline.
A well-structured timeline is your best defence against stress. It gives you breathing room for design tweaks, proofing, printing, and addressing without that rushed, panicked feeling.
Professional Printing vs a DIY Approach
This is one of the first big decisions you'll make. Do you hand it over to the experts or roll up your sleeves and do it yourselves? There are pros and cons to both, and the best choice really comes down to your budget, skills, and how much time you have.
Professional Printers: These guys are the pros for a reason. They offer incredible expertise, access to beautiful, high-quality materials, and can handle specialised techniques like letterpress or foil stamping. They manage all the technical stuff, delivering a flawless result. This is your best bet for a premium, stress-free finish.
DIY Printing: Going DIY gives you total creative freedom and can be a huge win for your budget. It’s perfect for crafty couples who know their way around design software and have the time to print, cut, and assemble everything themselves.
There's also a fantastic middle ground. You could design your own suite using a user-friendly platform like Canva and then simply send the print-ready files to a professional online printer. This gives you the creative control of DIY with the polished, high-quality finish of a pro job.
Getting these foundational elements sorted from the start is what makes the journey to print wedding invitations a smooth and genuinely exciting part of your wedding planning.
Getting Your Design File Print-Ready
This is where your vision really starts to take shape. Whether you’ve hired a designer, are tweaking a template, or are a DIY pro, getting your digital file ready for the printer is probably the single most important step in the whole process.
Nailing the technical details here is what separates a professional, polished invitation from one that just looks… off. It’s all about making sure what you see on your screen is exactly what you get in your hands.
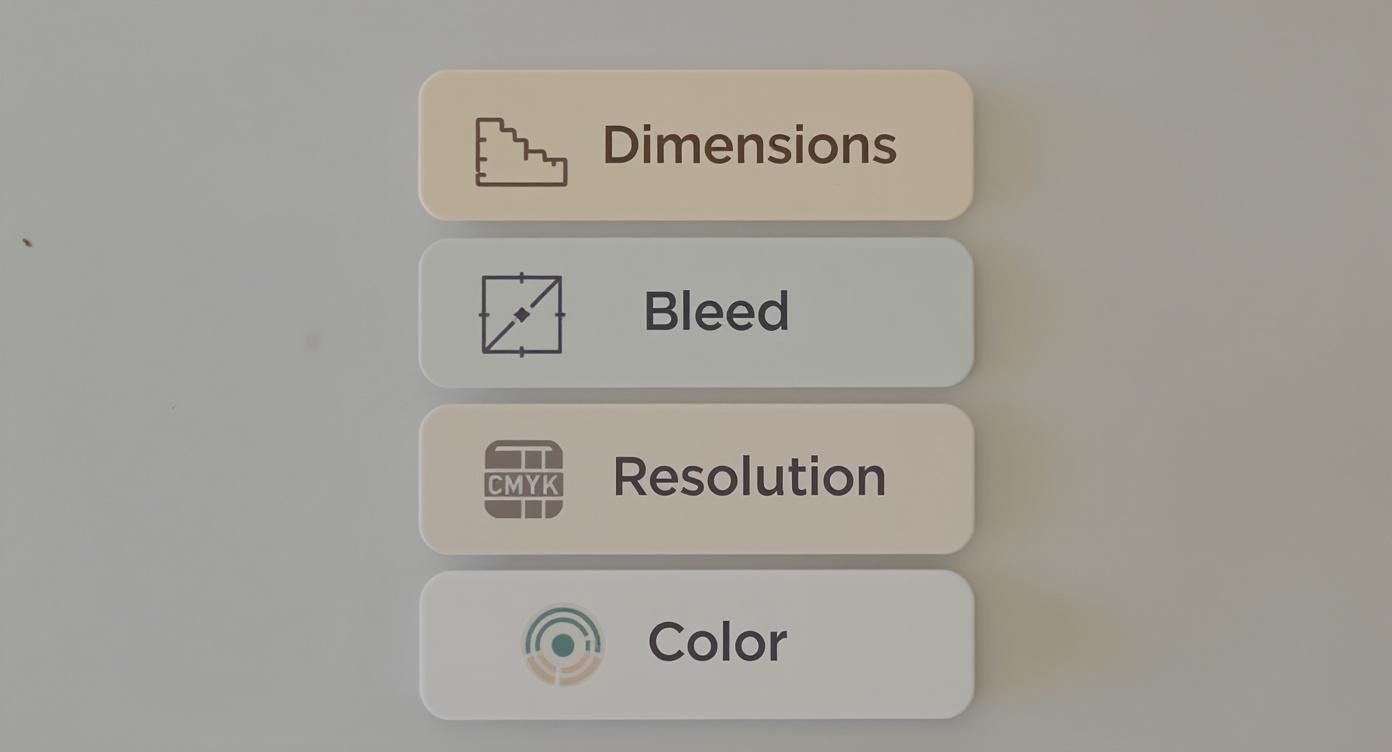
Setting Up Your Canvas: Dimensions and Safe Zones
Before a single word of text or a swirl of calligraphy goes on the page, you need to set up your document to the correct physical size. In Australia, A5 (148 x 210 mm) is a popular choice, but the slightly more classic 5×7 inch (127 x 178 mm) size is also very common. Don't guess—check with your printer first to confirm the exact dimensions they work with.
Once your artboard is sized correctly, you need to think about the safe zone. This is a little internal buffer, usually about 3-5mm from the edge of the card. All your critical information—names, dates, venue details—must stay inside this zone. Anything outside of it risks getting lopped off when the printer trims the cards, and nobody wants half a phone number.
The Secret to a Professional Finish: Bleed and Trim Marks
Ever received a flyer with a weird, thin white sliver along the edge? That’s what happens when a design file doesn't have a bleed. A bleed is simply the background colour or image extending a little bit past where the final cut will be.
Printers can't print right to the very edge of a card. Instead, they print on a much larger sheet and then trim everything down to size. The bleed is your safety net, ensuring that even if the cutting blade is a fraction of a millimetre off, you won't see any jarring white paper.
The Golden Rule: The industry standard is a 3mm bleed on all four sides.
What This Means: Your design file will be slightly bigger than your final invitation. For an A5 card (148 x 210 mm), the file you send to the printer will actually be 154 x 216 mm.
Showing Them Where to Cut:Trim marks are tiny little lines in the corners of your file that guide the printer's cutting machine. Most design programs like Adobe InDesign or Canva can add these for you automatically when you export your final file.
Think of the bleed as a small insurance policy for your design. It's a simple step that guarantees a professional, edge-to-edge finish and prevents any unwanted surprises when your invitations arrive.
Resolution and Colour: The Non-Negotiables
The sharpness and clarity of your finished invitation comes down to one number: 300 DPI (dots per inch). This is the standard resolution for high-quality printing. If you pull an image from a website (which is usually 72 DPI), it will look fuzzy and pixelated on paper. Always start with high-resolution images and graphics.
Just as crucial is the colour mode. Your computer screen creates colours using light (RGB – Red, Green, Blue). A printer creates colours using ink (CMYK – Cyan, Magenta, Yellow, Black).
If you design in RGB, the colours can shift quite dramatically when they're converted for printing. That vibrant, electric blue on your screen might turn into a dull, flat navy. To avoid disappointment, set your design software to CMYK mode from the very beginning. For a truly flawless and impactful design, remember that mastering color theory can help you anticipate how your chosen palette will translate from screen to paper.
By getting the dimensions right, adding a bleed, using high-resolution assets, and setting the correct colour mode, you're essentially handing your printer a perfect blueprint. It gives them everything they need to bring your vision to life just as you imagined it.
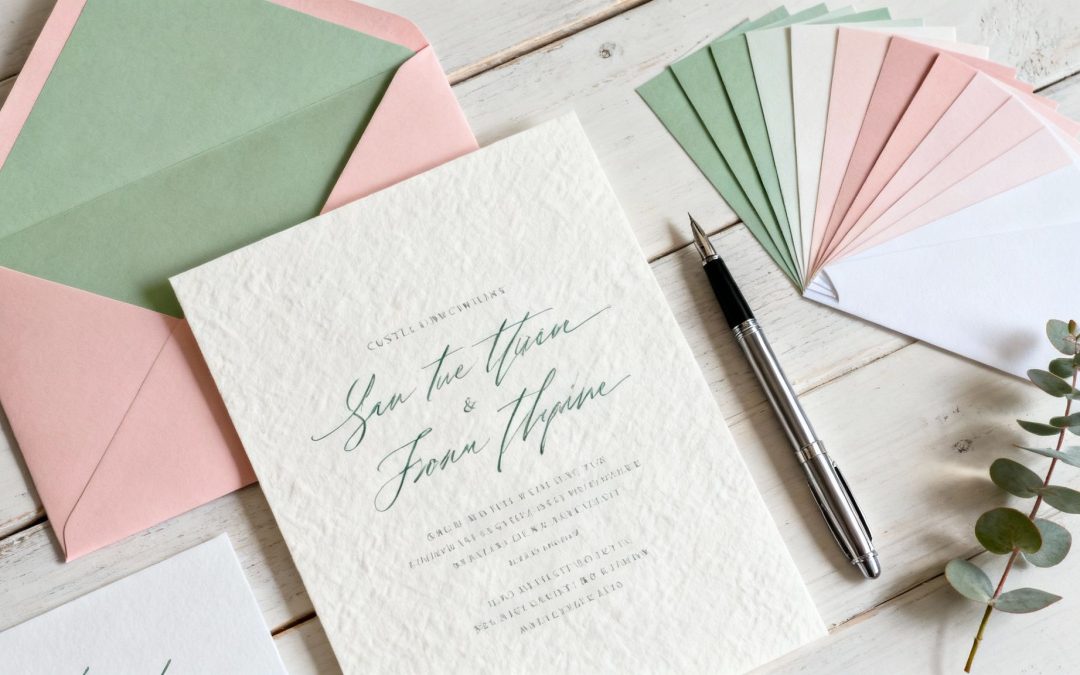
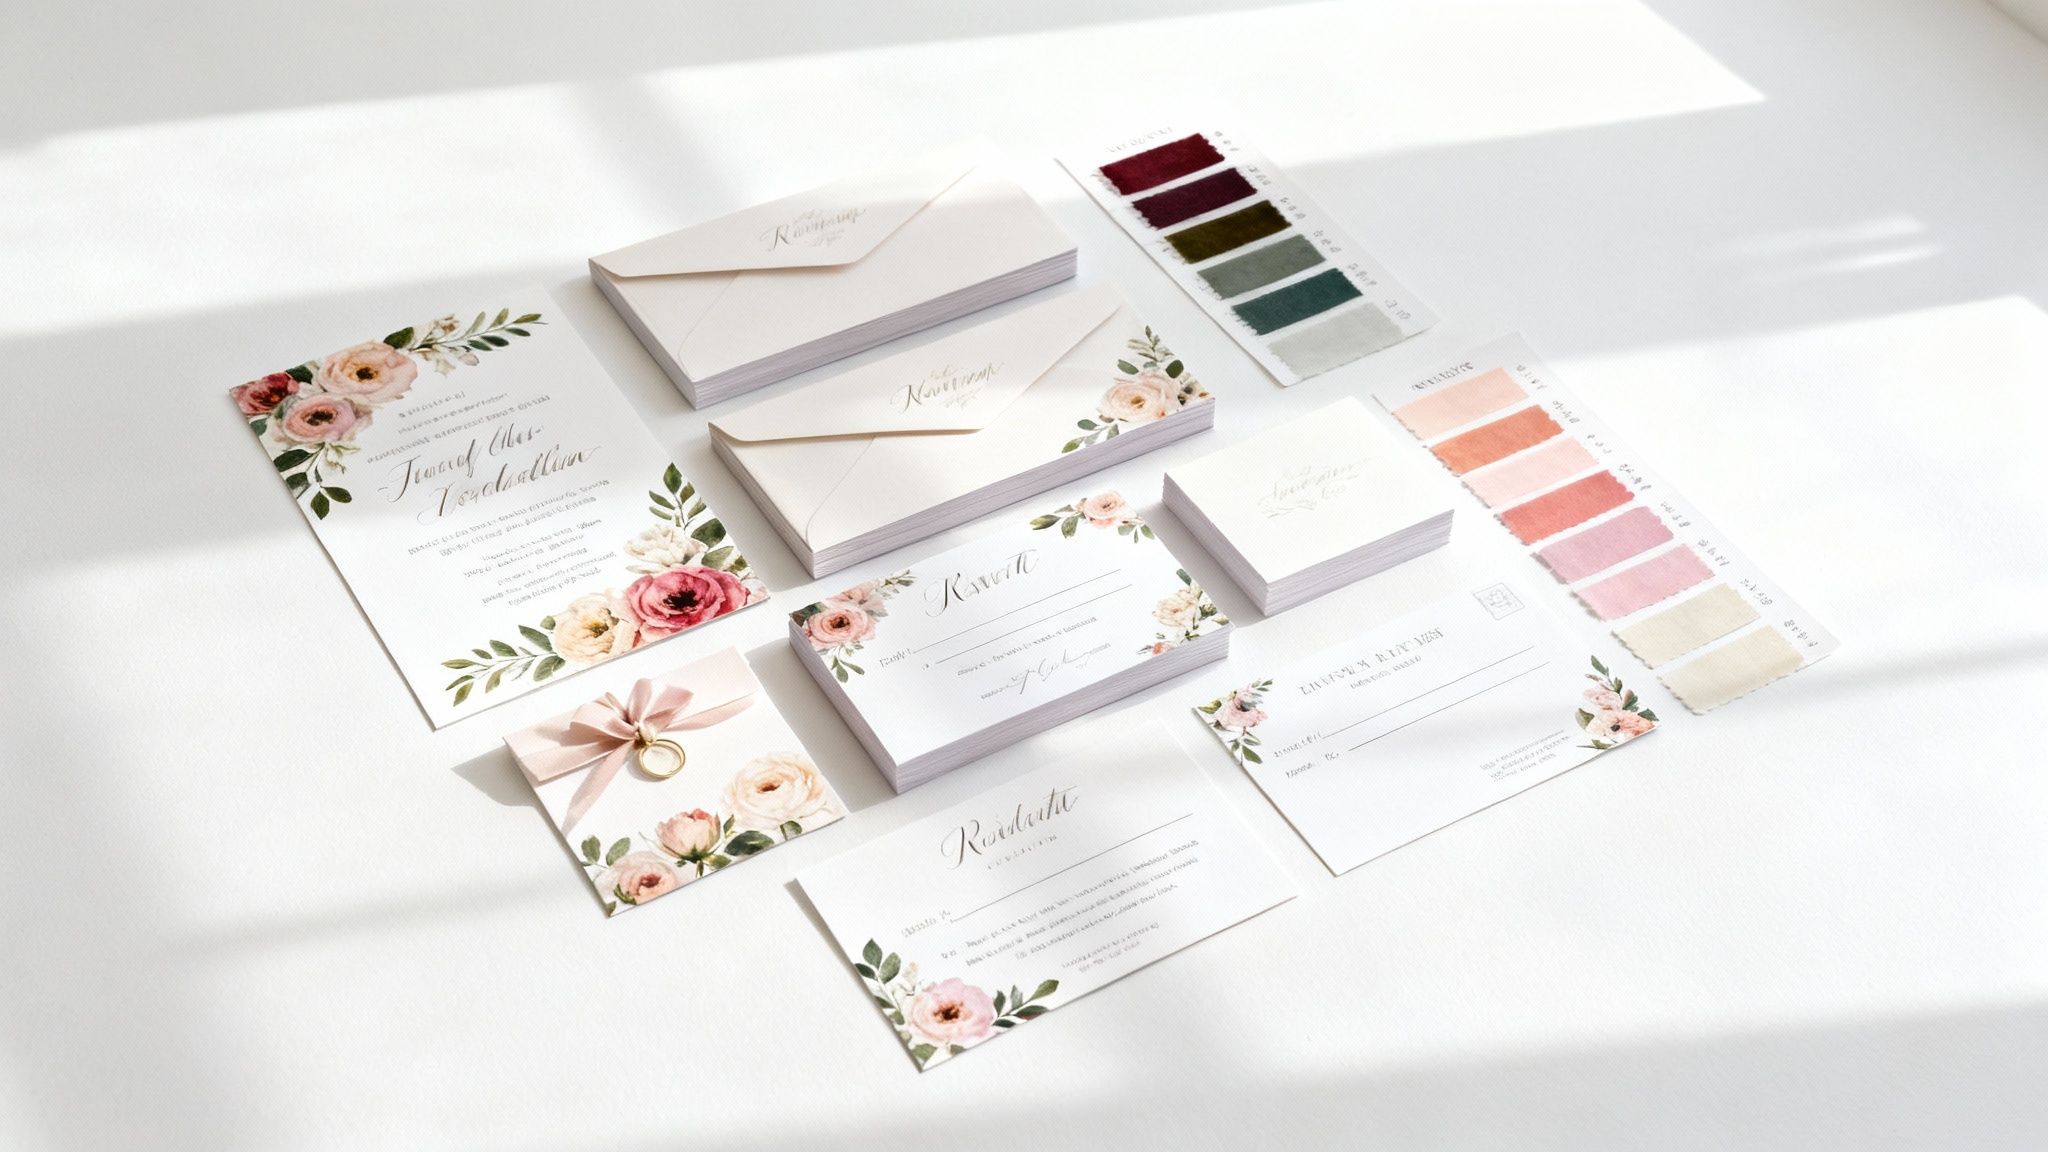
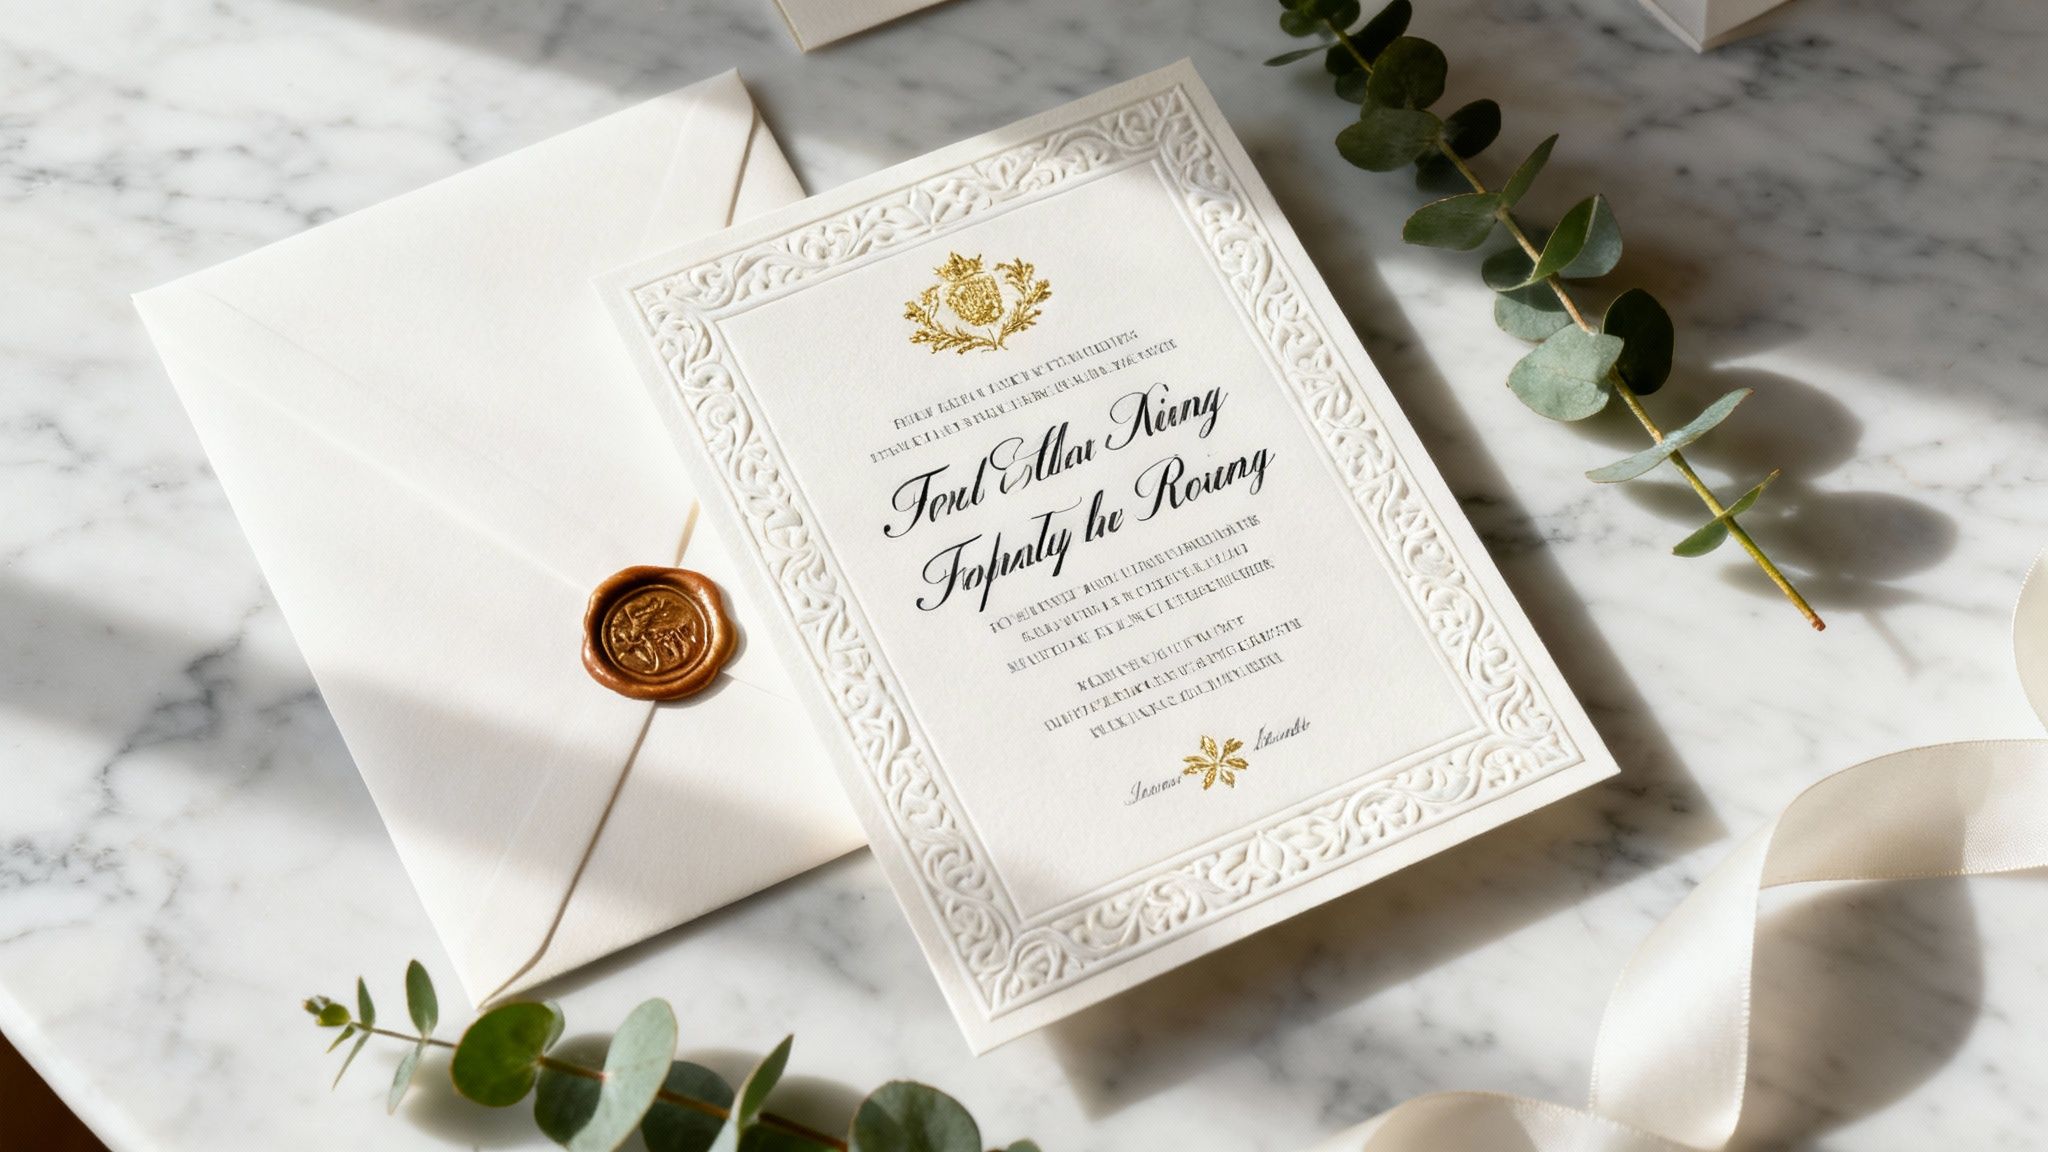
Choosing the Right Paper and Printing Technique
The moment your guests open their invitations, they get their first tangible hint of your wedding day. The weight of the paper in their hands and the impression of the text don't just convey information; they set a tone and build anticipation. This is where your design truly comes to life, transforming from a file on a screen into a beautiful object they can hold.
Making the right choice really comes down to balancing your dream aesthetic with your budget. The good news is you don't need to spend a fortune to create something stunning, but knowing your options is the key to making a decision you'll absolutely love.
Getting a Feel for Paper Weight and Texture
In Australia, the standard for measuring paper thickness is GSM, or "grams per square metre." Simply put, a higher GSM means heavier, thicker paper. Your everyday office printer paper is around 80gsm—far too flimsy for a wedding invitation.
Here’s a quick guide to what the numbers mean for your stationery:
200-250gsm: This is a lighter cardstock, often a good, budget-friendly choice for simpler flat cards or supplementary items like RSVP notes. It's solid, but might feel a little less substantial.
280-350gsm: This is the sweet spot for most wedding invitations. It has a high-quality, sturdy feel that gives a premium impression without the top-tier price tag. It's also robust enough to handle specialty techniques like letterpress or foil stamping.
400gsm and above: Now we're talking serious luxury. Often called "double-thick," this ultra-heavy cardstock makes a significant impact and is perfect for a very formal or high-end wedding.
Beyond the weight, the paper's texture plays a huge part in the overall vibe. A smooth matte card is a timeless classic, but other finishes can beautifully complement your theme. Textured stocks like linen or felt can add a subtle touch of elegance, while a creamy cotton paper offers a soft, pillowy feel that's just made for letterpress. You can even find recycled paper stocks with gorgeous, subtle flecks that lend an earthy, organic character.
The right paper does more than just hold ink; it becomes part of the design itself. I always tell my clients to order samples from a few printers. There’s no substitute for feeling the difference for yourself before you commit to a full order.
Comparing Popular Printing Methods
Once you've got a handle on your paper, it's time to think about how your design will actually be printed. This decision will have the biggest impact on both the final look and your overall cost.
The table below breaks down the most common options to help you decide what's right for you.
Flat, smooth ink on the paper's surface. Crisp and modern.
$
Letterpress
Classic, elegant typography and simple graphics.
A deep, tactile impression pressed into the paper.
$$$
Foil Stamping
Adding metallic glamour and a "wow" factor.
A shiny, metallic finish pressed onto the paper.
$$$
Thermography
Mimicking the formal look of engraving on a smaller budget.
Raised, glossy lettering that sits on top of the paper.
$$
Let's dive a little deeper into what these mean for your invitations.
Digital Printing is easily the most common and budget-friendly method. It works much like a very sophisticated office printer, applying ink directly onto the surface of the paper. This makes it a fantastic choice for designs with lots of colour, watercolour illustrations, or even photo elements. It’s fast, versatile, and offers incredible value. When weighing up your options, understanding digital vs. offset printing can provide a deeper comparison of common flat-print methods.
If you’re after a more tactile and luxurious finish, you’ll want to explore specialty printing methods.
Letterpress Printing is a true artisan technique. It uses a custom plate to press an inked design deep into thick, soft paper (cotton stock is a classic partner for letterpress). The result is a beautiful, tangible impression you can feel with your fingertips. It’s a timeless and elegant choice, but it’s also labour-intensive, which is reflected in its premium price.
Foil Stamping works in a similar way to letterpress, but instead of ink, it uses heat and pressure to apply a thin layer of metallic foil to the paper. It's perfect for adding a touch of glamour with gold, silver, or rose gold accents and creates a stunning, eye-catching effect.
Thermography is a clever technique that creates raised lettering. It works by dusting the wet ink with a special powder which, when heated, rises to create a glossy, embossed-like effect without actually pressing the paper. It offers a touch of formality and texture at a more accessible price point than traditional engraving.
No matter which printing method you choose, getting these four settings—dimensions, bleed, resolution, and colour mode—correct in your design file is the foundation for a flawless final print.
Finding the best approach often means finding the sweet spot between your dream aesthetic and your real-world budget. Don't forget you can mix and match! For example, you could digitally print your main invitation to accommodate a beautiful watercolour design, then add a foil-stamped tag or belly band for that touch of luxury. This hybrid approach is a great way to get a high-end feel while keeping costs manageable when you print wedding invitations.
Finalising Your Order and Proofing Like a Pro
You've waded through design files and paper stocks, and now you’re on the home stretch. This is it—the final step before you print wedding invitations, and where paying close attention to the little things really counts. It’s time to lock in your quantities and become a master of the proofing process.
Getting this part right is what saves you from that gut-wrenching feeling of finding a typo on 100 printed invites, or realising you’ve ordered far too few. Slowing down here is your best insurance against a costly and stressful last-minute reprint.
Calculating Your Final Invitation Count
Before you hit that "confirm order" button, let's get your numbers straight. The most common mistake I see couples make is ordering one invitation per guest. Remember, it's one invitation per household, not per person.
Run through your guest list and start grouping people by their address. A family of four gets one invitation. A couple living together? Just one. Once you have that household number, you need to add a buffer.
My non-negotiable rule is to always order 10-15% extra. These spares are absolute lifesavers. They cover B-list guests, invitations that get lost in the mail, keepsakes for you and your parents, and one for your photographer to capture on the day.
For example, if you have 80 households on your list:
Calculate 15% extra: 80 x 0.15 = 12
Your total order: 80 + 12 = 92 invitations
Trust me, it is always cheaper to add a few extras to your main order than to place a small, expensive reprint order down the track.
The Art of Proofing Your Invitations
Whether your printer sends you a digital PDF or a physical paper sample, do not skip the proofing stage. This is your very last chance to catch an error before the entire run is printed. It’s so easy to get excited and just give it a quick "looks good!", but a careful, methodical review is absolutely essential.
You've probably looked at your design a hundred times by now, which means your brain will naturally start to fill in the gaps and overlook mistakes. That's why you need a fresh perspective.
Recruit a Proofing Partner: Ask a friend or family member who is known for their eagle eye—and who wasn’t involved in the design—to read it over. They’re far more likely to spot something you’ve become blind to.
Read it Backwards: It sounds a bit strange, but reading the text from the last word to the first forces your brain to focus on each word individually instead of skimming the sentence. It’s an old editor’s trick that works wonders for catching spelling mistakes.
Check it on Different Devices: For a digital proof, look at it on your computer and your phone. Colours can render differently across screens, and it just gives you another angle to spot something amiss.
Your Ultimate Proofing Checklist
When that proof arrives, don't just give it a quick glance. If it's digital, print it out. Grab a pen and physically tick off each item on this list.
Names: Are all names spelt correctly? Yours, your parents', the venue's name—triple-check every single one.
Dates and Times: Does the day of the week actually match the date? Is the time clear (e.g., "5:00 PM" vs "five o'clock in the evening")? Is the year correct? You’d be surprised.
Venue Details: Is the full address for the ceremony and reception listed correctly? It’s worth popping it into Google Maps just to be sure.
Contact Information: Check every digit of a phone number and every letter of a website URL. This is crucial for your RSVP details or if you're linking to a registry. For those using an online service, you can learn more about how a gift registry works to make sure your guests have a smooth experience.
Spelling and Grammar: Read every single word aloud. Hunt for typos, grammatical errors, and any phrasing that just sounds a bit clunky.
Only when you are 100% confident that every detail is perfect should you send back that final approval. Taking your time here guarantees the beautiful invitations you’ve worked so hard on are absolutely flawless.
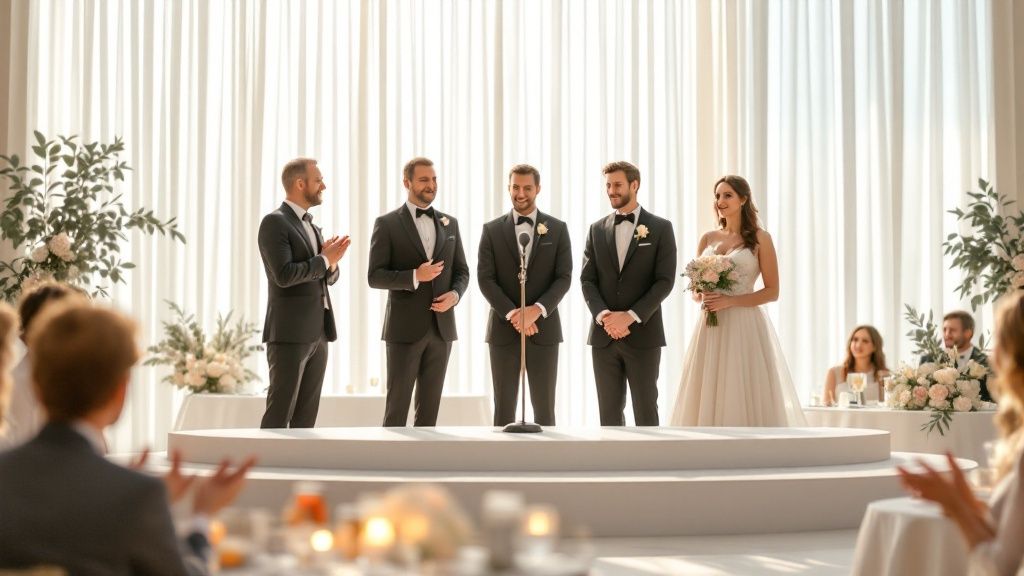
Getting Your Invitations into Your Guests' Hands
You’ve designed, proofed, and finally have a beautiful stack of printed invitations. Now for the final hurdle: getting them safely to your guests. This is where the nitty-gritty of postage and mailing comes in, and a bit of forward planning here will save you a world of stress.
The last thing anyone wants is their stunning invitations returned to sender because of a simple postage error. From how you address the envelopes to getting the stamp value just right, let's make sure every single one arrives perfectly.
The Art of Addressing
The way an envelope is addressed sets the tone before it's even opened. You've got a few options here, each with its own vibe and workload.
Hand Calligraphy: For a truly formal or luxurious wedding, nothing beats professional calligraphy. It’s an art form that signals a very special event is on the horizon. This is a premium service, so you'll want to find and book a calligrapher well ahead of time.
DIY Handwriting: If you have lovely penmanship, addressing the envelopes yourself is a wonderfully personal (and budget-friendly) touch. Just be sure to use a good quality pen that won’t smudge and maybe a sneaky ruler guide to keep your lines perfectly straight.
Printed Labels: Let’s be real, this is the most efficient method by a long shot. A simple mail merge from your guest list spreadsheet can produce clear, professional labels in minutes. If you want to keep things looking sleek, opt for clear labels that almost disappear on the envelope.
Whichever path you take, consistency is your friend. Use the same format for every address and meticulously double-check the spelling of every name and street against your master guest list.
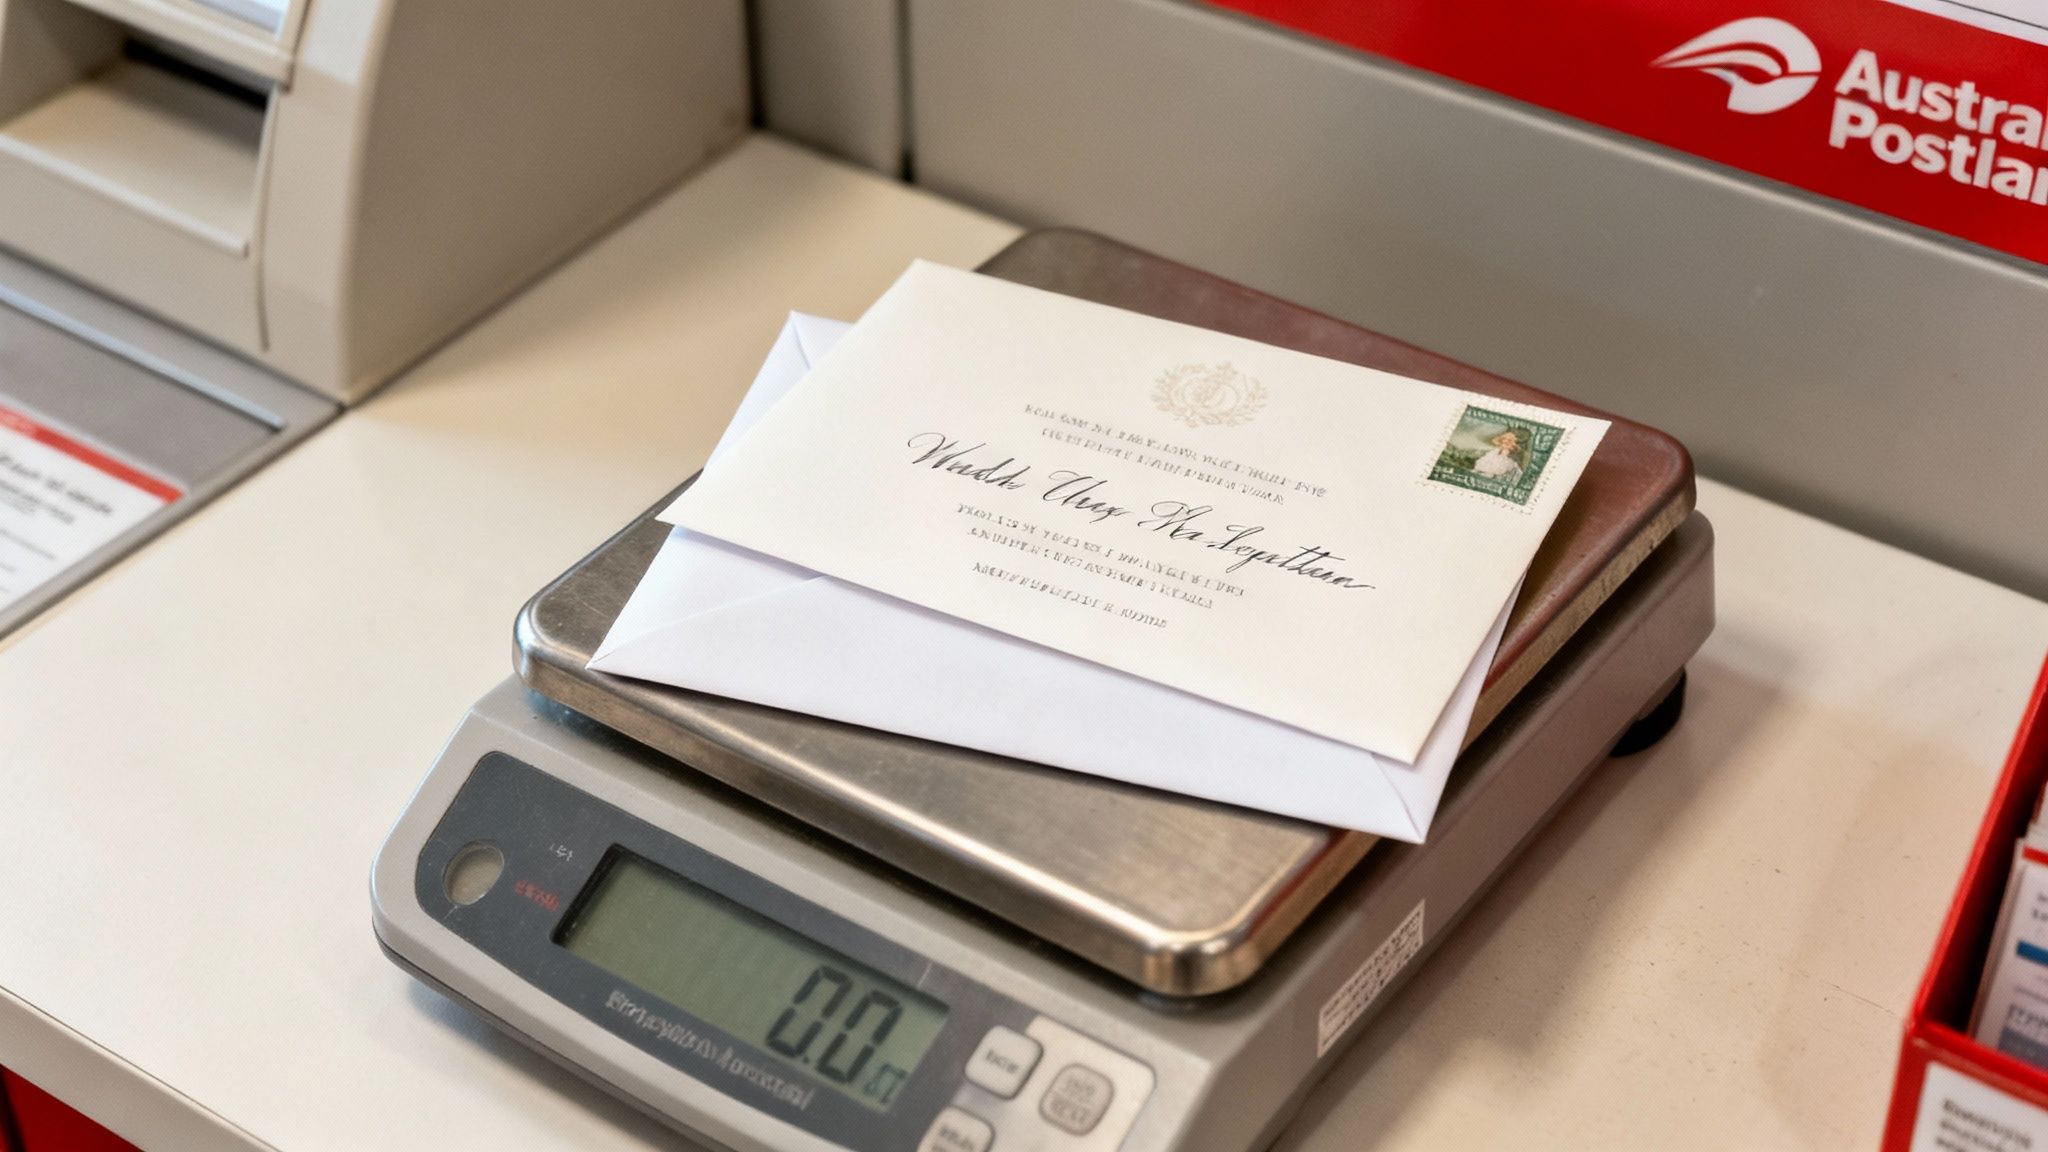
Your Most Important Trip to the Post Office
If there is one piece of advice I drill into every couple, it's this: do not guess the postage. Never. The weight of your invitation suite can be surprisingly deceptive, especially once you add multiple cards, a belly band, or a wax seal.
Before you even think about buying stamps, here’s what you need to do:
Assemble one complete invitation. Put everything inside the envelope just as a guest would receive it – the invitation, RSVP card, details card, and the return envelope.
Seal it properly. If you’re using a wax seal, add it now. You need a perfect, final-version replica of what you'll be mailing.
Take it to an Australia Post office. Walk up to the counter, hand it to a staff member, and ask them to weigh and measure it for you. They’ll tell you the exact postage cost for both domestic and any international guests.
This ten-minute trip is the best insurance policy you can get. It prevents the absolute nightmare of having dozens of invitations returned to you just weeks before your wedding, or worse, arriving with a "postage due" sticker for your guests to pay.
Once you have the correct postage value, you can buy your stamps. It's always worth asking to see the different designs available—Australia Post often releases beautiful commemorative stamps that might just match your wedding theme.
Setting Your Mailing Timeline
Timing is everything. You need to give your guests enough notice to clear their calendars, book travel, and get their RSVPs back to you without feeling rushed.
In Australia, the sweet spot for mailing your invitations is between 8 and 12 weeks before your wedding day.
12 weeks out: This is a good idea if you have a lot of guests travelling from overseas or interstate. It gives them plenty of time to hunt for flight deals and book accommodation.
8 weeks out: If most of your guests are local, eight weeks is a perfectly acceptable amount of notice.
When you print wedding invitations, this mailing date should be locked in your mind from the start. Work backwards from there to schedule your design, printing, and addressing phases. Giving yourself that buffer is the key to avoiding any last-minute panic and ensuring your beautiful invitations build excitement from the moment they arrive.
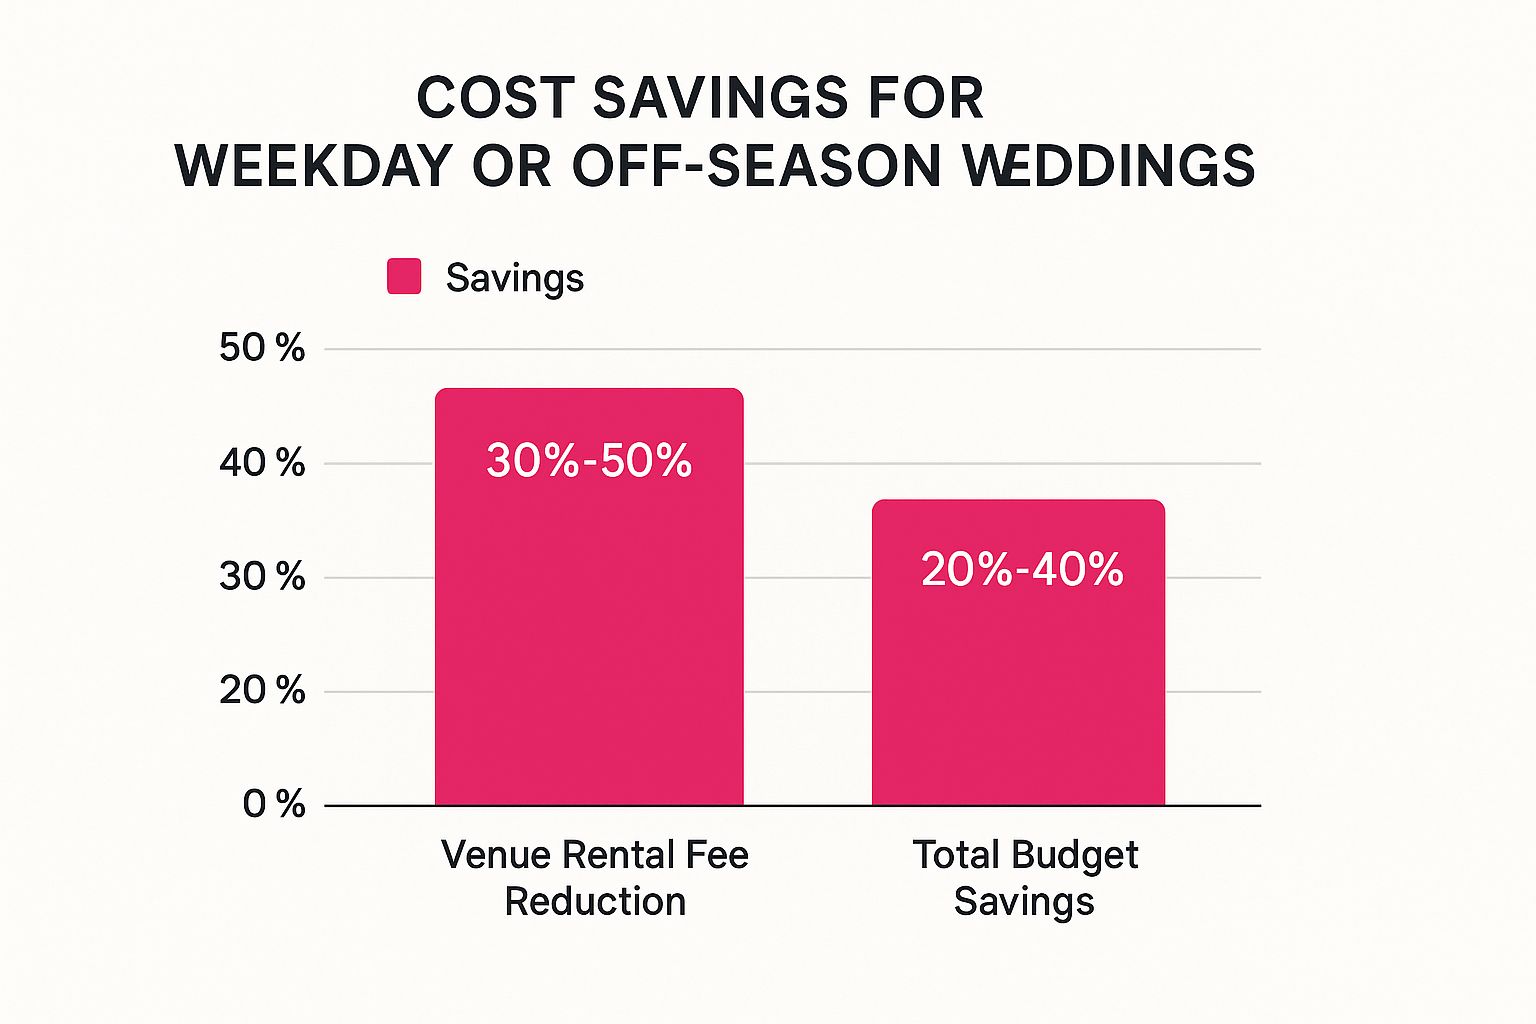
A Look at Australian Wedding Invitation Costs and Trends
Getting a handle on the local scene is the first step to planning your wedding stationery without any nasty budget surprises. The costs and styles for wedding invitations in Australia can be all over the map, but there are a few trends that are really changing the game for modern couples.
One of the biggest shifts I've seen is the move to a "hybrid" invitation. Couples are blending the classic feel of a physical invitation with the sheer convenience of digital tools. It's a clever solution: they'll print a gorgeous main invitation card, but add a simple QR code. A quick scan takes guests to a wedding website that holds all the nitty-gritty details—maps, hotel recommendations, gift registry info, and, most importantly, an easy online RSVP.
This approach gives you the best of both worlds. You still get that special, tactile moment when your guests open a beautiful piece of mail, but you also streamline all the logistics. It keeps the printed suite looking elegant and uncluttered, which is a win-win.
What to Expect on the Bill
So, what’s the real cost to print wedding invitations? The final number can swing wildly depending on where you are in Australia and the level of finish you’re after.
Recent stats show that while invitations are a must-have for 97% of Australian weddings, the average couple is spending about $1,150. But it really pays to know your local market. For example, couples in Queensland tend to spend closer to $782, whereas those over in Western Australia are looking at an average of $1,150. If you're a numbers person, you can see a full breakdown of Australian wedding statistics for more detail.
The biggest trend right now? Getting personal while keeping a close eye on the budget. In fact, a whopping 64% of couples are now choosing to DIY their printed invitations to help bring that final cost down.
This "DIY" approach doesn't mean you're stuck with something that looks homemade, either. Many couples are flexing their creative muscles with user-friendly design tools and then handing the files over to a professional printer for that flawless, high-quality finish.
If you're looking for more ways to be savvy with your spending, checking out these 6 amazing tips to save money on your wedding day can offer some great ideas. At the end of the day, whether you bring in a pro stationer or take the reins yourself, the aim is to create something that feels uniquely you and gets everyone excited for the celebration ahead.
Your Biggest Wedding Invitation Questions, Answered
Once you’ve got your beautiful invitations ready to print, a whole new world of questions tends to open up. From wording etiquette to navigating those tricky guest list situations, let’s tackle some of the most common queries we see from couples.
One of the biggest hurdles? Talking about gifts. It can feel really awkward, but trust me, being clear is the kindest thing you can do for your guests. The most elegant solution is to add a simple line directing everyone to your wedding website, where you can share all your registry details. This keeps the main invitation clean and classic.
Handling Plus-Ones and RSVPs
Deciding who gets a "plus-one" can cause some serious stress. A good rule of thumb I always recommend is to extend an invitation to the partners of guests who are married, engaged, or in a long-term, established relationship. For your single friends, it’s entirely your call and often comes down to budget and venue capacity.
The key is to be crystal clear from the start. Address the envelope specifically to the people you’re inviting. For example, "Ms Jane Smith and Mr John Doe" leaves no room for doubt, whereas "Ms Jane Smith" politely indicates the invitation is just for her.
Pro Tip: Your approach to plus-ones should be consistent. Clearly addressing the invitation to the intended guests is the most effective way to communicate your final numbers and sidestep any potential confusion.
Managing your RSVPs is the next critical piece of the puzzle. Make sure you set a clear RSVP deadline, usually about 3-4 weeks before the big day. This buffer is essential—it gives you enough time to give final numbers to your caterer and venue without a last-minute panic.
And if you find yourself chasing people after the deadline has passed? Don't worry, it happens to almost everyone. A friendly phone call or a gentle text message is the perfect way to get that final answer. For more advice on these common hurdles, our guide on frequently asked wedding questions is packed with helpful tips to get you through the final stretch.
At EasyRegistry, we're all about making your gift list simple and stress-free. Create your free registry today and give your guests a seamless way to celebrate with you.
Planning a wedding on a budget all boils down to one crucial conversation: the money talk. Before you even think about booking a venue or trying on dresses, you and your partner need to land on a total figure you’re both genuinely comfortable with. This number becomes the bedrock for every single decision you make from here on out. Honestly, getting aligned on this is the single most important step to creating a beautiful day without the financial hangover.
Building Your Realistic Wedding Budget
Alright, let's get real. Talking about money is probably the least romantic part of being engaged, but it's where you take back control. Shifting from vague daydreams to a concrete financial plan is the secret to pulling off a wedding on a budget. This isn't about being restrictive; it’s about being smart. It’s about deciding what really matters to you both and putting your money where your heart is.
The first move is to have a completely honest chat. Who's contributing? Are you footing the bill yourselves, or will family be chipping in? Getting a clear picture of your total pool of funds means you can build a plan based on reality, not just wishful thinking.
Understand the Averages But Define Your Own Path
It always helps to have a starting point. If you're planning a wedding on a budget in Australia, it's good to know what others are spending. A recent survey found the average cost of an Australian wedding is around $35,315. What’s really eye-opening is that couples tend to overspend their initial budget by about 29%, and 66% of them get a little help from family.
But here’s the thing: don't let those numbers scare you or dictate your plans. Your wedding budget should be a reflection of your priorities, not a national average.
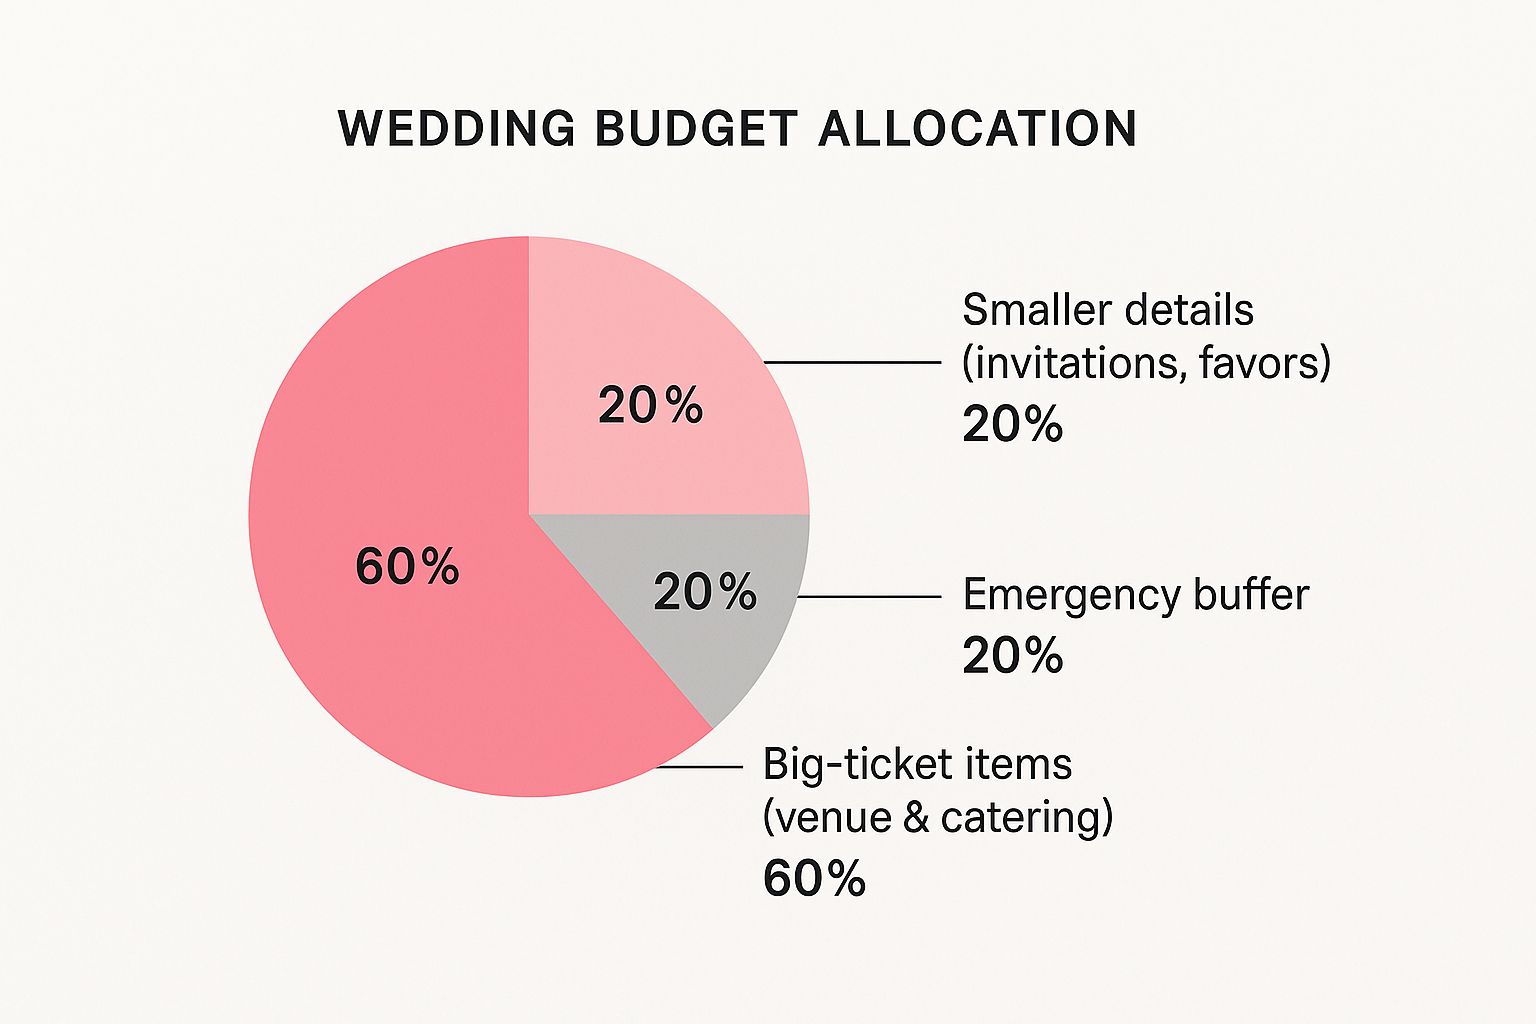
This infographic gives you a quick look at where the money typically goes.
As you can see, the venue and catering are often the biggest slices of the pie. This just goes to show how crucial it is to allocate your funds wisely right from the get-go.
Sample Wedding Budget Allocation
To help you visualise where your money might go, we've put together a sample budget breakdown. Think of this as a guide, not a rulebook. Adjust the percentages based on what's most important to you!
Category
Average Percentage of Budget
Example Cost (on a $25,000 budget)
Venue, Food & Drink
45-50%
$11,250 – $12,500
Photography/Videography
10-15%
$2,500 – $3,750
Attire & Beauty
8-10%
$2,000 – $2,500
Entertainment/Music
8-10%
$2,000 – $2,500
Flowers & Décor
8-10%
$2,000 – $2,500
Rings
3-5%
$750 – $1,250
Invitations & Stationery
2-3%
$500 – $750
Contingency Fund
5-10%
$1,250 – $2,500
Having a contingency fund is a lifesaver. Trust me, unexpected costs always pop up, and having that buffer will keep the stress levels down.
Prioritise What Truly Matters
This is the fun part—where the day becomes uniquely yours. Grab a drink, sit down together, and have each person list their top three "must-haves." Is it mouth-watering food? A phenomenal photographer to capture every moment? Or a live band that will have your nan on the dance floor all night?
This little exercise is incredibly powerful. It instantly shows you where to invest a bigger chunk of your budget and, just as importantly, where you’re both happy to cut back.
Priority A: The non-negotiables you both agree on (e.g., that amazing photographer).
Priority B: The "nice-to-haves" that aren't deal-breakers (e.g., over-the-top floral arrangements).
Priority C: Things you really don't mind skipping or doing on the cheap (e.g., fancy wedding favours or printed menus).
Sorting your wants into these buckets helps prevent disagreements later and makes sure your money is spent creating memories, not just meeting expectations.
The goal isn't just to spend less; it's to spend smarter. A well-defined budget frees you from decision fatigue and allows you to focus on the joy of getting married, knowing the financial side is under control.
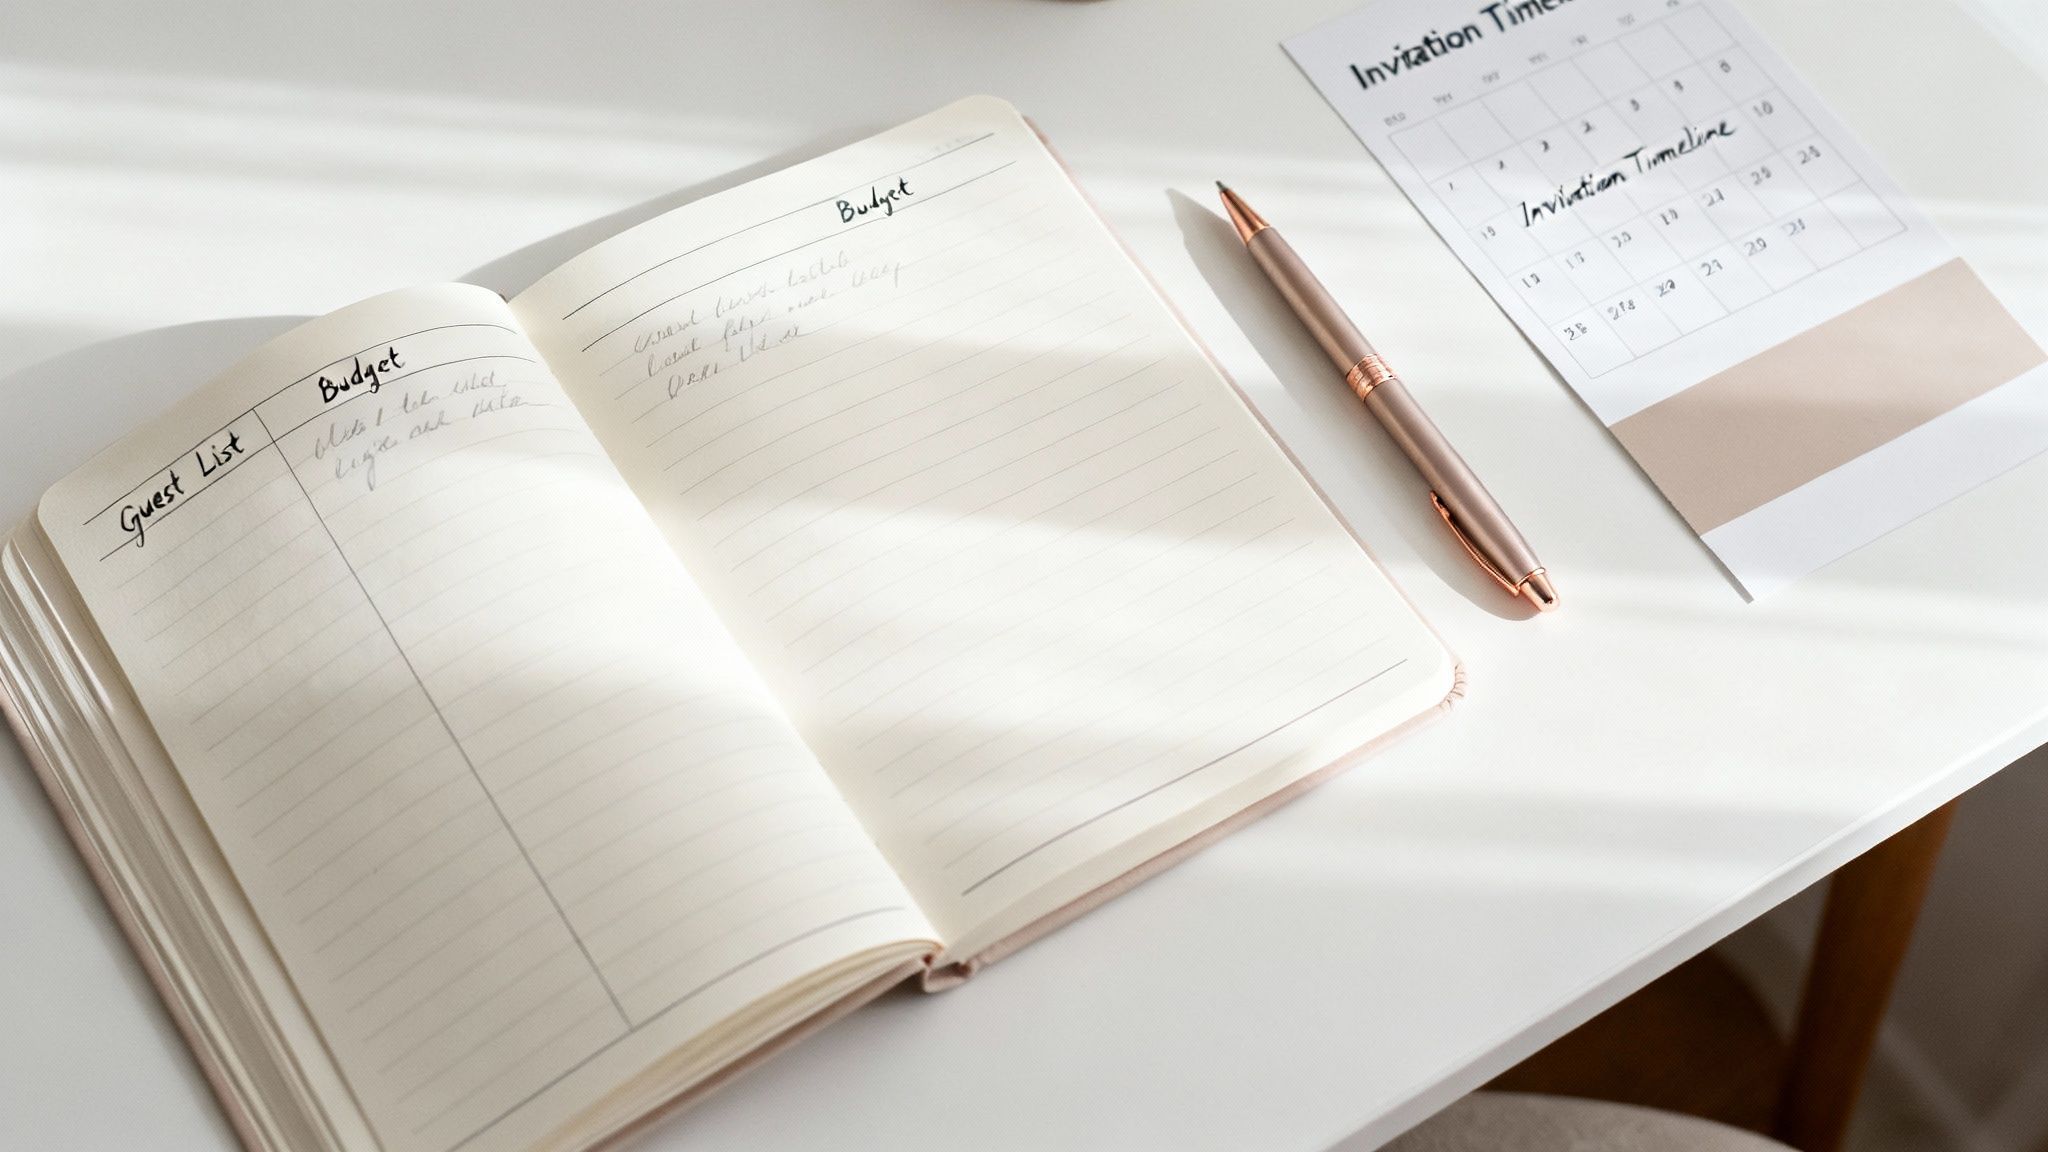
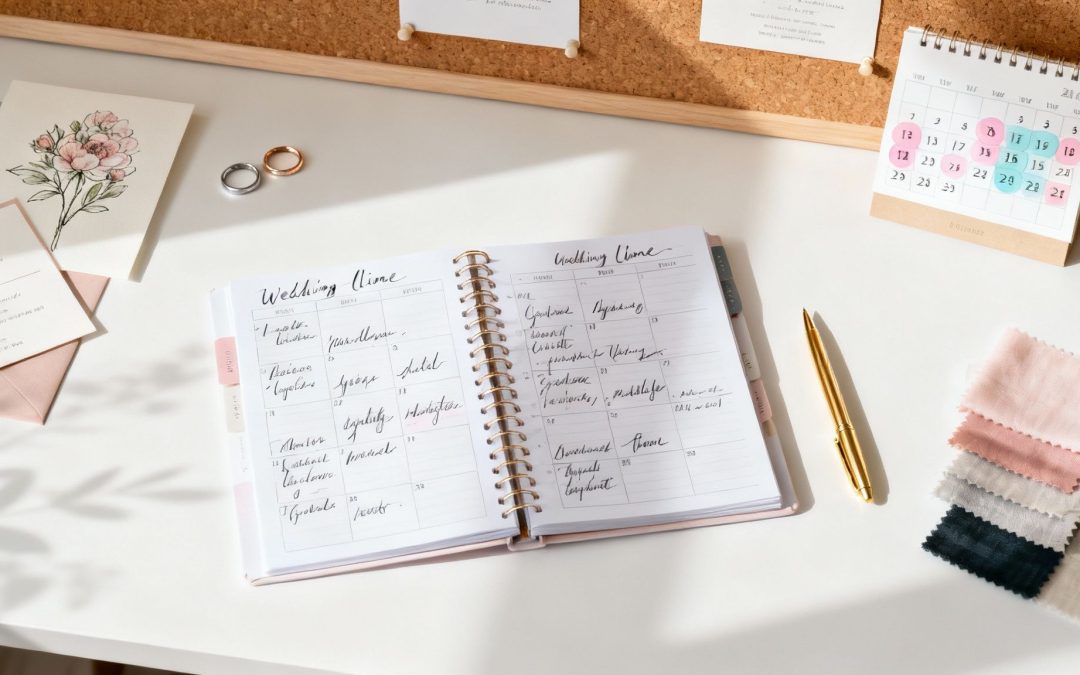
Create Your Master Budget Spreadsheet
With your priorities locked in, it’s time to get practical. A simple spreadsheet is about to become your best friend for tracking every single dollar. Don't just list the big-ticket items; get into the nitty-gritty. This should be a living document that you and your partner can both access and update on the fly.
Make sure your tracker includes columns for:
Item/Vendor: What’s the expense? (e.g., Venue, Catering, Photographer).
Estimated Cost: Your initial budget based on early quotes and research.
Actual Cost: The final price once you’ve signed a contract.
Deposit Paid: How much you've already paid to lock it in.
Balance Due: The remaining amount you still owe.
Due Date: The deadline for that final payment.
Remember to include the sneaky little costs people often forget, like postage for invitations, the marriage licence fee, and tips for your vendors. This level of detail is what stops last-minute surprises from blowing up your budget.
For more clever ideas on trimming costs without sacrificing style, check out our amazing tips to save money on your wedding day. Taking control from day one is the ultimate wedding budget hack.
Finding Your Perfect—and Affordable—Venue
Let's be honest, the venue and catering can feel like the two giants of wedding spending. They have a knack for gobbling up a massive chunk of your budget before you’ve even thought about flowers or music.
While they are a significant investment, this is also your first big chance to get creative and find a location that’s both stunning and sensible. Planning a wedding on a budget isn't about sacrifice; it's about looking beyond the obvious to uncover those hidden gems that offer incredible value. The key is to think outside the traditional wedding venue box.
Think Beyond the Obvious
Some of the most charming and affordable wedding venues are hiding in plain sight. Sure, grand hotels and exclusive estates are beautiful, but they come with a premium price tag. The good news? Unforgettable weddings happen everywhere.
Expanding your search can lead you to unique spots that bring the character without the hefty cost.
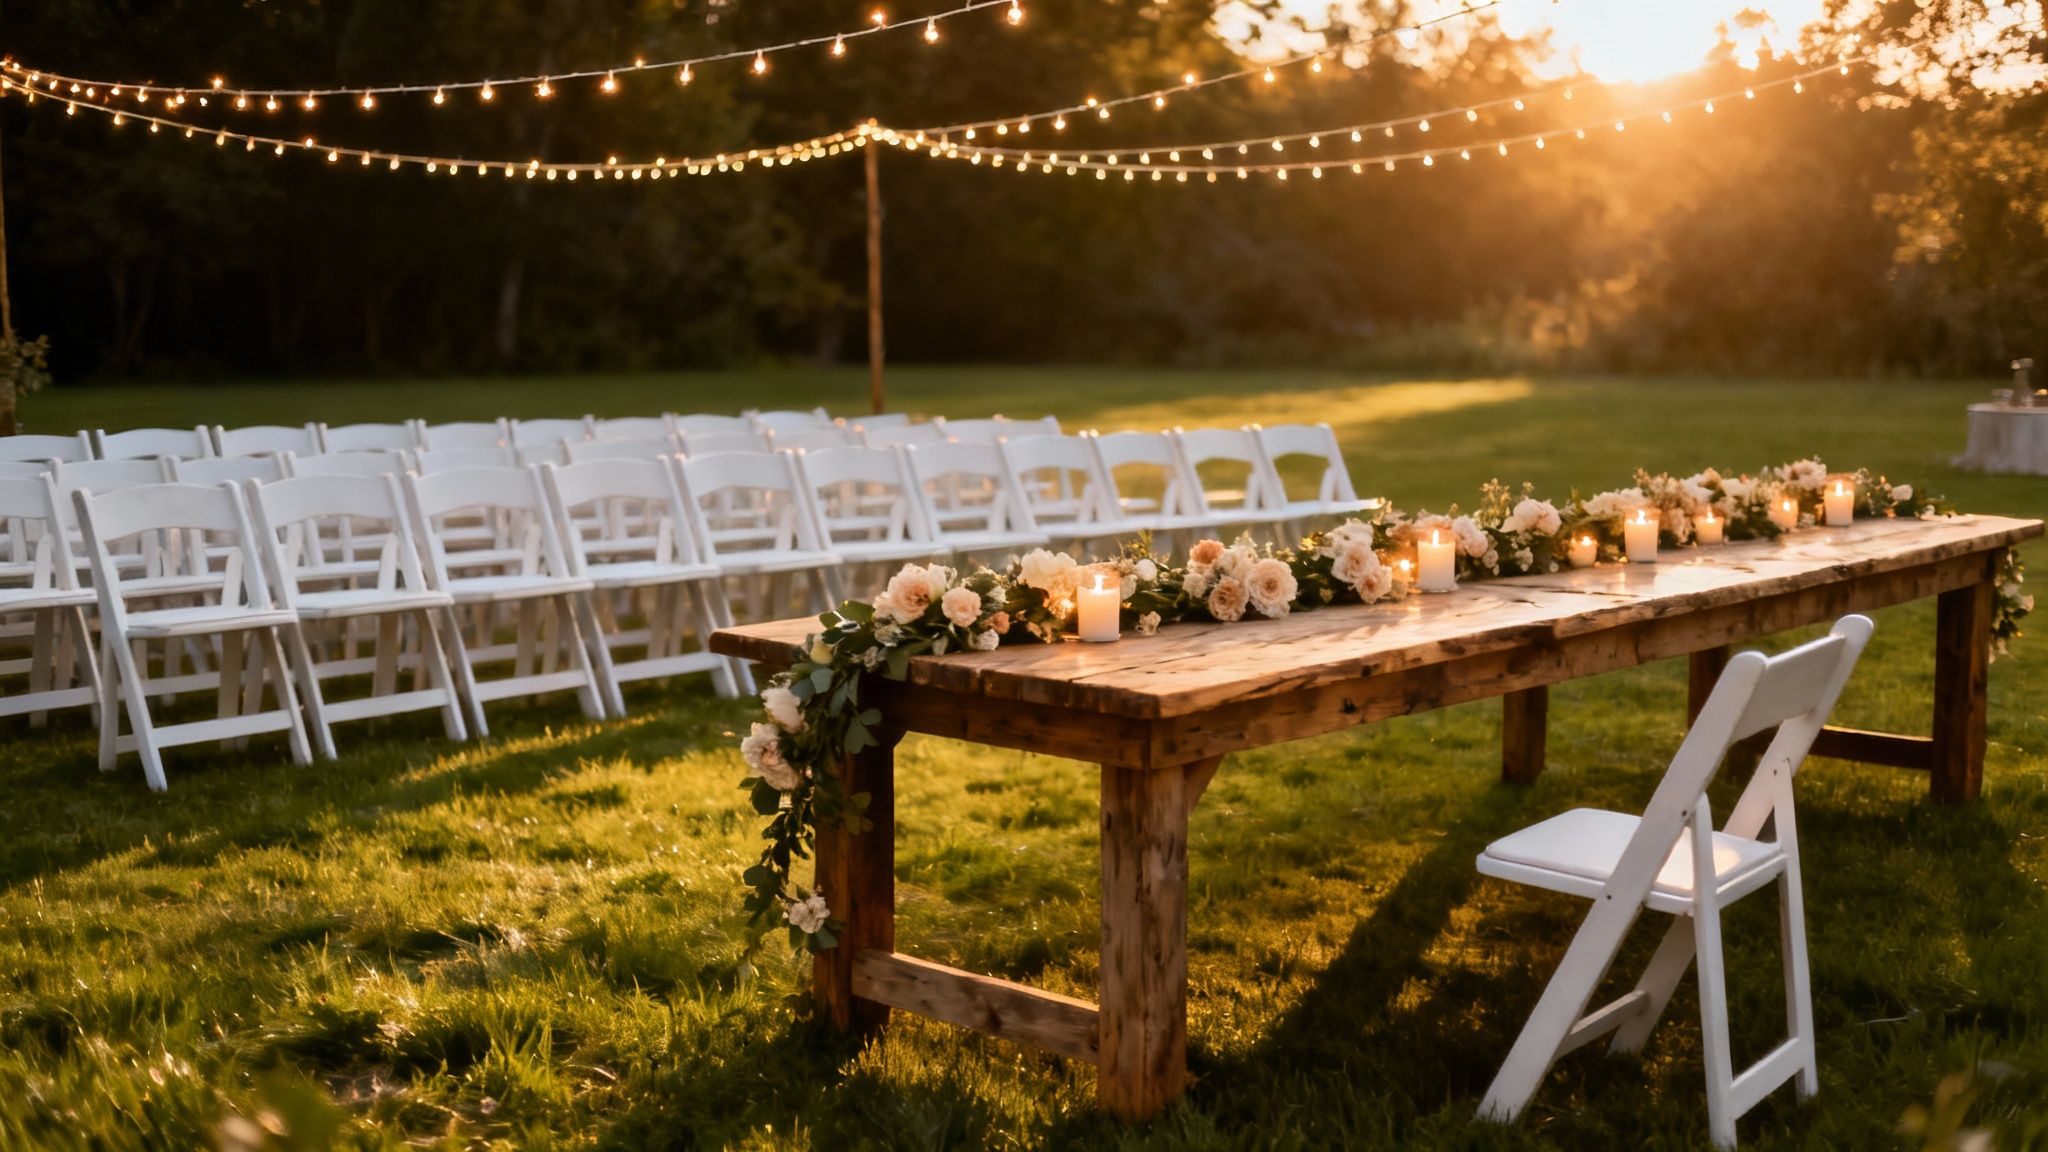
Community Halls & Surf Clubs: Don't write them off! Many have been beautifully renovated and offer gorgeous coastal views or rustic charm. They often act as a 'blank canvas', giving you total freedom to bring in your own decor and vendors.
Public Gardens or National Parks: For a truly breathtaking natural backdrop, a local botanical garden or park can be an incredibly cost-effective choice. You’ll often just pay a simple permit fee for the ceremony, which can save you thousands.
Restaurants with Private Rooms: A chic restaurant can be a brilliant all-in-one solution. You get a stylish space, professional staff, and exceptional food, often with a minimum spend instead of a huge venue hire fee.
University Campuses or Galleries: Many universities have stunning historic buildings, chapels, or modern art galleries available for hire at a fraction of the cost of dedicated wedding venues.
A massive budget-saver is choosing a venue that's already beautiful on its own. When the architecture, landscape, or existing decor does the heavy lifting, you can dramatically cut back on what you need to spend on flowers and extra styling.
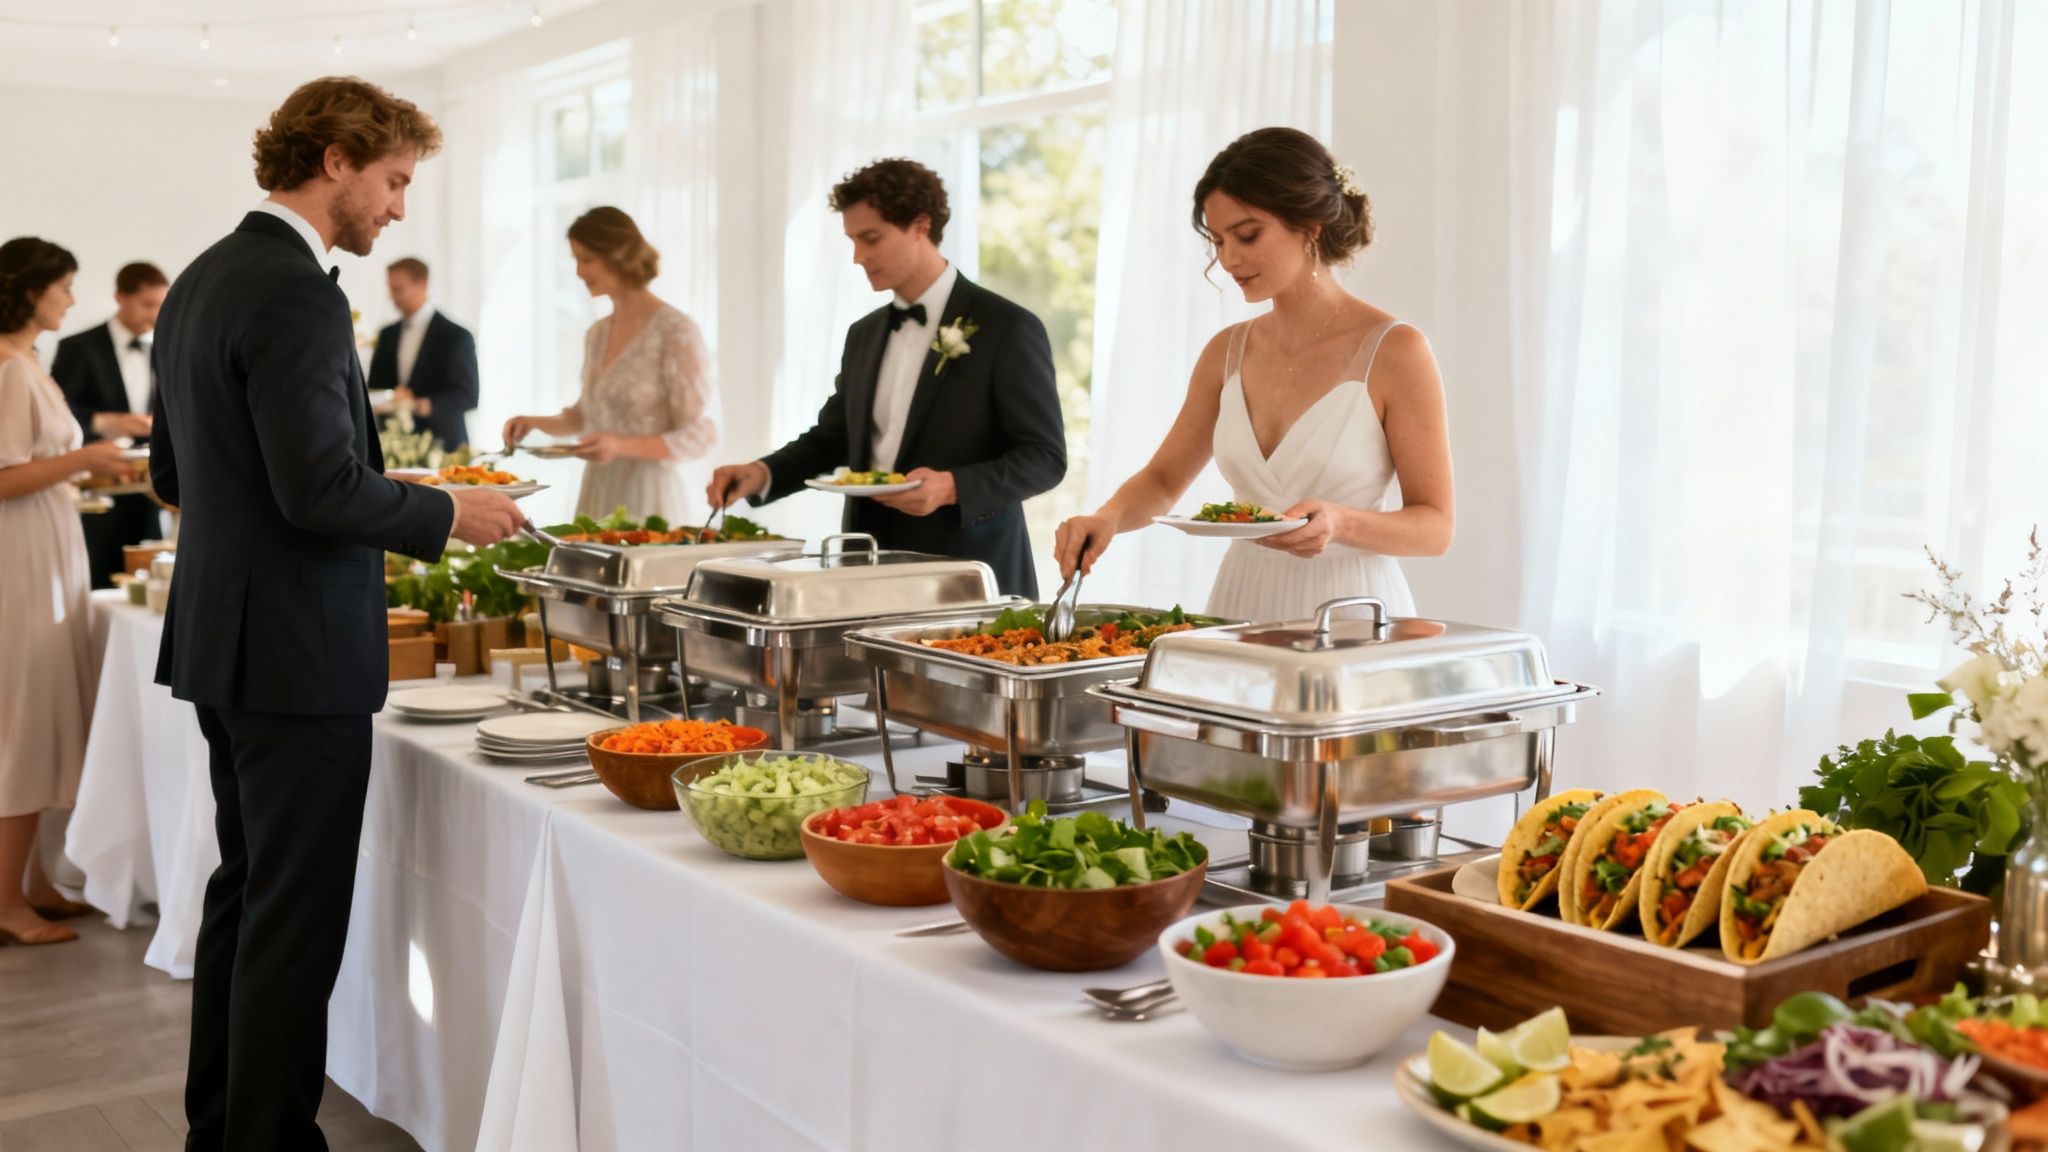
Make Smart Catering Choices That Don't Skimp on Style
Once you’ve found your venue, catering is the next big piece of the puzzle. The cost-per-head can escalate quickly, but modern catering options are a fantastic way to feed your guests well without blowing the budget.
A formal, three-course plated dinner is almost always the most expensive route. For a more relaxed and wallet-friendly vibe, why not explore these popular alternatives?
Food Trucks: These are perfect for creating a casual, fun atmosphere. You could hire one or two trucks offering different cuisines (like tacos and wood-fired pizza) for much less than a traditional caterer would charge.
Cocktail-Style Reception: Instead of a full sit-down meal, a continuous flow of substantial canapés and grazing stations creates a vibrant, social party. It’s a great way to keep costs manageable while everyone mingles.
Buffet or Family-Style Service: These options are almost always more affordable than plated meals because they require less service staff. Plus, they encourage guests to interact and give them more choice over what they eat.
The numbers really show how much these costs matter. For example, the average wedding in Victoria costs $37,128, with the venue and catering taking the biggest slice of the pie. It just goes to show that making smart decisions here has the biggest impact on your bottom line.
Uncover Hidden Fees and BYO Benefits
When you're touring potential venues, being armed with the right questions is your best defence against surprise costs. You’d be amazed how quickly hidden fees for things like cake cutting, furniture removal, or mandatory security can add up. For a complete list of what to ask, check out our guide on the essential questions for your wedding venue.
One of the most powerful ways to slash costs is to find a BYO (Bring Your Own) friendly venue. Alcohol is a major expense, and venue markups can be astronomical. A BYO venue lets you purchase your own alcohol from a bottle shop—ideally during a big sale!
Even if a venue isn't fully BYO, you can still find ways to save.
Limit the Options: Instead of a full open bar, offer a curated selection of beer, wine, and maybe one or two signature cocktails. It still feels generous without the huge price tag.
Skip the Champagne Toast: Let guests toast with whatever drink they already have in hand. Honestly, the cost of pouring a glass of bubbly for everyone for a 30-second moment is rarely worth it.
By being flexible with your venue, clever with your catering, and savvy with your drinks, you can create a beautiful, memorable celebration that honours both your vision and your financial goals.
Achieving High-End Style for Less
Everyone wants their wedding to feel special and look beautiful, but you don't need a shocking price tag to create that high-end vibe. It really comes down to being clever and creative. With a bit of insider know-how, you can pull off a sophisticated style that feels luxurious and personal, all while sticking to your budget. The trick is to make smart, impactful choices in a few key areas—your attire, the décor, and photography.
Let's be real: wedding costs in Australia have skyrocketed. We've seen the average spend jump from around $36,000 to over $65,000 in recent years. This surge is often fuelled by extravagant trends that can quickly blow a budget out of the water. This makes savvy spending more critical than ever.
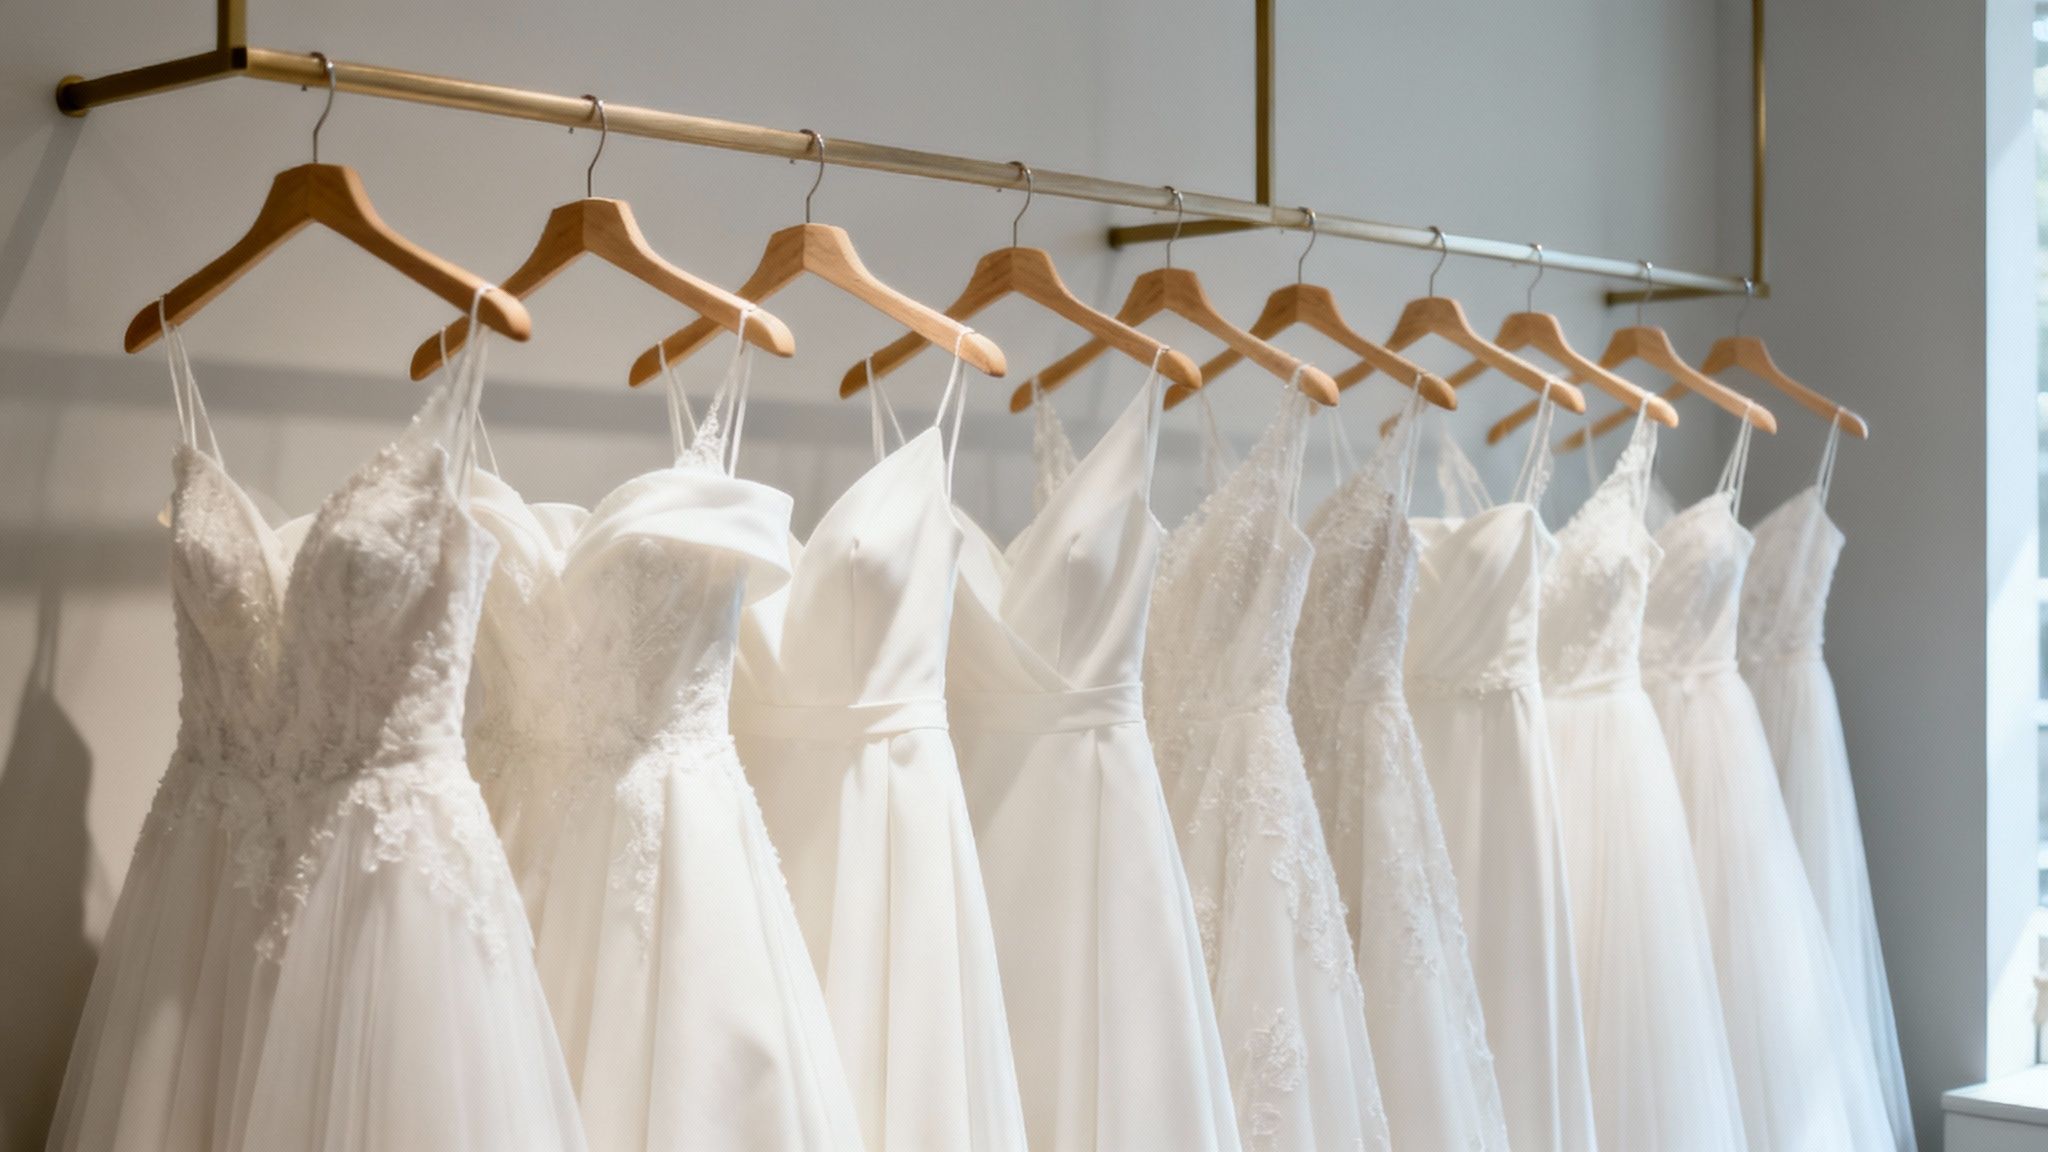
Finding Your Dream Attire Without the Designer Price
Your wedding day outfit is a huge part of feeling incredible, but the thought of a four-figure dress can be pretty daunting. The good news? The traditional bridal boutique is just one of many places to look.
Planning a wedding on a budget just means you get to explore some brilliant alternatives that deliver stunning results for a fraction of the cost.
Sample Sales: Keep an eye out for these! Boutiques often sell their floor stock at a massive discount—sometimes 50-70% off—to clear space for new collections. These dresses might have some minor wear from being tried on, but they're often in near-perfect condition.
Designer Rentals: Why buy when you can borrow? Rental services give you access to incredible designer gowns without the retail price. It's perfect if you want a show-stopping look for just one day.
Pre-Owned Dresses: Websites dedicated to selling pre-loved wedding dresses are absolute treasure troves. You can find immaculate, professionally cleaned designer gowns from recent seasons at a significant saving.
Emerging Designers: Check out platforms like Etsy or Instagram to find up-and-coming local designers. They often create gorgeous, customisable pieces at a more accessible price point as they build their brand.
Creating Impactful Décor on a Shoestring
Décor is where you can really let your personality shine, and thankfully, a little creativity goes a very long way. The secret to budget-friendly décor isn't filling every corner of your venue; it's focusing on high-impact elements that make a statement.
Your biggest décor decision is your venue. A location with inherent beauty—whether it’s a garden, a historic building, or a space with great architectural details—means you’ll spend far less on trying to create an atmosphere from scratch.
Once you have your canvas, you can focus your efforts. A few well-executed DIY projects can look incredibly professional and save you hundreds. Instead of trying to master complex floral arrangements, try something more manageable like designing your own signage or creating unique place cards. For some beautiful and achievable ideas, you might find this wedding photo shoot inspiration helpful.
Your centrepieces are another area where you can save a bundle. Consider these stunning and affordable alternatives to traditional flowers:
Lush Greenery: Garlands of eucalyptus or ivy are far less expensive than flowers and create a romantic, abundant look.
Candle Clusters: Nothing beats the romance of candlelight. Grouping pillar candles of various heights creates a warm, intimate, and incredibly elegant atmosphere for a minimal cost.
Fruit and Foliage: A beautiful bowl of seasonal fruit like pomegranates or figs mixed with some simple greenery can be a unique and striking centrepiece.
Capturing Memories with Smart Photography Choices
Your wedding photos are one of the few tangible things you'll take away from the day, so it’s an area you really want to get right. But that doesn’t mean you need to book the most expensive photographer in town to get beautiful results.
A brilliant strategy is to look for rising-star talent. These are photographers who have honed their skills as second shooters for established professionals and are now building their own portfolios. They often have a fresh, modern style and offer their services at a much lower rate than seasoned veterans, but their work is fantastic.
When you're discussing packages, be upfront about what you truly need. Many photographers offer all-inclusive deals with extras like engagement shoots and fancy albums. If your budget is tight, ask for a custom package that covers the essentials:
Hours of Coverage: Think realistically about how long you need them there. Eight hours is typically plenty of time to cover getting ready through to the first hour of dancing.
Second Shooter: While it's a nice-to-have, a second shooter isn't always essential, especially for smaller weddings. Cutting this can often save a few hundred dollars.
Digital Files: Make sure your package includes the high-resolution digital files with printing rights. This gives you the freedom to create your own album and prints later on when your budget allows.
Managing Your Guest List and Invitations
Of all the moving parts in wedding planning, nothing will blow up your budget faster than the guest list. Seriously. Every single person you invite adds a direct cost—for their meal, their chair, and even the amount of space you need. Getting a handle on your guest list isn't about being ruthless; it's about being realistic and protecting your financial goals.
This can be one of the toughest, most emotionally charged parts of the process, but having a clear plan from the start can save you a world of stress. It’s the single most powerful lever you can pull to keep your wedding costs in check.
Crafting Your Guest List With Care
The best way I've seen couples tackle this is with a tiered system. It helps you both get on the same page about your priorities and gives you a solid framework for those tricky conversations—especially when well-meaning family members have their own guest list in mind.
Sit down together and start drafting your list in waves:
The A-List: These are your absolute non-negotiables. We're talking immediate family (parents, siblings), your ride-or-die best friends, and your bridal party. Basically, the people you couldn't imagine getting married without.
The B-List: This is your next circle out. Think extended family like aunts, uncles, and cousins, plus your other close friends.
The C-List: Finally, this group includes people like your parents' friends, work colleagues, and other acquaintances you'd like to have there if space and budget allow.
Once you have these lists, you can see how they stack up against your venue's capacity and your per-head catering quote. If your A-list and B-list already hit your maximum number, you have a perfectly logical and fair reason to stop there. This system gives you a kind but firm way to navigate pressure: "We'd love to invite everyone, but we have to stick to our venue's capacity."
Gracefully managing expectations is key. Be prepared with a kind, consistent response for those who don't make the final cut. A simple, "We're keeping our celebration very intimate to stay on budget," is honest and respectful.
Smart and Stylish Invitation Strategies
Your invitations are the first glimpse your guests get of your wedding day, but they absolutely do not need to cost a fortune. Thankfully, there are more gorgeous and affordable options out there today than ever before.
You can make a stunning first impression without forking out for custom letterpress stationery. The real savings come from being strategic with your format and your follow-up.
Digital vs Print Invitations
Let's break down a few of the most popular, budget-friendly choices.
Invitation Type
Pros
Cons
Best For Couples Who…
Digital E-vites
Almost free, eco-friendly, instant delivery, super easy RSVP tracking.
Can feel less formal, might get lost in spam folders.
Are tech-savvy and want to put their budget towards other things, like catering or music.
DIY Print
You get full creative control and it's very cost-effective if you're a bit design-savvy.
It can be time-consuming, and the quality depends on your home printer.
Enjoy a creative project and have access to a decent printer.
Budget Printers
Professional quality for a low cost, with heaps of templates to choose from.
Less room for customisation, and watch out for potential hidden shipping costs.
Want a beautiful physical invitation without the high price tag of a boutique stationer.
A brilliant hybrid approach that many couples are using is to send one simple, beautifully printed invitation card that directs guests to a wedding website for all the other details. This saves a small fortune on extra inserts for accommodation, directions, and registry information—not to mention the savings on postage.
A free wedding website is an indispensable tool for any couple planning on a budget. It acts as a central hub where you can share your story, post updates, and host all the crucial info your guests need. This one simple step eliminates the need for expensive, multi-piece invitation suites and makes communication infinitely easier.
Your wedding registry can be one of the most powerful tools in your financial toolkit, especially when you're planning a wedding on a budget. It’s no longer just a list of toasters and towels; a modern registry is your chance to build a foundation for your new life together, aligning perfectly with your bigger financial goals.
Think of it this way: your guests genuinely want to celebrate you with a gift. By guiding them towards what you truly need—whether that's help with a home deposit or finally getting that fancy coffee machine—you make sure their generosity makes a real impact. It’s a wonderful way to be strategic and heartfelt at the same time.
Blending Traditional Gifts with Future Goals
Modern registry platforms have completely changed the game. Gone are the days of having to choose between asking for physical items or awkwardly asking for cash. With a flexible service, you can create a single, beautifully organised list that includes a mix of everything.
Physical Items: Of course! You can still add those classic home essentials you've been dreaming of, from a new knife set to quality cookware.
Cash or Experience Funds: This is where it gets really exciting. Guests can contribute towards your honeymoon, a deposit for your first home, or even a fund for a new puppy.
Group Gifting: Have your eye on a big-ticket item, like a new couch or a piece of art? Group gifting allows guests to pool their contributions, making a high-value gift much more attainable for everyone.
This combination approach is a win-win. Guests feel comfortable because they can choose a gift that resonates with them, whether it's a tangible item or a contribution to a once-in-a-lifetime experience. A flexible online service, like the one shown below, makes this process seamless.
The layout is clean and intuitive, allowing guests to easily see the mix of physical gifts and cash fund contributions you've selected for your future.
Traditional vs Modern Gift Registry Options
Choosing the right registry type is a big decision. While traditional registries have their place, modern options offer incredible flexibility that can directly support your financial goals as a new couple. Here's a quick comparison to help you decide what's best for you.
Registry Type
Best For Couples Who…
Budget Impact
Guest Experience
Traditional (In-Store)
Are starting from scratch and need physical household items. Prefer guests to buy tangible gifts from a specific retailer.
Minimal direct financial gain, but helps furnish a home without the couple having to pay for it.
Straightforward for guests who prefer physical gift-giving. Can be limiting if items are out of stock.
Cash-Only Fund
Are saving for a major goal like a house deposit, renovation, or honeymoon. Already have a fully furnished home.
High impact. All contributions go directly towards a significant financial goal, reducing future expenses.
Can feel impersonal or awkward for some guests. Wording needs to be handled with care.
Modern (Hybrid)
Want a mix of everything: physical gifts, cash funds, and contributions to experiences. Value flexibility and personalisation.
Maximum impact. Fulfills needs for home goods while also funnelling funds into major savings goals.
Offers the most choice and flexibility for guests, allowing them to contribute in a way they feel most comfortable with.
Ultimately, a modern hybrid registry gives you the best of both worlds. It respects the tradition of gift-giving while empowering you to build a strong financial start to your marriage.
How to Communicate Your Registry Choices
The key to a successful modern registry is all in the communication. You want your guests to feel excited about contributing, not like they're just paying a bill. The perfect place to share this information is on your wedding website, where you have the space to explain your choices with warmth and personality.
Here are a couple of wording examples you can adapt:
For a Honeymoon Fund: "Your presence at our wedding is the greatest gift of all! However, if you wish to give a gift, we would be overjoyed with a contribution to our honeymoon fund. We are so excited to create our first memories as a married couple, and your generosity will help us get there."
For a Home Deposit Fund: "We are so grateful to have everything we need for our home. As we begin our life together, our next big dream is to buy a place of our own. If you’d like to give a gift, a contribution to our 'Future Home Fund' would mean the world to us."
This approach helps guests feel connected to your journey. You can learn more about setting up a flexible wedding gift registry that makes this process simple and elegant.
As you curate your list, don't forget practical items like bedding. To make sure you get the perfect fit for your new home, you can consult this comprehensive bedding size chart. By thoughtfully planning your registry, you're not just getting gifts—you're getting a head start on your future.
Common Questions About Budget Weddings
Let's wrap up by tackling some of the most common questions we hear from couples planning a wedding on a tight budget. We've compiled the trickiest scenarios to give you the confidence you need to make smart, savvy decisions throughout your planning.
What’s the Very First Thing We Should Do?
Before you even think about venues or colour schemes, you need to have a real, honest conversation about money. Sit down together and figure out a total wedding budget that you're both genuinely comfortable with. No stretching, no maybes. Write that number down.
Once you have your number, you each need to list your top three non-negotiables. Is it incredible food? A top-tier photographer? A live band that will get everyone dancing? This simple exercise is a game-changer. It immediately clarifies where the bulk of your money should go and, just as importantly, where you're both happy to cut back. This becomes the bedrock for every other decision you make.
How Can We Trim the Guest List Without Hurting Feelings?
This is always the toughest part, isn't it? The secret here is to be consistent. Create clear, firm rules and apply them to everyone across the board, no exceptions.
A good starting point could be a 'no plus-ones unless they're married, engaged, or living together' rule. Or perhaps you decide on a 'no kids' wedding. Another popular and effective strategy is the ‘one-year rule’—if you haven’t spoken to them in the last year, they probably don't need an invitation.
If someone asks why they didn’t get an invite, just be honest but gentle.
A simple, "We're keeping our wedding incredibly intimate to stick to our budget, but we would absolutely love to celebrate with you another time!" is respectful and clear. It explains the situation without making anyone feel personally left out.
Do DIY Projects Actually Save You Money?
They certainly can, but you have to be strategic. A small, manageable project like designing your own place cards or thank-you notes? That’s a clear win. But taking on a massive project, like arranging all your own flowers, can quickly spiral. Once you buy all the tools, supplies, and buckets—not to mention the flowers themselves—it can end up being more expensive and incredibly stressful than just hiring a professional.
Before diving into any DIY project, ask yourselves three honest questions:
What is the total cost of all the materials?
Do I genuinely have the skill to pull this off beautifully?
How much time will this actually take?
Sometimes, your peace of mind is worth far more than the few dollars you might save. Choose your battles wisely.
What Are the Most Common Hidden Wedding Costs to Watch Out For?
Ah, the budget-busters! Those little fees that seem to come out of nowhere can really do some damage if you're not prepared.
Always be on the lookout for extra venue charges like cake-cutting fees (yes, that's a thing!) or corkage fees if you plan to bring your own alcohol. Vendor overtime is another big one; photographers, videographers, and DJs often have clauses for staying later than planned.
And don't forget about dress alterations, which can easily add hundreds of dollars to the price of a gown. Delivery, setup, and breakdown fees for things like flowers and rental furniture can also catch you by surprise. The best defence is a good offence: always ask for a fully itemised quote and read every line of your contracts. Make sure you know exactly what’s included and, more importantly, what isn’t.
Ready to create a gift registry that’s as smart and flexible as your wedding plans? With EasyRegistry, you can seamlessly combine physical gifts, cash funds for your honeymoon, and even contributions towards a house deposit—all in one beautiful, easy-to-use registry. Take the awkwardness out of asking for gifts and start building your future, your way.
That incredible, floaty feeling after getting engaged is amazing. But it’s often followed by a slightly more terrifying thought: "Now we have to plan a whole wedding?!" Trust me, I get it. A solid wedding planning timeline is the best way to turn that overwhelming feeling into an exciting, step-by-step project. It's your roadmap, designed to keep you organised, on budget, and actually enjoying the journey to your big day.
Your Wedding Planning Journey Starts Now
The moment you said "yes!" was pure magic. The next step shouldn't be pure panic. Think of this guide as your experienced companion, a flexible framework built for modern Aussie couples. This isn’t about ticking boxes on a rigid schedule; it’s about creating a logical flow that prevents that last-minute scramble and keeps the focus on celebrating your love.
Before you fall down a Pinterest rabbit hole or book a single vendor, the most important thing you can do is get on the same page with your partner. These initial conversations are the foundation of your entire wedding.
Sit down and have a real chat about:
Your Budget: What can you both realistically afford? Is anyone else contributing? This number is the bedrock of your planning and will shape almost every decision you make. For some great ideas on this, check out these amazing tips to save money on your wedding day.
Your Vision: What’s the vibe? Are you dreaming of a relaxed beach party, a glamorous black-tie affair, or a rustic country feast?
Your Guest List: You don't need exact names yet, but a rough headcount is crucial. It’s the key to finding a venue that can comfortably hold everyone without blowing the budget.
Understanding The Australian Timeline
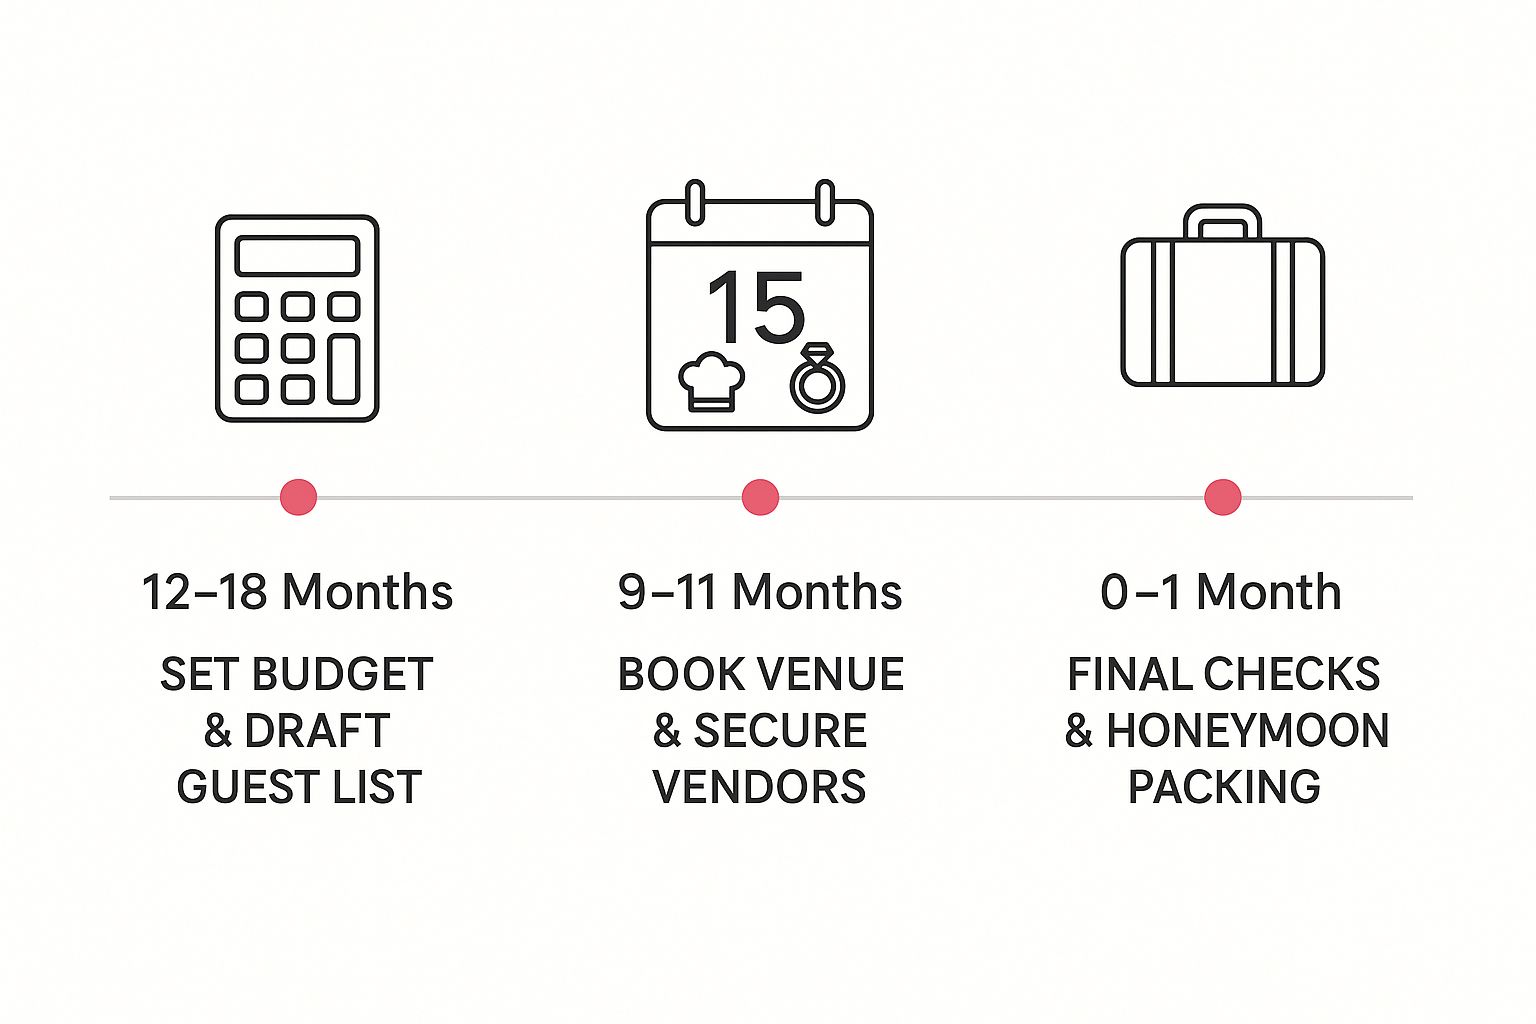
Here in Australia, we're seeing a trend towards longer engagements. The average wedding planning timeline now sits at around 22 months, which gives couples plenty of breathing room. It's a smart move, especially when you consider that popular venues in cities like Sydney and Melbourne can book out up to two years in advance.
This extra time allows you to research properly, secure your first-choice vendors, and spread out the costs. This infographic gives a great bird's-eye view of how it all breaks down.
As you can see, the early months are all about locking in the big, non-negotiable things. The finer details and personal touches come into play much closer to the date.
Your timeline is personal. If you’re planning in six months instead of eighteen, you’ll simply need to condense these stages. The key is not the length of your engagement, but how effectively you organise the tasks within it.
Why A Timeline Is Your Best Friend
A good timeline is more than just a checklist; it's your sanity-saver. It stops that nagging feeling that you’ve forgotten something critical. By tackling tasks in the right order, you avoid costly mistakes—like booking a caterer before you even know your final guest count. It helps you manage your cash flow by spacing out deposits and payments, which seriously reduces financial stress.
Basically, it's the tool that lets you move from the big-picture dreams to the tiny, meaningful details without losing your mind.
Wedding Timeline At A Glance Key Milestones
Here’s a high-level overview of the major tasks and when you should aim to complete them. Use this as a quick reference to stay on track throughout your planning journey.
Timeframe Before Wedding
Key Tasks to Complete
12+ Months
Set budget, draft guest list, choose your bridal party, book venue, and hire a wedding planner (if using).
10-11 Months
Book photographer, videographer, and celebrant. Start dress shopping.
8-9 Months
Send save-the-dates. Book entertainment (band/DJ) and florist.
6-7 Months
Order invitations. Arrange transport. Start planning honeymoon.
4-5 Months
Book hair and makeup trials. Choose wedding rings. Order the cake.
2-3 Months
Send invitations. Apply for marriage licence. Finalise menu and run sheet.
1 Month
Final dress fitting. Confirm all vendors. Write vows.
1-2 Weeks
Provide final numbers to venue/caterer. Create seating chart. Pack for honeymoon.
The Day Before
Drop off items at venue. Rehearse ceremony. Get a good night's sleep!
This table is just a guide, of course. The most important thing is to make the timeline work for you, your partner, and the unique celebration you're creating.
The First Steps: 12 to 18 Months Out
Alright, you're engaged! With over a year until the big day, it's easy to feel like you have all the time in the world. But trust me, this is the most crucial period for laying a solid foundation for your wedding. Forget the tiny details for now. This is the time for the big, non-negotiable decisions that will shape everything to come.
First things first: the budget. I know, it's not the most romantic chat, but it's the most important one. Sit down together and get real about what you can comfortably spend, and have a gentle conversation with any family members who might be contributing. This number is your North Star for the entire planning process.
Next up, draft a guest list. It doesn’t have to be final, but you need a realistic ballpark figure. Are you picturing an intimate affair with 50 of your closest people, or a massive celebration for 200? This single detail will immediately narrow down your venue search.
Setting Your Wedding Foundations
Once you've got a budget and a rough guest count, the real fun can start. This is when you get to dream about the 'when' and 'where'.
Choosing a date is a mix of heart and head. Think about what season you love, if there are any special anniversaries you'd like to honour, or the overall vibe you're going for. A breezy summer wedding feels completely different (and often costs more) than a cosy winter one. Keep an eye on public holidays too, as they can seriously impact vendor pricing and your guests' ability to travel.
With a couple of potential dates circled on the calendar, you can tackle the biggest piece of the puzzle: your venue. This is the backdrop for your entire day, so it's a big one!
Getting these foundational tasks sorted early is the best thing you can do for your future, less-stressed selves. A clear budget, guest count, and venue create a framework that makes every other decision so much easier.
Booking Your High-Priority Vendors
With your date and venue locked in, it’s time to secure any other suppliers you absolutely can't live without. These are the creative professionals who get snapped up 12-18 months in advance, especially for popular dates.
Think about what matters most to you as a couple. For most, the priority list includes:
Photographer: Their style will literally define how your memories look. If you've been stalking a particular photographer on Instagram for years, reach out now.
Videographer: Just like photographers, the best ones are in high demand and their calendars fill up incredibly fast.
Wedding Planner: If you're bringing a full-service planner on board, this is the time to do it. They’ll be your guide and sanity-saver through this entire journey.
Booking these key players might feel ridiculously early, but it’s one of the smartest things you'll do. It means you get your dream team, not just who’s left.
Creating Your Wedding Vision
Now is also the perfect time to let yourselves dream. Start a Pinterest board, a scrapbook, or a shared folder and just start saving images you love. Don't just stick to weddings—pull inspiration from travel, art, fashion, and interior design. What colours, textures, and moods are you both drawn to?
This isn't about making firm decisions yet; it's about discovering your shared style. You might find you're both drawn to minimalist, clean lines, or maybe you're all about lush, romantic florals. Knowing this makes everything from choosing invitations to flowers a breeze later on.
When you start looking at venues, having this vision really helps. It allows you to ask better, more specific questions. To make sure you don't miss anything crucial, take a look at these essential questions to ask your wedding venue before you sign on the dotted line. It’s a lifesaver for making sure the space can truly bring your vision to life.
Building Your Vendor Team: 9 to 11 Months Out
Okay, deep breath. You've locked in your venue and set the date! This is huge. Your wedding has officially moved from a dream into a real event with a time and a place. Now, the real fun begins: assembling the team of creative professionals who will bring your vision to life.
Think of your vendors as the artists and experts who will execute the day you're imagining. Your photographer freezes the memories in time, your florist paints the scene with colour and life, and your band or DJ sets the entire vibe for the party. Nailing these bookings now means you get your first-choice pros, not just whoever happens to be left.
Prioritising Your Key Creatives
It's time to research and book the vendors who make the biggest splash. These are usually the people who can only be in one place at a time, so their calendars fill up incredibly fast.
You'll want to start your search with these core suppliers:
Celebrant: This person is the heart and soul of your ceremony. You need to find someone you both genuinely connect with, as they’ll be the one guiding you through your vows and setting the tone for the entire day.
Videographer: Just like photographers, the best videographers are in high demand and get booked up well in advance. Figure out what style of film you're after—is it cinematic and dramatic, or more of a candid documentary?—and start reaching out.
Band or DJ: Let's be honest, the right music makes the party. Whether you're picturing a live band that gets Grandma on the dance floor or a DJ spinning your favourite tunes all night, get your entertainment locked in.
Florist and Stylist: Your flowers and décor are what make the space feel like yours. A great florist will take your colour palette and ideas and transform the venue into something truly beautiful and cohesive.
Don't just fall in love with an Instagram feed. Always schedule a video call or, if you can, a coffee catch-up. You'll be spending the entire day with these people, so feeling comfortable and having a good rapport is non-negotiable.
The Quest for the Perfect Attire
This window is also the official green light for wedding attire shopping—a major milestone on any wedding planning timeline! Finding 'the one', whether it’s a gown, a suit, or something completely different, can take a while. Plus, you need to account for production and alteration timelines.
Believe it or not, a custom-made gown can take anywhere from six to nine months just to be made and delivered. And that's before a single stitch of alteration has been done. Starting your search now avoids that last-minute panic and gives you the freedom to explore different designers and boutiques without feeling rushed.
Remember to factor in multiple fittings. Most outfits will need at least two or three rounds of tweaks to get that perfect fit, with the final one often happening just a couple of weeks before the big day.
Tantalise Your Taste Buds
Here's one of the most enjoyable jobs on the list: sorting out your food and cake. With your venue booked, you can now line up tastings with your caterer (if they're not in-house) and your favourite cake designers.
This is your chance to really have fun with it. Sample different dishes, play with flavour combinations, and design a menu that feels personal to you as a couple. Maybe you’ll choose canapés that give a nod to your first date, or a cake flavour you both absolutely love. These tastings are your final quality check before locking in the delicious details.
Give Your Guests a Heads-Up
By now, your guest list should be pretty much set in stone. Once you have that final list of everyone you want to celebrate with, it’s time to get those 'Save the Dates' in the mail.
This isn't just a formality; it's a critical courtesy for your guests. Sending them out nine to eleven months ahead of time gives everyone, especially those who need to travel or book time off work, plenty of notice. It ensures all your favourite people can make the necessary arrangements to be there. This simple step solidifies your guest list and makes everything feel wonderfully real.
Getting Into The Finer Details: 6 To 8 Months Out
With your big-ticket vendors locked in, the wedding planning timeline now shifts from broad strokes to the beautiful, finer details. This is where your day really starts to feel like yours. You’ve built the foundation; now it’s time to add the personality, colour, and character that will make it unforgettable.
During these months, you'll be refining your vision and sorting out the logistics that make everything run smoothly. It’s a genuinely exciting time when all those separate ideas you’ve had start clicking together, forming a clear picture of the celebration ahead.
Nailing Your Wedding Style and Decor
This is the perfect window to get serious about the look and feel of your day. It’s time to move beyond the Pinterest board and make some firm decisions. Sit down with your florist and stylist to finalise your colour palette, pick out specific floral arrangements, and choose the table linens that will bring your venue to life.
Try to think about the entire guest journey, from the moment they arrive until the last song. Do you need signage to point them in the right direction? What will your table centrepieces look like? Making these calls now ensures a cohesive and polished feel throughout the event.
To keep everyone entertained, you might also want to look into some unique wedding entertainment ideas. This could be anything from a classic photo booth with quirky props to a live painter capturing the buzz of the reception.
Sorting Guest Communications and Gifts
It’s officially time to get your wedding invitations organised. Make sure they are ordered and ready to be posted right at the six-month mark. Your invitation suite needs to be crystal clear, with RSVP instructions, a non-negotiable deadline, and easy-to-follow directions to your venue.
This is also the moment to set up your gift registry. Having this sorted before the invitations go out saves you from a hundred "what should we get you?" questions. You can create a seamless experience for everyone by setting up a wedding gift registry that blends traditional gifts with cash funds for bigger things, like your honeymoon.
A well-organised invitation and registry process sets a considerate tone for your wedding. Your guests will really appreciate you making it as easy as possible for them to RSVP and find your gift information.
Locking in Logistics and Legals
Beyond the pretty stuff, this period is crucial for nailing down practicalities. Organise transport for the wedding party and decide if you need to arrange a coach for guests, especially if your ceremony and reception are in different locations. Even just providing details for local taxi services is a helpful touch.
Most importantly, it’s time to tackle the legal paperwork. In Australia, you must lodge a Notice of Intended Marriage (NOIM) with your celebrant at least one month before the wedding, but getting it done now is a very smart move. Ticking this major legal task off your list early saves a world of last-minute stress.
Finally, let's talk about the best part: your honeymoon!
Book It In: Secure your flights and accommodation now to get the best deals and your first pick of options.
Confirm Time Off: Make sure you've both officially booked the necessary leave from work.
Check Your Passports: Double-check that your passports are valid and won’t expire anywhere near your travel dates.
Planning your honeymoon at this stage gives you something incredible to look forward to as the final planning push begins. It’s a wonderful, rewarding task that feels like the treat you’ve definitely earned.
Locking It In: Your 2 to 5-Month Checklist
With the wedding day now feeling very real and getting closer by the minute, your focus will naturally shift from big-picture dreaming to nailing down the finer details. This is the time when all those abstract ideas start to take shape, from the suit you’ll wear to the vows you’ll exchange. The final countdown is officially on!
First things first, let’s talk rings. If you haven't already chosen and bought your wedding bands, now’s the time to make it happen. Whether you’re going for a custom design or picking something straight from the jeweller's case, the process of sourcing, creating, and sizing them can take a few weeks. It’s always best to get this sorted early.
Getting Your Wedding Day Look Just Right
This is the perfect window to book in your hair and makeup trials. Scheduling them now gives you plenty of breathing room to experiment with a few different styles, see how they hold up over several hours, and make sure you vibe with your chosen artists. Don't forget to bring along snaps from your Pinterest board and a photo of your dress or suit to give them a clear picture of your vision.
It’s also prime time for those all-important attire fittings. Your outfit has likely arrived, and the tailoring process is about to begin. You'll probably need two or three appointments to get the fit absolutely perfect, so locking in that first one around the four-month mark keeps everything moving smoothly and avoids any last-minute panic.
A little tip from experience: make sure you bring the exact shoes you'll be wearing on the day to your very first fitting. Heel height makes a huge difference, and it’s the key to getting the length of your dress or trousers spot on.
The Final Headcount and Seating Plan
Your RSVP deadline will probably fall somewhere in this period, which is a huge turning point. As the replies start coming in, you'll need to keep a close eye on your list and be ready to gently chase up anyone who hasn’t responded by the due date.
Getting that final, accurate number of guests is a game-changer. It’s the magic number that dictates a few major things:
Catering Numbers: You’ll need to pass this on to your caterer so they can finalise food orders and staffing for the day.
Venue Setup: Your venue coordinator will use this number to create the floor plan and arrange tables and chairs.
The Seating Chart: Once you know exactly who's coming, you can start tackling the fun (and sometimes tricky) puzzle of the seating chart.
When you get married can play a big role here. In Australia, autumn and spring are by far the most popular seasons for weddings, with autumn hosting 35% of nuptials and spring close behind at 31%. If your wedding is during one of these peak times, your venue and suppliers will be incredibly busy, so giving them your final numbers promptly is even more crucial. You can dive deeper into how the seasons affect the wedding industry in this comprehensive Australian wedding report.
Perfecting the Ceremony and Saying Thanks
With most of the logistics running smoothly, you can circle back to the real heart of the day: the ceremony. Spend some quality time with your celebrant to iron out all the details. This is your chance to choose your readings, put the finishing touches on your vows, and decide on the music for those key moments—like walking down the aisle and signing the register.
Finally, this is a great time to think about buying gifts for your wedding party and parents. It’s such a lovely way to thank them for being by your side through it all. Finding something personal and meaningful now means it’s one less thing on your to-do list during those final, busy weeks before you say "I do."
The Final Month and Finishing Touches
You’ve made it to the home stretch! This final month is all about confirming the details, tying up loose ends, and getting yourself mentally and physically ready for the big day. The heavy lifting is behind you; now it's about final checks and a bit of self-care.
Your first job is to get in touch with all your vendors. I mean everyone. Give them a call or send a quick email to lock in arrival times, final payment due dates, and any other little details they need from you on the day. A quick chat now can prevent a world of stress later.
Creating Your Day-Of Masterplan
Once you have all those timings confirmed, it’s time to build your run sheet. Think of this as the masterplan for your wedding day, mapping out everything from your morning coffee to the final farewell.
Make sure you share this schedule with your wedding party and key suppliers. It’s crucial that everyone, from your maid of honour to the DJ, knows exactly where they need to be and when. As the day gets closer, your wedding party will be looking to you for direction, so it helps to get them organised. A quick guide on the essential best man duties and responsibilities can be a lifesaver.
This is also when you'll give your final guest numbers to your venue and caterer. They need this for everything from setting the tables to prepping the meals, so don't miss their deadline.
Final Preparations and Self-Care
With the logistics locked in, you can shift your focus to the more personal touches. You’ll have your final attire fitting and get to bring your dress or suit home at last! Just remember to store it somewhere safe where no one (especially your partner!) can peek. This is also the perfect time to assemble a wedding day emergency kit.
A few must-haves for your kit include:
Quick Fixes: Safety pins, a mini sewing kit, and stain remover pens are absolute non-negotiables.
Personal Care: A few painkillers, some blister plasters, mints, and any personal medications.
Beauty Touch-ups: A bit of your lipstick, powder, and hairspray for those quick refreshes throughout the night.
Now's a great time to finalise your seating chart and write out your place cards. While most weddings in Australia still happen on a Saturday (55%), Fridays are becoming a popular choice, now hosting 21% of weddings. This trend is often driven by couples wanting better venue availability and pricing, which can sometimes affect how early you need to finalise details.
Most importantly, pack for your honeymoon and look after yourself. Hand off any small, lingering tasks to friends or family you trust. Get a massage, enjoy a final pre-wedding date night, and get plenty of rest. You've planned an incredible celebration—now it’s time to relax and get ready to enjoy every moment of it.
Your Wedding Timeline Questions Answered
Working your way through a wedding planning timeline can feel like you’re constantly second-guessing yourself. It's totally normal to wonder if you're on the right track or if there’s some secret, "correct" way to do things. Let's clear up some of the most common questions we hear from couples.
Probably the biggest one we get is: "What if my engagement is shorter than 12 months?" First of all, don't panic! A shorter timeline just means you'll be compressing the checklist, not throwing it out the window. The priority of tasks stays the same—budget, guest list, and venue always come first—but you'll need to be ready to make decisions much faster. You might also need to be a bit more flexible with your vendor choices, as the most in-demand suppliers often book out over a year in advance.
Another big question is about when to bring family into the picture. Our advice? Have those conversations about potential budget contributions and who they’d like on the guest list right at the very beginning, during that initial 12 to 18-month planning phase. Getting this sorted out early avoids awkward conversations and mismatched expectations down the line. Clear, upfront communication really does set a positive tone for the entire process.
Can We Plan a Wedding in Six Months?
Yes, you absolutely can! It just requires being super organised and decisive from day one. The trick is to lock in your non-negotiables—think venue, celebrant, and photographer—within the first couple of weeks.
For a compressed timeline, it might look something like this:
Months 1-2: Nail down your budget, finalise the guest list, and book your venue and all key vendors. As soon as that venue is locked in, get your save-the-dates out.
Months 3-4: It's time to order your wedding attire, send out the formal invitations, and get the legal paperwork sorted, like lodging your Notice of Intended Marriage (NOIM).
Months 5-6: This is all about the final details. Think final dress or suit fittings, confirming timings with all your suppliers, and putting together a solid day-of schedule.
It’s definitely a sprint rather than a marathon, but it's completely doable if you stay focused.
The most important part of any wedding planning timeline isn’t its length, but how it’s structured. Prioritise logically, be ready to make decisions quickly, and never be afraid to delegate or ask for help from your wedding party or a professional planner.
What Task Is Most Often Forgotten?
You'd be surprised! It’s usually the small, practical details that get overlooked. Couples get so wrapped up in the big, creative elements—the flowers, the food, the music—that they forget about things like arranging transport for the wedding party or figuring out a solid wet-weather backup plan.
Another classic forgotten task is checking when your passports expire before the honeymoon. Do yourself a favour and check this around the six to eight-month mark. It will save you from a massive, stressful scramble right before your well-deserved holiday.
At EasyRegistry, we help you streamline one of the most important parts of your planning. Create a beautiful, simple-to-use gift registry that your guests will love. Get started today.
Planning a wedding is one of the most exciting chapters in your life, but it can quickly become one of the most expensive. With the average Australian wedding now costing tens of thousands of dollars, many couples feel overwhelmed by the financial pressure to create a perfect day. But what if you could have the celebration you've always dreamed of without the hefty price tag? The great news is, you absolutely can. By thinking creatively, prioritising what truly matters, and making smart, strategic choices, you can host a beautiful, memorable wedding that reflects your personality and love story, all while staying comfortably within your budget.
This guide is your resource for practical, actionable, and affordable wedding ideas that don't compromise on style or significance. We're moving beyond generic advice to give you specific strategies for every aspect of your celebration. You'll discover how to save significantly on your venue, catering, décor, entertainment, and more. Forget the idea that a smaller budget means a lesser wedding. Instead, let's explore how you can make your special day both stunning and sensible, creating cherished memories without starting your married life in debt. This list is designed to empower you with the insights needed to plan a celebration that is authentically, beautifully, and affordably yours.
1. Weekday or Off-Season Wedding
One of the most effective and straightforward affordable wedding ideas is to shift your event date away from the peak Saturday slot. Hosting your wedding on a weekday (Monday-Thursday) or during the off-season (typically November to March in most Australian locations, excluding major holidays) can unlock substantial savings. Venues and vendors have higher demand for Saturdays, but they often offer significant discounts during these quieter periods to fill their calendars.
This simple timing adjustment can reduce your overall wedding budget by 20-40% without compromising on the quality of your suppliers or the elegance of your day. For instance, a couple might find their dream venue is 50% cheaper on a Thursday, allowing them to allocate funds to other priorities like photography or a honeymoon.
How to Make It Work
Careful planning is key to ensuring a weekday or off-season date is a success for you and your guests.
Provide Advance Notice: Send your save-the-dates 6-8 months in advance for a weekday wedding. This gives guests ample time to arrange leave from work.
Choose a Strategic Day: Consider a Thursday evening or a Sunday. These days often feel more like an extension of the weekend and can result in better guest attendance than a Tuesday or Wednesday.
Negotiate with Vendors: When contacting suppliers, explicitly mention your off-peak date. Use this as leverage to negotiate better package deals or inclusions.
The following bar chart visualises the potential cost reductions you can achieve by opting for an off-peak wedding date.
As the data shows, the most significant discount often comes from the venue rental fee, which in turn dramatically lowers your total budget. For more insights on financial planning, you can learn more about how to save money on your wedding day.
2. Backyard or Private Property Wedding
Hosting your wedding in a family member’s or friend’s backyard is one of the ultimate affordable wedding ideas, as it completely eliminates venue hire fees. This approach not only offers significant savings but also provides an incredibly personal and intimate setting. You gain complete creative control to design a space that truly reflects your style, transforming a familiar location into a unique wedding venue.
The money saved on a venue, often thousands of dollars, can be reallocated to elevate other aspects of your day. This might mean investing in a stunning marquee, elaborate floral arrangements, or hiring a premium caterer to create an unforgettable dining experience for your guests.
How to Make It Work
A private property wedding requires meticulous planning to cover all logistical bases that a traditional venue would typically handle.
Plan for Practicalities: Organise essential rentals like a luxury restroom trailer for guest comfort, and a generator if the property's power supply is limited. Also, ensure you have adequate event insurance.
Create a Weather-Proof Plan: Hire a marquee with sidewalls to protect against unexpected rain or wind. It's crucial to have a solid backup plan to keep everyone comfortable no matter the weather.
Hire a Day-Of Coordinator: A coordinator is invaluable for managing vendor arrivals, setup, and troubleshooting on the day, allowing you and your family to relax and enjoy the celebration. They handle the complex logistics so you don't have to.
3. DIY Wedding Décor and Centerpieces
Embracing a do-it-yourself (DIY) approach to your wedding decorations is one of the most impactful affordable wedding ideas for couples wanting to add a personal touch. By creating your own centrepieces, signage, and other design elements, you can slash your décor budget by 50-70% while infusing your venue with unique character that reflects your story as a couple. This involves crafting items using materials from craft stores, online marketplaces, or even repurposed household objects.
From Pinterest-famous homemade signage to stunning paper flower walls, the possibilities are endless. For example, a couple in Texas saved over $2,000 by creating all their centrepieces using thrifted bottles and simple grocery store flowers, proving that a small budget can still yield elegant and memorable results.
How to Make It Work
Successful DIY décor requires creativity, planning, and a bit of hands-on effort.
Plan Ahead: Start your DIY projects at least 6-9 months before the wedding to avoid last-minute stress. Create one prototype of each item (like a centrepiece) before committing to making them all.
Make It a Team Effort: Host crafting parties with friends and family to make the process fun and efficient. Many hands make light work, and it becomes a memorable part of your wedding journey.
Shop Smart for Materials: Look for sales and coupons at stores like Spotlight or Lincraft. Ordering materials in bulk from wholesale suppliers online can also offer significant savings. For custom fabric decorations, you can even explore how to make your own DIY custom designs using iron transfer paper.
Assign a Day-Of Coordinator: Nominate a trusted friend or family member to be in charge of setting up all your DIY elements at the venue on the wedding day.
4. Buffet or Food Station Catering
One of the most impactful affordable wedding ideas is to rethink your meal service. Opting for a buffet-style setup or interactive food stations instead of a traditional plated sit-down dinner can significantly reduce catering costs while offering guests more variety and a relaxed, sociable dining atmosphere. This approach requires fewer service staff and often allows for more creative and diverse menu options.
The savings come from reduced labour costs and more efficient food portioning. A couple might find a local BBQ buffet caterer can serve 150 guests for under $4,000, whereas a formal plated equivalent could easily exceed $8,000. This shift in service style allows for a more dynamic and engaging experience for everyone involved.
How to Make It Work
A well-organised buffet is key to ensuring a smooth and enjoyable meal service without long queues or cold food.
Strategise the Layout: Set up multiple stations or double-sided buffet lines to prevent congestion and reduce guest waiting times. Popular options include taco bars, pasta stations, or even gourmet food trucks.
Manage Guest Flow: To avoid a single massive queue, have your MC or DJ release tables to the buffet one or two at a time. It’s also a great idea to have the wedding party go first to model the process.
Communicate Clearly: Use clear signage to label each dish, highlighting key ingredients and potential allergens like nuts, gluten, or dairy. This helps guests make informed choices quickly.
Negotiate Your Menu: When planning with your caterer, ask about using seasonal vegetables or more cost-effective proteins to lower the per-head price without sacrificing flavour or quality.
5. Digital Invitations and Day-Of Programs
Another highly effective of all affordable wedding ideas is to replace traditional paper stationery with beautifully designed digital versions. Sending save-the-dates, invitations, and even day-of programs via email or a wedding website can save couples anywhere from $500 to over $2,000 on printing, materials, and postage. It’s a modern, eco-friendly, and surprisingly elegant alternative.
Modern digital platforms offer stunning, customisable designs that mimic the look of high-end paper goods. This approach also streamlines RSVP tracking, allowing you to manage guest responses effortlessly. For example, a couple in Seattle saved nearly $1,700 by sending digital invitations from Paperless Post to 200 guests, costing them only $100 compared to an estimated $1,800 for printed versions.
How to Make It Work
To ensure your digital stationery is well-received and effective, a thoughtful approach is necessary.
Use a Premium Service: Platforms like Paperless Post, Greenvelope, or Evite offer wedding-specific suites with elegant designs, animated envelopes, and robust tracking features that feel more special than a standard email.
Maintain Traditional Timelines: Send digital save-the-dates 6-8 months out and invitations 8-10 weeks before the wedding, just as you would with paper.
Consider a Hybrid Approach: You could send printed invitations to immediate family or older guests as keepsakes while emailing the rest of your guest list to save on costs.
Communicate Clearly: Follow up with a phone call to less tech-savvy relatives to ensure they received and saw the invitation. Always send a test to yourself first to check formatting across different devices.
Utilise QR Codes: For any physical signage on the day, like a welcome sign or table numbers, include a QR code that links guests to the digital program, menu, or seating chart. This is a brilliant way to reduce day-of printing costs.
6. Grocery Store or Wholesale Flowers
Floral arrangements are a significant wedding expense, but one of the most impactful affordable wedding ideas is to bypass traditional florists altogether. By purchasing flowers directly from grocery stores, wholesale markets, or even warehouse clubs, you can dramatically reduce your floral budget. This DIY approach allows you to access beautiful, fresh blooms at a fraction of the cost, often saving 60-80% compared to professional floral services.
The savings can be substantial. For example, some couples have created all their wedding florals, from bouquets to centrepieces, for under $500 using blooms from places like Trader Joe's or local markets, compared to florist quotes exceeding $3,000. It empowers you to achieve a lush, flower-filled aesthetic without the high price tag, reallocating thousands of dollars to other wedding priorities.
How to Make It Work
A successful DIY floral project requires forward planning and a bit of creativity. The key is to keep the designs simple and enlist help.
Source Strategically: Explore local wholesale flower markets, which offer professional-grade stems to the public. Alternatively, many grocery stores and clubs like Costco offer bulk wedding flower packages that can be ordered online.
Plan Your Timeline: Purchase or have your flowers delivered 2-3 days before the wedding. This gives you a day to prep them (trimming stems, removing leaves, and hydrating them in water) and another day for arranging.
Choose Hardy Blooms: Opt for sturdy flowers that are more forgiving for beginners, such as roses, carnations, hydrangeas, and alstroemeria. Use affordable greenery like eucalyptus as a filler to create volume.
Recruit a Team: Turn your floral prep into a fun pre-wedding activity. Ask creative friends or family members to help with the arranging process. Keep prepared arrangements in a cool, dark room until the ceremony.
For a visual guide on how to create a simple, beautiful DIY bridal bouquet, the tutorial below offers excellent step-by-step instructions.
With some preparation and a clear vision, handling your own wedding flowers is a highly achievable way to save a significant portion of your budget.
7. Curated Spotify Playlist Instead of DJ/Band
One of the most impactful affordable wedding ideas is to forego a professional DJ or live band in favour of a personally curated playlist. With services like Spotify or Apple Music, you can craft the perfect soundtrack for your entire day, from the ceremony to the final dance. This approach can save you anywhere from $1,000 to over $3,000, a significant portion of any wedding budget.
This DIY music solution allows for complete creative control and personalisation, ensuring every song has meaning. A couple from Portland, for example, successfully managed their wedding music using Spotify Premium and a rented speaker system for just $300. This savvy move saved them an estimated $2,200 compared to the average DJ quotes they received, proving that a high-quality atmosphere doesn't require a high price tag.
How to Make It Work
A successful playlist-driven wedding relies on meticulous organisation and a little bit of technical preparation.
Segment Your Playlists: Create separate playlists for each part of the day: guest arrival, ceremony, cocktail hour, dinner, and dancing. This ensures the mood transitions smoothly. Make each playlist about 30% longer than the scheduled time to avoid repeats.
Test Everything On-Site: Before the big day, take your playback device and rented speakers to the venue. Test the sound quality, volume levels, and Wi-Fi connection. Always download your playlists for offline access to prevent any streaming interruptions.
Assign a "Music Coordinator": Designate a reliable, tech-savvy friend or family member to manage the music. Their role is to press play at the right times, adjust the volume, and handle any announcements using a rented wireless microphone.
Share Your Soundtrack: To give guests easy access to your curated playlist after the event, you can create and share QR codes for Spotify that link directly to your wedding soundtrack.
8. Daytime or Brunch Wedding
Swapping a traditional evening dinner reception for a stylish daytime event is one of the most impactful affordable wedding ideas. Hosting a morning ceremony followed by a brunch or lunch reception can dramatically reduce your catering bill, often by 30-50%, while creating a fresh, light-filled celebration. Brunch menus are typically far less expensive than formal dinner options, and guests tend to consume less alcohol during the day, which significantly lowers bar costs.
The natural daylight also becomes a key feature, reducing the need for expensive ambient lighting and allowing the beauty of your venue to shine. For example, a mimosa and bloody mary bar might cost $15-25 per person, whereas a full evening open bar can easily exceed $50 per person. This shift allows you to create an elegant atmosphere for a fraction of the cost.
How to Make It Work
A successful daytime wedding relies on timing and embracing a different kind of celebratory atmosphere.
Schedule Strategically: Plan your ceremony for around 10 or 11 am, so it flows seamlessly into a reception that can conclude by early afternoon.
Embrace Brunch Favourites: Curate a menu featuring delicious and cost-effective options like egg stations, pastries, fresh fruit platters, and a coffee bar.
Rethink Entertainment: A daytime event is less about a full dance floor. Opt for a string quartet, an acoustic musician, or a curated playlist for sophisticated background music.
Utilise Natural Light: Work with your photographer to capture beautiful, soft daylight portraits. While you won't get a 'golden hour' sunset, the bright, airy photos will be stunning.
One of the most impactful affordable wedding ideas is to step outside the traditional venue box. Choosing a non-traditional location like a public park, museum, brewery, or your favourite restaurant can significantly reduce your costs. These spaces often come with unique character and built-in décor, meaning you spend less on decorations, and their rental fees are typically much lower than dedicated wedding venues.
This creative approach can save you thousands. For example, a couple could rent a brewery event space for a fraction of the cost of a formal reception hall, or book a restaurant where the venue hire is included in the food and beverage package. This not only cuts down on the venue fee but also simplifies planning by bundling services, making it a clever way to manage your wedding budget.
How to Make It Work
Success with a non-traditional venue hinges on thorough research and asking the right questions.
Plan Ahead for Public Spaces: If you're considering a public park, be sure to apply for any necessary permits well in advance, sometimes up to 12 months ahead.
Confirm Inclusions and Restrictions: Ask what is included in the hire, such as tables, chairs, and staffing. Also, clarify any restrictions on vendors, noise ordinances, or event end times.
Visit at the Right Time: Schedule a visit to the venue at the same time of day you plan to host your event. This allows you to check the natural lighting, noise levels, and general atmosphere.
Choosing the right venue is a critical decision, so it's vital to have a comprehensive list of questions ready. To ensure you cover all your bases, you can learn more about what to ask your potential wedding venue.
10. Small Intimate Guest List
The single most effective way to implement affordable wedding ideas is by curating a small, intimate guest list. Since most major wedding expenses like catering, drinks, and venue size are calculated per person, reducing your guest count from 150 to 50 can slash your overall budget by 40-60%. This approach shifts the focus from a large-scale event to a more meaningful celebration with your absolute nearest and dearest.
Opting for an intimate wedding allows you to reallocate funds toward creating a premium experience for everyone involved. For instance, a couple might choose a luxury restaurant for 30 guests, spending far less than they would on basic catering for 150 guests at a traditional venue. This strategy prioritises quality and connection over quantity.
How to Make It Work
Navigating a smaller guest list requires thoughtful communication and firm decision-making to keep your plans on track.
Set Clear Criteria: Establish firm rules for your guest list from the start. This could include immediate family, bridal party, and friends you have seen in the past year.
Communicate Lovingly: When people ask, explain that you've chosen to have a very intimate ceremony. Frame it as a positive choice about creating a specific atmosphere, not a negative one about excluding people.
Invest the Savings: Use the money you've saved to enhance the guest experience. This could mean a gourmet menu, a top-tier photographer, or even more unique wedding gift ideas for your guests to contribute towards.
Consider a Casual Follow-Up: You can always host a casual backyard barbecue or gathering after the wedding to celebrate with your wider circle of friends and extended family.
Affordable Wedding Ideas Comparison Matrix
Item
Implementation Complexity ?
Resource Requirements ?
Expected Outcomes ?
Ideal Use Cases ?
Key Advantages ?
Weekday or Off-Season Wedding
Moderate – requires flexible scheduling and early planning
Low – standard venue and vendor use, but off-peak negotiation
Couples wanting unique, cost-effective, and daytime events
Reduced catering/bar costs, natural ambience
Non-Traditional Venue
Moderate – permit applications and rentals
Moderate – possible extra rentals for equipment
Venue savings $2,000-$8,000, unique atmosphere
Couples seeking character and lower venue costs
Lower fees, unique settings, bundled packages
Small Intimate Guest List
Low – guest list curation and communication
Low – fewer guests reduce overall costs
Major cost reduction 40-60%, more personalized experience
Couples valuing intimacy, meaningful connections
Largest cost savings, stress reduction, quality upgrade
Making Your Affordable Wedding a Reality
Crafting a beautiful wedding on a budget isn't about sacrifice; it's about smart, intentional choices that reflect who you are as a couple. Throughout this guide, we've explored a range of powerful, affordable wedding ideas designed to help you create a celebration that is both financially savvy and deeply personal. From the strategic timing of a weekday wedding to the intimate charm of a backyard celebration, each suggestion offers a path to significant savings without compromising on the joy and significance of the day.
The central theme connecting these ideas is a shift in perspective. Instead of focusing on what you can't afford, concentrate on what you value most. Is it a breathtaking venue, incredible food, or simply being surrounded by your closest friends and family? Answering this question is the key to allocating your budget effectively and building a wedding that feels authentic to your love story. The most memorable weddings are not defined by their price tag, but by the love, laughter, and personal touches that fill the day.
Your Actionable Next Steps
Feeling inspired? It's time to turn these ideas into a concrete plan. Don't try to implement everything at once. Instead, sit down with your partner and work through these practical steps:
Prioritise Your "Must-Haves": Together, create a list of your top three wedding priorities. This could be anything from the photographer to the food or a specific venue style. This list will be your North Star, guiding every budgetary decision you make.
Mix and Match for Maximum Impact: The real power of these affordable wedding ideas comes from combining them. Perhaps you'll pair a non-traditional restaurant venue with a curated Spotify playlist, or a smaller guest list with a delicious brunch menu. Analyse which combinations align best with your priorities and offer the most substantial savings.
Create a Detailed Budget: Start a spreadsheet and begin plugging in real numbers. Research local vendors for things like wholesale flowers, catering options for food stations, and the cost of hiring a public park space. A detailed budget transforms abstract ideas into a tangible roadmap.
Embracing these strategies empowers you to take control of your wedding planning, ensuring you start your married life on a strong financial foundation, free from unnecessary debt. Your wedding day is the beginning of a new chapter, and a cleverly planned, affordable celebration is the perfect prologue to a future built on shared goals and financial wellness.
Ready to simplify your gift-giving and focus on what truly matters? An online wishing well or gift registry makes it easy for guests to contribute to your honeymoon, a house deposit, or any other goal you're saving for. Get started with EasyRegistry today and give your guests a seamless, modern way to celebrate your new beginning. Explore your options at EasyRegistry.
Crafting the perfect wedding invitation sets the tone for your entire celebration, but finding the right words can feel overwhelming. The wedding invitations wording you choose is your guests' first glimpse into your special day, whether it’s a traditionally elegant affair or a relaxed, modern get-together. It’s a key piece of communication that conveys not just the essential details, but the unique spirit of your relationship.
This comprehensive guide is designed to eliminate the guesswork. We’ll break down 8 distinct styles of wedding invitation wording, providing curated examples, strategic analysis, and actionable takeaways for each one. We’ll explore the nuances of etiquette for every situation, from navigating modern family structures and destination weddings to honouring religious customs. Understanding where this task fits into your broader wedding planning timeline is crucial, as it impacts when you need to finalise and send your invitations to give guests ample notice.
Our goal is to help you confidently craft an invitation that is authentic, informative, and perfectly represents your union. Let's dive in and find the ideal phrasing to announce your big day.
1. Traditional Formal Wedding Invitation Wording
Rooted in centuries of etiquette, traditional formal wedding invitation wording follows a strict structure that honours tradition and family. This style is ideal for classic, black-tie, or religious ceremonies where upholding convention is paramount. The language is sophisticated and impersonal, using a third-person narrative, typically with the bride's parents positioned as the hosts. Every detail, from titles to spelling out numbers, is meticulously handled to convey respect and formality.
Strategic Breakdown
The core strategy of this wording is to communicate the gravity and significance of the event through established social codes. It removes ambiguity and sets a formal tone right from the start, letting guests know what kind of event to expect. This approach is less about personal flair and more about adhering to a time-honoured script that feels elegant and universally understood.
Host-Centric: The invitation is issued by the hosts (traditionally the bride's parents), not the couple. This acknowledges their role in orchestrating and financing the event.
Hierarchical Information: The wording follows a precise order: Hosts, Request Line, The Couple, Date and Time, Venue, and Reception Details.
Specific Phrasing: Key phrases like "request the honour of your presence" are used specifically for ceremonies held in a place of worship, while "request the pleasure of your company" is used for secular venues.
Example and Analysis
Example:
Mr. and Mrs. John Michael Smith request the honour of your presence at the marriage of their daughter Jennifer Anne to Mr. Michael James Thompson Saturday, the twenty-first of September Two thousand and twenty-five at half-past four in the afternoon St. Mary's Cathedral Sydney, New South Wales
This example flawlessly executes the traditional format. It uses full names with titles, spells out all numbers, and employs the correct "honour of your presence" phrasing for a cathedral wedding. For those seeking to maintain classic elegance, reviewing various formal invitation letter examples can provide valuable insights into traditional phrasing and structure. This classic wording also aligns well with traditional gift-giving practices, which can be managed with a modern wedding gift registry.
2. Casual and Modern Wedding Invitation Wording
Breaking away from the strict conventions of the past, casual and modern wedding invitation wording reflects the unique personality of the couple. This contemporary style uses relaxed, conversational language and often presents the couple as the primary hosts, putting their story front and centre. The wording is flexible, allowing for humour, personal anecdotes, and creative phrasing to create an invitation that feels authentic, intimate, and a true representation of the celebration to come.
Strategic Breakdown
The core strategy behind modern wording is to establish a personal connection with guests and set the tone for a relaxed, fun-filled event. It swaps formal titles and third-person phrasing for a more direct and engaging voice. This approach tells guests that the wedding will be less about rigid tradition and more about celebrating the couple's love story in a way that feels genuine to them.
Couple-Centric: The couple is typically the host, inviting guests directly. Phrases like "Together with their families" can be used to acknowledge parental support without adhering to formal hosting lines.
Tone-Setting Language: The choice of words immediately signals the vibe of the wedding. Phrases like "Let's party!" or "We're tying the knot" suggest a high-energy celebration, while softer language can imply a more relaxed, intimate gathering.
Simplified Information: Details are presented clearly and concisely. There is no requirement to spell out numbers or use full middle names, making the invitation easier to read at a glance.
Example and Analysis
Example:
Together with our families Emma Johnson and Ryan Martinez invite you to share in our joy as we say 'I do'
Saturday, 21 September 2024 at 4:30 in the afternoon The Royal Botanic Garden Sydney, New South Wales
Dinner, drinks, and dancing to follow
This example strikes a perfect balance between warmth and clarity. It acknowledges family support while keeping the focus on the couple. The phrase "share in our joy" is inviting and personal, and the clear, scannable format for the date, time, and venue ensures guests have all essential information. This style of wedding invitations wording is ideal for couples who want their stationery to feel both modern and heartfelt.
3. Couple-Hosted Wedding Invitation Wording
Reflecting a modern shift in wedding traditions, couple-hosted wedding invitation wording is used when the couple themselves are the hosts of the celebration. This approach, increasingly common as couples marry later or prefer to take financial ownership, places the couple's names at the forefront. The tone can range from formal to casual, but the core message is one of partnership and independence, inviting guests to celebrate a union they have personally orchestrated.
The infographic below outlines the hierarchical structure of this wording style, showing how the couple takes precedence while still allowing for family acknowledgement.
This visualisation highlights that the primary focus is always the couple, with tonal flexibility and family inclusion serving as secondary, optional layers.
Strategic Breakdown
The core strategy here is to clearly communicate that the couple is issuing the invitation, which re-frames the event as a celebration hosted by two partners beginning their new life together. This wording choice sets a tone of modern autonomy while still maintaining the grace and importance of the occasion. It allows for greater personalisation and directly reflects who is managing the event.
Couple as Primary Hosts: The couple's names appear first, immediately establishing them as the hosts. This is a fundamental departure from traditional wording.
Inclusive Language: Phrases like "Together with their families" or "Along with our parents" are often used. This is a strategic way to honour parental support without ceding the primary host role.
Tone Versatility: Unlike the strictness of traditional wording, this style can be adapted to suit any level of formality, from a black-tie affair to a relaxed backyard gathering.
Example and Analysis
Example:
Together with their families Rachel Anne Green and Ross Geller request the pleasure of your company at their wedding celebration Saturday, the seventh of June Two thousand and twenty-six at five o'clock in the evening The Botanical Gardens Melbourne, Victoria
This example strikes a perfect balance. It begins by graciously acknowledging family support before positioning the couple as the central hosts. The phrase "request the pleasure of your company" is appropriate for a non-religious venue like the Botanical Gardens. By using full names and spelling out the date and time, the invitation retains a sense of formality and occasion while clearly communicating a modern, couple-centric approach to the celebration.
4. Divorced or Blended Family Wedding Invitation Wording
Navigating modern family structures requires a thoughtful approach to wedding invitations wording. This style addresses the complexities of divorced, remarried, or blended families with grace and respect. The primary goal is to acknowledge the important people in the couple's lives without causing confusion or discomfort. The wording prioritises inclusivity and diplomacy, ensuring all hosting parties are recognised appropriately according to their relationship and contribution.
Strategic Breakdown
The core strategy here is clarity and sensitivity. This wording moves away from a single, traditional host line to a more descriptive format that accurately reflects the family situation. It sets a tone of unity and respect, showing guests that the new union is supported by all sides of the family, regardless of its structure. The key is to handle names and relationships in a way that is both honourable and easy to read.
Prioritise Inclusivity: The wording is carefully crafted to include divorced parents, stepparents, and other key family members who are hosting or have played a significant role.
Clear Hierarchy: Divorced parents are typically listed on separate lines. A mother is traditionally listed before the father. Stepparents are included alongside their partners.
Use of "Together with their families": This phrase serves as an elegant solution for highly complex family situations, ensuring no one feels excluded while keeping the invitation uncluttered.
Example and Analysis
Example:
Mrs. Jennifer Smith and Mr. John Smith request the honour of your presence at the marriage of their daughter Sarah Anne to Michael James son of Mr. and Mrs. Robert Williams
This example elegantly handles a situation where the bride's parents are divorced but are co-hosting the wedding. By placing their names on separate lines connected by "and," it signals a united front for the occasion. This wedding invitations wording is respectful of their individual identities while presenting them as joint hosts. It tactfully omits the groom's parents as hosts, instead identifying him as their son, a common choice when one side of the family is funding the event.
5. Destination Wedding Invitation Wording
Destination wedding invitations serve a dual purpose: they announce your marriage and act as a preliminary travel guide. The wording must balance excitement for the unique location with the practical information guests need to plan a significant trip. This style is essential for any couple asking their loved ones to travel, as it sets clear expectations about the time, cost, and logistical commitments involved. The tone is typically warm and celebratory, generating enthusiasm for the trip ahead.
Strategic Breakdown
The core strategy here is clarity and excitement. Unlike traditional invitations, this wording needs to provide more than just a date and time; it must convey the "why" behind the travel. It aims to make guests feel like they are being invited on a special holiday, not just to a ceremony, while transparently providing the tools they need to make an informed decision about attending.
Lead with the Location: The destination is the main draw, so it should be featured prominently to immediately capture attention and set the scene.
Information Hub: This wording often directs guests to a wedding website, which acts as a central repository for all travel, accommodation, and event details. This keeps the physical invitation uncluttered.
Extended Timeline: The language implies a multi-day celebration rather than a single-day event, encouraging guests to plan a mini-vacation around the wedding.
Example and Analysis
Example:
Together with their families Jennifer and David invite you to join them as they say "I do" when they are married in Maui, Hawaii Saturday, the seventh of June Two thousand and twenty-six at five o'clock in the evening The White Orchid Beach House Makena, Hawaii
For details on travel, accommodation, and our week of wedding festivities, please visit our website: jennanddavidmaui.com
This example effectively blends a warm, personal tone with crucial information. It clearly states the destination upfront and directs guests to a website for the extensive details that a destination wedding requires. This approach keeps the invitation elegant while ensuring guests have easy access to logistical information. For couples planning such an event, a travel registry can be a practical way for guests to contribute to the honeymoon or travel fund as a wedding gift.
6. Religious Wedding Invitation Wording
Religious wedding invitations infuse the announcement with faith-based language, scripture, and symbols that are central to the couple's beliefs. This style is essential for ceremonies where the spiritual union is the focal point, acknowledging the sacred nature of marriage within a specific religious tradition. The wording communicates not only the details of the event but also its profound spiritual significance, often following the established customs of Catholic, Jewish, Islamic, Hindu, or other faith communities.
Strategic Breakdown
The core strategy here is to frame the wedding as a sacred covenant blessed by a higher power and witnessed by the faith community. This approach sets a tone of reverence and joy, clearly signalling the religious importance of the ceremony to guests. The language chosen is intentional, reflecting specific theological concepts and traditions that are meaningful to the couple and their families.
Faith-Centric Language: The invitation explicitly mentions God, Allah, or a higher power, framing the marriage as a divine blessing or sacred rite.
Traditional Phrasing: It often incorporates specific phrases required by the religion, such as "in Holy Matrimony" for Christian weddings or referencing the "Nikah" for Islamic ceremonies.
Community and Family: The wording honours the role of family while positioning the union within the context of a larger faith community.
Example and Analysis
Example:
With joy in our hearts and blessings from above, Mr. and Mrs. Robert and Susan Miller request the honour of your presence at the marriage of their daughter Emily Claire to Mr. David Christopher Jones as they are united in the presence of God Saturday, the twelfth of October Two thousand and twenty-five at two o’clock in the afternoon St. Patrick's Cathedral Melbourne, Victoria
This example beautifully blends traditional formal structure with religious sentiment. It opens with a declaration of faith ("blessings from above") and reinforces it by stating the union occurs "in the presence of God." The use of "honour of your presence" is correct for a cathedral setting, respecting both formal and religious etiquette. This style of wedding invitations wording ensures the spiritual gravity of the day is communicated with grace and clarity.
7. Same-Sex Wedding Invitation Wording
The approach to same-sex wedding invitation wording reflects the evolution of marriage equality, focusing on language that honours both partners equally and authentically. This style can be adapted to fit any tone, from formal to casual, with the core principle being the equal and respectful presentation of the couple. It provides the freedom to choose name order (often alphabetically or by preference), decide on host listings, and select phrasing that genuinely represents the relationship, moving beyond outdated heteronormative conventions.
Strategic Breakdown
The strategy here is to centre the invitation around the couple's authentic love story and shared identity. Unlike traditional formats that can be rigid, this wording prioritises equality and personal expression. It communicates that the union is being celebrated on the couple's own terms, setting a tone of inclusivity and modern love for the event.
Equal Billing: Both partners are presented with equal prominence, breaking from the "bride first" tradition. The order is determined by the couple, not by gender.
Flexible Hosting: The invitation can be issued by the couple themselves, by both sets of parents, or a combination, depending on family dynamics and support.
Tone Authenticity: The language is chosen to match the couple’s personality. It can be formal and classic or playful and modern, without feeling constrained by traditional gendered roles.
Example and Analysis
Example:
Together with their families Alexandra Reed and Katherine Moore request the honour of your presence as they exchange vows of marriage Sunday, the twelfth of May Two thousand and twenty-six at five o’clock in the evening The Royal Botanic Garden Sydney, New South Wales
This example beautifully blends formality with a modern, inclusive approach. "Together with their families" is a warm, unifying phrase that includes all supportive relatives without getting into complex host listings. The names are given equal weight, and the classic phrasing "request the honour of your presence" elevates the tone. This style of wedding invitations wording is perfect for a sophisticated ceremony that celebrates a modern partnership.
8. Creative and Theme-Based Wedding Invitation Wording
Creative wedding invitations break from convention to reflect a couple's unique personality or a specific wedding theme. This style incorporates storytelling, humour, poetry, or pop culture references to give guests a preview of the wedding's unique atmosphere. The wording is crafted to align with the overall concept, whether it's vintage, rustic, literary, or based on a shared hobby, transforming the invitation into a memorable creative expression.
Strategic Breakdown
The core strategy here is to create an immersive experience for guests from the moment they receive the invitation. By infusing personality and thematic elements into the wedding invitations wording, you generate excitement and set clear expectations for a non-traditional celebration. This approach prioritises creative storytelling over formal etiquette, aiming to connect with guests on a more personal and engaging level.
Theme Integration: The language, tone, and even font choices are directly inspired by the wedding theme, ensuring a cohesive and memorable first impression.
Personality-Driven: The wording is a direct reflection of the couple's shared interests and story, making the invitation feel authentic and deeply personal.
Balancing Act: While creative, the wording must still clearly and concisely communicate all essential details like date, time, and location without causing confusion.
Example and Analysis
Example (Travel Theme):
Our greatest adventure begins! Please join us as we take our vows and begin the next chapter of our journey Sarah Jane Miller and Michael David Chen Saturday, the fifteenth of November Two thousand and twenty-five at two o'clock in the afternoon The Lookout, Kangaroo Valley New South Wales
Dinner and dancing to follow our arrival
This example successfully balances a clear theme with crucial information. Phrases like "greatest adventure" and "next chapter of our journey" establish the travel theme without sacrificing clarity. This style of invitation often pairs well with less conventional gift-giving, where couples might appreciate contributions towards their honeymoon or other experiences. For those looking beyond traditional presents, exploring some unique wedding gift ideas can provide inspiration that aligns with a more personalised celebration.
Unique, reflects personality, great guest engagement
Choosing Your Words and Celebrating with Ease
Your journey through the world of wedding invitation wording has likely revealed one crucial truth: the words you choose are a powerful first glimpse into the celebration you are planning. They set the tone, convey essential information, and, most importantly, reflect the unique story of you as a couple. This is more than just an exercise in etiquette; it's an opportunity to connect with your guests before they even arrive.
Throughout this guide, we've explored a wide spectrum of styles, from the time-honoured traditions of formal phrasing to the heartfelt simplicity of modern, casual language. We’ve dissected the nuances of hosting lines, navigated the complexities of blended families, and embraced the creativity of themed celebrations. The common thread is authenticity. The most effective wedding invitations wording is that which feels genuine to you.
Key Takeaways for Perfecting Your Invitation
As you move from inspiration to implementation, remember these core principles:
Clarity is Paramount: Regardless of style, your invitation's primary job is to inform. Ensure the "who, what, where, and when" are unambiguous. Double-check dates, times, and venue addresses for absolute accuracy.
Tone Sets Expectations: The language you select, whether it’s "request the honour of your presence" or "want you to come party with us," tells guests what to expect. This helps them choose their attire and get into the right mindset for your special day.
Authenticity Resonates: Don't feel pressured to adopt a formal tone if you're a relaxed, casual couple. Your invitation is an extension of your personalities. Choosing wording that sounds like you will make the message more meaningful and sincere.
Ultimately, mastering your wedding invitations wording is about striking a balance between established convention and personal expression. It’s about creating a piece of communication that is both functional and emotionally resonant. By carefully considering the examples and applying the strategic insights we've discussed, you can craft an invitation that not only looks beautiful but also speaks volumes about your love and the new life you are beginning together. With this important detail sorted, you can move forward with confidence, knowing you've created the perfect introduction to your wedding day.
Now that your invitation wording is sorted, the next step is making the gifting process just as seamless and personal for your guests. EasyRegistry allows you to create a flexible online gift registry that perfectly complements your wedding style, whether you’re asking for contributions towards a honeymoon, a home deposit, or specific items. Start your free registry today and give your guests a simple, meaningful way to celebrate with you at EasyRegistry.
The classic order of speeches at a wedding is a time-honoured tradition for a reason. It usually kicks off with the MC, moves to the father of the bride, then the groom, the best man, and sometimes wraps up with the maid of honour.
This isn't just a random list; the sequence is cleverly designed to build an emotional story throughout the reception, taking guests from a warm welcome to heartfelt thank-yous and a few good-natured laughs.
Why The Traditional Speech Order Works
For generations, this particular lineup has set the gold standard for wedding receptions. It creates a natural, engaging flow, with each person playing a unique part in celebrating the couple.
Even if you decide to mix things up, knowing the traditional structure gives you a fantastic starting point.
Kicking Things Off: The Opening Speakers
The Master of Ceremonies (MC) gets the ball rolling. Their main job is to welcome all the guests, establish a fun and celebratory atmosphere, and make sure everyone knows who's speaking next. A good MC is the glue that holds the reception together, keeping the energy high and the transitions seamless.
Next up is traditionally the father of the bride. This speech is often a highlight—a warm welcome to everyone, especially the groom’s family. He’ll usually share a few cherished memories of his daughter growing up and officially welcome his new son-in-law to the family. It’s a moment packed with pride and emotion.
The groom follows. This is his chance to thank guests for celebrating with them, give a special nod to both sets of parents, and acknowledge the entire wedding party. But the most important part? It’s his public opportunity to speak from the heart to his new spouse, sharing his love and excitement for their future.
This simple infographic gives you a great visual guide for organising your speech lineup.
As you can see, creating that perfect flow is all about a bit of thoughtful planning—identifying your speakers, figuring out the timing, and putting them in an order that makes sense.
For a quick reference, here’s a breakdown of the classic roles.
Classic Wedding Speech Sequence
Order
Speaker
Primary Role
1
Master of Ceremonies
Welcomes guests and introduces each speaker.
2
Father of the Bride
Welcomes the groom's family and shares memories.
3
Groom
Thanks guests and parents, and toasts his partner.
4
Best Man
Shares humorous anecdotes and toasts the couple.
5
Maid of Honour
Offers a personal tribute to the bride and the couple.
This table shows how each speech builds on the last, creating a well-rounded and memorable experience for everyone.
The Grand Finale: Closing Speakers
After the groom, the best man steps up to change the pace. His speech is famous for bringing the humour, often filled with funny (but appropriate!) stories about the groom. The best speeches manage to perfectly blend the laughs with a genuinely sincere toast to the happy couple.
Rounding out the formalities, the maid of honour often has the final word. Her speech is usually a deeply personal and emotional tribute to her friend, the bride. It’s a beautiful moment to reflect on their friendship and wish the newlyweds all the happiness in the world.
This structure is so popular that around 85% of Australian weddings still follow a similar order. Of course, there's always room for your own spin, but it's a proven formula. If you're curious about local customs, you can read more about the trends in Australian wedding speeches and their order.
A Little Direction for Your Key Speakers
Knowing the order of wedding speeches is the easy part. The real art is helping your speakers feel confident enough to deliver a toast that lands perfectly. Each person in your lineup has a unique role to play in telling your love story, and a little bit of guidance can turn a nervous ramble into a truly memorable moment.
When you give them a few pointers, you're not just helping them—you're ensuring each speech builds on the last, creating an emotional arc for the evening that resonates with everyone. A few simple prompts can help them craft a message that feels both personal and perfectly suited for the occasion.
The Father of the Bride (or Parent)
Traditionally, this speaker is the host, so their main job is to officially welcome everyone. The tone should be a lovely blend of warmth, pride, and a touch of sentimentality, all without dragging on for too long.
Their Mission: Welcome all the guests (especially the other family), share one or two short, sweet memories of their child, and finish with a toast to the newlyweds.
A Classic Opener: "Good evening, everyone. On behalf of my wife and I, it’s a real honour to welcome you all here tonight to celebrate [Bride] and [Groom]."
What to Skip: A minute-by-minute recap of their child's entire life story. Keep inside jokes to a minimum, too—you want everyone to feel included.
The Groom (or Partner)
This is a moment for public gratitude and heartfelt love. The groom's speech is a bridge, connecting the two families and thanking the community that has gathered to support them.
The focus here is really on thanking the people who matter most. Thank the guests for travelling, both sets of parents for their endless love and support, and the wedding party for standing by their side. But the most important part? It’s the chance to speak directly to their new spouse, sharing a personal thought about their love and the future they're about to build together.
A great groom's speech is less about performance and more about sincerity. Speaking from the heart about your partner is the most powerful part of this toast. Don't overthink it; just be genuine.
The Best Man
Everyone usually looks forward to the best man’s speech, expecting a few laughs. But from my experience, the best ones are those that perfectly balance the humour with genuine warmth. The goal is to celebrate the groom and the couple's relationship, not to deliver a five-minute stand-up routine.
A few friendly tips for the best man:
Share a funny but positive story that shows off the groom's great character.
Definitely steer clear of any embarrassing stories or, even worse, mentioning past relationships. It's just not the time or place.
Remember to say something wonderful about the bride and how happy she makes your mate.
Always end with a sincere toast to the couple's health and happiness.
The Maid of Honour
This speech brings a whole new perspective, often focusing on the deep friendship with the bride and the beauty of the couple's partnership. It tends to be a bit more personal and emotional. A fantastic Maid of Honour speech might share a story that really illustrates the bride's best qualities and how her partner complements her so perfectly.
The toast should be a celebration of their unique bond and a heartfelt wish for their future. It really provides a beautiful, personal bookend to the more formal toasts.
Designing a Modern and Personal Speech Lineup
While tradition gives us a great starting point, it's definitely not the final word for your wedding day. I'm seeing more and more couples shake things up, personalising the order of speeches to better reflect their unique story, their family, and the people they truly want to hear from.
This shift towards a more customised lineup is now the norm, not the exception. A 2023 survey actually found that around 70% of Australian couples chose to break from the conventional wedding speech order to create something that felt more like them. You can read more about this growing trend in wedding speeches.
A modern approach isn't about throwing tradition out the window; it's about making it your own. It’s a chance to open the floor to other important people in your lives to share their love and support.
Who Else Can Speak?
First things first, think about who you’d love to include. Who has played a massive role in your lives, both as individuals and as a couple? This is your chance to hear from voices that don't always get a spot in the classic lineup.
Here are a few wonderful additions I’ve seen work beautifully:
The Mother of the Bride or Groom: Their perspective is often filled with incredible warmth and unique memories, offering a beautiful balance to the traditional father's speech.
A Sibling: Let's be honest, no one knows you quite like a brother or sister. They can share hilarious childhood stories or heartfelt anecdotes that bring a deeply personal touch.
The Couple Together: A joint speech is a powerful way to thank your guests as a team. It really showcases your unity and can feel a lot less daunting than going it alone.
The best modern speech lineups feel inclusive and authentic. The goal is to create a series of toasts that genuinely represent your community, rather than just ticking boxes on a traditional checklist.
Structuring Your Custom Lineup
Once you have your speakers sorted, the next step is arranging them in an order that flows well and keeps your guests hooked. A great little trick is to alternate between sentimental and humorous speeches. This creates a really dynamic emotional rhythm for the evening.
For instance, you could start with a parent's heartfelt welcome, follow it with a sibling's funny story, and then have the two of you give your joint thank-you speech. The Best Man could then round things out with his signature humour. This approach stops the speeches from feeling too same-same and keeps the energy high.
It also ensures every speaker gets their moment to shine. As you plan, just remember to give each person clear guidelines on timing to keep the reception running smoothly—much like how a wishing well registry helps streamline the gift-giving process.
Mastering the Flow: Timing and Etiquette for Wedding Speeches
Getting the order of speeches right is one thing, but timing is what makes them truly memorable. A fantastic, heartfelt toast can fall flat if it kills the party's momentum or drags on for too long. The real art is weaving the speeches into the fabric of the evening so they feel like special moments, not awkward interruptions.
As a rule of thumb, I always advise speakers to aim for 3 to 5 minutes. That’s the sweet spot. It’s just enough time to share a great story and a warm wish, but short enough to keep everyone’s full attention. When you have a few people speaking, keeping things concise maintains the energy in the room and stops guests from getting fidgety.
When to Schedule the Speeches
From my experience, the absolute best time for speeches is between the meal courses. You’re making smart use of the natural pauses in the reception, giving guests something captivating to listen to while they wait for their next plate. Plus, it guarantees your speakers have a captive—and usually very happy—audience.
Here’s a popular flow that works beautifully:
The Welcome Toast: The MC or a parent can offer a brief welcome right after guests have found their seats. It’s a lovely way to kick things off.
The Main Speeches: The perfect slot for two or three key speeches is after the main course plates have been cleared, just before dessert is served.
The Final Toast: A high-energy speech, often from the Best Man, is a brilliant way to wrap up the formalities and get everyone excited for the dance floor.
A well-timed speech schedule feels like part of the entertainment, not an obligation. By spacing them out, you create a rhythm for the evening that keeps everyone engaged from start to finish.
To help you visualise this, here is a sample timeline that shows how you might slot the speeches into your reception schedule.
Sample Wedding Reception Speech Timeline
This is just an example, of course! You can adapt it to fit the unique flow and vibe of your own celebration.
Time
Event
Notes for Speeches
6:30 PM
Guests seated for dinner
MC gives a welcome toast and housekeeping notes.
7:30 PM
Main course cleared
Father of the Bride and Maid of Honour give their speeches.
8:15 PM
Dessert is served
Best Man gives a lively speech to transition to party mode.
8:30 PM
Cake cutting & first dance
The couple can give a short 'thank you' speech here.
Remember to coordinate this schedule with your venue manager and MC. When you’re finalising your run sheet, it’s a good idea to go over these key wedding venue questions to make sure your timeline works with their kitchen and service flow.
For couples looking to organise every last detail of their big day, a comprehensive Wedding Collection can be a lifesaver, offering guidance on everything from stationery to scheduling. A little bit of planning goes a long way in making sure the speeches enhance the celebration and help make the night unforgettable.
Answering Your Top Wedding Speech Questions
Even when you've got the perfect lineup of speakers, a few niggly questions always seem to pop up during the planning. Let's run through some of the most common ones I hear, so you can feel completely ready for a smooth and memorable reception.
How Long Should a Wedding Speech Be?
The golden rule here is to keep them short and sweet. The sweet spot for a wedding speech is anywhere between 3 to 5 minutes. Honestly, that's more than enough time for a speaker to share a beautiful story, offer their best wishes, and lead a toast without guests starting to fidget.
When you have a few people lined up to speak, sticking to this timeframe is even more important. It helps keep the energy in the room up and ensures the speeches are a genuine highlight, not a drawn-out intermission. A great tip to pass on to your speakers is to have them actually time their speech beforehand—it makes a world of difference.
Can the Bride Give a Speech?
Absolutely! And I have to say, it's a trend I love to see. It’s a fantastic opportunity for you to personally thank your guests, your families, and of course, your brand-new spouse.
You can deliver it solo for a really personal touch, or you could do a joint speech with your partner. This is a brilliant way to kick off your marriage as a united team. It really is your day, so if you've got something to say, you should definitely grab the microphone.
It's your wedding, so your voice matters most. If you want to give a speech, don't let tradition stop you. It’s a powerful way to add a personal, modern touch to your celebration.
What if a Speaker Goes on for Too Long?
Ah, the dreaded rambler. This is a common worry, but prevention is your best bet. Just have a friendly, casual chat with all your speakers beforehand and gently mention the 3-to-5-minute guideline. Most people are actually grateful for the direction.
Your MC is your secret weapon here. Work out a subtle, non-verbal cue with them in advance. For example, if a speech is dragging on, the MC can gracefully stand up or move a little closer to the lectern. It's a gentle nudge that it's time to wrap things up. This allows them to step in, thank the speaker, and move the night along without any awkwardness. Keeping things on track also helps you stay on budget, and you can explore more amazing tips to save money on your wedding day in our other guides.
Is It Okay to Read a Speech from a Phone?
Look, while it's tempting, I always advise against reading a speech directly from a phone. The bright screen can look quite harsh in photos and videos, and it tends to create a bit of a barrier between the speaker and the audience.
Instead, good old-fashioned printed cue cards are the way to go.
They're less intrusive: Cue cards just blend in better than a glowing phone.
They encourage eye contact: It's so much easier to glance down at a card and then look back up at the room.
They look more polished: It shows a level of thought and preparation that guests really appreciate.
If a phone is the only option, pass on these tips: tell the speaker to pop it on airplane mode, crank up the font size, and dim the screen brightness as much as possible to minimise the distractions.
Planning a wedding involves countless details, from speeches to gifts. With EasyRegistry, you can create a beautiful, simple-to-use gift registry that takes the guesswork out for your guests. Build your perfect registry in minutes at https://www.easyregistry.com.au.