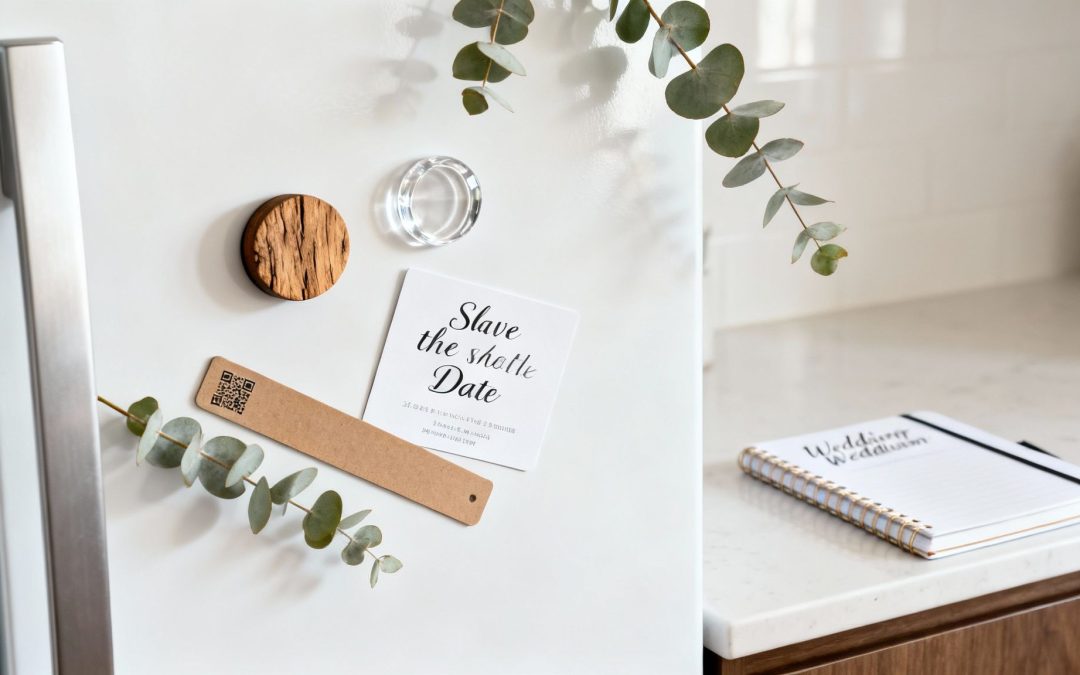
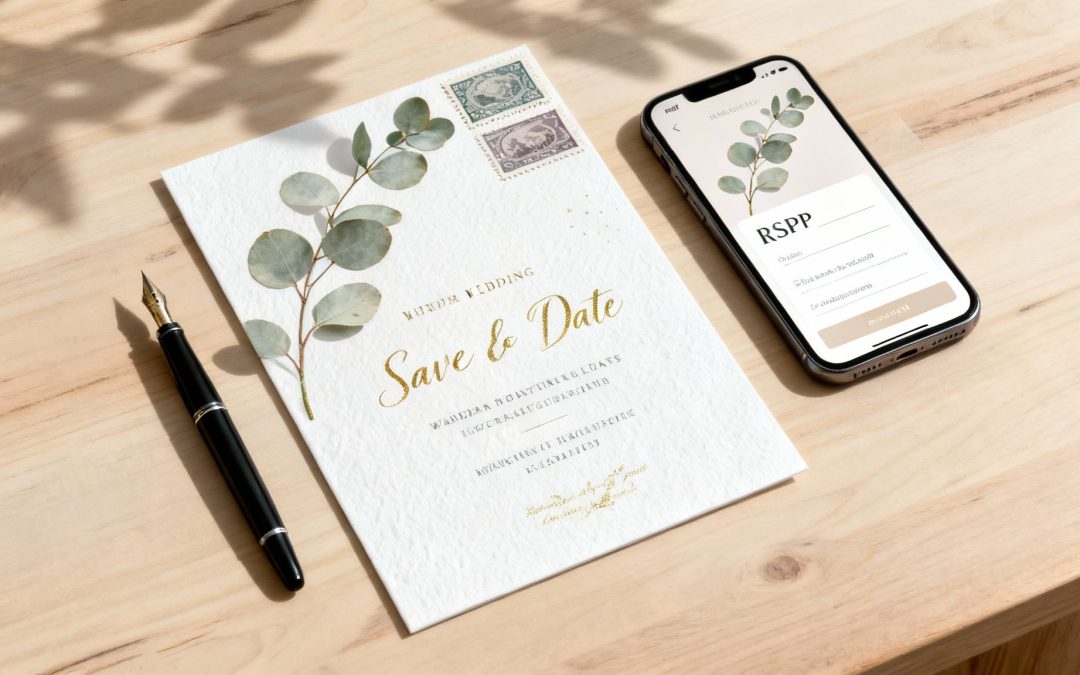
Wedding save the date magnets are a fantastic, practical choice for letting everyone know about your big day. They’re a constant, friendly reminder that sticks right on the fridge, making sure your wedding date doesn't get lost in the shuffle. For Aussie couples, they offer a really lovely, tangible keepsake in a world that’s getting more and more digital.
Why Magnets Are Such a Smart Choice for Your Save The Dates
In a world of constant digital pings and overflowing inboxes, something you can actually hold in your hand has a special kind of power. That’s exactly why so many savvy Australian couples are choosing magnets for their save the dates. They’re more than just an announcement; they become a small, happy part of your guests' everyday routine.
Just think about it. A paper card can easily get tucked away in a drawer and forgotten, but a magnet finds a prime spot on the most-visited appliance in the home: the fridge. Every time your guest grabs the milk or a snack, they’ll see a little reminder of your wedding. This constant visibility helps lock the date in their memory, making it far less likely they'll accidentally double-book themselves.
A Lasting First Impression
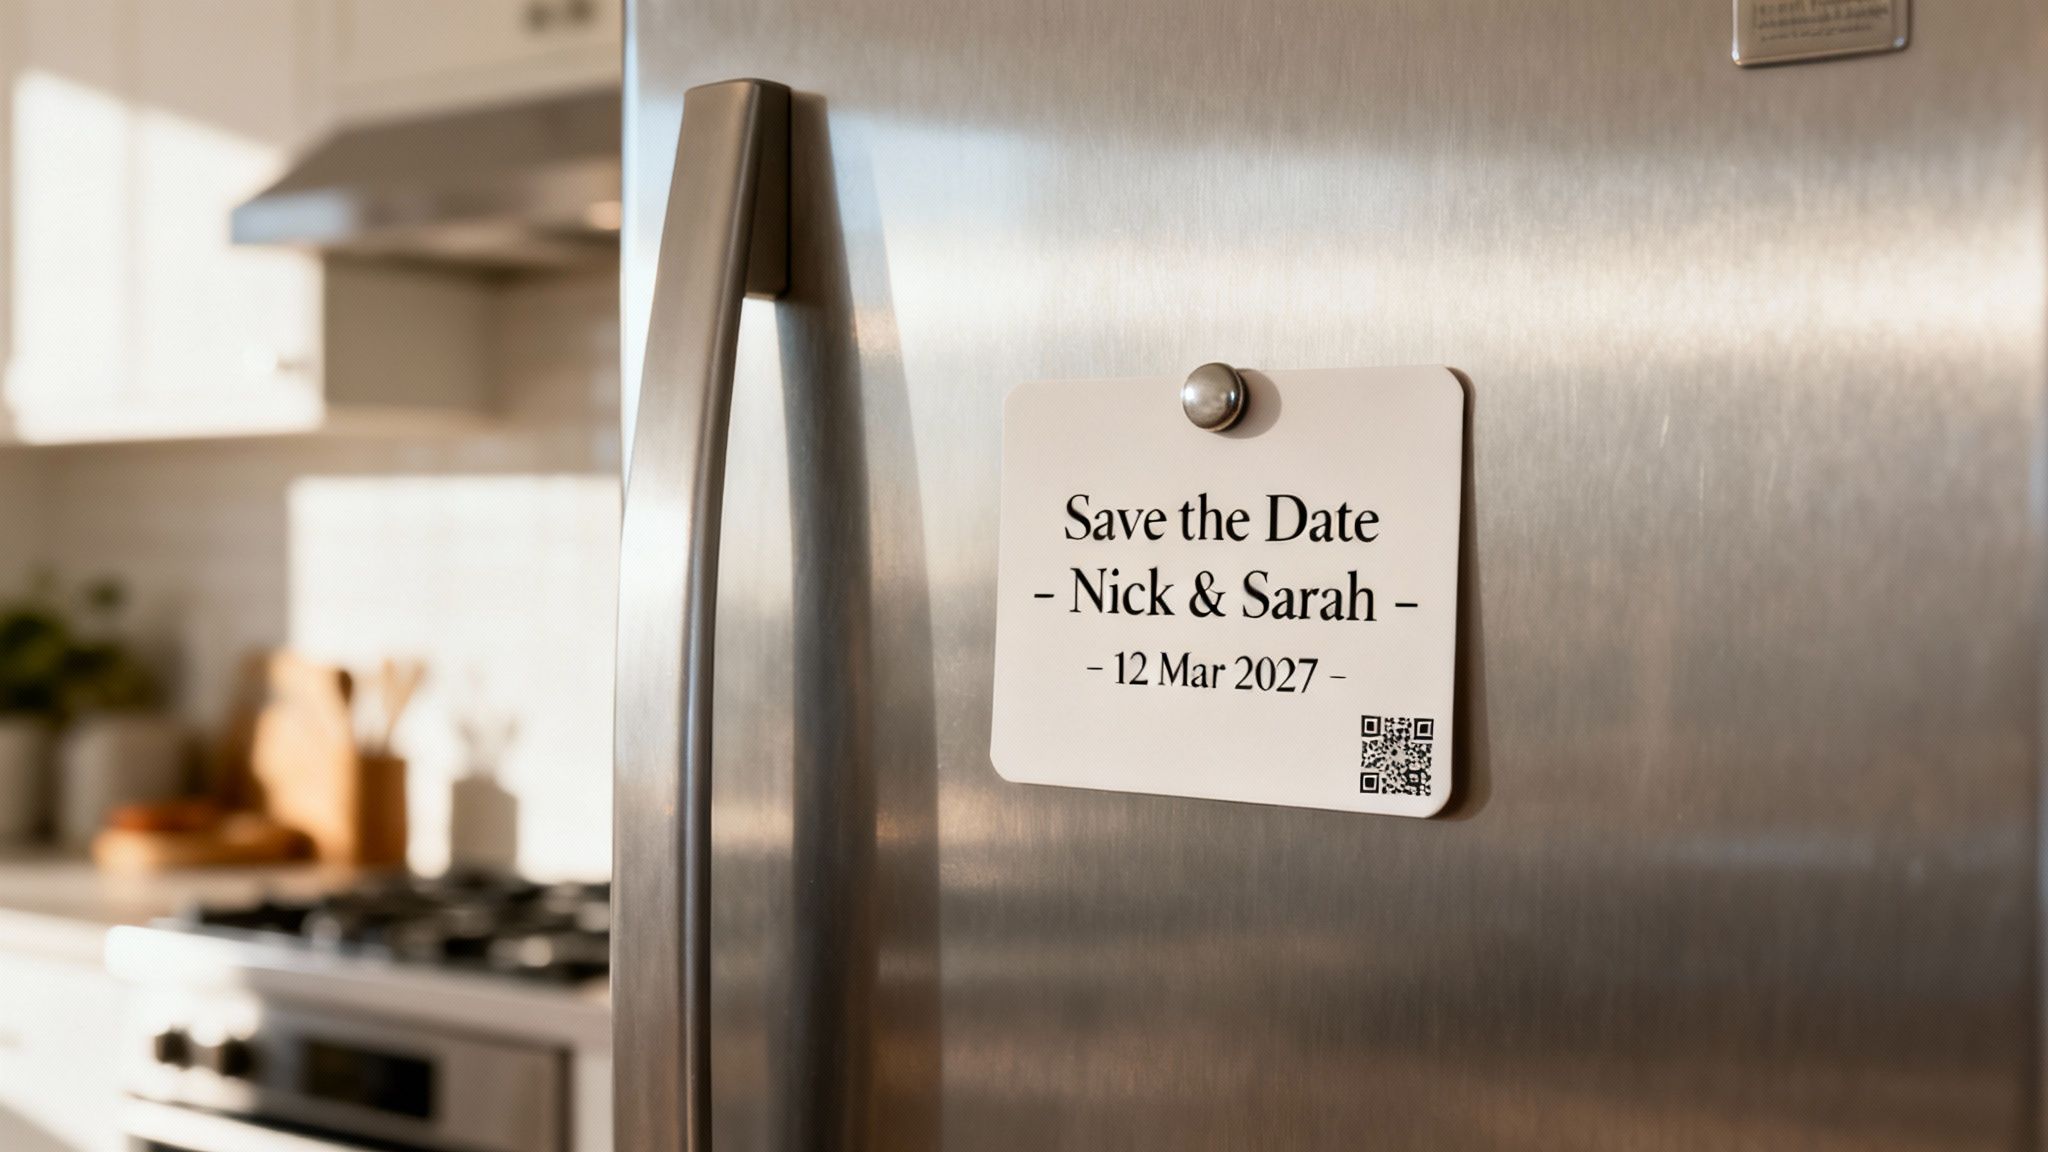
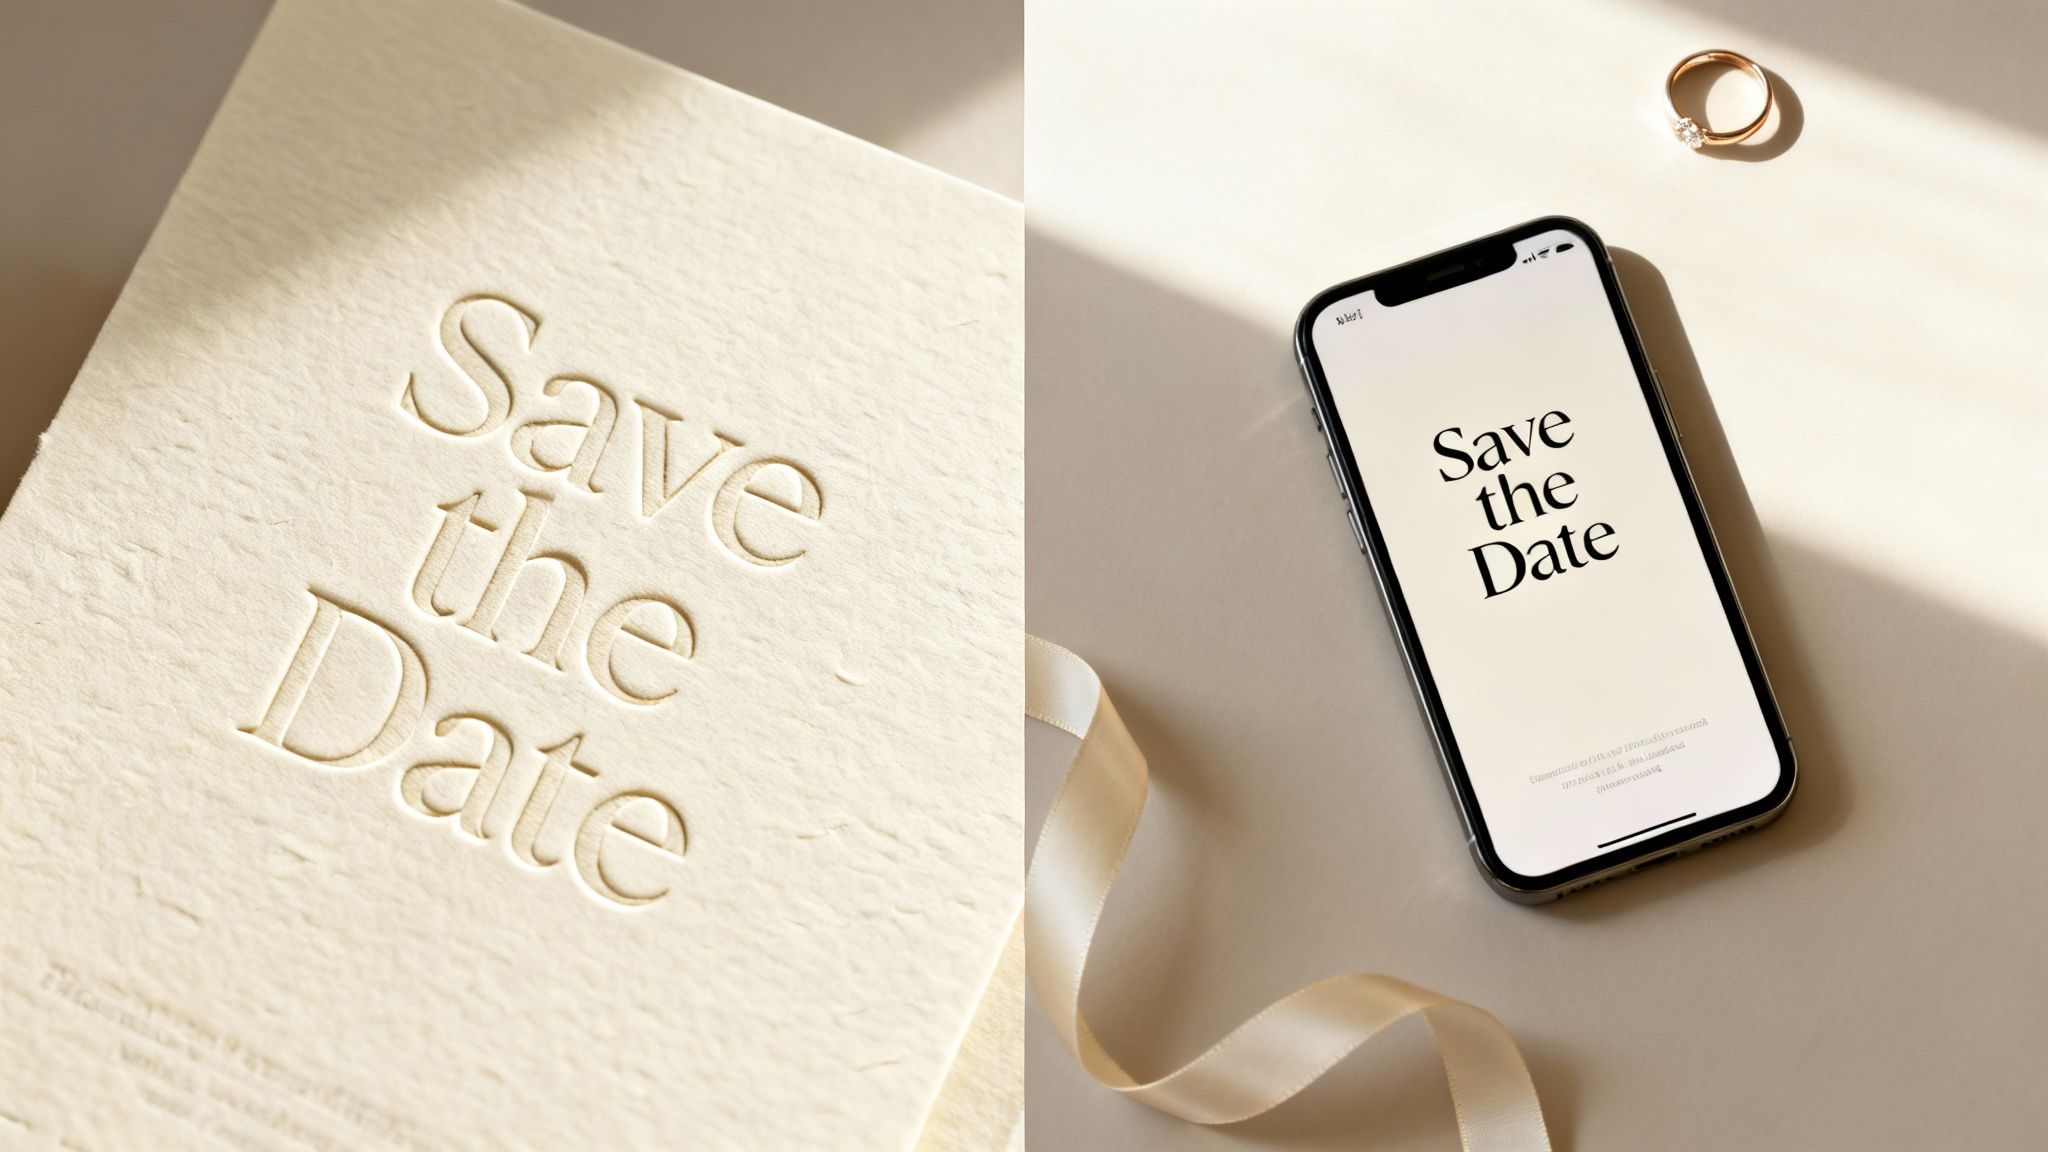
Your save the date is the very first glimpse your guests get into your wedding. It sets the tone and gives a little hint of the style you’re going for, months before the formal invitations are sent. A well-designed magnet acts like a miniature billboard for your love story, building excitement from the moment it arrives. It’s not just a notice; it’s a keepsake.
This isn't just a hunch; it's a trend we're seeing with couples all over the country. In fact, 14% of Australian couples are now choosing magnetic save the dates. It shows a real preference for a durable announcement over something that can be easily dismissed or deleted. People still love having something they can physically display and cherish.
Practicality Meets Modern Planning
Beyond their charm, wedding save the date magnets are incredibly practical. It's easy to design them to work hand-in-hand with your digital planning tools, perfectly bridging the gap between a physical memento and your online wedding hub.
Effortless Registry Access: Adding a QR code that links straight to your EasyRegistry is a game-changer. Guests can scan it with their phone in a second and have your registry bookmarked long before the formal invitation arrives.
Centralised Information: You can also print a simple, clean URL to your wedding website on the magnet. This gives guests one central spot for all the details—accommodation, travel tips, and any updates.
Budget-Friendly Impact: Magnets deliver huge visibility without blowing the budget. They’re great value, and you can find even more clever ways to save money on your wedding day to keep everything on track.
By blending a memorable physical object with easy digital access, you’re creating a guest experience that’s both thoughtful and incredibly efficient. It’s the first step in making your entire wedding journey a smooth and enjoyable one for everyone.
At the end of the day, a save the date magnet is so much more than an announcement. It's a clever, stylish, and super effective way to guarantee your wedding date gets a prime spot in your guests' homes and minds.
Designing a Magnet That Reflects Your Story
Your save the date is the very first glimpse your guests get into your wedding day. It’s more than just a heads-up; it’s the opening chapter of your story, setting the stage for everything to come. This little magnet on their fridge should feel like you.
So, before you jump on a generic template, take a moment to think about the vibe of your celebration. Are you planning a relaxed, rustic wedding in the Barossa Valley? Maybe an engraved wooden magnet is the perfect fit. Or is it a chic, modern affair in a Melbourne laneway? A sleek acrylic design would capture that feel beautifully.
Capturing Your Unique Style
The look and feel of your magnet is the first clue for your guests. It hints at the dress code, the atmosphere, and the kind of celebration you’re planning. A well-thought-out design builds that buzz and makes everyone feel like they’re part of your journey right from the start.
Not sure where to begin? Here are a few popular directions couples take:
Photo-centric: An engagement photo is a classic for a reason. It’s personal, full of joy, and instantly connects everyone to your story.
Minimalist & Modern: Think clean lines, elegant fonts, and a 'less is more' approach. It's a sophisticated look that never goes out of style.
Artistic & Illustrated: A custom illustration of your venue, your beloved pet, or even a fun caricature of the two of you adds a whimsical touch that's impossible to replicate.
If you're looking to create something truly bespoke without hiring an illustrator, a free AI art generator can be a fantastic tool. You can use it to play with unique patterns, abstract backgrounds, or other graphic elements to make your design stand out.
The Essential Information Your Magnet Must Have
While the design is the fun part, your wedding save the date magnet has a very important job to do: communicating the key details. The trick is to keep it clear and simple, so the magnet is easy to read at a glance.
Make sure these four things are on there:
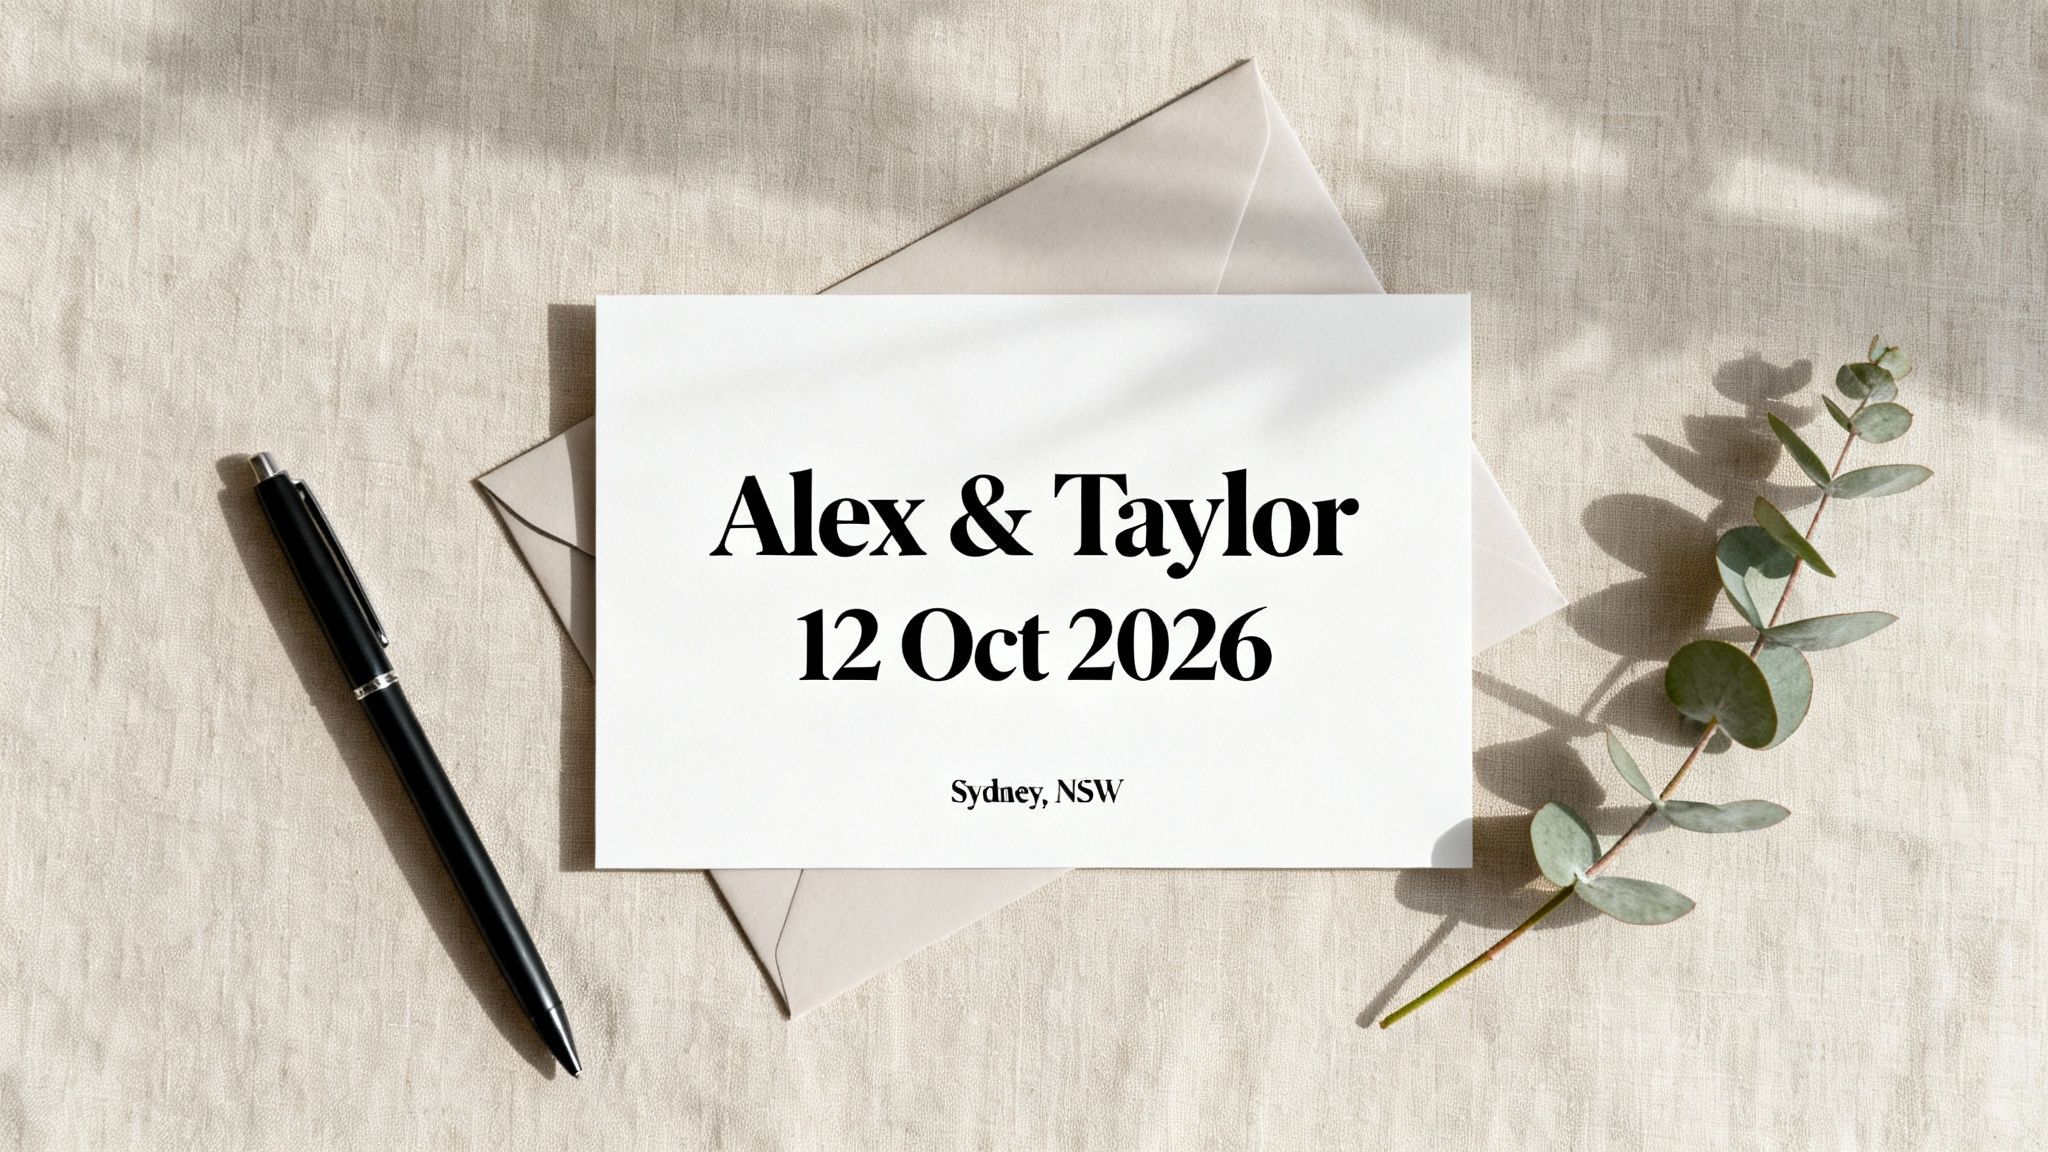
Your Names: Put your first names front and centre.
The Wedding Date: This is the hero! Make it bold and unmissable.
The Location: Just the city and state is perfect for now (e.g., "Byron Bay, NSW"). You'll share the specific venue details in the formal invitation.
A Note for Later: A simple line like "Formal invitation to follow" is all you need to manage expectations.
Remember, clarity trumps clutter. Your guests should be able to glance at their fridge and instantly know the who, when, and where.
Integrating Your EasyRegistry Details Seamlessly
Thankfully, modern wedding etiquette has caught up, and it’s now perfectly fine (and super helpful for your guests!) to include registry information on your save the date. It’s not about asking for gifts; it's about giving your guests a handy bit of info if they want to get organised early.
The key is to do it with a bit of class. Here are two fantastic ways to add your EasyRegistry link without messing up your beautiful design.
The QR Code Method
A QR code is a clever little square that, when scanned with a phone camera, takes guests straight to your registry. It's instant, tech-savvy, and means no one has to type a thing.
Pros: It’s incredibly fast and easy for your guests. No chance of them misspelling a URL.
Cons: If not integrated well, it can sometimes feel a bit corporate.
Design Tip: Treat the QR code as a small design element. Tuck it neatly into a corner or pop it on the back. Just don’t let it be the main event.
The Custom URL Method
A clean, personalised URL is an elegant and simple alternative. A link like EasyRegistry.com.au/Nick-Sarah is easy to remember and looks fantastic.
Pros: It has a clean, personal feel that often looks more aesthetically pleasing than a QR code.
Cons: Guests have to type it in themselves, which leaves a tiny room for error.
Design Tip: Use a simple, legible font for the URL. Place it at the bottom of the magnet where it’s readable but doesn't fight for attention with your names and the date.
Ultimately, whether you go for a QR code or a custom URL is all about what suits your style and the overall look of your magnet. Both are great ways to make life a little easier for you and your guests.
Navigating Timelines and Mailing Etiquette
Timing is everything, especially when it comes to getting your wedding save the date magnets into the hands of your guests. Nailing the timeline and understanding a few key etiquette points will ensure your announcement builds excitement, not last-minute stress.
The right schedule really hinges on where you're tying the knot. A chilled-out wedding in your hometown has a completely different lead time than an adventurous celebration that requires flights and hotels. Getting this right from the start means giving your guests plenty of notice to make plans.
When to Send Your Magnets
For a local wedding—say, in inner-city Melbourne or a familiar Perth suburb—the sweet spot is 8 to 10 months before the big day. This gives everyone enough time to mark their calendars and sort out a babysitter without feeling rushed. It's the perfect window to lock in your date before their diaries fill up.
But if you’re planning a destination wedding, you need to give your guests a much longer heads-up. For a stunning ceremony in the Whitsundays or a romantic vineyard escape in the Margaret River region, you should aim to send your magnets a full 12 months in advance. That extra time is absolutely crucial for people to research flights, book accommodation, and put in their leave requests at work.
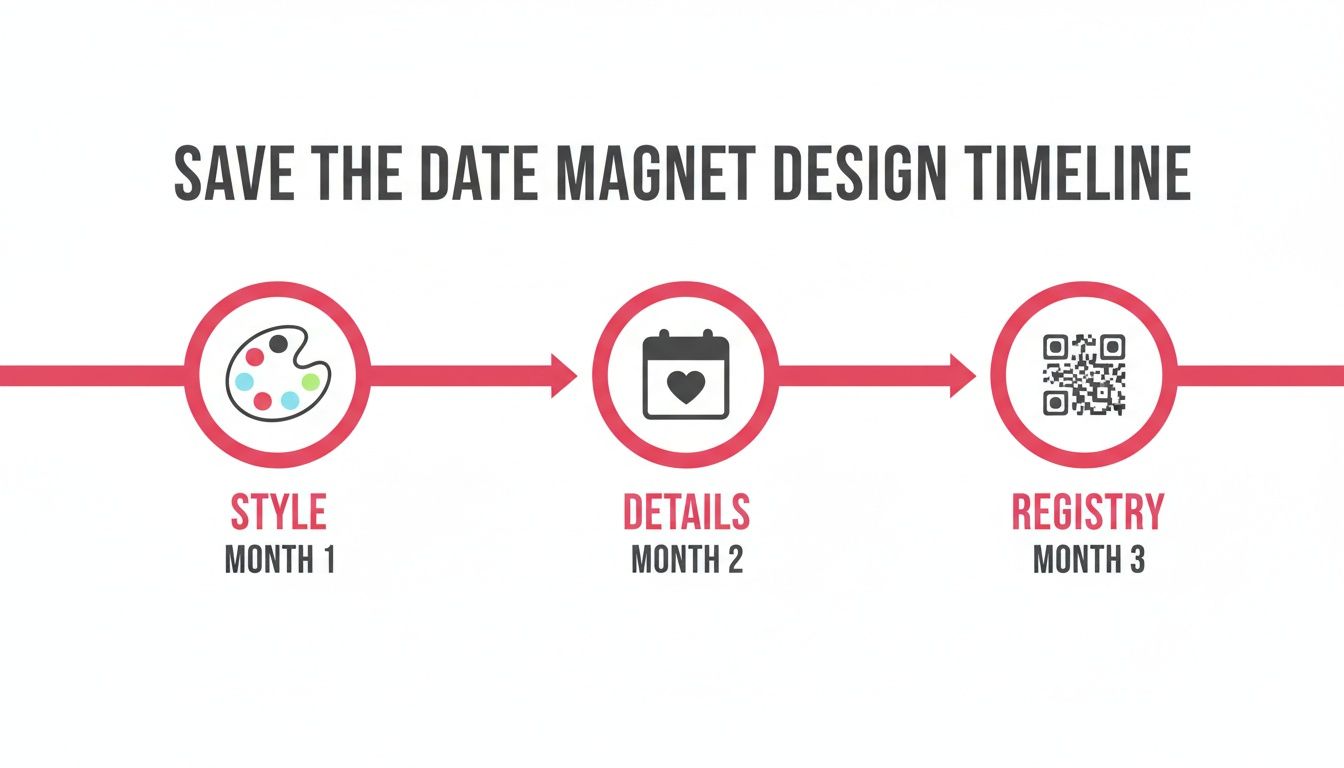
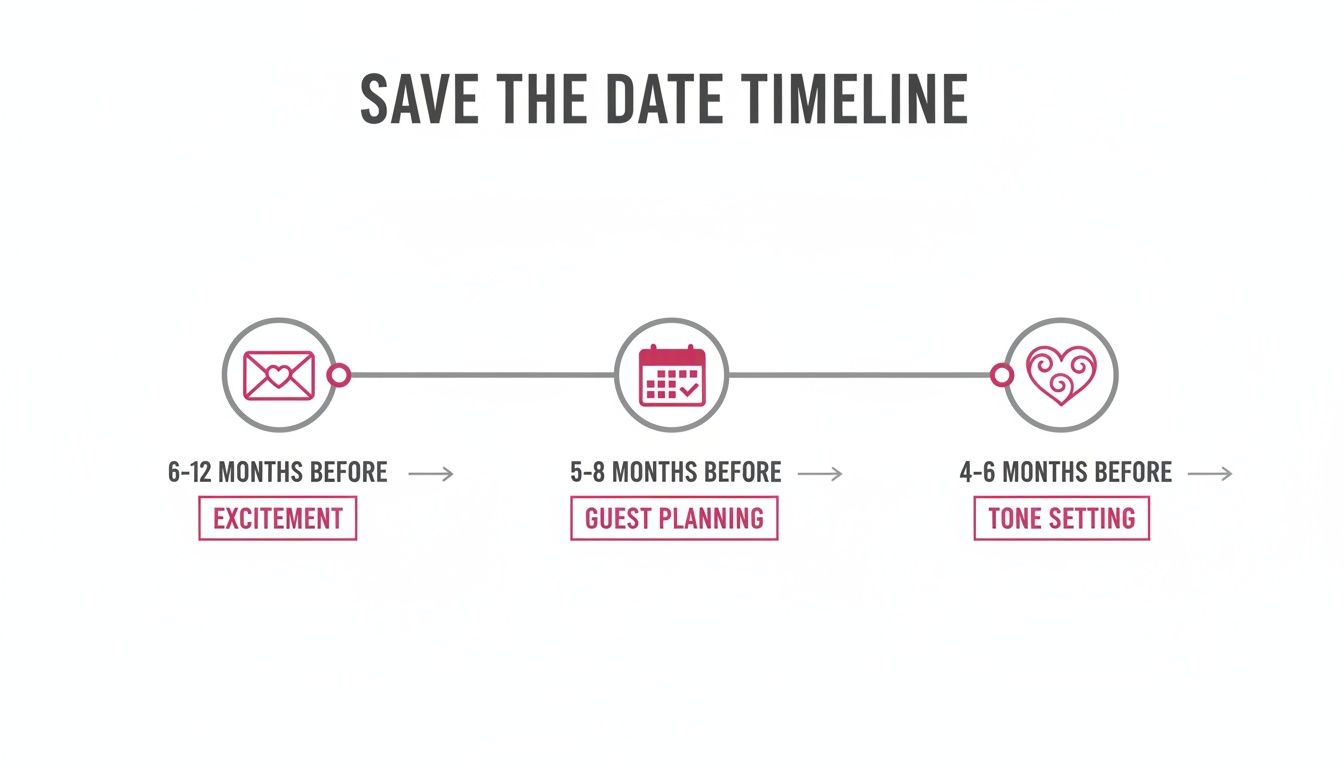
This timeline gives you a great visual guide for the whole design phase, helping you map out the journey from picking a style to finalising all the details.
Breaking down the process into manageable steps like this ensures you stay organised and don't feel overwhelmed.
Here’s a quick-reference table to help you plan your timeline based on your wedding style and location within Australia.
Save The Date Magnet Timeline and Postage Guide
Wedding Type
Recommended Sending Time
Key Postage Consideration
Local Wedding
8–10 months out
Standard letter postage is likely sufficient, but always weigh a sample first.
Interstate Wedding
10–12 months out
Magnets can add weight; may require a large letter stamp. Check with Australia Post.
Destination Wedding
12+ months out
Consider couriers for bulk sends or hand-delivery to local guests to save on costs.
This guide helps simplify the planning process, but always remember to double-check postage specifics to avoid any budget surprises down the line.
The Often-Overlooked Postage Predicament
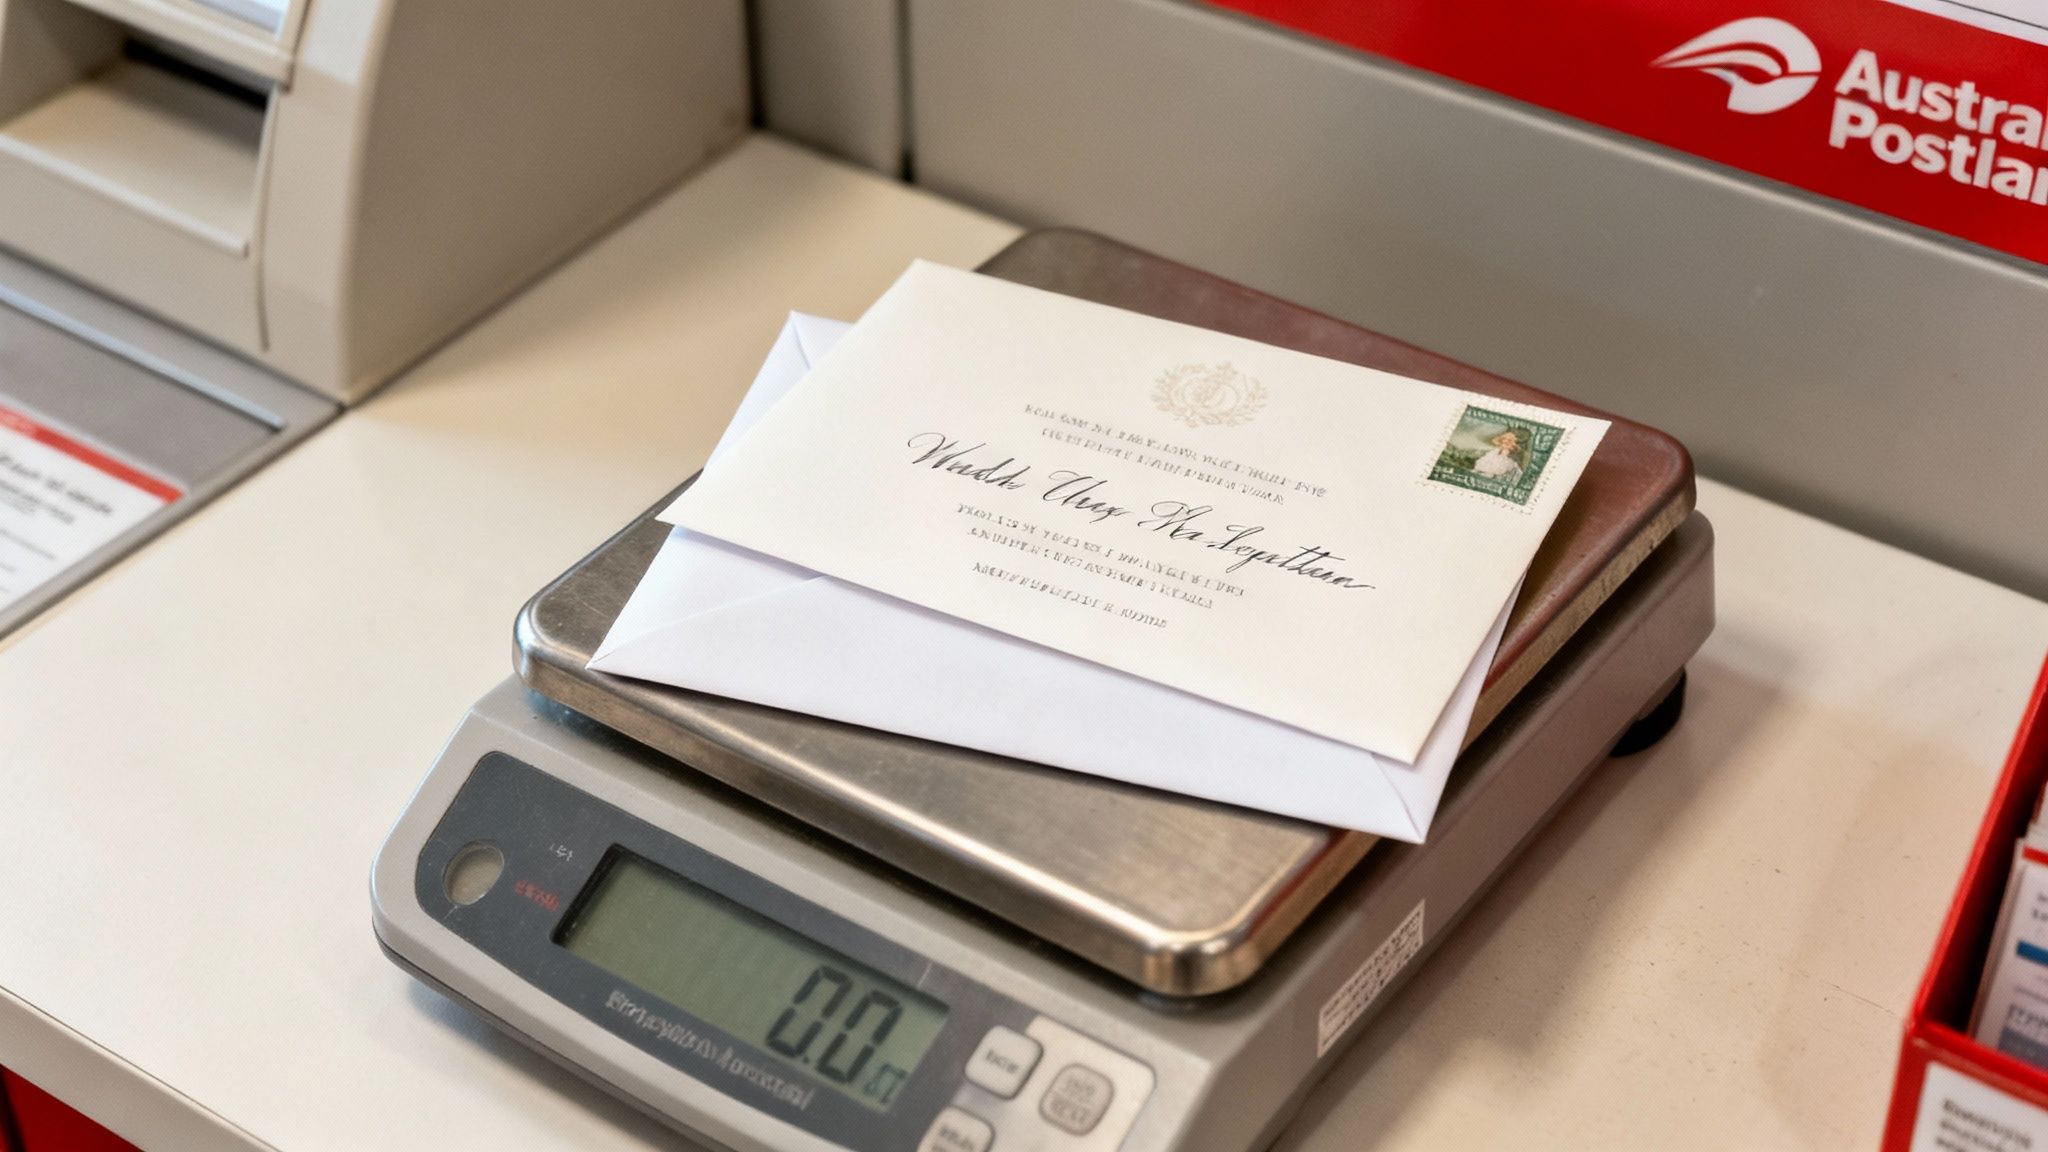
Here’s a piece of advice that could save you a fair bit of money and a massive headache: postage costs. It’s such an easy detail to forget, but the weight of your magnet can have a huge impact on your budget. A beautiful, thick wooden magnet or one with a full magnetic backing weighs a lot more than a standard paper card.
That weight difference can easily push your mail into a higher postage bracket with Australia Post. What you thought was a small cost can quickly become a substantial one. Just imagine multiplying an unexpected extra dollar or two in postage by 100 guests—it adds up fast!
Pro Tip: Before you place your final order, take a fully assembled sample—magnet, envelope, and any backing card—to your local post office. Get them to weigh it and give you an exact postage cost. This simple five-minute task will prevent any nasty surprises.
When you're ready to mail everything, finding an affordable and reliable shipping method is key. To ensure your beautiful magnets arrive safely without breaking the bank, you can explore options for finding Australia's cheapest small parcel courier.
Addressing and Etiquette Essentials
Finally, let's talk about the finer points of who gets a magnet and how to address it. Getting these details right sets a warm and inclusive tone from the very beginning.
Who gets one? Send a save the date to every single household you are definitely inviting. If you have an 'A list' and a 'B list' of guests, only the 'A list' should receive one. Think of it as a promise that a formal invitation is on its way.
Be specific: When you're addressing the envelopes, be crystal clear about who is invited. For a couple, use both their names (e.g., "Mr. John Smith and Ms. Jane Doe"). If you’re inviting the whole family, address it to "The Smith Family." This clarity prevents any awkward assumptions about plus-ones or children later on.
By thinking through your timeline and mastering these little mailing details, you can ensure your beautiful save the date magnets arrive perfectly and set the stage for an amazing celebration.
Choosing Your Style: What’s Trending in Australia?
The material you choose for your wedding save the date magnets is where the personality of your big day really starts to shine. It's the very first glimpse your guests will get, and right now, Aussie couples are all about picking materials that tell a story—reflecting everything from a relaxed winery vibe to a chic city affair.
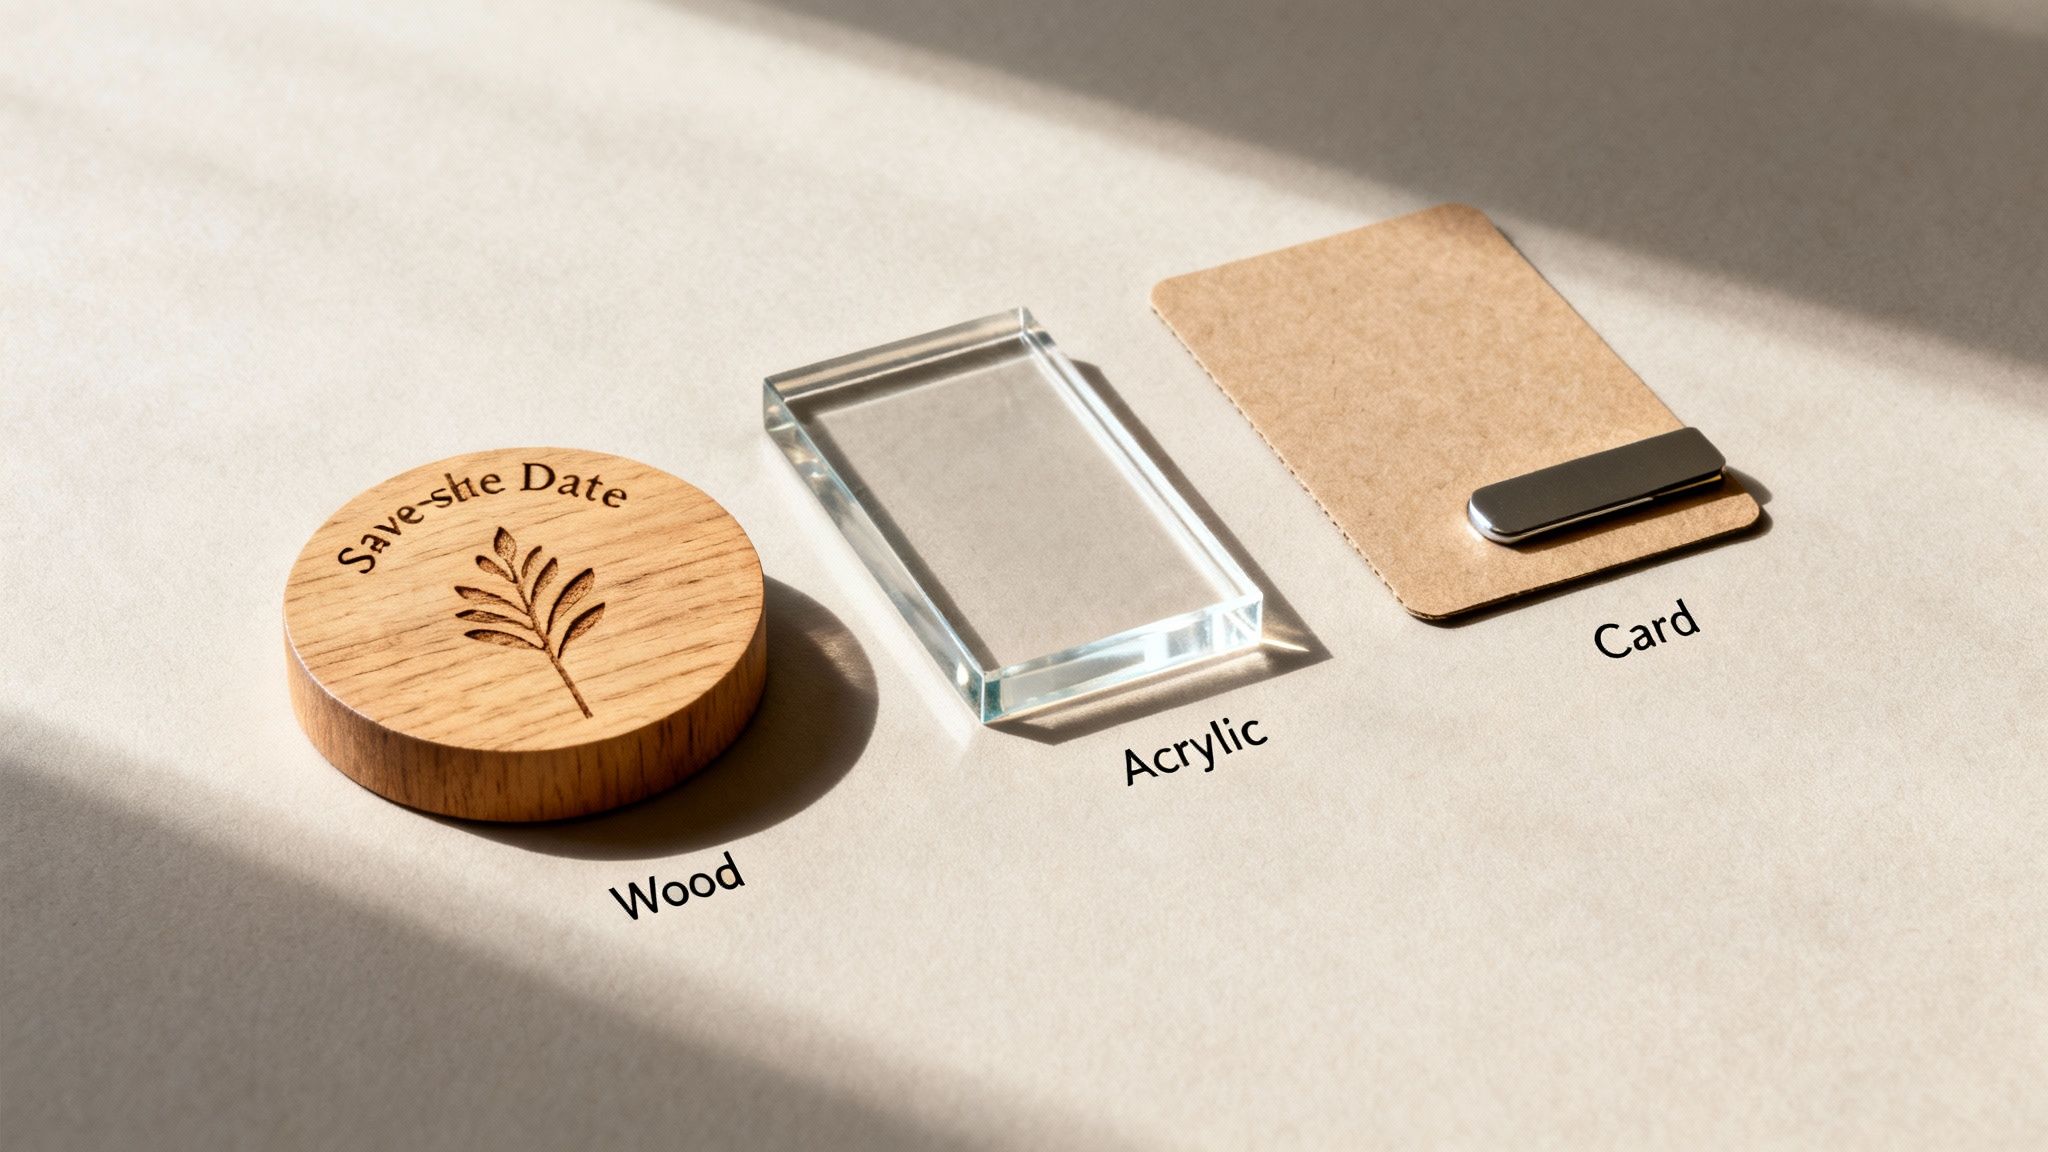
This decision is about more than just looks; it sets a tangible tone. Think about it: a sleek, cool acrylic magnet feels completely different in a guest's hand compared to a warm, textured wooden one. Let’s dive into the options that are really popular with Australian couples at the moment.
Rustic Charm with Engraved Wood
If you're planning a day with a natural, earthy feel—maybe a winery wedding in the Barossa Valley or a rustic barn do in the Southern Highlands—engraved wood is just perfect. It has this wonderfully warm, organic texture that feels both personal and a bit luxe.
Wooden magnets are also incredibly versatile. You can get them laser-engraved with really fine details, like delicate floral patterns or your own unique monogram. Plus, they’re surprisingly tough, so you can be confident they’ll survive the post and look great on your guests' fridges for years to come.
Sleek and Modern Acrylic Designs
For a completely different vibe, there's acrylic. It’s the go-to for modern, chic weddings, especially for couples tying the knot in a stylish city venue in Sydney or Melbourne. Acrylic gives you a clean, sophisticated finish that feels very high-end.
Clarity and Elegance: Clear acrylic with white or metallic text creates a gorgeous "floating" effect. It’s seriously stunning.
Durability: This is a solid material. It won't bend or get battered in the mail, which is a huge plus.
Versatility: You can have it cut into almost any shape you can dream of—classic rectangles, on-trend arches, or simple circles. The creative freedom is all yours.
This is a fantastic choice for minimalist, black-tie, or contemporary themes. It makes a bold, polished first impression that promises an elegant day ahead.
Classic Cardstock for Timeless Appeal
Don't overlook the timeless elegance of a high-quality cardstock magnet. We're not talking about a flimsy piece of paper here; this is a canvas for your creativity. For couples who love a classic stationery look or are keeping a close eye on the budget, a beautifully designed card with a magnet on the back is a brilliant and ever-popular option.
A well-chosen cardstock magnet offers the best of both worlds: the traditional feel of fine stationery and the practical, long-lasting visibility of a fridge magnet. It’s a choice that delivers both style and substance.
The design possibilities are practically endless with cardstock. You can add luxurious touches like foil stamping, letterpress, or embossing to elevate the whole look. It’s also the perfect way to feature a favourite engagement photo, letting your personalities take centre stage.
The Power of Themed and Destination Magnets
Beyond just the material, more and more Australian couples are using their magnets to hint at their unique story, especially for destination weddings. It turns out that guests genuinely love keeping these. A save the date magnet is far less likely to be tossed aside than a simple card, especially when it’s a beautiful keepsake.
We’re seeing so many creative ideas, like beachy motifs for a Queensland wedding or clever passport-style layouts for an overseas celebration. You can see how couples are using magnetic save the dates as keepsakes on Paperlust for more inspiration.
Ultimately, the material you land on becomes part of your wedding narrative. Whether it’s the honest, rustic feel of wood, the polished look of acrylic, or the classic charm of cardstock, your choice starts building that excitement and gives your guests a beautiful reminder of what’s to come.
Your Final Checklist Before Hitting Send
You've agonised over fonts, picked the perfect photo, and designed a beautiful magnet. But before you hit that final "approve" button with your printer, it’s time for one last, crucial check-in. This is your safety net, designed to catch those sneaky little details that can turn into big headaches and expensive reprints.
Think of it as your pre-flight check. Running through these points gives you the confidence that every single save the date is absolutely perfect before it begins its journey to your guests' fridges.
The Proofreading Gauntlet
Typos are the number one enemy of wedding stationery. Believe me, once something is printed, there’s no undo button. After staring at the same design for hours, your eyes will start to play tricks on you, so a fresh perspective is non-negotiable.
Read It Out Loud: This simple trick feels a bit silly, but it works. It forces your brain to slow down and process each word, making you far more likely to catch awkward phrasing or a misspelled street name.
Get a Second (and Third) Pair of Eyes: Please, do not skip this. Send the final proof to at least two other people. A trusted friend, your mum, or someone from the bridal party will bring fresh eyes and instantly spot a mistake you’ve skimmed over a dozen times.
Check the Details Methodically: Don't just glance at it. Systematically check every single piece of information against your master list: your names (spelled correctly!), the date, the city, and your wedding website URL.
Technical Checks and Balances
A gorgeous design is only half the battle; it also has to work. Technical glitches, especially with QR codes, are a common pitfall that can frustrate your guests and defeat the whole purpose of including a link.
Test that QR code like your life depends on it. Scan it with different phones (iPhone and Android) and from different camera apps to make sure it works for everyone. Double-check it leads to the correct URL every single time. This is especially important if you're guiding guests to your wedding gift registry early on.
Crucial Tip: Always, always ask for a physical sample from your printer before you approve the full run. Computer screens lie about colours. What looks like a deep burgundy on your monitor might print as a bright, firetruck red. A physical proof is the only way to be 100% certain about the colour accuracy, paper feel, and magnet strength.
Finalising Your Numbers
Okay, before you send that big order off, just take one more moment to confirm your count. This tiny step can save you from the stress of running out or the sting of wasting money on extras you didn't need.
Triple-Check Your Guest List: Is your list truly final? It's so much easier and cheaper to add a couple of names now than to have to place a small, expensive second order later on.
Order Extras: This is a non-negotiable. Always order about 10-15% extra magnets. This buffer covers any last-minute guest additions, keepsakes for you and your families, and a few spares for your photographer to capture in your detail shots.
Confirm the Household Count: Do a final count of households, not individual guests. A family of four living at the same address only needs one magnet.
By meticulously working through this checklist, you can move forward with total peace of mind. You'll know that the beautiful save the date you designed isn't just a stunning introduction to your wedding, but also a perfectly executed, error-free message for all your excited guests.
Common Questions About Wedding Magnets
Even with all the planning sorted, it's completely normal to have a few questions about the finer details of your wedding save the date magnets. Getting these little things right helps everything run smoothly and sets a wonderfully thoughtful tone for your guests. Let's tackle some of the most common queries we hear from Aussie couples.
Think of this as your quick-fire guide to the etiquette and practicalities. We’ll cover everything from who makes the guest list cut to the best way to share your registry details without a hint of awkwardness.
Do We Send a Magnet to Every Single Guest?
This is a big one, and the answer is all about commitment. A save the date should only go to every person or household you are absolutely certain you will be inviting to the wedding. Once that magnet is sent, there’s no turning back—it's essentially a promise that a formal invitation is on its way.
If you’re working with an 'A list' and a 'B list', only the confirmed 'A list' should get a save the date. This avoids any confusion or potential disappointment down the track and makes sure the people you definitely want there have the date locked in their calendars nice and early.
Can We Just Send Them to Out-of-Town Guests?
While it might seem like a clever way to cut costs, sending save the dates only to guests who need to travel generally isn't the best idea. It can unintentionally create a feeling of exclusion among your local friends and family, leaving them wondering if they're a lower priority.
Consistency is key to good wedding etiquette. Sending a magnet to everyone on your main guest list ensures all your loved ones feel equally valued and included from the very beginning. Plus, it guarantees that even your local friends have the date officially marked, helping them avoid booking something else.
A save the date is the first piece of communication your guests receive about your wedding. By sending it to everyone, you're setting an inclusive and thoughtful tone that will carry through your entire celebration.
This unified approach helps build a real sense of shared excitement among all your guests, whether they live around the corner or across the country.
Is It Okay to Put Our EasyRegistry Link on the Magnet?
Yes, absolutely! Modern wedding etiquette has fully embraced making things as simple as possible for guests. Including your registry info on the save the date is no longer seen as presumptuous; it’s actually considered helpful and practical, especially for those guests who love to plan ahead.
The trick is to integrate it thoughtfully into the design so it feels like a handy piece of information, not the main event. Here are the two best ways to do it:
A Discreet QR Code: A small, neatly placed QR code is a fantastic, modern option. Guests can scan it in an instant and get direct access to your registry.
A Clean URL: A simple, personalised link like EasyRegistry.com.au/OurWedding looks elegant and is easy for guests to type in. It fits seamlessly into most designs without looking cluttered.
Both methods give guests the information they might be looking for without overpowering the main announcement of your names and wedding date. For other common questions about how online registries work, you can find a lot of helpful answers by checking out these frequently asked questions about gift registries.
What Is the Biggest Mistake Couples Make?
Hands down, the most common and costly mistake is not checking postage costs with Australia Post before placing a bulk order. A beautiful, heavy wooden or acrylic magnet can easily weigh more than a standard letter, pushing it into a more expensive postage category. This tiny oversight can add hundreds of dollars to your budget out of nowhere.
Our best advice? Always take a complete sample—the magnet, the envelope, and any backing card—to your local post office and have them weigh it for an accurate quote.
The second biggest mistake is a simple typo. After staring at a design for hours, it's so easy for your brain to miss something obvious. Proofread everything at least three times, and then get a trusted friend or family member to check it one last time before you give the final approval for printing.
At EasyRegistry, we're all about making your wedding journey simpler. From sharing your gift wishes to managing contributions, our platform is designed to take the stress out of planning so you can focus on the joy of your celebration.
So, you're getting married! Amidst the whirlwind of venue scouting and cake tasting, one of the very first things to land on your to-do list should be your save the date cards. Far from being just another piece of wedding stationery, they're your official opening act.
Think of them as the trailer for your wedding movie. They don't give away the whole plot, but they set the scene and get everyone excited for the main event.
Giving Your Guests a Much-Needed Heads-Up
Let's be practical. The main job of a save the date is to give your favourite people enough time to actually plan to be there. This is a game-changer, especially for anyone who needs to travel.
Whether you've got friends flying in from interstate or family making a long drive, that early notice is what allows them to:
Snag cheaper travel and accommodation: We all know booking flights and hotels last minute is a recipe for a budget blowout.
Book time off work: Getting annual leave approved often takes time, so the more notice, the better.
Line up childcare: For parents, organising a babysitter for a whole weekend isn't always a simple task.
Sort out their finances: Being a wedding guest is an honour, but it can be costly. A heads-up helps everyone budget properly.
Here in Australia, with longer engagements becoming more common, locking in your date with guests early is more critical than ever. We're seeing more couples push their weddings out to save up, with recent research showing 40% of couples are extending their engagements by a full year. This makes a save the date essential for making sure your VIPs are available. You can read more about what's happening in the local wedding scene in the 2024 Australian Wedding Industry Report.
Setting the Scene for Your Big Day
Beyond the pure logistics, your save the date is the very first taste your guests get of your wedding's vibe. It’s your chance to make a brilliant first impression and start building that buzz.
Your save the date isn't just an announcement; it's the prologue to your wedding story. It sets the scene, introduces the main characters (that’s you!), and gives everyone a reason to be excited for the main event.
This is where you start to tell your story. A sleek, minimalist card hints at a modern city wedding, while something with a floral, rustic feel might suggest a relaxed celebration in the countryside. It’s your first real opportunity to show off your personality as a couple. You’re not just asking them to circle a date on the calendar; you're officially inviting them to be part of your journey from the get-go.
Nailing the Timing and Guest List Etiquette
Figuring out when to send your save the dates is one of the first big decisions you'll make, and it really comes down to two things: where you're getting married and who's coming. The whole point is to give your favourite people a heads-up, so the more notice they need, the earlier you should get them in the mail.
For a local wedding where most of your guests live nearby, the sweet spot is around six to eight months before the big day. This gives everyone plenty of time to pop it on their calendar and book a day or two off work, but it’s not so far in advance that they forget about it entirely.
What About Destination Weddings?
That standard timeline goes right out the window if you’re planning a destination wedding or have lots of guests flying in from interstate or overseas. For these situations, you need to be way more generous with your timing.
If your wedding involves passports and serious travel plans, you’ll want to send your save the dates nine to twelve months in advance. Honestly, you can’t give too much notice here. This gives your guests the best possible chance to scout out affordable flights, book good accommodation, and sort out their annual leave. The earlier they know, the more likely they can make it.
It all starts with that initial excitement, moves into the nitty-gritty of guest planning, and then you set the whole vibe for your event.
This journey from a happy announcement to practical planning is why a solid timeline is so crucial. Following a comprehensive ultimate wedding planning timeline can be a real lifesaver.
The Unbreakable Rule of the Guest List
Okay, let's get serious for a moment about the single most important rule of wedding etiquette: if you send someone a save the date, you must send them a wedding invitation. No ifs, ands, or buts.
A save the date isn't a "maybe" or a way to test the waters. It's a promise that a formal invitation is coming their way. Sending one and then pulling the invitation is a major faux pas that will definitely cause hurt and confusion. Before you order a single card or click 'send' on an e-vite, your guest list needs to be locked in.
Think of your save the date list as your final "A-list." You can always add more people later by just sending them an invitation, but you can never, ever subtract someone once they've received a save the date.
This is why it's so important to have your venue's capacity confirmed. Before you tell anyone to mark their calendar, be absolutely sure you and your budget can accommodate every single person on that list. If you're still deciding on a spot, check out our guide on the crucial https://blog.easyregistry.com.au/wedding-venue-questions/ to help you finalise those details.
How to Handle Plus-Ones (and Avoid Awkwardness)
Clarity is everything when it comes to your guest list. Your save the date should make it crystal clear exactly who is invited, which saves you from so many headaches later on.
Couples: Address the card to both people by name (e.g., "Sarah Chen & David Miller").
Single guests with a plus-one: If you’re happy for them to bring someone, write "James Smith & Guest." This explicitly gives them the option.
Families: If you’re inviting kids, address it to "The Thompson Family." If it’s an adults-only affair, address it just to the parents ("Mr & Mrs Thompson").
Being specific right from the start manages everyone's expectations and helps you dodge those tricky "So, can I bring my cousin?" conversations. Your save the dates are the first impression of your wedding—make it a clear and thoughtful one.
Crafting Wording That Is Clear And Captivating
The words on your save the date are more than just an announcement; they’re the very first glimpse your guests get into your wedding story. It’s their first impression, setting the tone and delivering the need-to-know info, all while showing off your unique personality as a couple. The trick is to find that sweet spot between crystal-clear information and your own personal flair.
At the end of the day, the message needs to be simple and straight to the point. Drowning your guests in details will only cause confusion and take away from the card’s main job: getting them to circle the date on their calendar. Think of it as the headline, not the full story—that can come later on your wedding website and the formal invitation.
The Absolute Must-Haves
Before you start getting creative, there are a few non-negotiable details every save the date needs. Skip any of these, and you can expect a flood of texts and calls from confused friends and family.
Make sure your card clearly states:
Your Names: Seems obvious, but you need to be clear about who’s getting married! Whether you use first names or full names really depends on how formal your wedding will be.
The Wedding Date: This is the hero of the card. Always include the full date—day of the week, date, month, and year—to avoid any mix-ups. For example, "Saturday, 25 October 2025".
The Location (City and State/Country): Your guests don't need the exact venue address just yet. What they do need is the city and state (or country, if it's a destination wedding). This is the crucial bit of info they'll use to book flights and accommodation.
A Note About the Formal Invitation: A simple line like "Formal invitation to follow" is a must. It lets everyone know this isn't the final invitation, so they shouldn't be hunting for an RSVP card.
Think of your save the date as a friendly heads-up, not a formal summons. The language should feel personal and exciting, giving guests just enough information to get them planning without overwhelming them with details that might still change.
What To Leave Out For Now
Just as important as what you put on the card is what you leave off. A common mistake is cluttering the save the date with too much information, which can create confusion. Save the finer points for the formal invitation and your wedding website.
For now, be sure to skip:
Specific Venue Details: The city is enough for now. You can share the ceremony and reception locations later on.
Registry Information: It’s considered poor etiquette to put gift registry details on a save the date. This is best placed on your wedding website or shared by close family if guests ask.
RSVP Requests: It’s way too early to ask for a firm headcount. The official RSVPs will be collected with the formal invitations, which are typically sent 6-8 weeks before the wedding.
A Detailed Schedule: Times for the ceremony, cocktail hour, and reception are not necessary at this stage. Plus, these details are often finalised much closer to the date.
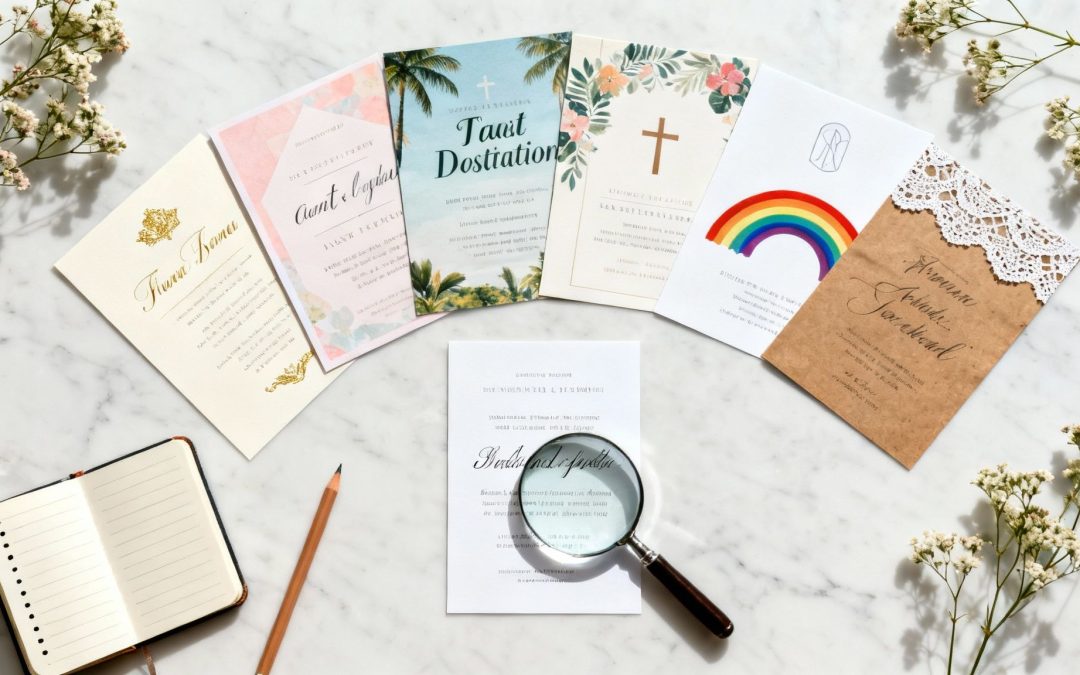
Finding Your Voice: Wording Examples For Every Style
Now for the fun part—letting your personality shine through. The tone you choose should be a true reflection of you as a couple and the vibe you want for your wedding day. Are you planning an elegant, black-tie affair or a chilled-out, barefoot-on-the-beach kind of day?
Finding the right words can be tough, so here are a few examples to get you started, sorted by the kind of wedding you're planning.
Save The Date Wording Examples for Every Style
Wedding Style
Wording Example
Traditional & Formal
"Please save the date for the wedding of Amelia Grace Thompson and Liam James Carter"
Modern & Casual
"Save our date! Chloe & Ben are getting married!"
Minimalist & Chic
"Save the Date. Olivia and Jack. 25.10.25. Melbourne, VIC."
Playful & Humorous
"It’s about time! Save the date for Zoe & Leo's wedding."
Destination Wedding
"Pack your bags! We’re getting married in Bali! Save the date for Mia and Noah."
Ultimately, the best wording for your save the date is whatever feels most authentic to you. It’s the first chapter of your wedding story, so have fun with it and make it a great one.
Choosing Between Paper and Digital Designs
Alright, you’ve sorted out your guest list and locked in a timeline. Now for the fun part: deciding what your save the dates will actually look and feel like. This is where your wedding's visual story really begins, and the choice between traditional paper and sleek digital designs says a lot about your style, budget, and the vibe you want to create.
Honestly, there’s no right or wrong answer here. The best choice is the one that feels most like you as a couple. Let's break down the pros and cons of each to help you land on the perfect fit for your big day.
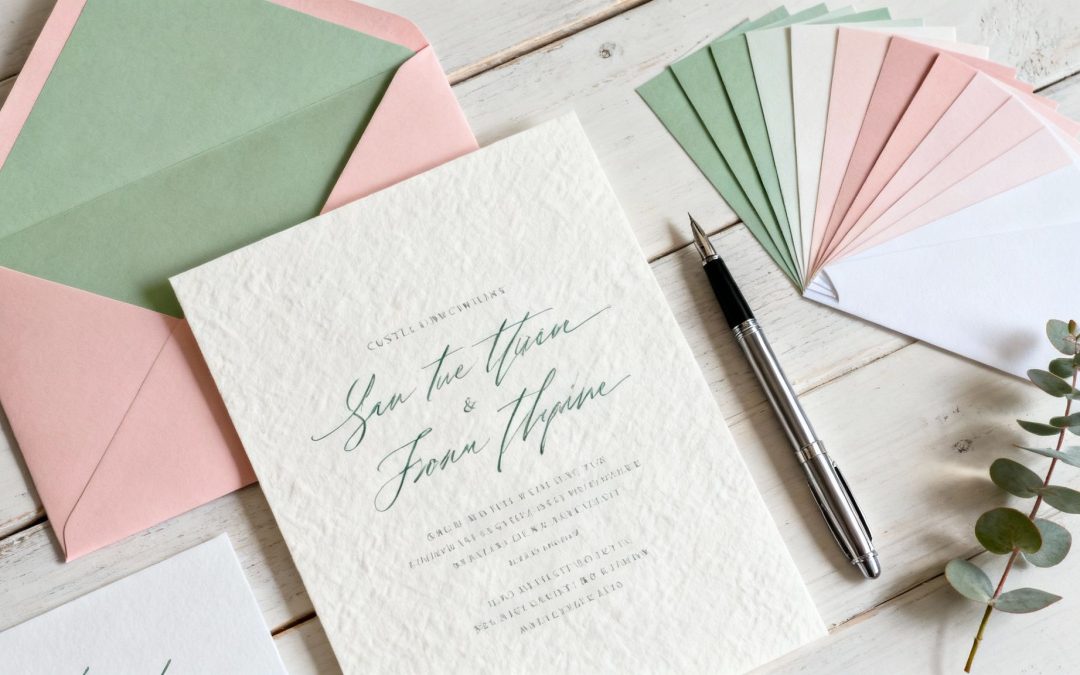
The Timeless Charm of Tangible Cards
There's just something special about receiving a beautiful piece of mail, isn't there? A physical save the date is a tangible keepsake your guests can stick on the fridge—a happy, constant reminder of the celebration to come. This traditional route immediately sets a certain tone, often hinting at a more formal or classic wedding style.
You simply can't replicate the tactile experience of paper. The weight of the cardstock, the texture of a letterpress design, or the shimmer of gold foil all combine to make a powerful first impression. These little details make your announcement feel significant and thoughtfully planned.
It's this sentiment that keeps physical cards so popular. Even with all the digital options out there, traditional stationery still dominates for milestone events like weddings because it just feels more special.
Exploring Your Paper and Print Options
If you're leaning towards paper, you’ve got a whole world of creative possibilities to explore. The materials you choose will have a huge impact on the final look and feel of your announcement.
Paper Stock: This is all about the thickness and texture of your card. A heavier stock (measured in GSM, or grams per square metre) feels more luxurious and substantial. You can choose from smooth matte and glossy finishes to more textured linen or even eco-friendly recycled paper. For a deep dive, check out a comprehensive guide to paper weights—it's surprisingly helpful.
Printing Techniques: Different methods create completely different effects. Digital printing is the most common and budget-friendly option. For a more high-end, tactile finish, look into techniques like letterpress (where the design is pressed into the paper) or foil stamping.
Key Takeaway: A physical save the date is more than just information; it’s a sensory experience. The weight, texture, and visual details create a lasting impression and give your guests a tangible piece of your wedding story to hold onto.
The Efficiency and Ease of Digital Designs
For modern, eco-conscious, or budget-savvy couples, digital save the dates are a brilliant alternative. They offer unmatched convenience and speed. With just a few clicks, your announcement can land directly in your guests' inboxes, saving you a small fortune on postage and reducing your wedding's carbon footprint.
Digital platforms also make managing your guest list a breeze. You can track who has opened the email, send out gentle reminders, and link everyone directly to your wedding website. This immediate connection is a massive plus, as it encourages guests to check out travel details or accommodation options straight away.
This approach works especially well for more casual weddings or for couples who are used to managing their lives online. It reflects a modern, streamlined style of planning.
Considering a Hybrid Approach?
You don't have to be all-or-nothing. A hybrid model can genuinely offer the best of both worlds.
Many couples send beautiful paper save the dates to close family and older guests who they know will appreciate a traditional announcement. Then, they’ll send a stylish e-card to friends and younger relatives who are perfectly happy with digital comms. This method is thoughtful and efficient, ensuring everyone feels included while you still get to take advantage of digital convenience.
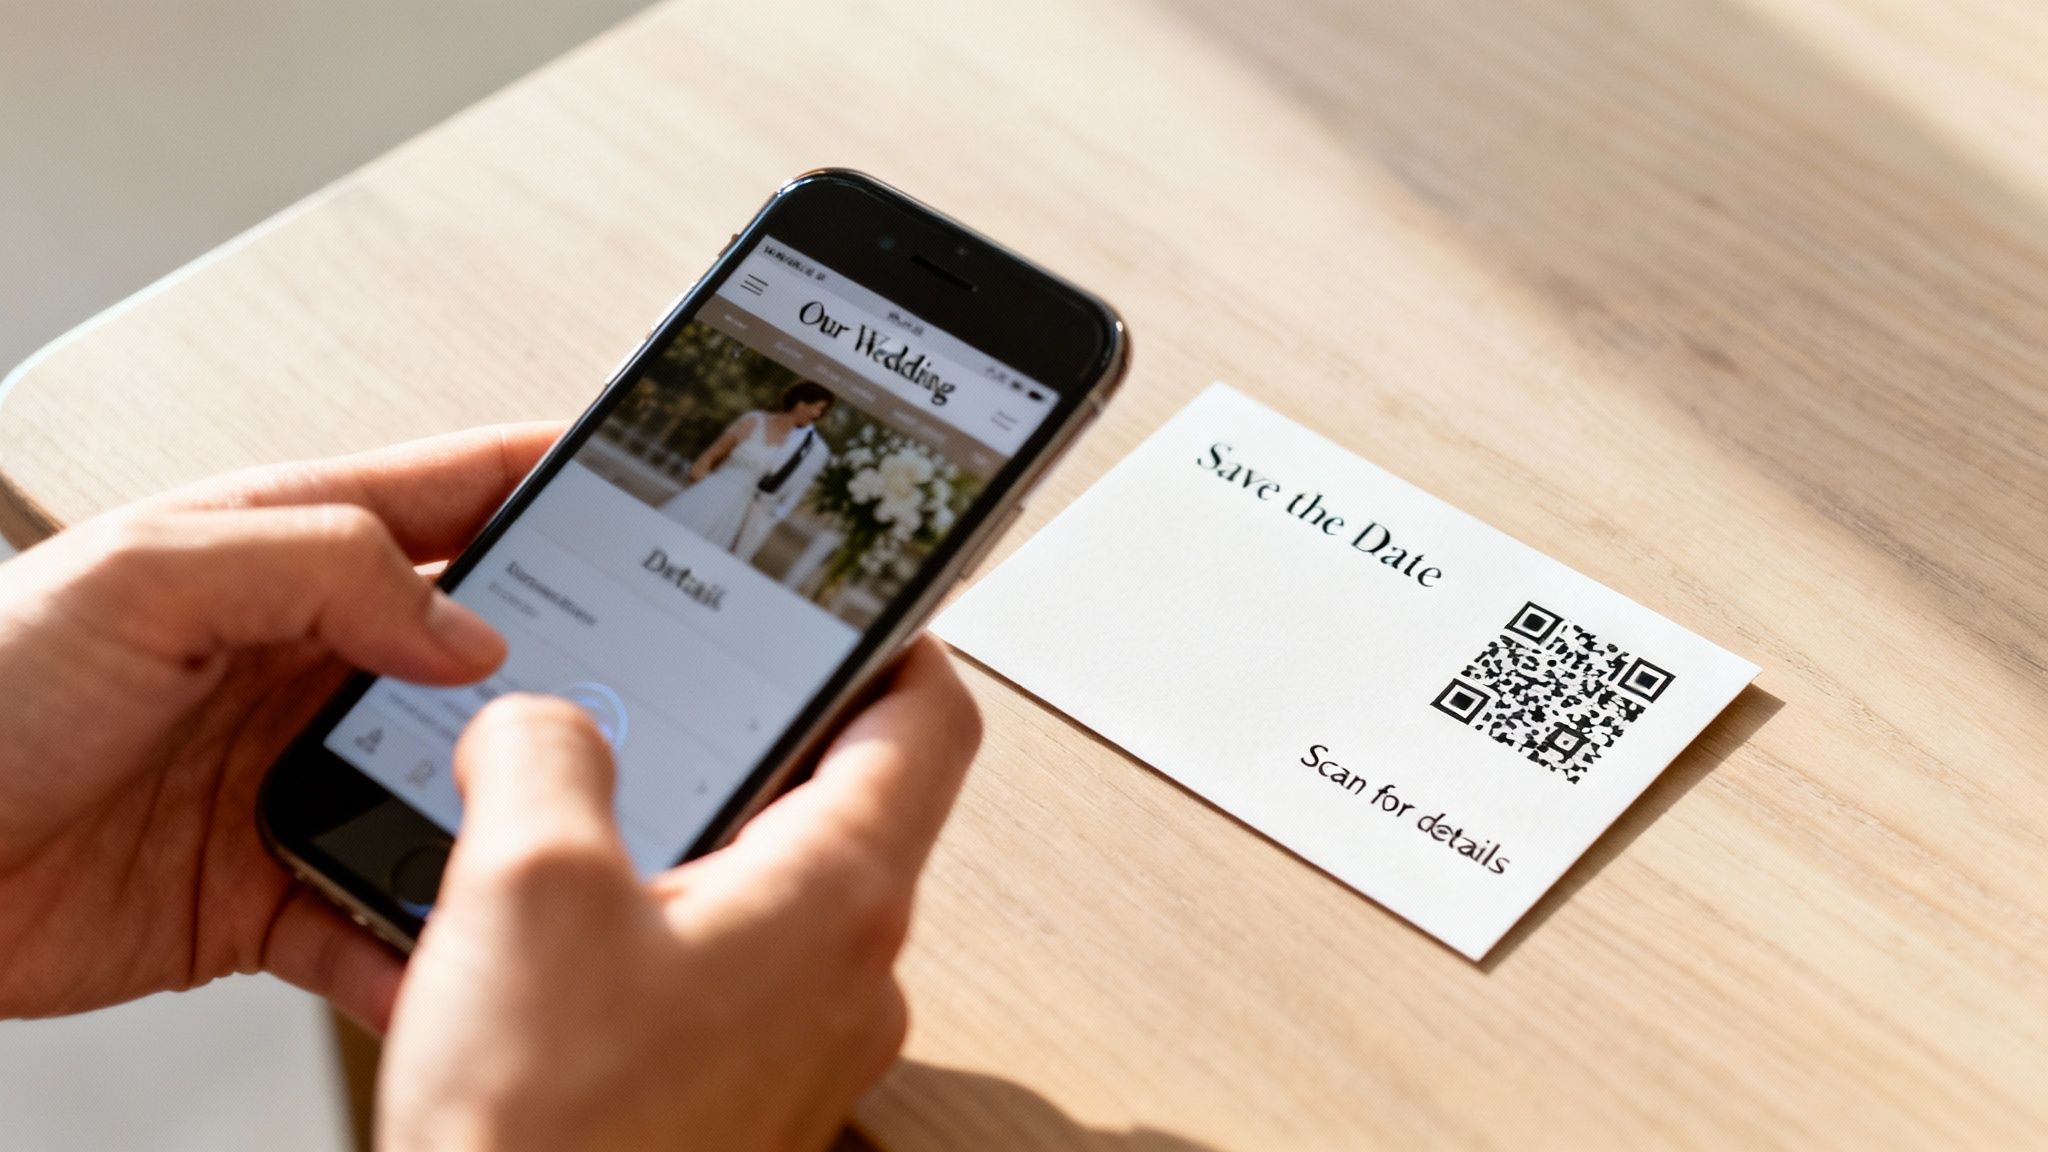
Using Wedding Websites and QR Codes Effectively
Think of your save-the-date card as more than just a heads-up. It's really the first official touchpoint of your wedding experience, and by pairing it with a wedding website and a QR code, you can turn that small piece of paper into a super-helpful info hub for your guests. It’s a bit of a game-changer for modern wedding planning.
A wedding website becomes the single source of truth for your guests. It answers all their questions before they even have a chance to ask them, which drastically cuts down on those repetitive texts and phone calls about logistics. This frees you up to focus on the bigger picture and lets you share more of your story to get everyone excited.
What to Include on Your Website at This Stage
Don't feel pressured to have your entire wedding website perfectly polished when the save-the-dates go out. The real goal right now is to give your guests the essential details they need to start planning, especially if they’re travelling.
Here’s what you should aim to have live:
A Warm Welcome & Your Story: A short welcome message and a little background on you as a couple really helps guests feel connected to the celebration.
The Key Event Details: Just reiterate your names, the date, and the city or town. You don't need to have the specific venue locked in and announced, but confirming the general location is crucial.
Travel and Accommodation Advice: This is probably the most important part for out-of-towners. Suggest a few hotels (and mention any room blocks you've arranged), list the closest airports, and offer some tips for getting around.
A Simple FAQ Section: Start with the big questions you anticipate, like "Is there a dress code?" or "Can we bring our kids?". You can always add to this later as more queries come in.
The finer points—like the detailed schedule for the day, menu choices, and specific transport plans—can absolutely wait until you send the formal invitations. For now, it's all about providing just enough information to make things easy.
By directing guests to a central online hub, you streamline communication from day one. A wedding website paired with a QR code on your save the date cards empowers guests to find information independently, making their experience smoother and your planning process far more organised.
The Power of a Simple QR Code
QR codes have become the seamless bridge between your physical save-the-date and your digital wedding website. In fact, recent data shows that 38% of couples now include QR codes on their wedding stationery. It's a simple, effective tool that virtually everyone with a smartphone knows how to use.
With a quick scan, your guests get instant access to all the helpful information you've put together on your website. No more squinting to type out a long, complicated URL. They just point their camera, and they’re there.
It's all about making things easy for your guests, and a clean, user-friendly interface makes all the difference. When the time comes for your gift registry, you’ll see how a simple design can make the process smooth for everyone. You can learn more about how an online registry works to see just how seamless it can be.
Getting the Call-to-Action Right
Don't just slap a QR code on your card and call it a day! You need to give your guests a little nudge in the right direction. A clear, friendly call-to-action is key to getting them to actually scan it.
Keep the wording simple and direct. Something like:
"Scan for our wedding website and travel details!"
"For more info and to read our story, pop over to our website."
"Visit our wedding website for accommodation tips and more."
This tiny bit of text removes any confusion and encourages people to engage with your website straight away. It’s a small detail that makes a huge difference in keeping everyone in the loop and excited for your big day.
Your Save The Date Questions, Answered
Even with a perfect plan, you’re bound to have questions crop up when you get to the wedding stationery stage. We get it. Let’s walk through some of the most common queries we see, with clear answers to help you tick this off your list with confidence.
Do We Really Need to Send Save The Dates to Everyone?
Not necessarily, but it’s a very smart move for your most important people. Think of them as non-negotiable for anyone travelling from interstate or overseas, your immediate family, and your wedding party. These are the people who need a serious heads-up to book flights, sort out accommodation, and take time off work.
What about local guests? It’s a lovely gesture but less critical, especially if you have a shorter engagement.
Just remember the golden rule: anyone who gets a save the date must get a formal invitation later. This is a promise, so only send them to people you are 100% sure will be on your final guest list. There’s no taking it back.
What’s the Biggest Mistake Couples Make?
Hands down, the single biggest mistake is sending save the dates before the guest list is set in stone. It’s so tempting to get excited and send them out, but a save the date is a commitment to send an invitation. If you have to cut people later due to budget or venue limits, it creates hurt feelings and incredibly awkward conversations.
Another classic slip-up is putting way too much information on the card. Details about your gift registry, the exact ceremony time, or the dress code can all wait. Keep it clean and simple—save the nitty-gritty for the wedding website and the formal invitation.
The point of a save the date is to inform, not overwhelm. Keeping it simple and sending it only to a confirmed guest list sets a clear, considerate tone for your whole wedding experience.
Should We Ask for RSVPs on the Save The Date?
Definitely not. The whole point is just to give your guests a heads-up so they can block out the date. You're not asking for a firm commitment this far out. People’s plans change, and any RSVPs you collect now will be unreliable.
However, you can use it to get a soft headcount. A great way to do this is by adding a friendly note next to your wedding website details. Something like, "Head to our website for travel info and to let us know if you think you can make it!" This gives you a rough idea of numbers without pressuring anyone for a final answer. Save the formal RSVPs for the official invitations.
Is It Okay to Send Save The Dates by Email?
Absolutely! Digital save the dates are a fantastic, modern option. They’re eco-friendly, budget-conscious, and incredibly efficient—you save a bundle on printing and postage, and they’re delivered instantly. Plus, guests can click straight through to your wedding website.
The key is to know your audience. Older relatives, like grandparents, might not be as comfortable with digital invites and would probably cherish getting a physical card in the mail.
A hybrid approach is often the perfect solution. Many couples now:
Send beautiful paper cards to close family and older guests.
Email a stylish e-card to friends and younger relatives.
This way, everyone gets the news in a format that works for them. If you have more specific questions about how online wedding tools work, our team has put together a detailed list of answers to help with your planning. You can explore our own frequently asked questions for extra guidance.
Ready to streamline your gift-giving experience? With EasyRegistry, you can create a beautiful, user-friendly registry for your wedding, baby shower, or any special occasion. Give your guests the gift of choice and make your planning process simpler. Create your free registry today at https://www.easyregistry.com.au.
Before you even dream about fonts, foils, and fancy paper stocks, let's talk about the essentials. A little bit of planning upfront is the single best thing you can do to make printing your wedding invitations a breeze, not a frantic, last-minute nightmare. Getting these fundamentals sorted first saves you from stress and costly mistakes down the track.
Laying the Groundwork for Your Wedding Invitations
Think of this early stage as building the foundation for your house. It’s not the most glamorous part, but without it, everything else falls apart. A clear plan acts as your blueprint, guiding every decision and keeping the process enjoyable rather than overwhelming.
First up: your budget. Be honest with yourselves about what you can comfortably spend. The cost of wedding stationery can swing wildly, from a couple of hundred dollars for a beautiful DIY project to several thousand for a custom-designed, letterpress suite. Knowing your number from the get-go immediately narrows your choices and makes decisions about printers, paper, and finishes much easier.
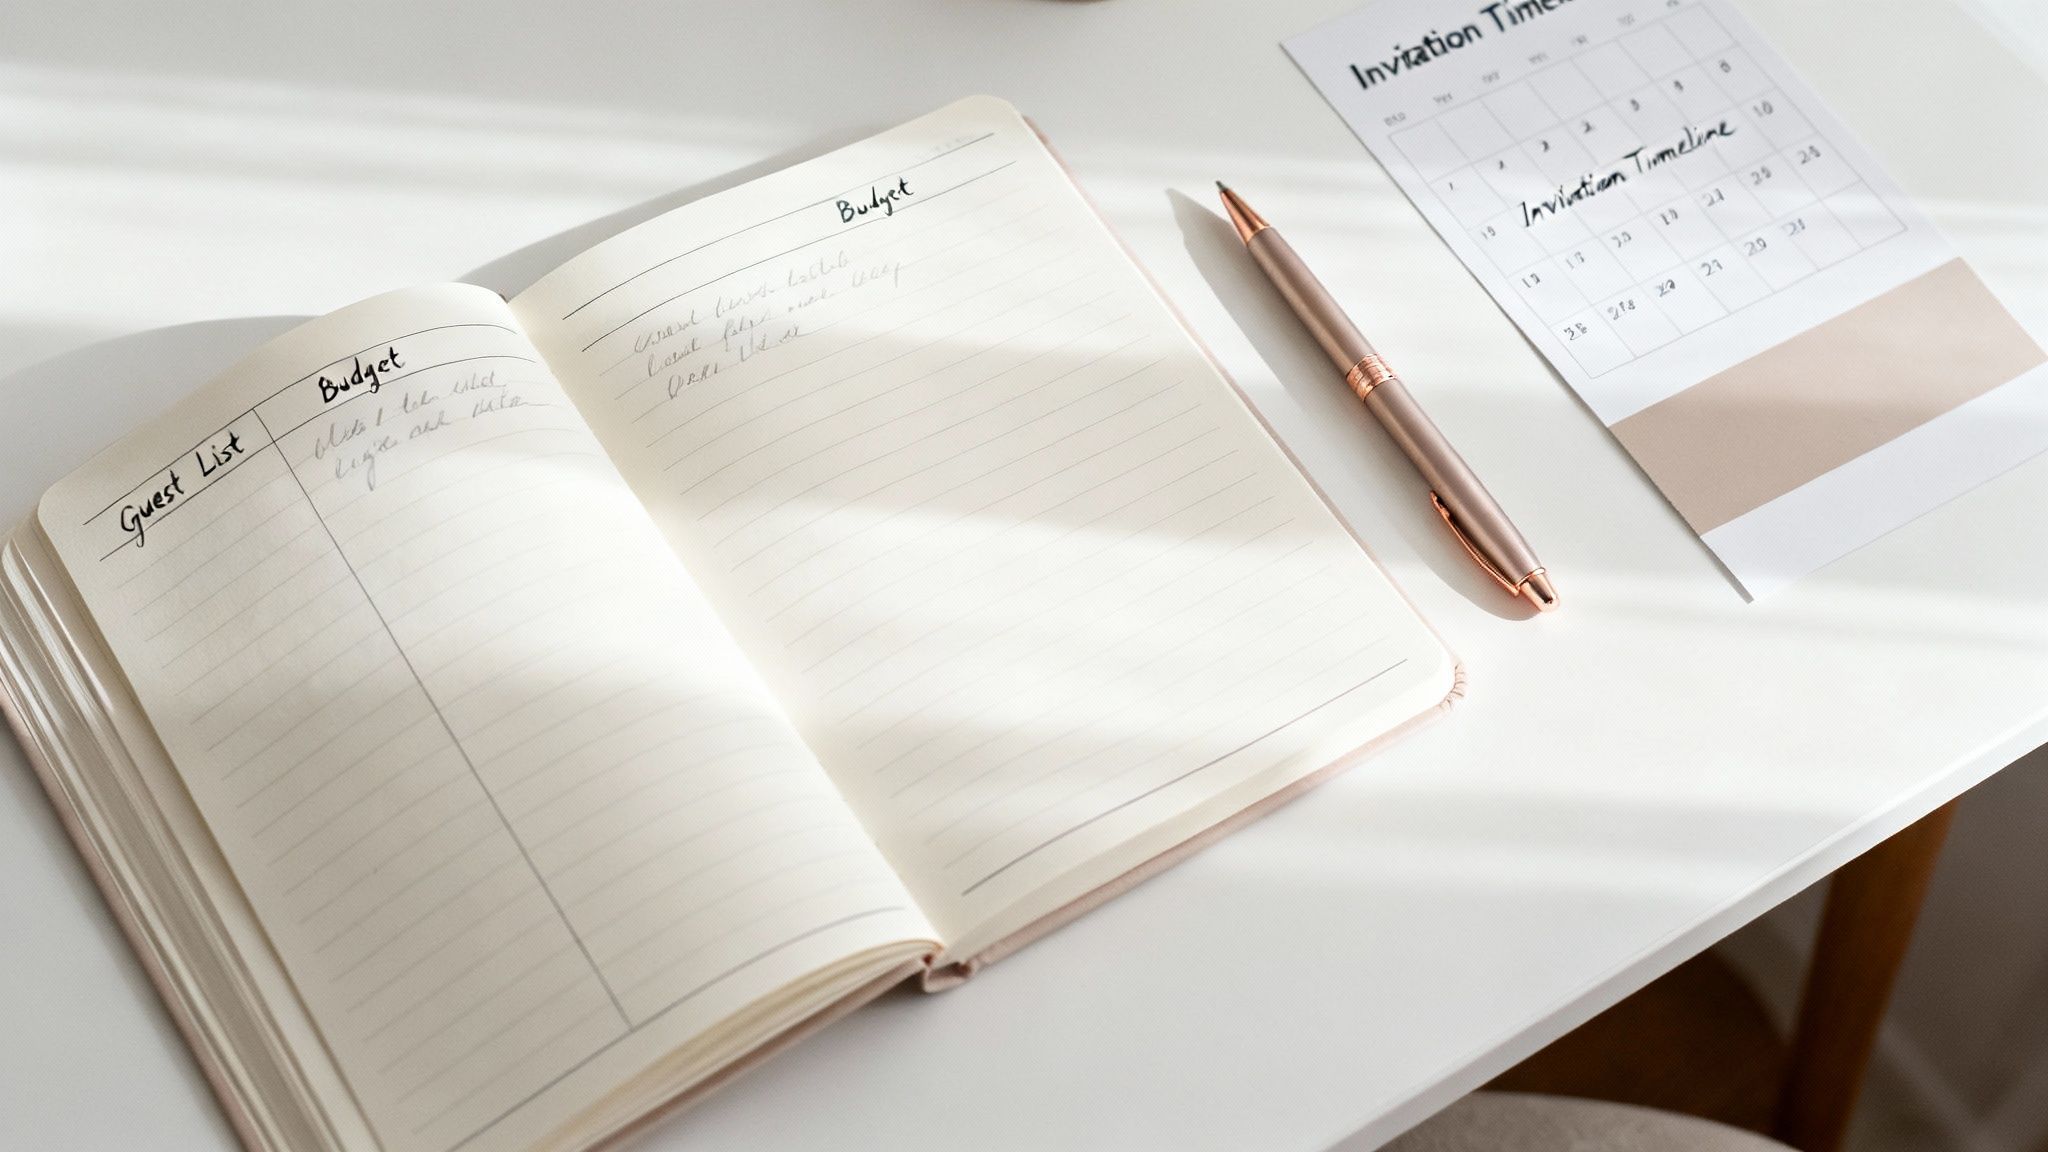
Finalising Your Guest List and Timeline
Once you've got a budget, it's time to lock in that guest list. This is non-negotiable, as your final numbers dictate how many invitations you actually need to print. The key here is to count households or couples, not individual people. Most families or couples living together will only need one invitation.
My go-to advice? Always order 10-15% extra. You’ll want a few for keepsakes, a couple for your photographer to capture on the day, and a buffer for any last-minute additions or post office mishaps. Trust me, it’s much cheaper to order a few extra upfront than to do a small, expensive reprint later.
With your quantity sorted, you can work out a realistic timeline. The trick is to work backwards from your wedding date. As a rule of thumb, you want to pop your invitations in the mail 8-12 weeks before the big day. This gives your guests plenty of notice, especially anyone travelling from interstate or overseas. That means you need to have them designed, printed, and addressed well before that deadline.
A well-structured timeline is your best defence against stress. It gives you breathing room for design tweaks, proofing, printing, and addressing without that rushed, panicked feeling.
Professional Printing vs a DIY Approach
This is one of the first big decisions you'll make. Do you hand it over to the experts or roll up your sleeves and do it yourselves? There are pros and cons to both, and the best choice really comes down to your budget, skills, and how much time you have.
Professional Printers: These guys are the pros for a reason. They offer incredible expertise, access to beautiful, high-quality materials, and can handle specialised techniques like letterpress or foil stamping. They manage all the technical stuff, delivering a flawless result. This is your best bet for a premium, stress-free finish.
DIY Printing: Going DIY gives you total creative freedom and can be a huge win for your budget. It’s perfect for crafty couples who know their way around design software and have the time to print, cut, and assemble everything themselves.
There's also a fantastic middle ground. You could design your own suite using a user-friendly platform like Canva and then simply send the print-ready files to a professional online printer. This gives you the creative control of DIY with the polished, high-quality finish of a pro job.
Getting these foundational elements sorted from the start is what makes the journey to print wedding invitations a smooth and genuinely exciting part of your wedding planning.
Getting Your Design File Print-Ready
This is where your vision really starts to take shape. Whether you’ve hired a designer, are tweaking a template, or are a DIY pro, getting your digital file ready for the printer is probably the single most important step in the whole process.
Nailing the technical details here is what separates a professional, polished invitation from one that just looks… off. It’s all about making sure what you see on your screen is exactly what you get in your hands.
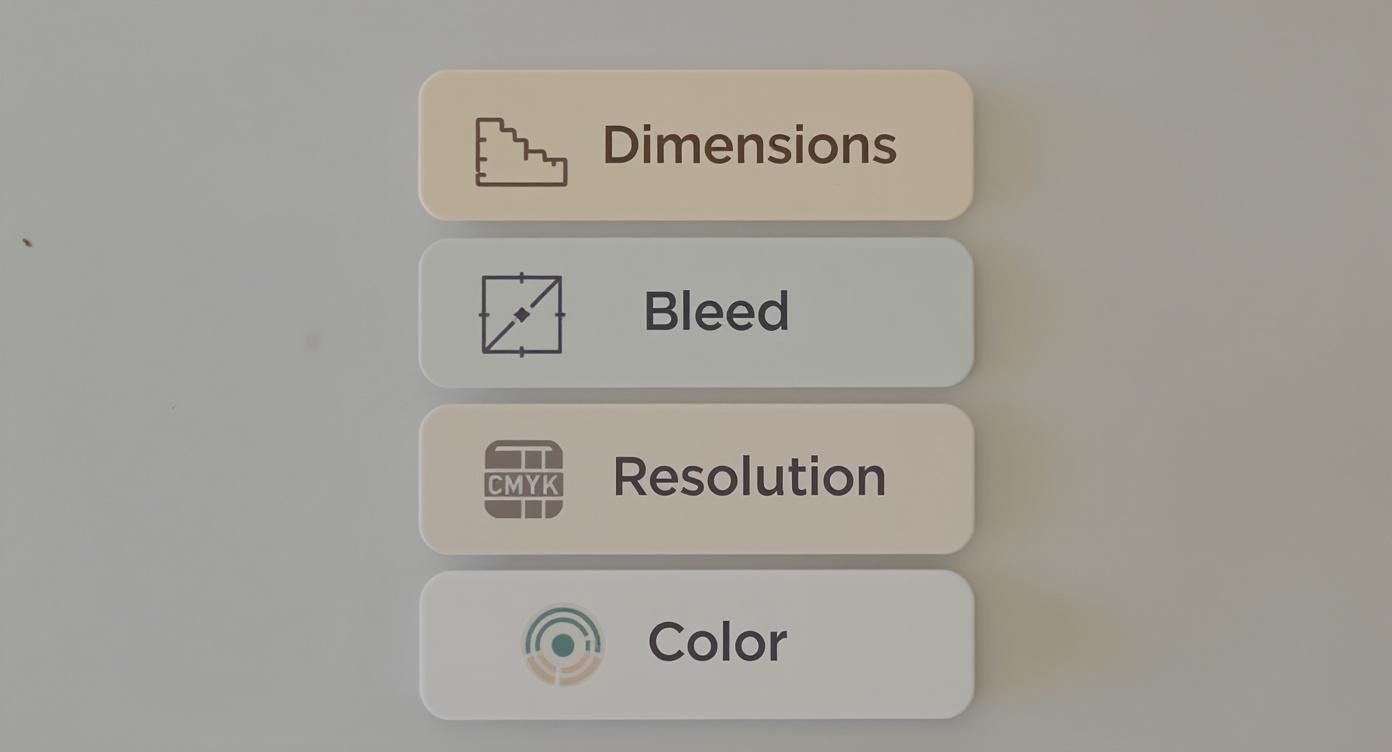
Setting Up Your Canvas: Dimensions and Safe Zones
Before a single word of text or a swirl of calligraphy goes on the page, you need to set up your document to the correct physical size. In Australia, A5 (148 x 210 mm) is a popular choice, but the slightly more classic 5×7 inch (127 x 178 mm) size is also very common. Don't guess—check with your printer first to confirm the exact dimensions they work with.
Once your artboard is sized correctly, you need to think about the safe zone. This is a little internal buffer, usually about 3-5mm from the edge of the card. All your critical information—names, dates, venue details—must stay inside this zone. Anything outside of it risks getting lopped off when the printer trims the cards, and nobody wants half a phone number.
The Secret to a Professional Finish: Bleed and Trim Marks
Ever received a flyer with a weird, thin white sliver along the edge? That’s what happens when a design file doesn't have a bleed. A bleed is simply the background colour or image extending a little bit past where the final cut will be.
Printers can't print right to the very edge of a card. Instead, they print on a much larger sheet and then trim everything down to size. The bleed is your safety net, ensuring that even if the cutting blade is a fraction of a millimetre off, you won't see any jarring white paper.
The Golden Rule: The industry standard is a 3mm bleed on all four sides.
What This Means: Your design file will be slightly bigger than your final invitation. For an A5 card (148 x 210 mm), the file you send to the printer will actually be 154 x 216 mm.
Showing Them Where to Cut:Trim marks are tiny little lines in the corners of your file that guide the printer's cutting machine. Most design programs like Adobe InDesign or Canva can add these for you automatically when you export your final file.
Think of the bleed as a small insurance policy for your design. It's a simple step that guarantees a professional, edge-to-edge finish and prevents any unwanted surprises when your invitations arrive.
Resolution and Colour: The Non-Negotiables
The sharpness and clarity of your finished invitation comes down to one number: 300 DPI (dots per inch). This is the standard resolution for high-quality printing. If you pull an image from a website (which is usually 72 DPI), it will look fuzzy and pixelated on paper. Always start with high-resolution images and graphics.
Just as crucial is the colour mode. Your computer screen creates colours using light (RGB – Red, Green, Blue). A printer creates colours using ink (CMYK – Cyan, Magenta, Yellow, Black).
If you design in RGB, the colours can shift quite dramatically when they're converted for printing. That vibrant, electric blue on your screen might turn into a dull, flat navy. To avoid disappointment, set your design software to CMYK mode from the very beginning. For a truly flawless and impactful design, remember that mastering color theory can help you anticipate how your chosen palette will translate from screen to paper.
By getting the dimensions right, adding a bleed, using high-resolution assets, and setting the correct colour mode, you're essentially handing your printer a perfect blueprint. It gives them everything they need to bring your vision to life just as you imagined it.
Choosing the Right Paper and Printing Technique
The moment your guests open their invitations, they get their first tangible hint of your wedding day. The weight of the paper in their hands and the impression of the text don't just convey information; they set a tone and build anticipation. This is where your design truly comes to life, transforming from a file on a screen into a beautiful object they can hold.
Making the right choice really comes down to balancing your dream aesthetic with your budget. The good news is you don't need to spend a fortune to create something stunning, but knowing your options is the key to making a decision you'll absolutely love.
Getting a Feel for Paper Weight and Texture
In Australia, the standard for measuring paper thickness is GSM, or "grams per square metre." Simply put, a higher GSM means heavier, thicker paper. Your everyday office printer paper is around 80gsm—far too flimsy for a wedding invitation.
Here’s a quick guide to what the numbers mean for your stationery:
200-250gsm: This is a lighter cardstock, often a good, budget-friendly choice for simpler flat cards or supplementary items like RSVP notes. It's solid, but might feel a little less substantial.
280-350gsm: This is the sweet spot for most wedding invitations. It has a high-quality, sturdy feel that gives a premium impression without the top-tier price tag. It's also robust enough to handle specialty techniques like letterpress or foil stamping.
400gsm and above: Now we're talking serious luxury. Often called "double-thick," this ultra-heavy cardstock makes a significant impact and is perfect for a very formal or high-end wedding.
Beyond the weight, the paper's texture plays a huge part in the overall vibe. A smooth matte card is a timeless classic, but other finishes can beautifully complement your theme. Textured stocks like linen or felt can add a subtle touch of elegance, while a creamy cotton paper offers a soft, pillowy feel that's just made for letterpress. You can even find recycled paper stocks with gorgeous, subtle flecks that lend an earthy, organic character.
The right paper does more than just hold ink; it becomes part of the design itself. I always tell my clients to order samples from a few printers. There’s no substitute for feeling the difference for yourself before you commit to a full order.
Comparing Popular Printing Methods
Once you've got a handle on your paper, it's time to think about how your design will actually be printed. This decision will have the biggest impact on both the final look and your overall cost.
The table below breaks down the most common options to help you decide what's right for you.
Flat, smooth ink on the paper's surface. Crisp and modern.
$
Letterpress
Classic, elegant typography and simple graphics.
A deep, tactile impression pressed into the paper.
$$$
Foil Stamping
Adding metallic glamour and a "wow" factor.
A shiny, metallic finish pressed onto the paper.
$$$
Thermography
Mimicking the formal look of engraving on a smaller budget.
Raised, glossy lettering that sits on top of the paper.
$$
Let's dive a little deeper into what these mean for your invitations.
Digital Printing is easily the most common and budget-friendly method. It works much like a very sophisticated office printer, applying ink directly onto the surface of the paper. This makes it a fantastic choice for designs with lots of colour, watercolour illustrations, or even photo elements. It’s fast, versatile, and offers incredible value. When weighing up your options, understanding digital vs. offset printing can provide a deeper comparison of common flat-print methods.
If you’re after a more tactile and luxurious finish, you’ll want to explore specialty printing methods.
Letterpress Printing is a true artisan technique. It uses a custom plate to press an inked design deep into thick, soft paper (cotton stock is a classic partner for letterpress). The result is a beautiful, tangible impression you can feel with your fingertips. It’s a timeless and elegant choice, but it’s also labour-intensive, which is reflected in its premium price.
Foil Stamping works in a similar way to letterpress, but instead of ink, it uses heat and pressure to apply a thin layer of metallic foil to the paper. It's perfect for adding a touch of glamour with gold, silver, or rose gold accents and creates a stunning, eye-catching effect.
Thermography is a clever technique that creates raised lettering. It works by dusting the wet ink with a special powder which, when heated, rises to create a glossy, embossed-like effect without actually pressing the paper. It offers a touch of formality and texture at a more accessible price point than traditional engraving.
No matter which printing method you choose, getting these four settings—dimensions, bleed, resolution, and colour mode—correct in your design file is the foundation for a flawless final print.
Finding the best approach often means finding the sweet spot between your dream aesthetic and your real-world budget. Don't forget you can mix and match! For example, you could digitally print your main invitation to accommodate a beautiful watercolour design, then add a foil-stamped tag or belly band for that touch of luxury. This hybrid approach is a great way to get a high-end feel while keeping costs manageable when you print wedding invitations.
Finalising Your Order and Proofing Like a Pro
You've waded through design files and paper stocks, and now you’re on the home stretch. This is it—the final step before you print wedding invitations, and where paying close attention to the little things really counts. It’s time to lock in your quantities and become a master of the proofing process.
Getting this part right is what saves you from that gut-wrenching feeling of finding a typo on 100 printed invites, or realising you’ve ordered far too few. Slowing down here is your best insurance against a costly and stressful last-minute reprint.
Calculating Your Final Invitation Count
Before you hit that "confirm order" button, let's get your numbers straight. The most common mistake I see couples make is ordering one invitation per guest. Remember, it's one invitation per household, not per person.
Run through your guest list and start grouping people by their address. A family of four gets one invitation. A couple living together? Just one. Once you have that household number, you need to add a buffer.
My non-negotiable rule is to always order 10-15% extra. These spares are absolute lifesavers. They cover B-list guests, invitations that get lost in the mail, keepsakes for you and your parents, and one for your photographer to capture on the day.
For example, if you have 80 households on your list:
Calculate 15% extra: 80 x 0.15 = 12
Your total order: 80 + 12 = 92 invitations
Trust me, it is always cheaper to add a few extras to your main order than to place a small, expensive reprint order down the track.
The Art of Proofing Your Invitations
Whether your printer sends you a digital PDF or a physical paper sample, do not skip the proofing stage. This is your very last chance to catch an error before the entire run is printed. It’s so easy to get excited and just give it a quick "looks good!", but a careful, methodical review is absolutely essential.
You've probably looked at your design a hundred times by now, which means your brain will naturally start to fill in the gaps and overlook mistakes. That's why you need a fresh perspective.
Recruit a Proofing Partner: Ask a friend or family member who is known for their eagle eye—and who wasn’t involved in the design—to read it over. They’re far more likely to spot something you’ve become blind to.
Read it Backwards: It sounds a bit strange, but reading the text from the last word to the first forces your brain to focus on each word individually instead of skimming the sentence. It’s an old editor’s trick that works wonders for catching spelling mistakes.
Check it on Different Devices: For a digital proof, look at it on your computer and your phone. Colours can render differently across screens, and it just gives you another angle to spot something amiss.
Your Ultimate Proofing Checklist
When that proof arrives, don't just give it a quick glance. If it's digital, print it out. Grab a pen and physically tick off each item on this list.
Names: Are all names spelt correctly? Yours, your parents', the venue's name—triple-check every single one.
Dates and Times: Does the day of the week actually match the date? Is the time clear (e.g., "5:00 PM" vs "five o'clock in the evening")? Is the year correct? You’d be surprised.
Venue Details: Is the full address for the ceremony and reception listed correctly? It’s worth popping it into Google Maps just to be sure.
Contact Information: Check every digit of a phone number and every letter of a website URL. This is crucial for your RSVP details or if you're linking to a registry. For those using an online service, you can learn more about how a gift registry works to make sure your guests have a smooth experience.
Spelling and Grammar: Read every single word aloud. Hunt for typos, grammatical errors, and any phrasing that just sounds a bit clunky.
Only when you are 100% confident that every detail is perfect should you send back that final approval. Taking your time here guarantees the beautiful invitations you’ve worked so hard on are absolutely flawless.
Getting Your Invitations into Your Guests' Hands
You’ve designed, proofed, and finally have a beautiful stack of printed invitations. Now for the final hurdle: getting them safely to your guests. This is where the nitty-gritty of postage and mailing comes in, and a bit of forward planning here will save you a world of stress.
The last thing anyone wants is their stunning invitations returned to sender because of a simple postage error. From how you address the envelopes to getting the stamp value just right, let's make sure every single one arrives perfectly.
The Art of Addressing
The way an envelope is addressed sets the tone before it's even opened. You've got a few options here, each with its own vibe and workload.
Hand Calligraphy: For a truly formal or luxurious wedding, nothing beats professional calligraphy. It’s an art form that signals a very special event is on the horizon. This is a premium service, so you'll want to find and book a calligrapher well ahead of time.
DIY Handwriting: If you have lovely penmanship, addressing the envelopes yourself is a wonderfully personal (and budget-friendly) touch. Just be sure to use a good quality pen that won’t smudge and maybe a sneaky ruler guide to keep your lines perfectly straight.
Printed Labels: Let’s be real, this is the most efficient method by a long shot. A simple mail merge from your guest list spreadsheet can produce clear, professional labels in minutes. If you want to keep things looking sleek, opt for clear labels that almost disappear on the envelope.
Whichever path you take, consistency is your friend. Use the same format for every address and meticulously double-check the spelling of every name and street against your master guest list.
Your Most Important Trip to the Post Office
If there is one piece of advice I drill into every couple, it's this: do not guess the postage. Never. The weight of your invitation suite can be surprisingly deceptive, especially once you add multiple cards, a belly band, or a wax seal.
Before you even think about buying stamps, here’s what you need to do:
Assemble one complete invitation. Put everything inside the envelope just as a guest would receive it – the invitation, RSVP card, details card, and the return envelope.
Seal it properly. If you’re using a wax seal, add it now. You need a perfect, final-version replica of what you'll be mailing.
Take it to an Australia Post office. Walk up to the counter, hand it to a staff member, and ask them to weigh and measure it for you. They’ll tell you the exact postage cost for both domestic and any international guests.
This ten-minute trip is the best insurance policy you can get. It prevents the absolute nightmare of having dozens of invitations returned to you just weeks before your wedding, or worse, arriving with a "postage due" sticker for your guests to pay.
Once you have the correct postage value, you can buy your stamps. It's always worth asking to see the different designs available—Australia Post often releases beautiful commemorative stamps that might just match your wedding theme.
Setting Your Mailing Timeline
Timing is everything. You need to give your guests enough notice to clear their calendars, book travel, and get their RSVPs back to you without feeling rushed.
In Australia, the sweet spot for mailing your invitations is between 8 and 12 weeks before your wedding day.
12 weeks out: This is a good idea if you have a lot of guests travelling from overseas or interstate. It gives them plenty of time to hunt for flight deals and book accommodation.
8 weeks out: If most of your guests are local, eight weeks is a perfectly acceptable amount of notice.
When you print wedding invitations, this mailing date should be locked in your mind from the start. Work backwards from there to schedule your design, printing, and addressing phases. Giving yourself that buffer is the key to avoiding any last-minute panic and ensuring your beautiful invitations build excitement from the moment they arrive.
A Look at Australian Wedding Invitation Costs and Trends
Getting a handle on the local scene is the first step to planning your wedding stationery without any nasty budget surprises. The costs and styles for wedding invitations in Australia can be all over the map, but there are a few trends that are really changing the game for modern couples.
One of the biggest shifts I've seen is the move to a "hybrid" invitation. Couples are blending the classic feel of a physical invitation with the sheer convenience of digital tools. It's a clever solution: they'll print a gorgeous main invitation card, but add a simple QR code. A quick scan takes guests to a wedding website that holds all the nitty-gritty details—maps, hotel recommendations, gift registry info, and, most importantly, an easy online RSVP.
This approach gives you the best of both worlds. You still get that special, tactile moment when your guests open a beautiful piece of mail, but you also streamline all the logistics. It keeps the printed suite looking elegant and uncluttered, which is a win-win.
What to Expect on the Bill
So, what’s the real cost to print wedding invitations? The final number can swing wildly depending on where you are in Australia and the level of finish you’re after.
Recent stats show that while invitations are a must-have for 97% of Australian weddings, the average couple is spending about $1,150. But it really pays to know your local market. For example, couples in Queensland tend to spend closer to $782, whereas those over in Western Australia are looking at an average of $1,150. If you're a numbers person, you can see a full breakdown of Australian wedding statistics for more detail.
The biggest trend right now? Getting personal while keeping a close eye on the budget. In fact, a whopping 64% of couples are now choosing to DIY their printed invitations to help bring that final cost down.
This "DIY" approach doesn't mean you're stuck with something that looks homemade, either. Many couples are flexing their creative muscles with user-friendly design tools and then handing the files over to a professional printer for that flawless, high-quality finish.
If you're looking for more ways to be savvy with your spending, checking out these 6 amazing tips to save money on your wedding day can offer some great ideas. At the end of the day, whether you bring in a pro stationer or take the reins yourself, the aim is to create something that feels uniquely you and gets everyone excited for the celebration ahead.
Your Biggest Wedding Invitation Questions, Answered
Once you’ve got your beautiful invitations ready to print, a whole new world of questions tends to open up. From wording etiquette to navigating those tricky guest list situations, let’s tackle some of the most common queries we see from couples.
One of the biggest hurdles? Talking about gifts. It can feel really awkward, but trust me, being clear is the kindest thing you can do for your guests. The most elegant solution is to add a simple line directing everyone to your wedding website, where you can share all your registry details. This keeps the main invitation clean and classic.
Handling Plus-Ones and RSVPs
Deciding who gets a "plus-one" can cause some serious stress. A good rule of thumb I always recommend is to extend an invitation to the partners of guests who are married, engaged, or in a long-term, established relationship. For your single friends, it’s entirely your call and often comes down to budget and venue capacity.
The key is to be crystal clear from the start. Address the envelope specifically to the people you’re inviting. For example, "Ms Jane Smith and Mr John Doe" leaves no room for doubt, whereas "Ms Jane Smith" politely indicates the invitation is just for her.
Pro Tip: Your approach to plus-ones should be consistent. Clearly addressing the invitation to the intended guests is the most effective way to communicate your final numbers and sidestep any potential confusion.
Managing your RSVPs is the next critical piece of the puzzle. Make sure you set a clear RSVP deadline, usually about 3-4 weeks before the big day. This buffer is essential—it gives you enough time to give final numbers to your caterer and venue without a last-minute panic.
And if you find yourself chasing people after the deadline has passed? Don't worry, it happens to almost everyone. A friendly phone call or a gentle text message is the perfect way to get that final answer. For more advice on these common hurdles, our guide on frequently asked wedding questions is packed with helpful tips to get you through the final stretch.
At EasyRegistry, we're all about making your gift list simple and stress-free. Create your free registry today and give your guests a seamless way to celebrate with you.
Crafting the perfect wedding invitation sets the tone for your entire celebration, but finding the right words can feel overwhelming. The wedding invitations wording you choose is your guests' first glimpse into your special day, whether it’s a traditionally elegant affair or a relaxed, modern get-together. It’s a key piece of communication that conveys not just the essential details, but the unique spirit of your relationship.
This comprehensive guide is designed to eliminate the guesswork. We’ll break down 8 distinct styles of wedding invitation wording, providing curated examples, strategic analysis, and actionable takeaways for each one. We’ll explore the nuances of etiquette for every situation, from navigating modern family structures and destination weddings to honouring religious customs. Understanding where this task fits into your broader wedding planning timeline is crucial, as it impacts when you need to finalise and send your invitations to give guests ample notice.
Our goal is to help you confidently craft an invitation that is authentic, informative, and perfectly represents your union. Let's dive in and find the ideal phrasing to announce your big day.
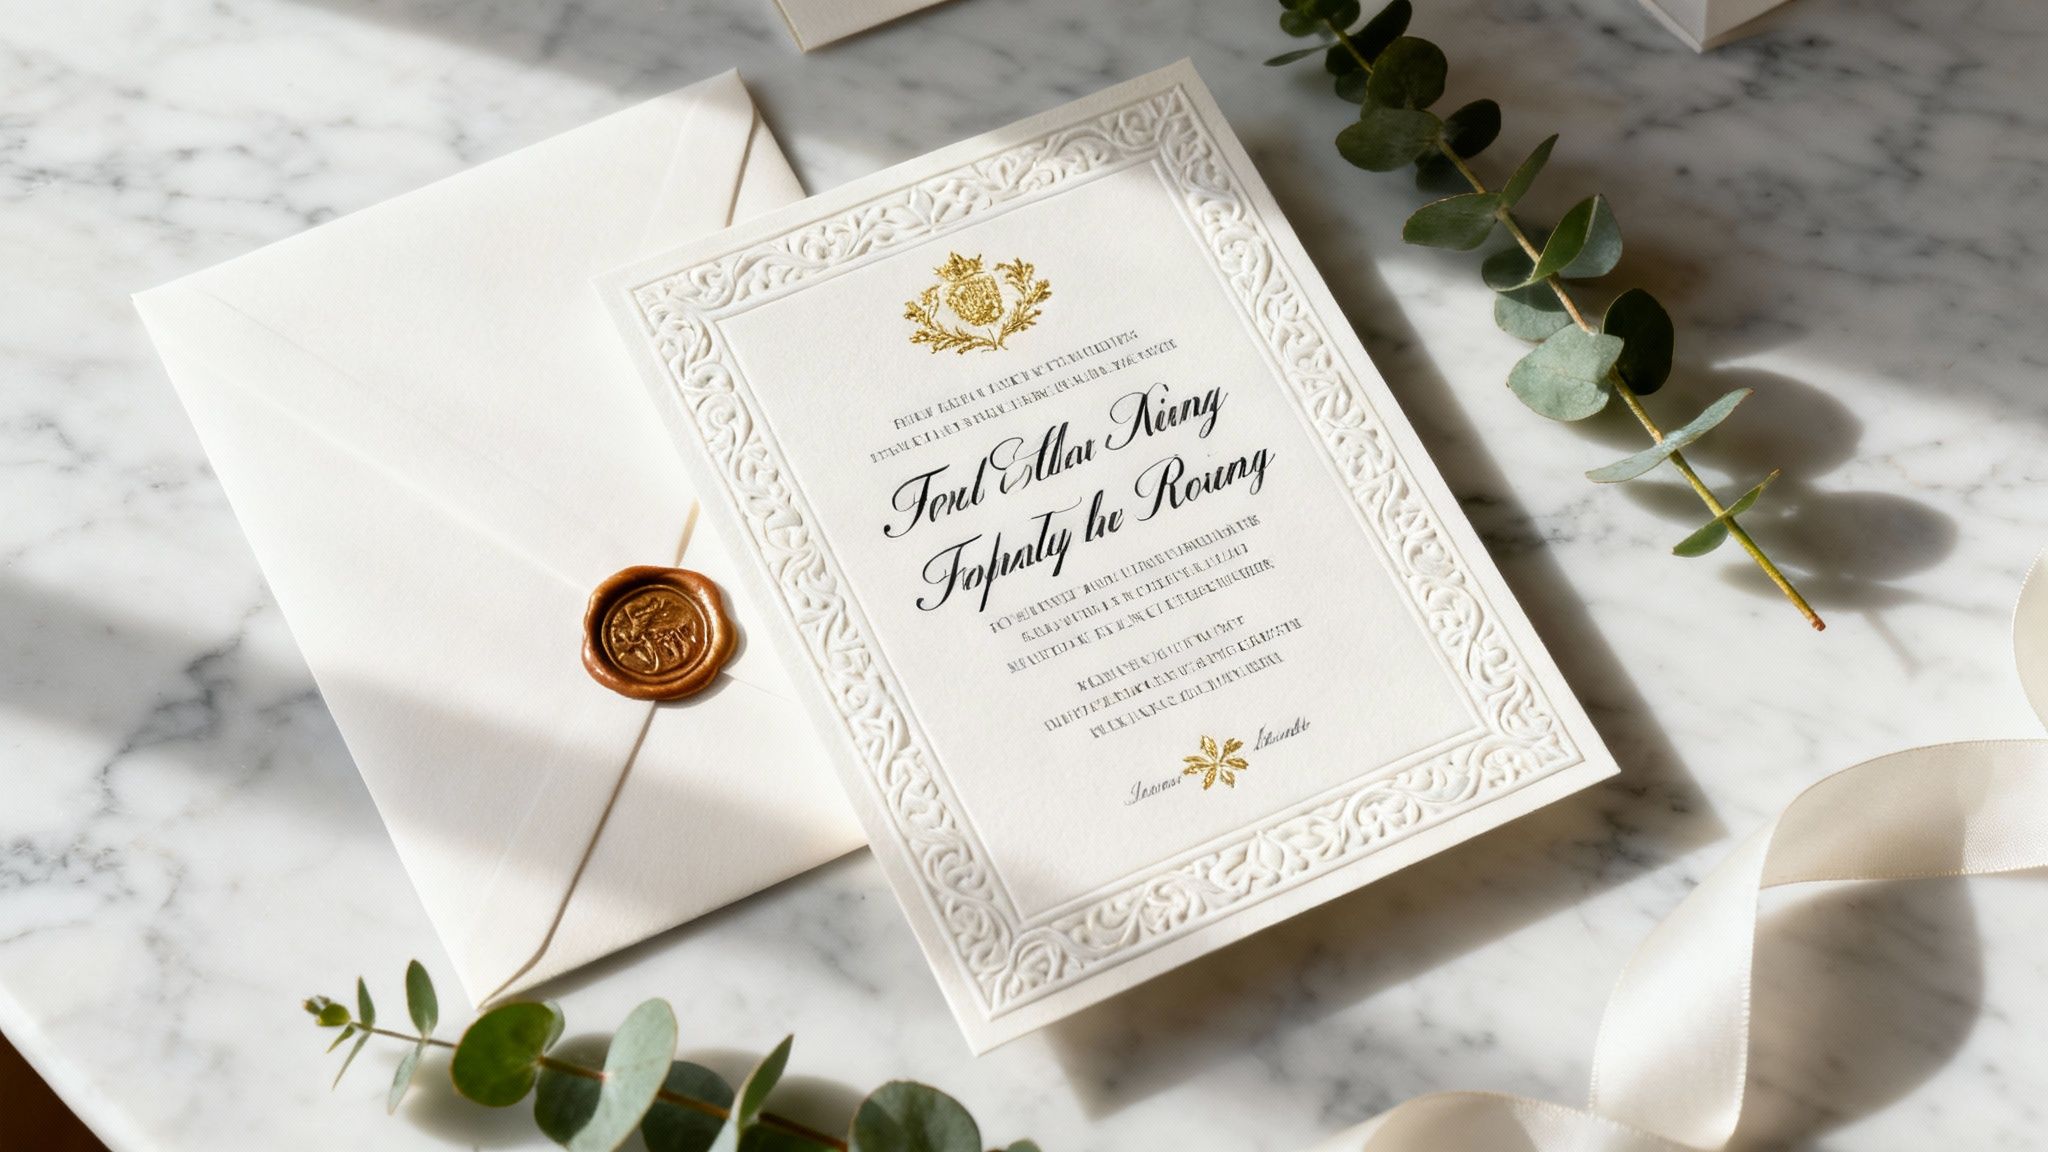
1. Traditional Formal Wedding Invitation Wording
Rooted in centuries of etiquette, traditional formal wedding invitation wording follows a strict structure that honours tradition and family. This style is ideal for classic, black-tie, or religious ceremonies where upholding convention is paramount. The language is sophisticated and impersonal, using a third-person narrative, typically with the bride's parents positioned as the hosts. Every detail, from titles to spelling out numbers, is meticulously handled to convey respect and formality.
Strategic Breakdown
The core strategy of this wording is to communicate the gravity and significance of the event through established social codes. It removes ambiguity and sets a formal tone right from the start, letting guests know what kind of event to expect. This approach is less about personal flair and more about adhering to a time-honoured script that feels elegant and universally understood.
Host-Centric: The invitation is issued by the hosts (traditionally the bride's parents), not the couple. This acknowledges their role in orchestrating and financing the event.
Hierarchical Information: The wording follows a precise order: Hosts, Request Line, The Couple, Date and Time, Venue, and Reception Details.
Specific Phrasing: Key phrases like "request the honour of your presence" are used specifically for ceremonies held in a place of worship, while "request the pleasure of your company" is used for secular venues.
Example and Analysis
Example:
Mr. and Mrs. John Michael Smith request the honour of your presence at the marriage of their daughter Jennifer Anne to Mr. Michael James Thompson Saturday, the twenty-first of September Two thousand and twenty-five at half-past four in the afternoon St. Mary's Cathedral Sydney, New South Wales
This example flawlessly executes the traditional format. It uses full names with titles, spells out all numbers, and employs the correct "honour of your presence" phrasing for a cathedral wedding. For those seeking to maintain classic elegance, reviewing various formal invitation letter examples can provide valuable insights into traditional phrasing and structure. This classic wording also aligns well with traditional gift-giving practices, which can be managed with a modern wedding gift registry.
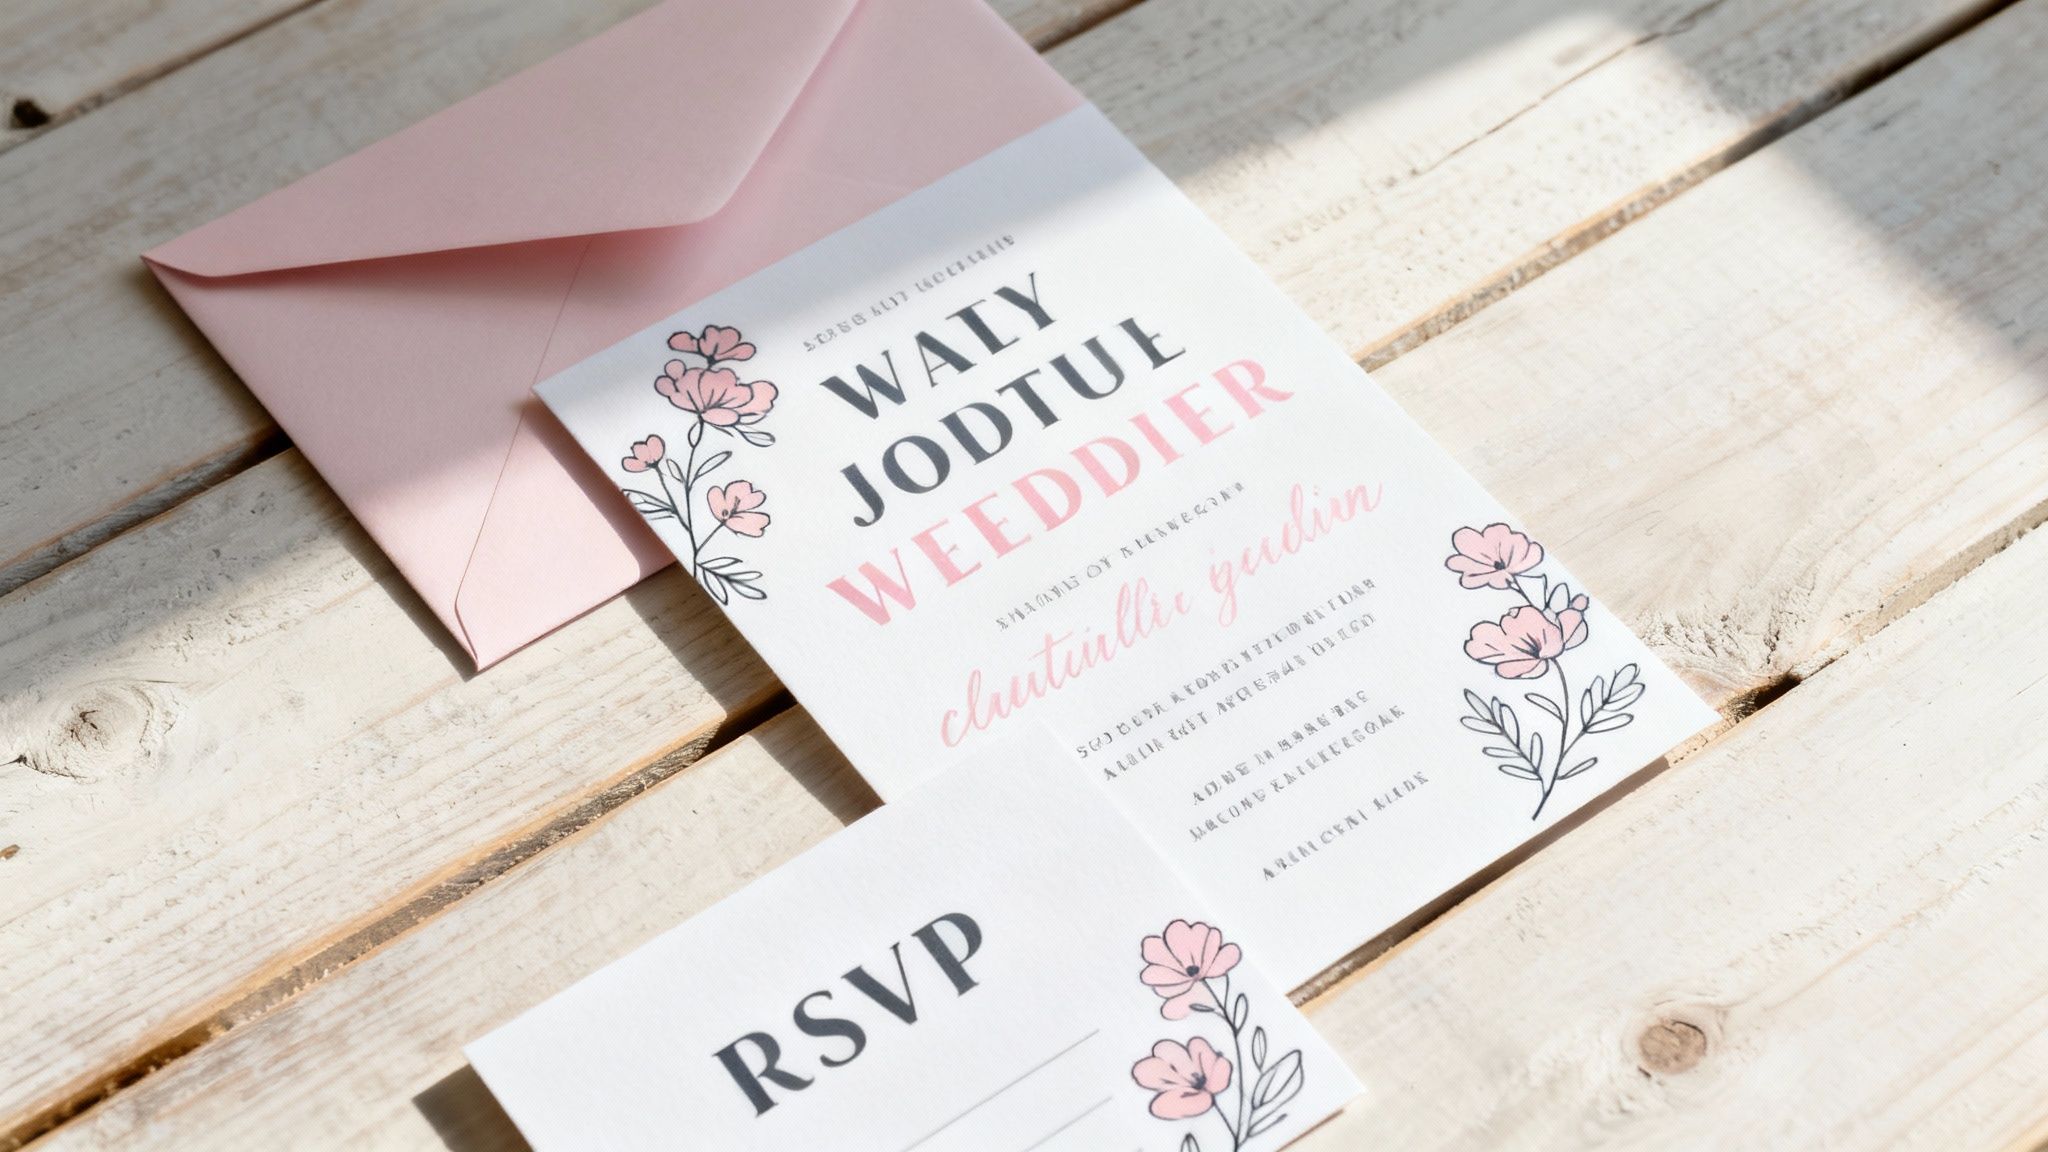
2. Casual and Modern Wedding Invitation Wording
Breaking away from the strict conventions of the past, casual and modern wedding invitation wording reflects the unique personality of the couple. This contemporary style uses relaxed, conversational language and often presents the couple as the primary hosts, putting their story front and centre. The wording is flexible, allowing for humour, personal anecdotes, and creative phrasing to create an invitation that feels authentic, intimate, and a true representation of the celebration to come.
Strategic Breakdown
The core strategy behind modern wording is to establish a personal connection with guests and set the tone for a relaxed, fun-filled event. It swaps formal titles and third-person phrasing for a more direct and engaging voice. This approach tells guests that the wedding will be less about rigid tradition and more about celebrating the couple's love story in a way that feels genuine to them.
Couple-Centric: The couple is typically the host, inviting guests directly. Phrases like "Together with their families" can be used to acknowledge parental support without adhering to formal hosting lines.
Tone-Setting Language: The choice of words immediately signals the vibe of the wedding. Phrases like "Let's party!" or "We're tying the knot" suggest a high-energy celebration, while softer language can imply a more relaxed, intimate gathering.
Simplified Information: Details are presented clearly and concisely. There is no requirement to spell out numbers or use full middle names, making the invitation easier to read at a glance.
Example and Analysis
Example:
Together with our families Emma Johnson and Ryan Martinez invite you to share in our joy as we say 'I do'
Saturday, 21 September 2024 at 4:30 in the afternoon The Royal Botanic Garden Sydney, New South Wales
Dinner, drinks, and dancing to follow
This example strikes a perfect balance between warmth and clarity. It acknowledges family support while keeping the focus on the couple. The phrase "share in our joy" is inviting and personal, and the clear, scannable format for the date, time, and venue ensures guests have all essential information. This style of wedding invitations wording is ideal for couples who want their stationery to feel both modern and heartfelt.
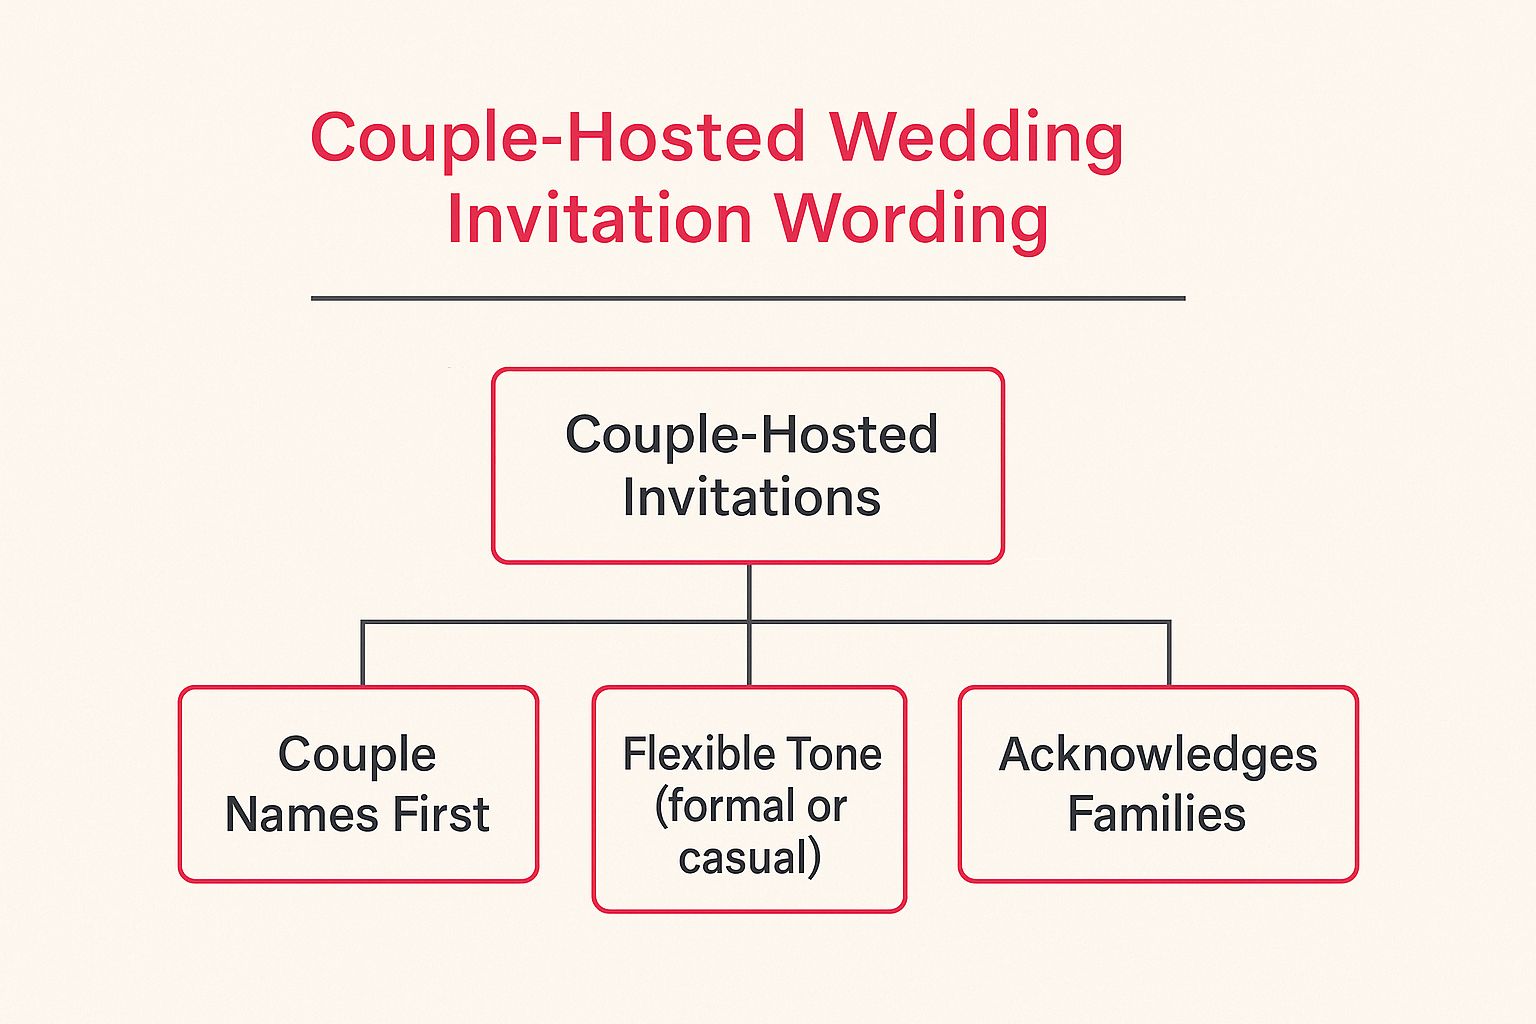
3. Couple-Hosted Wedding Invitation Wording
Reflecting a modern shift in wedding traditions, couple-hosted wedding invitation wording is used when the couple themselves are the hosts of the celebration. This approach, increasingly common as couples marry later or prefer to take financial ownership, places the couple's names at the forefront. The tone can range from formal to casual, but the core message is one of partnership and independence, inviting guests to celebrate a union they have personally orchestrated.
The infographic below outlines the hierarchical structure of this wording style, showing how the couple takes precedence while still allowing for family acknowledgement.
This visualisation highlights that the primary focus is always the couple, with tonal flexibility and family inclusion serving as secondary, optional layers.
Strategic Breakdown
The core strategy here is to clearly communicate that the couple is issuing the invitation, which re-frames the event as a celebration hosted by two partners beginning their new life together. This wording choice sets a tone of modern autonomy while still maintaining the grace and importance of the occasion. It allows for greater personalisation and directly reflects who is managing the event.
Couple as Primary Hosts: The couple's names appear first, immediately establishing them as the hosts. This is a fundamental departure from traditional wording.
Inclusive Language: Phrases like "Together with their families" or "Along with our parents" are often used. This is a strategic way to honour parental support without ceding the primary host role.
Tone Versatility: Unlike the strictness of traditional wording, this style can be adapted to suit any level of formality, from a black-tie affair to a relaxed backyard gathering.
Example and Analysis
Example:
Together with their families Rachel Anne Green and Ross Geller request the pleasure of your company at their wedding celebration Saturday, the seventh of June Two thousand and twenty-six at five o'clock in the evening The Botanical Gardens Melbourne, Victoria
This example strikes a perfect balance. It begins by graciously acknowledging family support before positioning the couple as the central hosts. The phrase "request the pleasure of your company" is appropriate for a non-religious venue like the Botanical Gardens. By using full names and spelling out the date and time, the invitation retains a sense of formality and occasion while clearly communicating a modern, couple-centric approach to the celebration.
4. Divorced or Blended Family Wedding Invitation Wording
Navigating modern family structures requires a thoughtful approach to wedding invitations wording. This style addresses the complexities of divorced, remarried, or blended families with grace and respect. The primary goal is to acknowledge the important people in the couple's lives without causing confusion or discomfort. The wording prioritises inclusivity and diplomacy, ensuring all hosting parties are recognised appropriately according to their relationship and contribution.
Strategic Breakdown
The core strategy here is clarity and sensitivity. This wording moves away from a single, traditional host line to a more descriptive format that accurately reflects the family situation. It sets a tone of unity and respect, showing guests that the new union is supported by all sides of the family, regardless of its structure. The key is to handle names and relationships in a way that is both honourable and easy to read.
Prioritise Inclusivity: The wording is carefully crafted to include divorced parents, stepparents, and other key family members who are hosting or have played a significant role.
Clear Hierarchy: Divorced parents are typically listed on separate lines. A mother is traditionally listed before the father. Stepparents are included alongside their partners.
Use of "Together with their families": This phrase serves as an elegant solution for highly complex family situations, ensuring no one feels excluded while keeping the invitation uncluttered.
Example and Analysis
Example:
Mrs. Jennifer Smith and Mr. John Smith request the honour of your presence at the marriage of their daughter Sarah Anne to Michael James son of Mr. and Mrs. Robert Williams
This example elegantly handles a situation where the bride's parents are divorced but are co-hosting the wedding. By placing their names on separate lines connected by "and," it signals a united front for the occasion. This wedding invitations wording is respectful of their individual identities while presenting them as joint hosts. It tactfully omits the groom's parents as hosts, instead identifying him as their son, a common choice when one side of the family is funding the event.
5. Destination Wedding Invitation Wording
Destination wedding invitations serve a dual purpose: they announce your marriage and act as a preliminary travel guide. The wording must balance excitement for the unique location with the practical information guests need to plan a significant trip. This style is essential for any couple asking their loved ones to travel, as it sets clear expectations about the time, cost, and logistical commitments involved. The tone is typically warm and celebratory, generating enthusiasm for the trip ahead.
Strategic Breakdown
The core strategy here is clarity and excitement. Unlike traditional invitations, this wording needs to provide more than just a date and time; it must convey the "why" behind the travel. It aims to make guests feel like they are being invited on a special holiday, not just to a ceremony, while transparently providing the tools they need to make an informed decision about attending.
Lead with the Location: The destination is the main draw, so it should be featured prominently to immediately capture attention and set the scene.
Information Hub: This wording often directs guests to a wedding website, which acts as a central repository for all travel, accommodation, and event details. This keeps the physical invitation uncluttered.
Extended Timeline: The language implies a multi-day celebration rather than a single-day event, encouraging guests to plan a mini-vacation around the wedding.
Example and Analysis
Example:
Together with their families Jennifer and David invite you to join them as they say "I do" when they are married in Maui, Hawaii Saturday, the seventh of June Two thousand and twenty-six at five o'clock in the evening The White Orchid Beach House Makena, Hawaii
For details on travel, accommodation, and our week of wedding festivities, please visit our website: jennanddavidmaui.com
This example effectively blends a warm, personal tone with crucial information. It clearly states the destination upfront and directs guests to a website for the extensive details that a destination wedding requires. This approach keeps the invitation elegant while ensuring guests have easy access to logistical information. For couples planning such an event, a travel registry can be a practical way for guests to contribute to the honeymoon or travel fund as a wedding gift.
6. Religious Wedding Invitation Wording
Religious wedding invitations infuse the announcement with faith-based language, scripture, and symbols that are central to the couple's beliefs. This style is essential for ceremonies where the spiritual union is the focal point, acknowledging the sacred nature of marriage within a specific religious tradition. The wording communicates not only the details of the event but also its profound spiritual significance, often following the established customs of Catholic, Jewish, Islamic, Hindu, or other faith communities.
Strategic Breakdown
The core strategy here is to frame the wedding as a sacred covenant blessed by a higher power and witnessed by the faith community. This approach sets a tone of reverence and joy, clearly signalling the religious importance of the ceremony to guests. The language chosen is intentional, reflecting specific theological concepts and traditions that are meaningful to the couple and their families.
Faith-Centric Language: The invitation explicitly mentions God, Allah, or a higher power, framing the marriage as a divine blessing or sacred rite.
Traditional Phrasing: It often incorporates specific phrases required by the religion, such as "in Holy Matrimony" for Christian weddings or referencing the "Nikah" for Islamic ceremonies.
Community and Family: The wording honours the role of family while positioning the union within the context of a larger faith community.
Example and Analysis
Example:
With joy in our hearts and blessings from above, Mr. and Mrs. Robert and Susan Miller request the honour of your presence at the marriage of their daughter Emily Claire to Mr. David Christopher Jones as they are united in the presence of God Saturday, the twelfth of October Two thousand and twenty-five at two o’clock in the afternoon St. Patrick's Cathedral Melbourne, Victoria
This example beautifully blends traditional formal structure with religious sentiment. It opens with a declaration of faith ("blessings from above") and reinforces it by stating the union occurs "in the presence of God." The use of "honour of your presence" is correct for a cathedral setting, respecting both formal and religious etiquette. This style of wedding invitations wording ensures the spiritual gravity of the day is communicated with grace and clarity.
7. Same-Sex Wedding Invitation Wording
The approach to same-sex wedding invitation wording reflects the evolution of marriage equality, focusing on language that honours both partners equally and authentically. This style can be adapted to fit any tone, from formal to casual, with the core principle being the equal and respectful presentation of the couple. It provides the freedom to choose name order (often alphabetically or by preference), decide on host listings, and select phrasing that genuinely represents the relationship, moving beyond outdated heteronormative conventions.
Strategic Breakdown
The strategy here is to centre the invitation around the couple's authentic love story and shared identity. Unlike traditional formats that can be rigid, this wording prioritises equality and personal expression. It communicates that the union is being celebrated on the couple's own terms, setting a tone of inclusivity and modern love for the event.
Equal Billing: Both partners are presented with equal prominence, breaking from the "bride first" tradition. The order is determined by the couple, not by gender.
Flexible Hosting: The invitation can be issued by the couple themselves, by both sets of parents, or a combination, depending on family dynamics and support.
Tone Authenticity: The language is chosen to match the couple’s personality. It can be formal and classic or playful and modern, without feeling constrained by traditional gendered roles.
Example and Analysis
Example:
Together with their families Alexandra Reed and Katherine Moore request the honour of your presence as they exchange vows of marriage Sunday, the twelfth of May Two thousand and twenty-six at five o’clock in the evening The Royal Botanic Garden Sydney, New South Wales
This example beautifully blends formality with a modern, inclusive approach. "Together with their families" is a warm, unifying phrase that includes all supportive relatives without getting into complex host listings. The names are given equal weight, and the classic phrasing "request the honour of your presence" elevates the tone. This style of wedding invitations wording is perfect for a sophisticated ceremony that celebrates a modern partnership.
8. Creative and Theme-Based Wedding Invitation Wording
Creative wedding invitations break from convention to reflect a couple's unique personality or a specific wedding theme. This style incorporates storytelling, humour, poetry, or pop culture references to give guests a preview of the wedding's unique atmosphere. The wording is crafted to align with the overall concept, whether it's vintage, rustic, literary, or based on a shared hobby, transforming the invitation into a memorable creative expression.
Strategic Breakdown
The core strategy here is to create an immersive experience for guests from the moment they receive the invitation. By infusing personality and thematic elements into the wedding invitations wording, you generate excitement and set clear expectations for a non-traditional celebration. This approach prioritises creative storytelling over formal etiquette, aiming to connect with guests on a more personal and engaging level.
Theme Integration: The language, tone, and even font choices are directly inspired by the wedding theme, ensuring a cohesive and memorable first impression.
Personality-Driven: The wording is a direct reflection of the couple's shared interests and story, making the invitation feel authentic and deeply personal.
Balancing Act: While creative, the wording must still clearly and concisely communicate all essential details like date, time, and location without causing confusion.
Example and Analysis
Example (Travel Theme):
Our greatest adventure begins! Please join us as we take our vows and begin the next chapter of our journey Sarah Jane Miller and Michael David Chen Saturday, the fifteenth of November Two thousand and twenty-five at two o'clock in the afternoon The Lookout, Kangaroo Valley New South Wales
Dinner and dancing to follow our arrival
This example successfully balances a clear theme with crucial information. Phrases like "greatest adventure" and "next chapter of our journey" establish the travel theme without sacrificing clarity. This style of invitation often pairs well with less conventional gift-giving, where couples might appreciate contributions towards their honeymoon or other experiences. For those looking beyond traditional presents, exploring some unique wedding gift ideas can provide inspiration that aligns with a more personalised celebration.
Unique, reflects personality, great guest engagement
Choosing Your Words and Celebrating with Ease
Your journey through the world of wedding invitation wording has likely revealed one crucial truth: the words you choose are a powerful first glimpse into the celebration you are planning. They set the tone, convey essential information, and, most importantly, reflect the unique story of you as a couple. This is more than just an exercise in etiquette; it's an opportunity to connect with your guests before they even arrive.
Throughout this guide, we've explored a wide spectrum of styles, from the time-honoured traditions of formal phrasing to the heartfelt simplicity of modern, casual language. We’ve dissected the nuances of hosting lines, navigated the complexities of blended families, and embraced the creativity of themed celebrations. The common thread is authenticity. The most effective wedding invitations wording is that which feels genuine to you.
Key Takeaways for Perfecting Your Invitation
As you move from inspiration to implementation, remember these core principles:
Clarity is Paramount: Regardless of style, your invitation's primary job is to inform. Ensure the "who, what, where, and when" are unambiguous. Double-check dates, times, and venue addresses for absolute accuracy.
Tone Sets Expectations: The language you select, whether it’s "request the honour of your presence" or "want you to come party with us," tells guests what to expect. This helps them choose their attire and get into the right mindset for your special day.
Authenticity Resonates: Don't feel pressured to adopt a formal tone if you're a relaxed, casual couple. Your invitation is an extension of your personalities. Choosing wording that sounds like you will make the message more meaningful and sincere.
Ultimately, mastering your wedding invitations wording is about striking a balance between established convention and personal expression. It’s about creating a piece of communication that is both functional and emotionally resonant. By carefully considering the examples and applying the strategic insights we've discussed, you can craft an invitation that not only looks beautiful but also speaks volumes about your love and the new life you are beginning together. With this important detail sorted, you can move forward with confidence, knowing you've created the perfect introduction to your wedding day.
Now that your invitation wording is sorted, the next step is making the gifting process just as seamless and personal for your guests. EasyRegistry allows you to create a flexible online gift registry that perfectly complements your wedding style, whether you’re asking for contributions towards a honeymoon, a home deposit, or specific items. Start your free registry today and give your guests a simple, meaningful way to celebrate with you at EasyRegistry.