At its heart, a simple wedding guest list template is just a spreadsheet or document that helps you get a handle on everyone you want to invite to your big day. Think of it as your master control centre for names, contact details, RSVPs, and everything in between, turning what can feel like an overwhelming task into something totally manageable.
Building the Foundation of Your Wedding Guest List
Before you even think about opening a spreadsheet, you need a game plan. Your guest list isn't just a list of names; it's the very foundation of your wedding. It has a massive impact on your budget, your choice of venue, and the whole vibe of the day. Honestly, almost every other decision you make will stem from this one.
This is where you and your partner need to sit down and have a really honest chat about what you both actually want. Are you dreaming of a massive party with all your friends and extended family? Or is a smaller, more intimate day with your absolute nearest and dearest more your style?
Key Takeaway: Getting on the same page about the size and feel of your wedding before you start adding names is the single most important step. This shared vision will be your guide and save you from potential disagreements later on.
Navigating Family Expectations
Ah, the family conversation. Talking to your parents about who they think should be invited, especially if they're helping out financially, can feel like walking a tightrope. The key is to set some clear, kind boundaries right from the get-go so you stay in the driver's seat.
Get in early: Bring it up with them before they have a chance to draw up their own dream list. Share your vision and your rough numbers first.
Talk money openly: If your parents are contributing, it's totally fair for them to have some input on the guest list. A popular solution is to give each family a set number of invitations to "spend" as they wish.
Be a team: Make sure you and your partner present a united front. It shows everyone that the final decisions are being made by the two of you, together.
Tackling these conversations early means you can start building your list with confidence. A well-organised guest list also makes other parts of planning so much simpler, like setting up a wedding gift registry for the people you know are definitely coming.
Understanding Modern Wedding Sizes
If it feels like weddings are getting smaller, you're not imagining it. Couples are increasingly prioritising more personal, meaningful experiences, and a smaller guest list is often the best way to achieve that.
In fact, the average Aussie wedding now has around 88 guests. That number has been slowly dropping from 89 in 2024, 92 in 2023, and a pre-COVID high of 98. A big reason for this is the rising cost of living, which is encouraging couples to really think about who they share their day with. It’s always interesting to see how current wedding trends are shaping the way people celebrate.
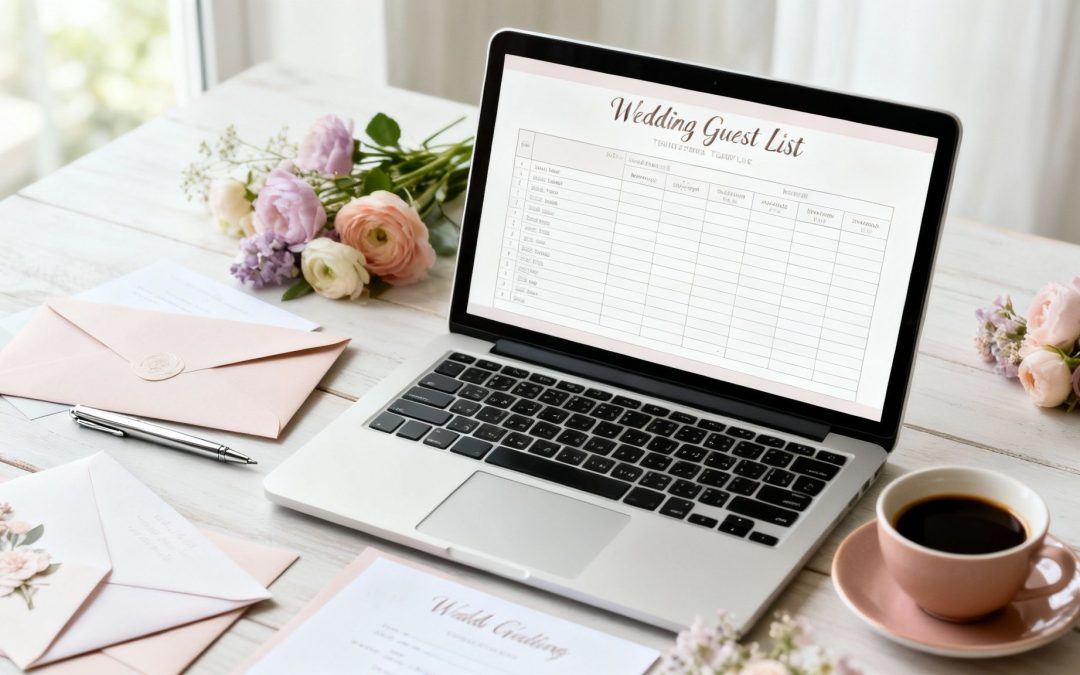
Creating Your Master Wedding Guest List Template
Alright, you've got a shared vision for your wedding size. Now it's time to turn that vision into a practical, powerful tool. A simple list of names just won’t cut it; the key to staying organised is creating a proper guest list template. Think of this as your wedding command centre—the single source of truth for everything from posting invitations to finalising your seating chart.
Let's build a master spreadsheet that works as hard as you do. This isn't just about who's coming. It’s about creating a system that will save you countless hours and prevent that dreaded last-minute panic.
The Anatomy of a Perfect Guest List
A truly useful guest list goes way beyond just names and addresses. By thinking ahead and adding specific columns from the very beginning, you’ll gather all the crucial information you'll need later on. Trust me, this proactive approach means you won't be scrambling for details in the final, hectic weeks before the wedding.
Imagine this scenario: your caterer needs final numbers, and fast, including a complete list of dietary requirements. If you've been tracking this info in your spreadsheet all along, it's a simple case of filtering a column. If not, you’re suddenly faced with chasing down dozens of guests right when you’re at your busiest.
Here’s a breakdown of the essential columns you should set up in your wedding guest list template. Setting this up properly from the start is a game-changer.
Essential Columns For Your Wedding Guest List Template
This table breaks down the must-have fields for your spreadsheet, explaining why each one is so valuable for streamlined planning.
Column/Field Name
Purpose and Key Benefit
Full Name(s)
Give every single guest their own row, even if they're a couple or family. This makes getting an accurate headcount a breeze later on.
Relationship Tier (A/B/C)
This is your private prioritisation system. A-listers are the non-negotiables, B-listers are invited if space opens up, and C-listers might be for an evening reception or a reserve list.
Plus-One Status
A simple 'Yes/No' or the name of their partner. Decide on your plus-one rule early and stick to it—this column helps you apply it consistently.
Dietary Needs/Allergies
This is an absolute must-have. Capturing this information as RSVPs come in is a massive favour to your future self and your caterer.
Invitation Sent
Use a checkbox or pop in the date to confirm their invitation is in the mail. No more "Did we send that one?" questions.
RSVP Received
Another simple checkbox. It feels so good to tick this one off as the replies roll in!
Attending (Yes/No)
The most important field for locking in your final numbers and costs.
Table Number
This will stay empty for a while, but it's where you'll map out your seating plan. It's incredibly satisfying to fill this in.
Gift Log
A space to jot down a brief description of any gift received. Crucial for thank-yous.
Thank-You Card Sent
The final step! A checkbox to make sure every guest's generosity is properly acknowledged.
By setting these columns up from day one, you’ll find your spreadsheet evolves naturally with your planning journey.
It starts as a brainstorming tool, becomes an RSVP tracker, transforms into a seating chart planner, and finally, serves as your thank-you card checklist. It's a living document that supports you at every stage.
Practical Tips for Managing Your Template
Keeping this master list clean and up-to-date is everything. As you start filling it out, you'll quickly see how all the pieces of information connect. For example, that relationship tier becomes your best friend when an A-lister regretfully declines, helping you decide exactly who to invite from the B-list without any guesswork.
A well-organised gift log is another lifesaver. When you receive a present, immediately note what it is and who sent it. Trying to remember this weeks after the wedding, when you're in a post-celebration haze, is a recipe for stress and potential mix-ups.
This simple habit makes writing thoughtful, personal thank-you notes a genuinely lovely experience, rather than a dreaded chore. It’s what turns your wedding guest list template from just a pre-wedding tool into a genuinely valuable post-wedding asset.
How to Prioritise Guests and Make the Final Cut
Okay, you've emptied your brains and listed everyone from your primary school bestie to your parents' friendly neighbours. Now for the hard part – deciding who actually makes it onto the final invitation list. This is where the practical realities of your budget and venue capacity can feel a bit brutal. It often means making some really tough calls.
The secret is to come at it with a clear head and a solid plan, not just pure emotion. Having a structured approach takes a lot of the personal sting out of it and helps you and your partner work as a team. This way, the final list truly reflects who you both want standing with you on the day.
The A-List and B-List Strategy
Probably the most effective way to wrangle your list is to use a tier system. You can build this right into your guest list spreadsheet by splitting everyone into an A-list and a B-list. It creates a clear, logical path forward and seriously reduces the stress.
The A-List: These are your non-negotiables. We're talking immediate family (parents and siblings), your ride-or-die best friends, and your bridal party. Basically, the people you couldn't imagine getting married without.
The B-List: This is everyone else you’d absolutely love to celebrate with if space and budget weren't an issue. Think cousins, great-aunts, close work friends, or friends you don't get to see as often. They aren't 'second-best' guests; they’re just in the next circle out.
Here’s how it works in practice: send out invitations to everyone on your A-list first. As the RSVPs start to come back and you get a few 'regrets', you can then start sending invites to people on your B-list to fill those spots. This rolling approach lets you fill every seat without accidentally going over your headcount.
Remember, the B-list is a practical tool, not a ranking of how much you value someone. It’s simply a smart way to manage the very real constraints of space and money that almost every couple deals with.
This is more relevant than ever. On average, Australian couples are trimming their dream guest list of 116 down to a more realistic 88. It's a direct result of rising costs, with the average wedding now costing between $35,315 and $36,000. Knowing you're not alone in this can make those tough decisions a little easier. You can also find some amazing tips to save money on your wedding day while still having an incredible celebration.
Handling Tricky Guest List Situations
Even with a perfect A/B system, some tricky scenarios are bound to pop up. Having a few game plans ready will help you navigate these conversations without any awkwardness.
Dealing with Parental Input
Let's be real: your parents might have their own vision for the guest list, especially if they're helping foot the bill. It's only fair to include them in the conversation. A great compromise is to give each set of parents a specific number of invitations they can 'own'. This honours their contribution and makes them feel involved, but it keeps you in control of the overall numbers.
The Plus-One Dilemma
First, know this: you do not have to give every single guest a plus-one. A common, and very fair, rule of thumb is to offer a plus-one to anyone who is married, engaged, or in a serious, long-term relationship.
For your single friends, it’s completely up to you. The most important thing is to decide on your rule and then apply it consistently to everyone. That consistency is key to making sure nobody feels left out or unfairly treated.
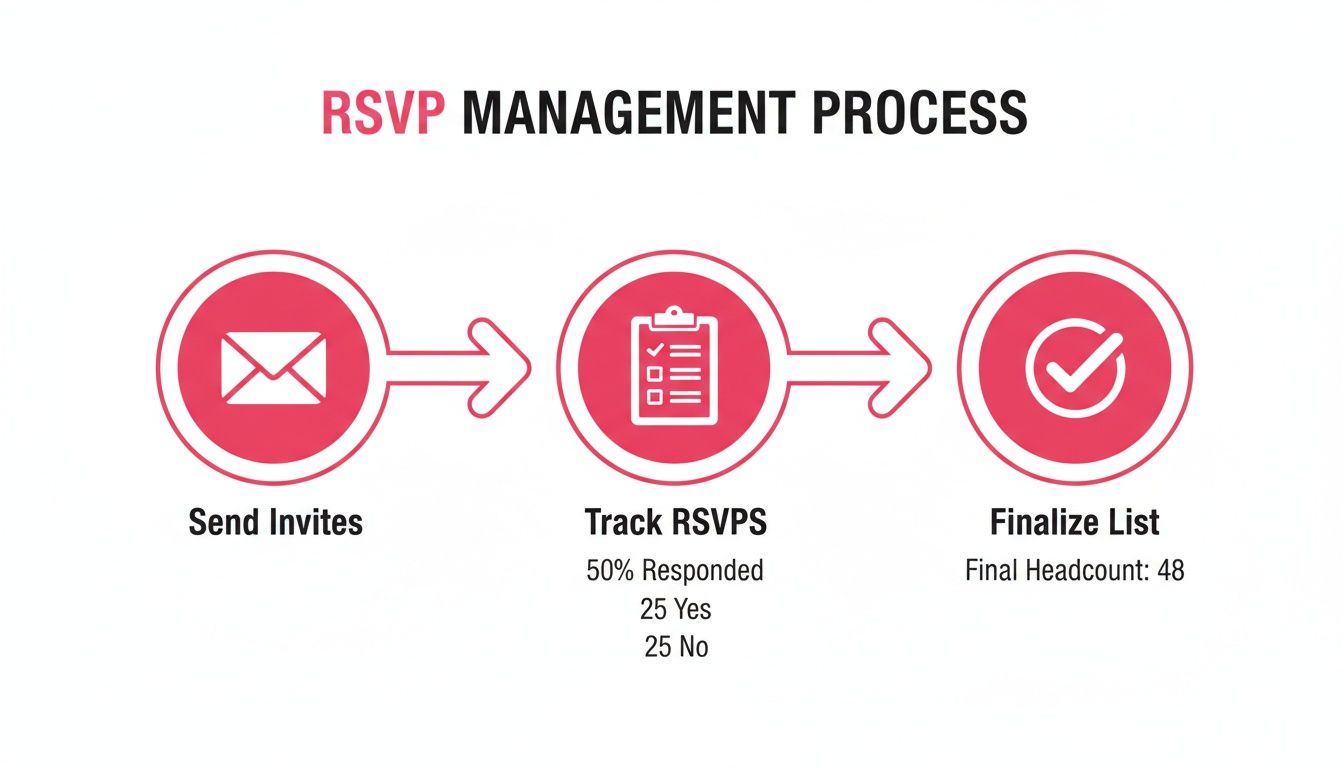
RSVPs, Follow-Ups, and Nailing Down Your Final Numbers
This is when it all starts to feel real. Once those invitations are sent, your guest list spreadsheet shifts from a planning tool to your command centre for tracking RSVPs. It's an exciting time as the replies start trickling (or flooding!) in.
Whether you're getting traditional mail-in cards or digital responses through a wedding website, the game plan is the same. Update your spreadsheet the moment you get a reply. Pop a 'Yes' in the 'RSVP Received' column and, most importantly, update their status in the 'Attending' column. Staying on top of this in real-time saves you a massive headache later and gives you a constantly accurate picture of who is coming.
Dealing with the Stragglers
Don't stress – there will always be a handful of people who miss the RSVP deadline. It happens at every single wedding. A polite and gentle nudge is all you need to get an answer. The trick is to be friendly but firm, especially since your caterer and venue will be waiting on your final numbers.
A quick text or email usually does the job perfectly.
Here's a go-to script: "Hi [Guest Name], hope you're well! We're getting so excited for the wedding and are just finalising our numbers for the caterer. Just wanted to check if you think you'll be able to make it? We need to give them the final headcount by [Date], so would be great to know by then. Hope we get to celebrate with you!"
This approach works wonders because it's warm, it explains why you're chasing them (it's for the caterer, not because you're nagging!), and it gives them a new, clear deadline. It takes the pressure off and gets you the answer you need without any awkwardness.
Turning Your Final Count into Action
Once you've collected all your RSVPs, you have the magic number: your final headcount. This one number is the key to unlocking the last major phase of your wedding planning. It's what you’ll hand over to your venue and caterer, which will determine a huge chunk of your final costs.
This is also the perfect time to turn to your B-list. If you had more declines than you expected, you can now send out those invitations. Because you've been so organised, this becomes a smooth and simple process, not a last-minute scramble.
And with that confirmed list, you're ready to tackle the next big puzzle: the seating chart. Knowing exactly who will be in the room lets you start thoughtfully planning tables and making sure everyone has a great time. As you dive into these details, you can also explore the helpful EasyRegistry sharing and tracking features to make managing everything from gifts to guest communication even simpler.
Turning Your Guest List into a Seating Chart
Your guest list has been your planning bible up to this point, but it has one final, crucial job: helping you create the seating chart. This isn't just about assigning seats; it's about engineering the perfect vibe for your reception.
All that information you carefully gathered is about to pay off big time. The columns noting how you know someone, their age group, or even little personal details are your secret weapon for creating tables where conversations spark and guests feel at ease. Once you have your final numbers, tackling the seating plan is the next big puzzle. If you need some extra guidance, there are some great strategies for seating your wedding guests that can make this process a whole lot easier.
The RSVP management workflow is what gets you to this final, exciting stage.
As you can see, a clear process makes it simple to get from sending invites to having that finalised list, ready for you to work your magic on the seating plan.
Crafting a Thoughtful Seating Arrangement
The ultimate goal here is to make every single guest feel welcome and comfortable. A good place to start is with your 'anchor' tables—think immediate family and the bridal party—placing them in the best spots in the room. From there, it's all about creating mini-communities at each table.
Group by connection: The easiest win is to seat guests with people they already know. It gives them a familiar and comfortable home base for the night.
Mix in some shared interests: Think of yourself as a friendship matchmaker! Mix friends from different parts of your life who you know share similar jobs, hobbies, or are at a similar life stage.
Consider the vibe: Got some super social, outgoing friends? Put them at a table in the middle of the action to help get the party started. Your quieter guests might appreciate a table that’s a bit further from the dance floor and speakers.
A brilliant seating chart doesn't just organise people; it engineers a fantastic party. A little bit of thought here goes a long way and has a huge impact on how much your guests enjoy the celebration.
Your Template's Post-Wedding Life
Don't be so quick to delete that spreadsheet after the last dance! It has one last, very important role to play in your post-wedding to-do list: thank-you cards.
Remember those 'Gift Log' and 'Address' columns? They're now your best friends. With all the details in one place, you can breeze through your list, making sure every thoughtful gift is acknowledged with a personal note sent to the right address. This turns your wedding guest list template from a planning workhorse into a post-wedding lifesaver, making the final task of your wedding journey organised and genuinely enjoyable.
Answering Those Tricky Guest List Questions
Even the most organised spreadsheet can't answer every question that pops up when you're building your guest list. Navigating the etiquette side of things can feel like a minefield, but don't worry—we've got the answers to the most common queries couples have.
How Far Out Should We Finalise Our Guest List?
Getting your timing right is a game-changer. You'll want to have a solid draft of your guest list sorted about 9-12 months before your wedding. This isn't just a rough number; it's the key piece of information you need to choose and book a venue that can actually fit everyone you want to celebrate with.
The list you'll use for sending out invitations needs to be locked in 3-4 months before the big day. As for that final, final headcount for your caterer? They'll usually need it 1-2 weeks before the wedding, once all your RSVPs are in.
Do We Really Have to Give Everyone a Plus-One?
Honestly? No, you don't. Modern wedding etiquette has become much more flexible, which is a huge relief for most couples. A good, practical rule of thumb is to automatically offer a plus-one to any guest who is married, engaged, or in a serious, long-term relationship. It's a simple way to acknowledge and respect their partnership.
When it comes to your single friends, the decision is completely up to you. Often, it just comes down to your budget and how much space you have at the venue. The most important thing here is to be consistent. Decide on a rule for plus-ones and stick to it for everyone to avoid any awkwardness or hurt feelings.
What’s the Best Way to Manage a B-List?
Handling a "B-list" is all about being tactful and timely. As soon as you start getting RSVPs back from your initial "A-list" with a 'no', you can begin sending invitations to guests on your secondary list.
Pro Tip: You don't want anyone to feel like they were a backup choice. To avoid this, make sure their invitation is sent at least 6-8 weeks before the wedding. A good strategy is to send them out in small batches as you get declines, rather than waiting to send them all at once.
How Do We Politely Tell Someone They Aren’t Invited?
First things first: you are under no obligation to announce who isn't invited. If someone puts you on the spot and asks directly, the best strategy is to be kind, but also honest and firm.
A simple, straightforward response works best. You could say something like, "We've had to make some really tough choices to keep our wedding small and stick to our budget." Resist the urge to over-explain or make up excuses. A short, polite answer is all that's needed.
As you navigate these details, remember every decision helps shape the day you're dreaming of. For more creative ideas on planning your celebration, you can find some beautiful wedding photo shoot inspiration.
Once you've nailed down your guest list, let EasyRegistry make the next part of your wedding planning a breeze. We help you create a simple, stylish gift registry your guests will find a joy to use.
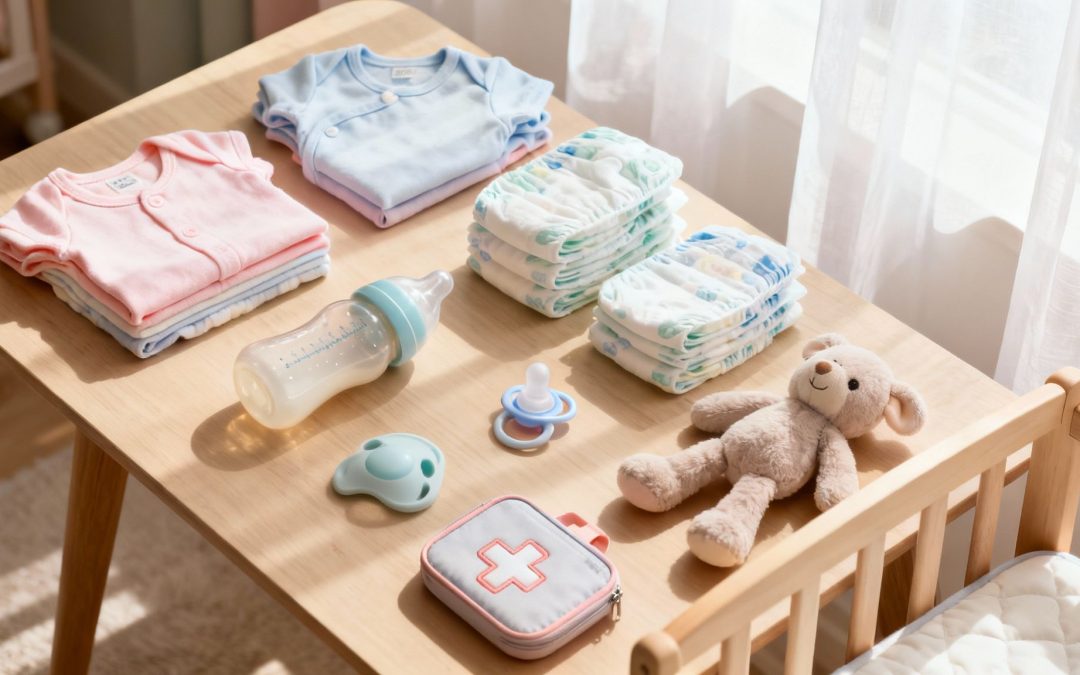
Diving into the world of baby gear can feel like preparing for a major expedition. An infant items list is your ultimate map, guiding you through everything from nursery furniture and feeding supplies to nappies and safety essentials. Think of it as your complete checklist to ensure you're ready for your baby's arrival, without forgetting anything important along the way.
Getting Started Without Getting Overwhelmed
That first look at a baby checklist can be seriously daunting. The goal here is to trade that feeling of overwhelm for a sense of calm and control. We’ll do this by breaking down your infant items list into simple, manageable categories.
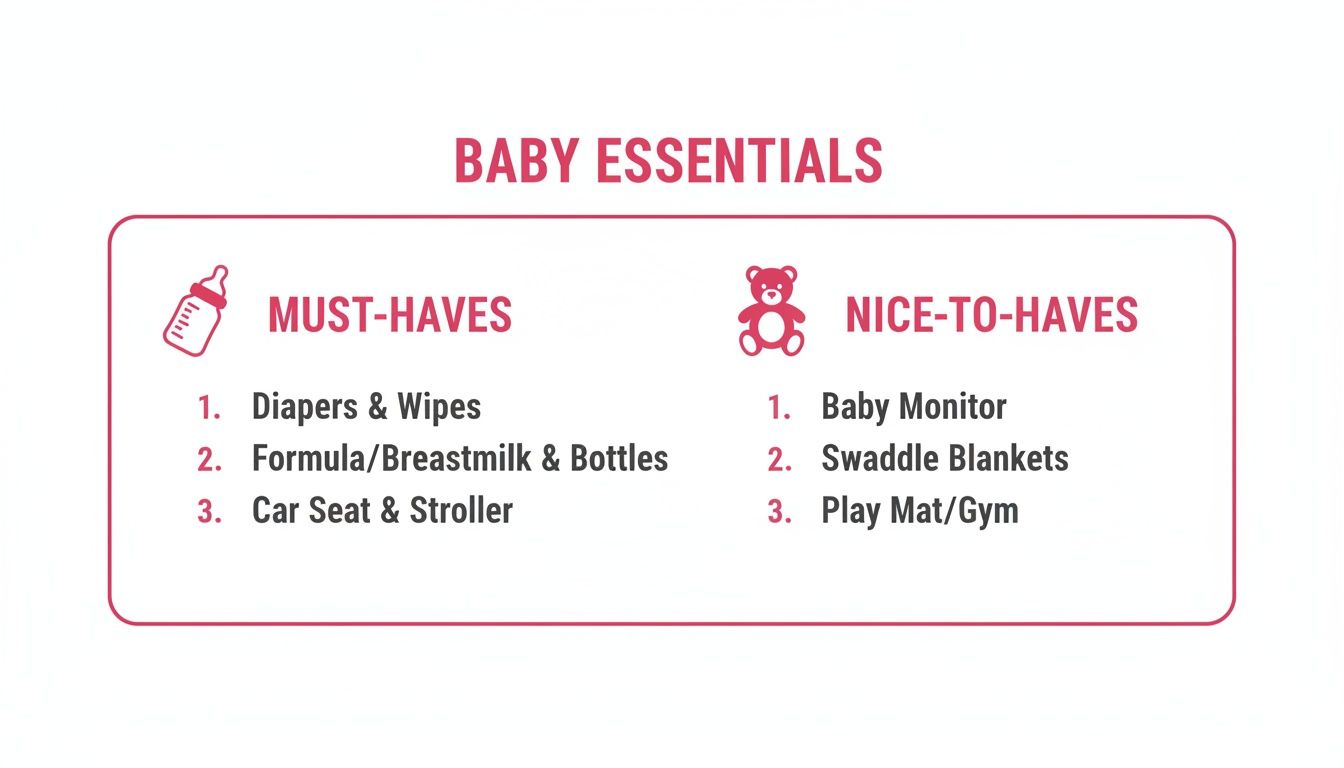
Forget trying to figure everything out at once. We'll give you a clear roadmap, starting with a high-level view that separates the absolute 'must-haves' from the 'nice-to-haves'. For a great starting point, this essential baby items list provides a solid foundation.
This visual helps clarify the two main categories to focus on as you build your list.
Making this distinction is the key to managing your budget and ensuring you have what truly matters for your baby’s first few months.
Prioritising Your Baby Checklist
Approach this like packing for a big trip. You’d pack your passport, wallet, and any medications first—the absolute non-negotiables—long before you consider adding extra shoes or a travel pillow. The same logic applies here: nail down the core needs first.
The Australian baby care products market is huge, hitting USD 3.22 billion. That number represents a mountain of products out there, from nappies and wipes to specialty skincare, which makes prioritisation absolutely essential.
To make this easier, here’s a quick breakdown to help you sort through the noise.
Quick Guide Must-Haves vs Nice-to-Haves
Category
Must-Have Items
Nice-to-Have Items
Sleeping
Safe cot/bassinet, firm mattress, fitted sheets
White noise machine, video baby monitor, swaddle sacks
Feeding
Bottles, formula/breast pump, burp cloths
Bottle warmer, steriliser, nursing pillow, high chair
This table is just a starting point, but it helps frame your thinking as you build your own personalised list.
A well-organised list isn't just about buying things; it's about creating a calm, prepared environment for you and your baby. It empowers you to make informed decisions instead of last-minute panic buys.
This strategic approach also helps you build a practical registry that friends and family can easily contribute to. Understanding how a flexible registry works can make sharing your wishlist simple and stress-free for everyone involved.
Ultimately, your infant items list is a personal tool. It will change and grow as you discover your own parenting style and your baby's unique personality. This guide is here to give you the framework; you get to fill in the details that feel right for your family.
Building a Safe and Serene Nursery
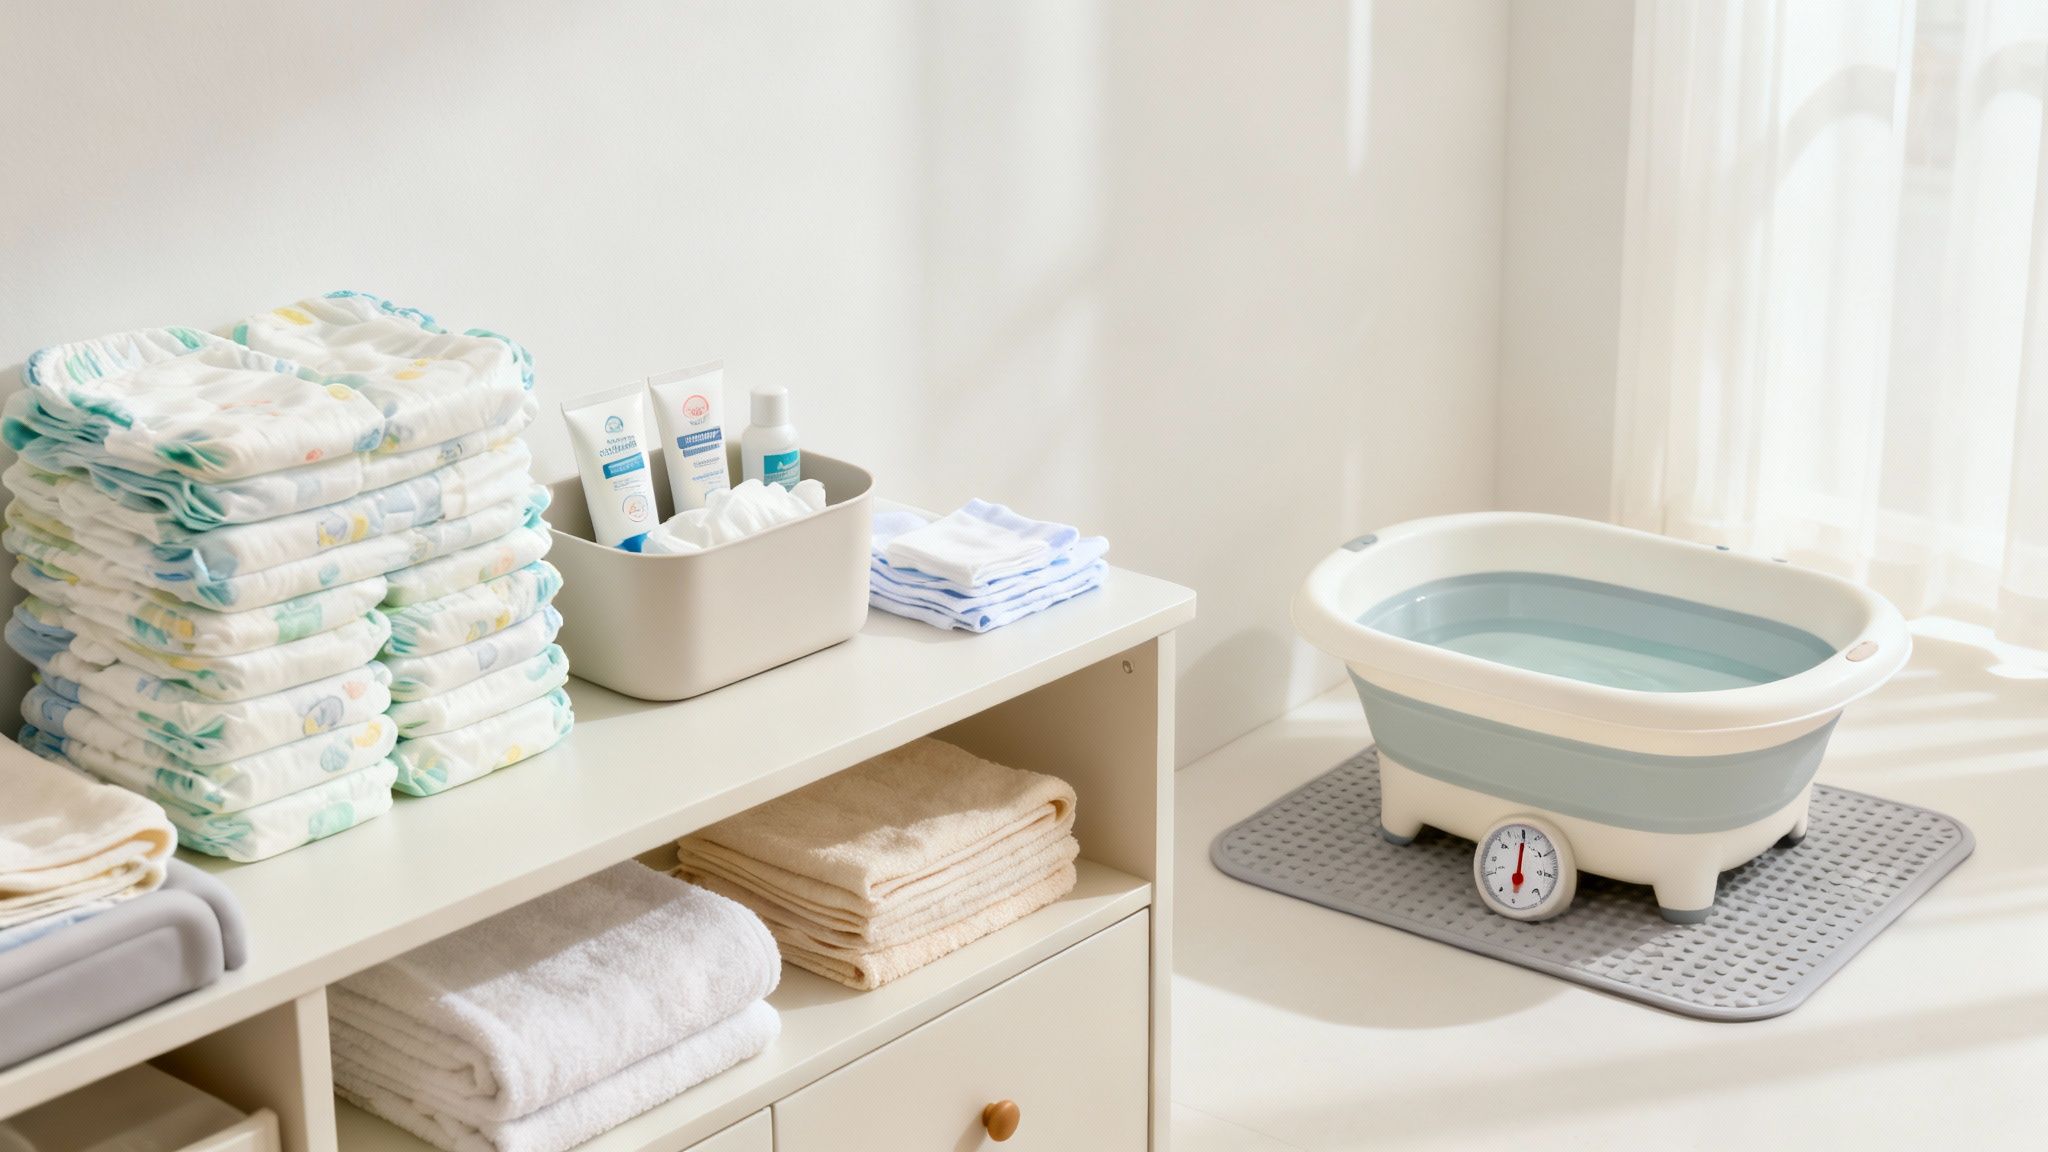
Your baby’s nursery is so much more than just a room with a cot in it. It's their first little world—a sanctuary for sleep, comfort, and growth. Getting it right is about creating a space that's not only calming but, above all, safe. We'll walk through the essentials, explaining the 'why' behind each choice to help you build a nursery that feels organised and gives you total peace of mind.
The absolute centrepiece of any nursery is a safe place for your baby to sleep. Think of the cot less like a piece of furniture and more like a crucial piece of safety equipment.
In Australia, it’s vital that any cot you choose meets the mandatory safety standard AS/NZS 2172. This isn't just red tape; this standard ensures the cot bars are spaced correctly (so a baby’s head can't get stuck), the frame is sturdy, and there are no footholds or bits that could cause an accident.
Cot and Mattress Safety
The mattress is just as important as the cot it sits in. For safe sleep and to reduce the risk of SIDS, you need a surface that is firm and flat—no exceptions. It must fit snugly inside the cot, leaving no more than a 20mm gap between the mattress and the cot frame. Any bigger, and it poses a serious entrapment risk.
When it comes to bedding, less is always more. A safe cot contains just a fitted sheet over the mattress. That’s it. Steer clear of cot bumpers, pillows, duvets, and soft toys, as these all introduce a risk of suffocation. If you're worried about warmth, a safe, correctly-sized baby sleeping bag is the perfect solution. And when you're looking for the best options, a breathable crib mattress is a fantastic choice for both safety and comfort.
Creating a Functional Space
Beyond the cot, a few other pieces of furniture will quickly prove their worth, especially when you’re stumbling around at 3 a.m.
Change Table or Station: You don’t need to buy a purpose-built change table. A changing pad secured to the top of a solid chest of drawers does the job beautifully and saves on space. The best part? Everything you need—nappies, wipes, creams—is right there in the drawers below.
Comfortable Feeding Chair: Trust me on this one. A supportive glider or a comfy armchair will be your best friend during those long nights. Having a dedicated, comfortable spot makes feeding sessions feel so much more relaxed for both you and your little one.
Smart Storage Solutions: For such tiny people, babies sure do have a lot of stuff. A well-organised chest of drawers, perhaps with some drawer dividers, is brilliant for keeping all those tiny singlets, swaddles, and socks from descending into chaos.
The goal is to create a nursery that works for you, not against you. When everything has its place and the layout makes sense, you can focus on your baby instead of hunting for a lost sock in the dark.
Finally, let's talk atmosphere. Blackout blinds are an absolute game-changer. They signal to your baby that it's time for sleep, even when it's bright daylight outside, making nap times that much easier. A dimmable lamp or a soft night light is also a must-have, giving you just enough light for a nappy change without jolting your baby wide awake. These simple touches are what turn the room from a collection of items into a truly peaceful haven.
Navigating Your Baby's Feeding Journey
Feeding your newborn is one of the first and most powerful ways you’ll connect, and having the right gear can make those early days (and nights!) so much smoother. What you'll need for your infant items list is incredibly personal—it all comes down to whether you plan to breastfeed, bottle-feed, or do a bit of both.
Let’s walk through what you’ll need for either path. This isn't about which way is 'best'; it's about making sure you feel prepared and confident with the equipment that works for your family.
Essentials for Breastfeeding Mums
If you're planning to breastfeed, you're the main event! But a few key items can make a world of difference for your comfort, convenience, and supply. Think of them as your personal support crew.
A comfortable and efficient breast pump is often top of the list. Even if you plan to feed directly from the breast most of the time, a pump is a lifesaver for relieving engorgement, building up a small freezer stash for when you need a break, or helping to maintain your supply.
Along with a pump, you’ll want a few other staples:
Nursing Bras: Get yourself 3-4 comfortable and supportive nursing bras. Your size will likely change, so look for soft, stretchy fabrics that can adapt with you.
Washable Nursing Pads: An absolute must for managing leaks. Having plenty on hand means you won’t get caught out.
Nipple Cream: The first few weeks can be a bit rough on your skin. A lanolin-free, baby-safe cream offers some much-needed relief.
Milk Storage Bags: Perfect for freezing any expressed milk. Look for durable, pre-sterilised bags that lie flat to save precious freezer space.
Having these items ready before your baby arrives can be a game-changer. The last thing you want is a desperate, late-night trip to the chemist when you’re exhausted and just getting the hang of things.
Must-Haves for Bottle Feeding
For parents using formula or expressed breast milk, the focus shifts to having a clean, safe, and efficient system ready to go.
The baby food market in Australia, which includes essentials like infant formula, is a big deal—it's projected to grow to USD 793.835 million by 2030. This just goes to show how central these products are for so many Aussie families. You can read more about these baby food market trends in Australia.
Here’s a practical list to get you started:
Bottles and Teats: Begin with 4-6 bottles. It’s smart not to buy a huge set of one brand until you know what your baby actually likes. Some little ones are surprisingly picky about teat shape and flow!
Bottle Steriliser: While boiling on the stove is an option, an electric steam steriliser or a microwave one makes life so much easier, ensuring bottles are hygienically clean with minimal fuss.
Bottle Brushes: You'll need at least two—a big one for the bottles and a small one for the teats—to clean out every nook and cranny.
Formula Dispenser: A container with pre-measured sections is fantastic for feeds on the go. It saves you from lugging a whole tin of formula around.
No matter how you choose to feed your baby, a few items are universally helpful. A comfy chair for feeding sessions, stacks of burp cloths (you can never have too many!), and a supportive nursing pillow can make those frequent feeds far more enjoyable. This part of your registry is all about creating a setup that reduces stress and lets you soak up those precious moments with your new baby.
Mastering Nappy Changes and Bath Time
Getting the hang of nappy changes and bath time will quickly become a core part of your day-to-day. The secret to mastering these frequent tasks—especially when you’re sleep-deprived—is having a simple, organised setup that makes everything as smooth as possible.
Think of your changing area like a Formula 1 pit stop. Everything you need has to be within arm’s reach, because you can never leave a baby unattended on a change table, not even for a split second. And with an average of 8-12 nappy changes a day for a newborn, you’ll be grateful for an efficient system.
The Great Nappy Debate
One of the first big decisions you'll make is whether to go with disposable or reusable cloth nappies. Disposables are undeniably convenient; you just toss them and you're done, which is a massive help in those first exhausting weeks. Many brands are also offering more eco-friendly and biodegradable options now.
On the flip side, modern cloth nappies have come a long way from the old-school squares and safety pins. They’re brilliantly designed, super absorbent, and often work out cheaper in the long run. The trade-off is the upfront cost and the laundry routine. Lots of families actually find a hybrid approach works best—using cloth at home and disposables when they're out and about.
Your Nappy Changing Station Checklist
Whether you opt for a dedicated change table or just a secure pad on top of a dresser, here’s what you’ll want to have stocked and ready to go.
Nappies: To start, grab one or two large boxes of newborn-sized disposables. If you're going with cloth, you'll want about 20-24 nappies to get you through two days between washes.
Wipes: A big refillable pack of gentle, water-based wipes is a non-negotiable. A little pro-tip: a weighted dispenser is a fantastic 'nice-to-have' that lets you pull out a single wipe with one hand.
Barrier Cream: A good zinc-based cream creates a protective layer that helps prevent nappy rash. A thin layer at most changes, particularly before bed, does the trick.
Change Mat: You definitely need a wipeable, waterproof changing pad. The Keekaroo Peanut Changer is a popular splurge item because it doesn't need covers, making clean-ups incredibly simple.
Nappy Pail: A dedicated bin with a good lid, like the Ubbi pail, is amazing for keeping smells contained. A huge plus is that you can use regular rubbish bags with it.
Making Bath Time Safe and Sweet
Bath time can be a beautiful way to bond with your baby, but safety always comes first. A baby's skin is incredibly delicate and they lose body heat fast, so a little prep goes a long way towards a calm, happy experience. You don't need a tub overflowing with toys; just a few key items will do the job.
For tiny newborns, bathing them in the sink with an insert like the Puj Tub is a brilliant, back-saving trick. As they get a bit bigger, a small, supportive infant tub inside your main bath gives them a secure space. Always, always check the water temperature with your elbow or a bath thermometer—it should feel lukewarm, right around 37°C.
Bath time isn't just about getting clean; it's about creating a calming ritual. A gentle wash, a snuggly warm towel, and a soft lotion massage can become a lovely signal to your baby that it’s time to wind down for sleep.
Here’s a simple list for your bath caddy:
Infant Bath or Insert: Look for one that gives good support for your baby’s head and neck.
Soft Washcloths & Hooded Towel: You don’t need special baby ones, but they do tend to be softer. A hooded towel is fantastic for keeping their little head warm straight out of the water.
Gentle Baby Wash: Find a mild, soap-free, and fragrance-free cleanser that won’t irritate their sensitive skin.
Baby Lotion: A gentle, hypoallergenic lotion is great for locking in moisture after a bath, especially if you live in a drier climate.
Your Baby Health and Safety Toolkit
When you’re putting together your list of must-have infant items, nothing brings more peace of mind than a well-stocked health and safety kit. These are the things you hope you’ll rarely use, but you’ll be so relieved to have them on hand when a fever spikes in the middle of the night or you need to deal with a stuffy nose.
Think of it as your first line of defence against late-night worries. Building this toolkit isn’t about expecting the worst; it's about being prepared for the normal ups and downs of babyhood, so you can handle them calmly and confidently.
This shift towards proactive preparation is happening everywhere. The infant healthcare market in Australia was recently valued at USD 4.73 billion and is only expected to grow. This isn't just about the basics anymore; parents are investing in smarter health tools that give them more control. You can get a deeper insight into how the Australian infant healthcare market is evolving and the trends driving it.
Building Your Baby First-Aid Kit
You don't need to stock an entire ambulance, just a small, organised container with the essentials. Having these items ready means you can deal with minor health hiccups without a frantic, last-minute trip to the chemist.
Here’s a simple checklist to get your at-home first-aid kit started.
Baby First-Aid Kit Checklist
Item
Purpose
Recommended Quantity
Digital Thermometer
For quick and accurate temperature checks. An underarm reading is the safest method for newborns.
1
Infant Paracetamol
For relieving fever or pain. Always check with your GP or pharmacist for the correct dosage.
1 small bottle
Nasal Aspirator
A lifesaver for gently clearing a blocked nose, which makes breathing and feeding much easier.
1
Saline Nasal Spray
Helps to loosen up stubborn mucus before you use the nasal aspirator.
1 bottle
Antiseptic Wipes
Perfect for cleaning little cuts and scrapes before popping on a bandage.
1 small pack
Bandages
A small variety of sizes to cover any minor scratches.
1 box
Gauze Pads & Tape
For any scrapes that are a bit too big for a standard bandage.
Small pack
Just remember to keep this kit somewhere cool and dry, easy for you to grab but completely out of your little one’s reach. It’s also a good idea to check the expiry dates on everything every six months or so.
Home and Car Safety Essentials
Once your first-aid kit is sorted, the next step is making sure your baby’s environment is safe for them to grow and explore in. This means "baby-proofing" your home and ensuring every car trip is secure.
Creating a safe space for your baby to explore isn't about wrapping your home in bubble wrap. It's about identifying and neutralizing the most common hazards so they can learn and grow without unnecessary risk.
Start by going room by room. It’s the simple things that make the biggest difference: cover unused power points with safety plugs, use anti-tip straps to secure heavy furniture like bookshelves to the wall, and install safety gates at the top and bottom of your stairs.
When it comes to travel, a properly installed car seat is absolutely non-negotiable. In Australia, the law mandates that your car seat must meet the AS/NZS 1754 standard. But buying the right seat is only half the battle; it has to be installed correctly. Many local councils and organisations offer professional fitting services for a small fee, which is a fantastic investment for your peace of mind.
Creating a Stress-Free Baby Registry
Once you’ve put together your checklist of baby essentials, the next step is turning it into a registry. This is the simplest way to let friends and family know what you actually need, transforming your personal shopping list into a helpful guide for anyone who wants to celebrate your new arrival.
Think of it this way: a traditional registry from a single department store is like being handed a set menu. You’re limited to what that one place offers. A modern online registry, on the other hand, is more like a food court—you can pick your favourite dishes from anywhere and bring them all to the same table.
This flexibility is a complete game-changer for new parents. You’re not locked into one retailer’s range or prices. It means you can choose the safest car seat from a specialty store, that perfect cot from a boutique brand, and a bundle of organic cotton onesies from an online-only shop, all in one easy-to-share list.
Add Anything from Any Store
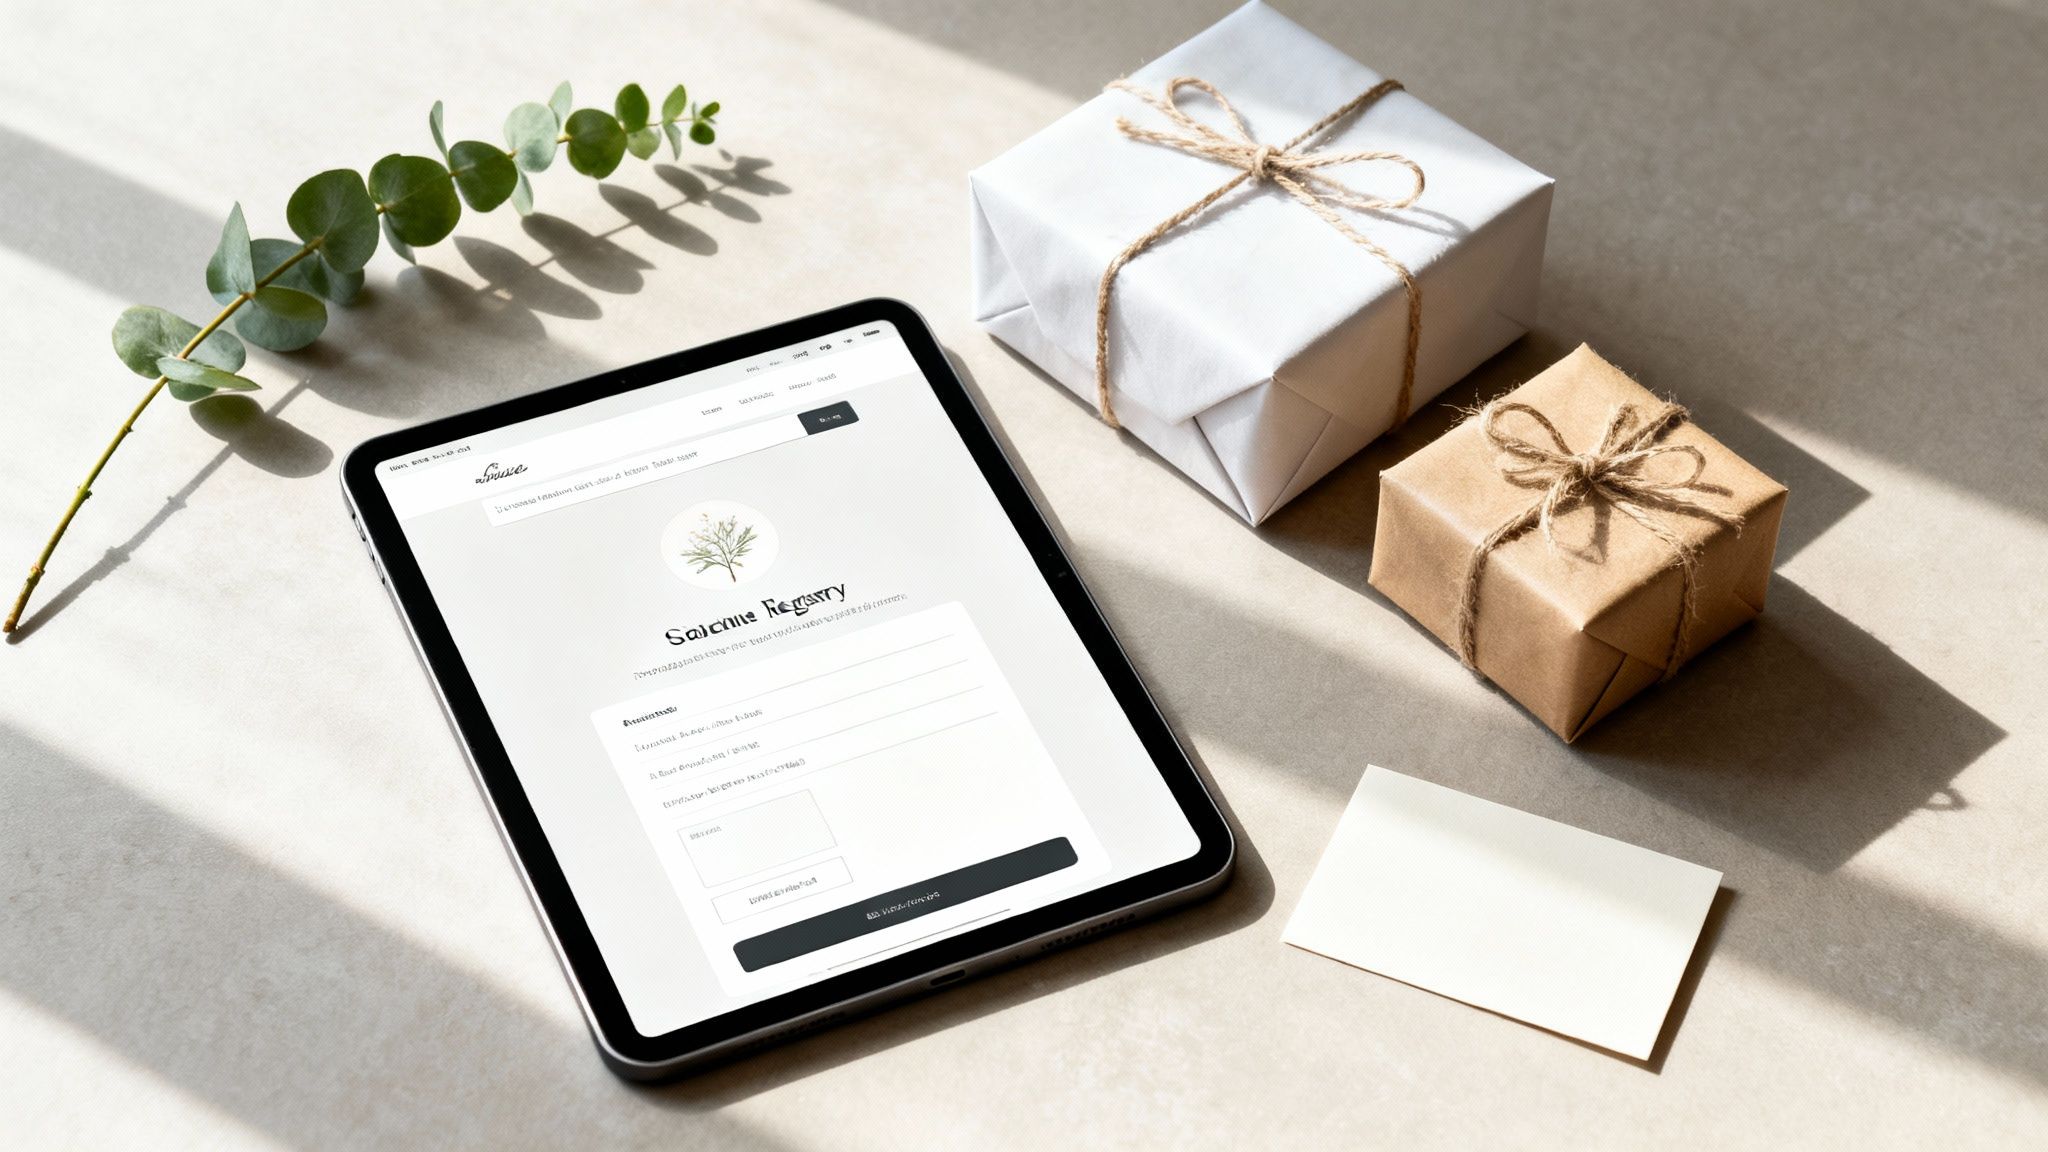
The real beauty of a modern registry is the freedom it gives you. With a platform like EasyRegistry, you can add any item from any Australian online store just by copying and pasting the webpage link.
This screenshot gives you a peek at how clean and simple the interface is, making it a breeze to build your list.
As you can see, the layout is designed to be intuitive. You can add items, see what’s been gifted, and manage everything without any headaches.
This approach means you get the exact items you've spent time researching and carefully choosing for your baby, instead of having to settle for a close-enough alternative from a single shop. It’s the best way to truly personalise your list. You can see just how to get started with this handy baby shower registry guide.
How to Handle Big-Ticket Items
So, what do you do about the big, expensive essentials like a pram, a cot, or other nursery furniture? It can feel a bit awkward to list a $1,000 item, knowing it’s likely too much for one person to buy. This is where group gifting is a lifesaver.
Group gifting lets several friends and family members pitch in smaller amounts towards one expensive item. It’s a wonderful, collaborative way for everyone to help you get something you truly need, without any single person feeling pressured to overspend.
Instead of one person footing the bill for the entire pram, a few people can contribute what they’re comfortable with. It’s a fantastic feature that makes it easy for everyone to feel like they’ve given a meaningful, genuinely helpful gift.
A great tip is to add a short, personal note to your bigger items. Something like, "We chose this car seat for its top safety ratings!" gives your guests a little insight into your choice and makes them feel more connected to the gift.
Finally, remember that your registry isn’t set in stone. It’s a living document you can update anytime. As you get closer to your due date, you might discover new things you need or change your mind about others. A well-managed registry takes the stress out of gifting for everyone, turning it into a shared, joyful part of the celebration.
Got Questions About Your Baby Checklist? Let's Talk.
As you start to tick things off your baby checklist, it's totally normal for a few questions to pop up. Am I buying enough? Am I forgetting something crucial? Am I about to spend a fortune on things I don't actually need?
Don't worry, every new parent has been there. Think of this as your final sanity check. We're going to tackle the most common head-scratchers to clear up any last-minute doubts, so you can feel confident and ready for your little one's arrival.
How Many Baby Clothes Do I Really Need?
This is the big one. It's so easy to get carried away with tiny, adorable outfits, but the truth is, newborns live a simple life: sleep, feed, nappy change, repeat. Comfort and practicality are everything.
A good starting point is about 7-10 bodysuits or onesies and the same number of sleepers. It’s smart to get a mix of newborn and 0-3 month sizes, since you never really know how big your baby will be until they’re here. This amount gives you a buffer for the inevitable spit-ups and nappy blowouts without you having to do laundry every five minutes.
The golden rule for baby clothes is function over fashion. You'll thank yourself during those 3 a.m. feeds when you're dealing with simple snaps or zips instead of fumbling with a dozen tiny, fiddly buttons in the dark.
And remember, babies grow at a truly astonishing speed in those first few months. Sticking to a smaller, practical wardrobe means you won't waste money on clothes they might only wear once or twice. Plus, you’ll likely get plenty of cute outfits as gifts to round out their collection.
When Should I Start Buying Baby Stuff?
The best time to start chipping away at your checklist is during the second trimester, usually between weeks 13 and 20. This is often the sweet spot of pregnancy—morning sickness has hopefully eased up, and you’ve got more energy than you will in that final home stretch.
Starting then gives you a few key advantages:
Time to Research: You have plenty of breathing room to properly research the big-ticket items like car seats and cots, making sure they meet all Australian safety standards.
Spread the Cost: Buying things over several months makes the financial side of things feel way more manageable.
Shop the Sales: With more time up your sleeve, you can keep an eye out for sales and promotions, saving you a good chunk of money on essential gear.
This is also the perfect time to get your online baby registry sorted. Once your 20-week scan is done, you can start adding those bigger items to your list for friends and family with confidence.
Are Expensive Baby Items Always Better?
It’s a common myth that a higher price tag automatically means better quality or safety, but that’s definitely not always the case with baby gear. For many items, focusing on function and safety standards over a premium brand name is the much smarter move.
When it comes to anything safety-critical, like a car seat or a cot, the only thing that matters is that it meets current Australian safety standards (like AS/NZS 1754 for car seats). The fanciest model on the market isn't necessarily the safest; a properly installed, standards-compliant budget option is always better than a poorly fitted luxury one.
For other things like change tables, clothing, or nappy bins, the budget-friendly options are often just as effective. It's all about being a savvy shopper and putting your money where quality and safety truly make a difference.
What’s the One Thing Most Parents Forget?
In the whirlwind of preparing for a baby, it’s so easy to overlook the needs of the new mum. The most commonly forgotten items are postpartum recovery supplies. Your focus is naturally on the baby, but you’ll be recovering from a huge physical event and will need some care, too.
Make sure to add a few things for yourself to the checklist:
Maternity pads
Comfy, high-waisted underwear
Nipple cream (if you plan to breastfeed)
A perineal spray or bottle for soothing relief
Comfortable loungewear or pyjamas
Looking after yourself is just as important as looking after your new baby.
Here are a few more quick answers to some common questions we hear.
Frequently Asked Questions
Question
Answer
Do I need a special 'nappy bin'?
Not necessarily! While some parents swear by them for containing odours, a regular lidded rubbish bin that's emptied frequently works just as well for many families.
How many nappies should I stockpile?
It's tempting to buy in bulk, but hold off on going too crazy. Babies grow fast, and you might find a particular brand doesn't suit your baby's skin. Start with one or two large boxes of newborn size.
What's the difference between a bassinet and a cot?
A bassinet is smaller and designed for the first few months, often kept in the parents' room. A cot is larger and will be your baby's bed for the next couple of years. Many parents start with a bassinet for convenience.
Is a baby monitor an absolute essential?
It depends on your home's layout. If your baby will be sleeping in a room far from where you are, a monitor provides great peace of mind. For smaller homes or apartments, you might not need one right away.
Ready to turn your perfectly curated infant items list into a shareable, stress-free registry? With EasyRegistry, you can add any product from any Australian store, set up group gifts for bigger items, and give your loved ones a simple way to celebrate your new arrival. Start building your free baby registry today at https://www.easyregistry.com.au.
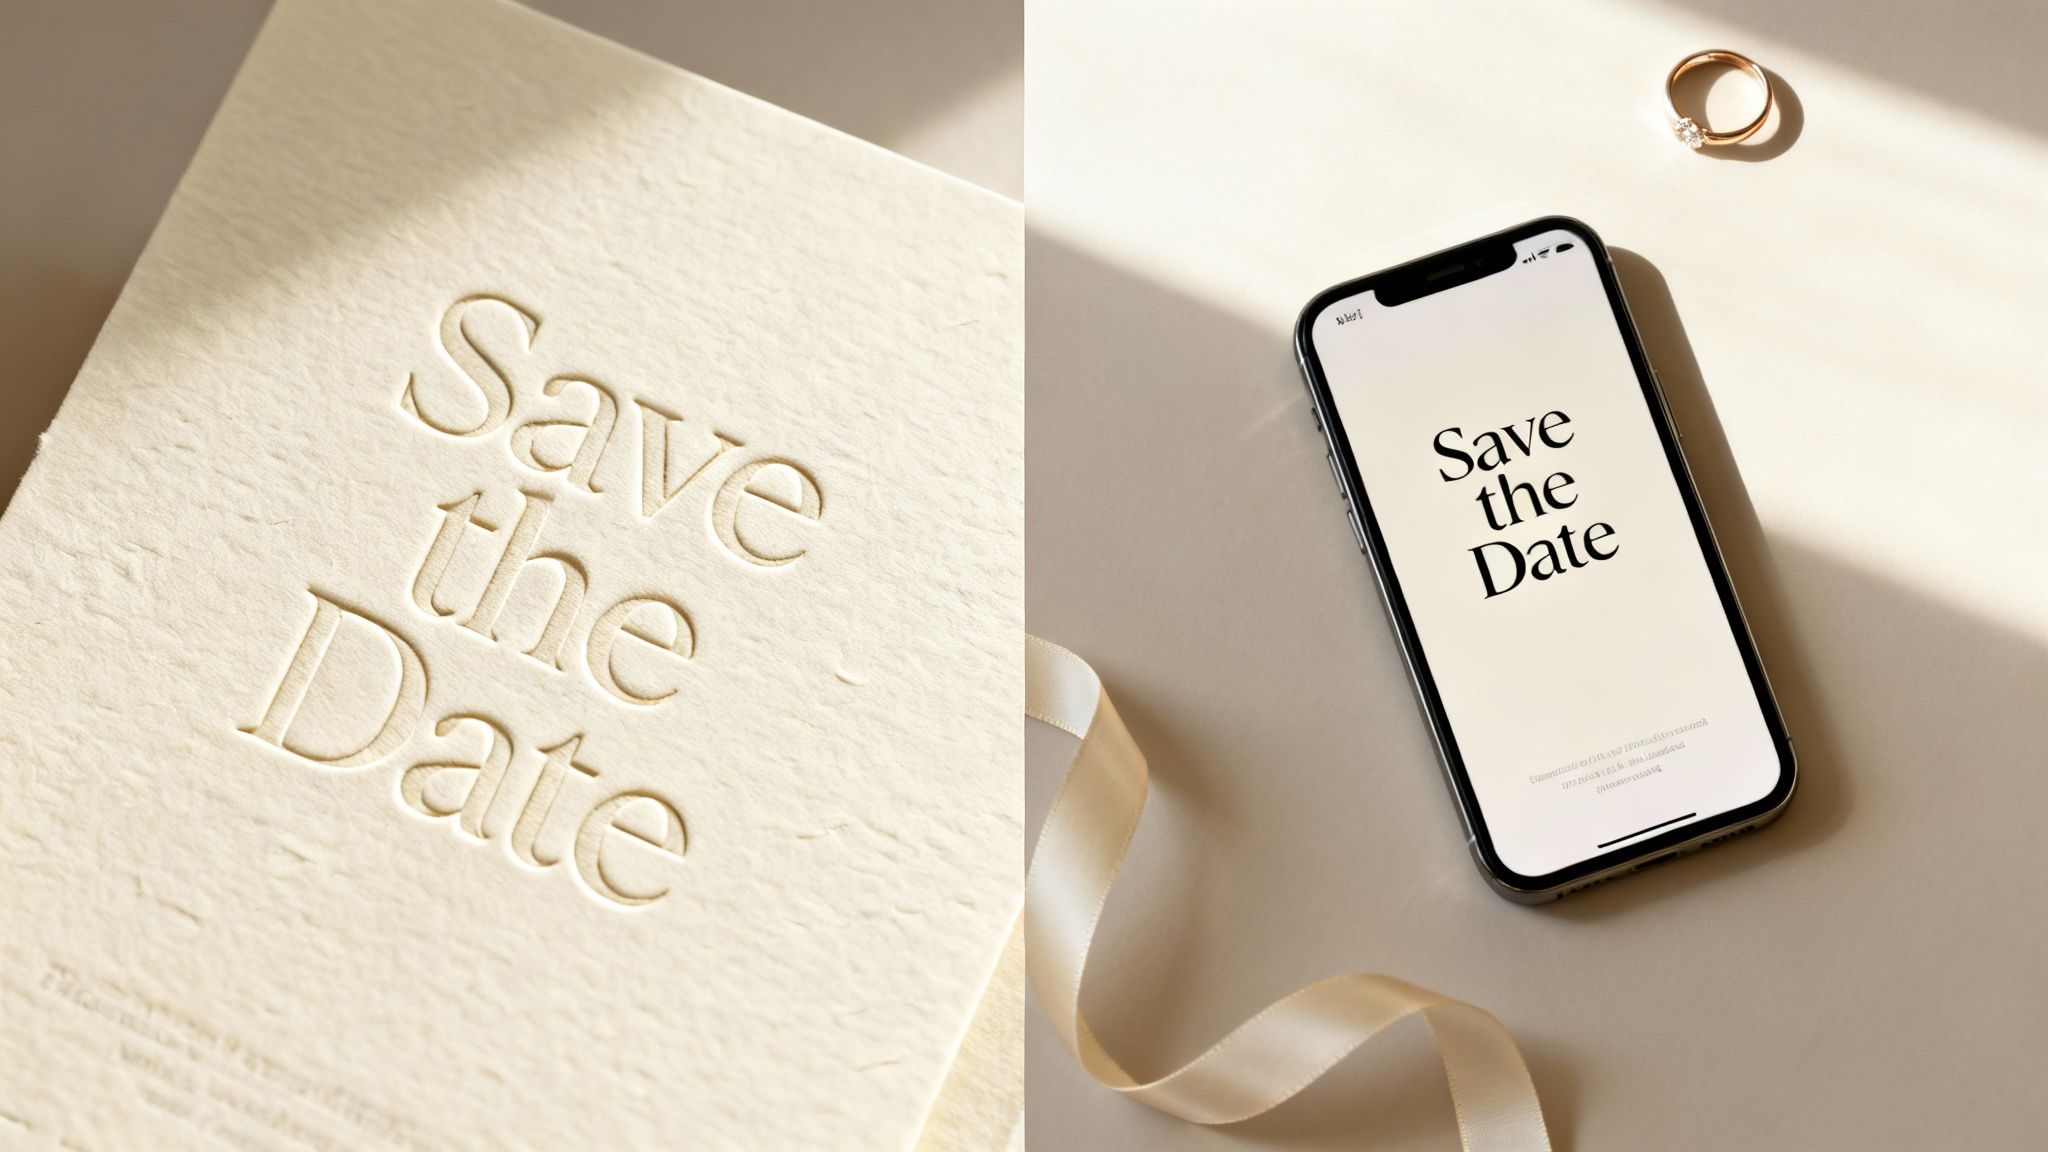
So, you're getting married! Amidst the whirlwind of venue scouting and cake tasting, one of the very first things to land on your to-do list should be your save the date cards. Far from being just another piece of wedding stationery, they're your official opening act.
Think of them as the trailer for your wedding movie. They don't give away the whole plot, but they set the scene and get everyone excited for the main event.
Giving Your Guests a Much-Needed Heads-Up
Let's be practical. The main job of a save the date is to give your favourite people enough time to actually plan to be there. This is a game-changer, especially for anyone who needs to travel.
Whether you've got friends flying in from interstate or family making a long drive, that early notice is what allows them to:
Snag cheaper travel and accommodation: We all know booking flights and hotels last minute is a recipe for a budget blowout.
Book time off work: Getting annual leave approved often takes time, so the more notice, the better.
Line up childcare: For parents, organising a babysitter for a whole weekend isn't always a simple task.
Sort out their finances: Being a wedding guest is an honour, but it can be costly. A heads-up helps everyone budget properly.
Here in Australia, with longer engagements becoming more common, locking in your date with guests early is more critical than ever. We're seeing more couples push their weddings out to save up, with recent research showing 40% of couples are extending their engagements by a full year. This makes a save the date essential for making sure your VIPs are available. You can read more about what's happening in the local wedding scene in the 2024 Australian Wedding Industry Report.
Setting the Scene for Your Big Day
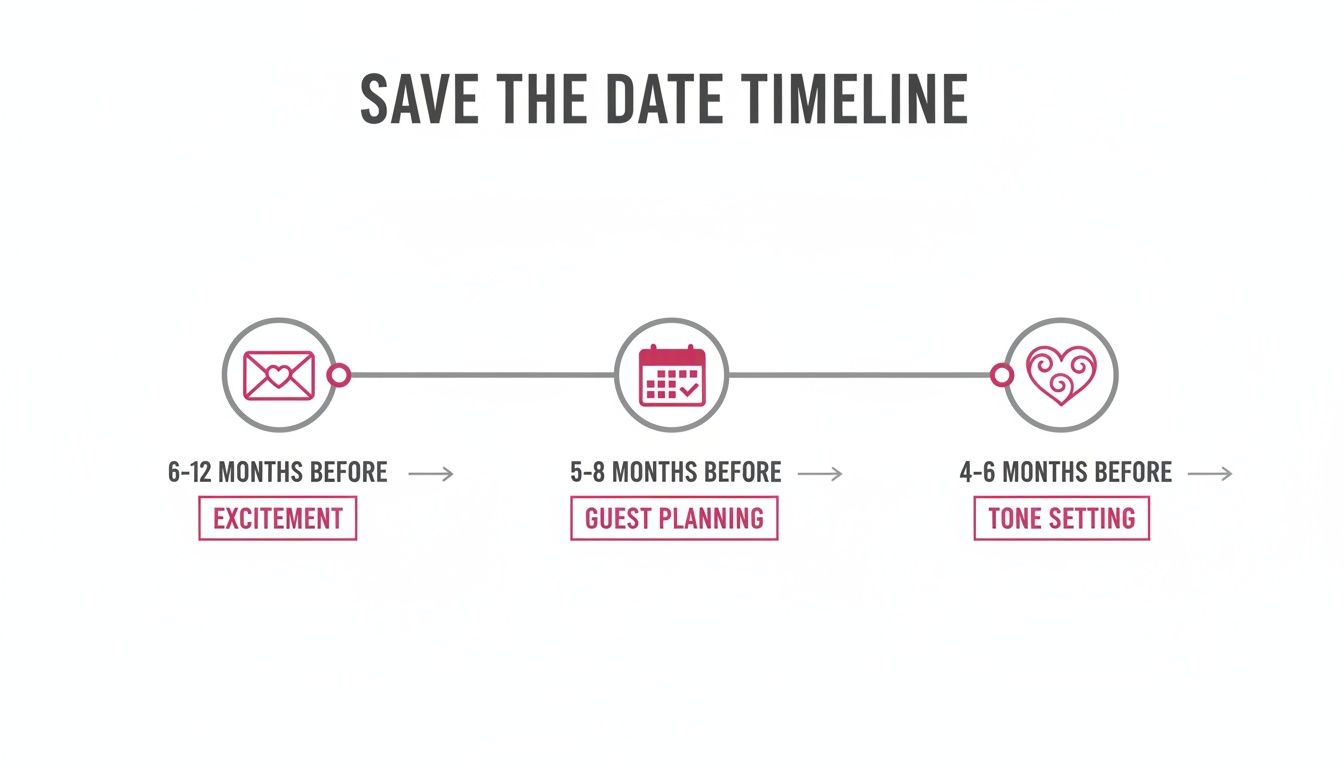
Beyond the pure logistics, your save the date is the very first taste your guests get of your wedding's vibe. It’s your chance to make a brilliant first impression and start building that buzz.
Your save the date isn't just an announcement; it's the prologue to your wedding story. It sets the scene, introduces the main characters (that’s you!), and gives everyone a reason to be excited for the main event.
This is where you start to tell your story. A sleek, minimalist card hints at a modern city wedding, while something with a floral, rustic feel might suggest a relaxed celebration in the countryside. It’s your first real opportunity to show off your personality as a couple. You’re not just asking them to circle a date on the calendar; you're officially inviting them to be part of your journey from the get-go.
Nailing the Timing and Guest List Etiquette
Figuring out when to send your save the dates is one of the first big decisions you'll make, and it really comes down to two things: where you're getting married and who's coming. The whole point is to give your favourite people a heads-up, so the more notice they need, the earlier you should get them in the mail.
For a local wedding where most of your guests live nearby, the sweet spot is around six to eight months before the big day. This gives everyone plenty of time to pop it on their calendar and book a day or two off work, but it’s not so far in advance that they forget about it entirely.
What About Destination Weddings?
That standard timeline goes right out the window if you’re planning a destination wedding or have lots of guests flying in from interstate or overseas. For these situations, you need to be way more generous with your timing.
If your wedding involves passports and serious travel plans, you’ll want to send your save the dates nine to twelve months in advance. Honestly, you can’t give too much notice here. This gives your guests the best possible chance to scout out affordable flights, book good accommodation, and sort out their annual leave. The earlier they know, the more likely they can make it.
It all starts with that initial excitement, moves into the nitty-gritty of guest planning, and then you set the whole vibe for your event.
This journey from a happy announcement to practical planning is why a solid timeline is so crucial. Following a comprehensive ultimate wedding planning timeline can be a real lifesaver.
The Unbreakable Rule of the Guest List
Okay, let's get serious for a moment about the single most important rule of wedding etiquette: if you send someone a save the date, you must send them a wedding invitation. No ifs, ands, or buts.
A save the date isn't a "maybe" or a way to test the waters. It's a promise that a formal invitation is coming their way. Sending one and then pulling the invitation is a major faux pas that will definitely cause hurt and confusion. Before you order a single card or click 'send' on an e-vite, your guest list needs to be locked in.
Think of your save the date list as your final "A-list." You can always add more people later by just sending them an invitation, but you can never, ever subtract someone once they've received a save the date.
This is why it's so important to have your venue's capacity confirmed. Before you tell anyone to mark their calendar, be absolutely sure you and your budget can accommodate every single person on that list. If you're still deciding on a spot, check out our guide on the crucial https://blog.easyregistry.com.au/wedding-venue-questions/ to help you finalise those details.
How to Handle Plus-Ones (and Avoid Awkwardness)
Clarity is everything when it comes to your guest list. Your save the date should make it crystal clear exactly who is invited, which saves you from so many headaches later on.
Couples: Address the card to both people by name (e.g., "Sarah Chen & David Miller").
Single guests with a plus-one: If you’re happy for them to bring someone, write "James Smith & Guest." This explicitly gives them the option.
Families: If you’re inviting kids, address it to "The Thompson Family." If it’s an adults-only affair, address it just to the parents ("Mr & Mrs Thompson").
Being specific right from the start manages everyone's expectations and helps you dodge those tricky "So, can I bring my cousin?" conversations. Your save the dates are the first impression of your wedding—make it a clear and thoughtful one.
Crafting Wording That Is Clear And Captivating
The words on your save the date are more than just an announcement; they’re the very first glimpse your guests get into your wedding story. It’s their first impression, setting the tone and delivering the need-to-know info, all while showing off your unique personality as a couple. The trick is to find that sweet spot between crystal-clear information and your own personal flair.
At the end of the day, the message needs to be simple and straight to the point. Drowning your guests in details will only cause confusion and take away from the card’s main job: getting them to circle the date on their calendar. Think of it as the headline, not the full story—that can come later on your wedding website and the formal invitation.
The Absolute Must-Haves
Before you start getting creative, there are a few non-negotiable details every save the date needs. Skip any of these, and you can expect a flood of texts and calls from confused friends and family.
Make sure your card clearly states:
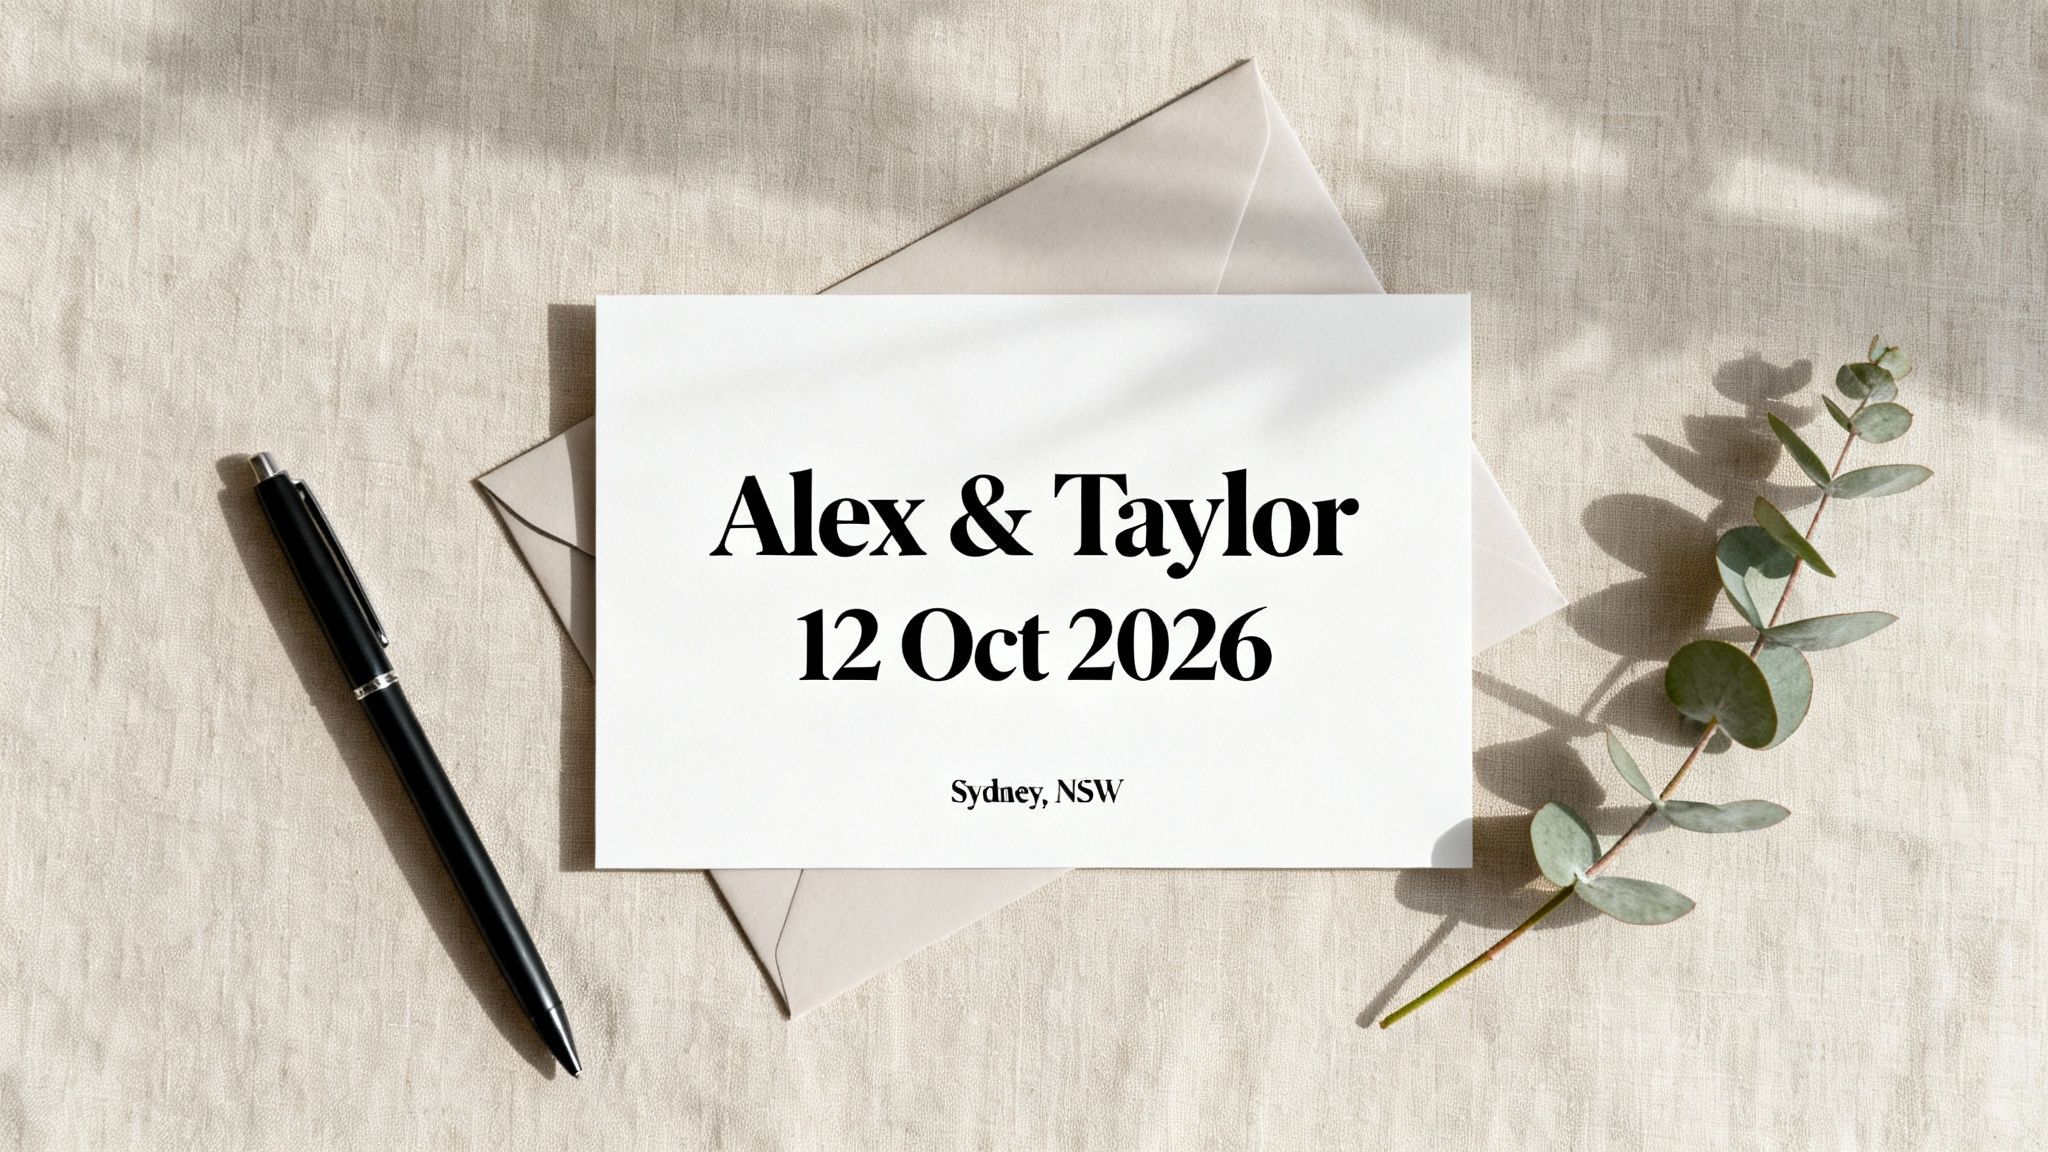
Your Names: Seems obvious, but you need to be clear about who’s getting married! Whether you use first names or full names really depends on how formal your wedding will be.
The Wedding Date: This is the hero of the card. Always include the full date—day of the week, date, month, and year—to avoid any mix-ups. For example, "Saturday, 25 October 2025".
The Location (City and State/Country): Your guests don't need the exact venue address just yet. What they do need is the city and state (or country, if it's a destination wedding). This is the crucial bit of info they'll use to book flights and accommodation.
A Note About the Formal Invitation: A simple line like "Formal invitation to follow" is a must. It lets everyone know this isn't the final invitation, so they shouldn't be hunting for an RSVP card.
Think of your save the date as a friendly heads-up, not a formal summons. The language should feel personal and exciting, giving guests just enough information to get them planning without overwhelming them with details that might still change.
What To Leave Out For Now
Just as important as what you put on the card is what you leave off. A common mistake is cluttering the save the date with too much information, which can create confusion. Save the finer points for the formal invitation and your wedding website.
For now, be sure to skip:
Specific Venue Details: The city is enough for now. You can share the ceremony and reception locations later on.
Registry Information: It’s considered poor etiquette to put gift registry details on a save the date. This is best placed on your wedding website or shared by close family if guests ask.
RSVP Requests: It’s way too early to ask for a firm headcount. The official RSVPs will be collected with the formal invitations, which are typically sent 6-8 weeks before the wedding.
A Detailed Schedule: Times for the ceremony, cocktail hour, and reception are not necessary at this stage. Plus, these details are often finalised much closer to the date.
Finding Your Voice: Wording Examples For Every Style
Now for the fun part—letting your personality shine through. The tone you choose should be a true reflection of you as a couple and the vibe you want for your wedding day. Are you planning an elegant, black-tie affair or a chilled-out, barefoot-on-the-beach kind of day?
Finding the right words can be tough, so here are a few examples to get you started, sorted by the kind of wedding you're planning.
Save The Date Wording Examples for Every Style
Wedding Style
Wording Example
Traditional & Formal
"Please save the date for the wedding of Amelia Grace Thompson and Liam James Carter"
Modern & Casual
"Save our date! Chloe & Ben are getting married!"
Minimalist & Chic
"Save the Date. Olivia and Jack. 25.10.25. Melbourne, VIC."
Playful & Humorous
"It’s about time! Save the date for Zoe & Leo's wedding."
Destination Wedding
"Pack your bags! We’re getting married in Bali! Save the date for Mia and Noah."
Ultimately, the best wording for your save the date is whatever feels most authentic to you. It’s the first chapter of your wedding story, so have fun with it and make it a great one.
Choosing Between Paper and Digital Designs
Alright, you’ve sorted out your guest list and locked in a timeline. Now for the fun part: deciding what your save the dates will actually look and feel like. This is where your wedding's visual story really begins, and the choice between traditional paper and sleek digital designs says a lot about your style, budget, and the vibe you want to create.
Honestly, there’s no right or wrong answer here. The best choice is the one that feels most like you as a couple. Let's break down the pros and cons of each to help you land on the perfect fit for your big day.
The Timeless Charm of Tangible Cards
There's just something special about receiving a beautiful piece of mail, isn't there? A physical save the date is a tangible keepsake your guests can stick on the fridge—a happy, constant reminder of the celebration to come. This traditional route immediately sets a certain tone, often hinting at a more formal or classic wedding style.
You simply can't replicate the tactile experience of paper. The weight of the cardstock, the texture of a letterpress design, or the shimmer of gold foil all combine to make a powerful first impression. These little details make your announcement feel significant and thoughtfully planned.
It's this sentiment that keeps physical cards so popular. Even with all the digital options out there, traditional stationery still dominates for milestone events like weddings because it just feels more special.
Exploring Your Paper and Print Options
If you're leaning towards paper, you’ve got a whole world of creative possibilities to explore. The materials you choose will have a huge impact on the final look and feel of your announcement.
Paper Stock: This is all about the thickness and texture of your card. A heavier stock (measured in GSM, or grams per square metre) feels more luxurious and substantial. You can choose from smooth matte and glossy finishes to more textured linen or even eco-friendly recycled paper. For a deep dive, check out a comprehensive guide to paper weights—it's surprisingly helpful.
Printing Techniques: Different methods create completely different effects. Digital printing is the most common and budget-friendly option. For a more high-end, tactile finish, look into techniques like letterpress (where the design is pressed into the paper) or foil stamping.
Key Takeaway: A physical save the date is more than just information; it’s a sensory experience. The weight, texture, and visual details create a lasting impression and give your guests a tangible piece of your wedding story to hold onto.
The Efficiency and Ease of Digital Designs
For modern, eco-conscious, or budget-savvy couples, digital save the dates are a brilliant alternative. They offer unmatched convenience and speed. With just a few clicks, your announcement can land directly in your guests' inboxes, saving you a small fortune on postage and reducing your wedding's carbon footprint.
Digital platforms also make managing your guest list a breeze. You can track who has opened the email, send out gentle reminders, and link everyone directly to your wedding website. This immediate connection is a massive plus, as it encourages guests to check out travel details or accommodation options straight away.
This approach works especially well for more casual weddings or for couples who are used to managing their lives online. It reflects a modern, streamlined style of planning.
Considering a Hybrid Approach?
You don't have to be all-or-nothing. A hybrid model can genuinely offer the best of both worlds.
Many couples send beautiful paper save the dates to close family and older guests who they know will appreciate a traditional announcement. Then, they’ll send a stylish e-card to friends and younger relatives who are perfectly happy with digital comms. This method is thoughtful and efficient, ensuring everyone feels included while you still get to take advantage of digital convenience.
Using Wedding Websites and QR Codes Effectively
Think of your save-the-date card as more than just a heads-up. It's really the first official touchpoint of your wedding experience, and by pairing it with a wedding website and a QR code, you can turn that small piece of paper into a super-helpful info hub for your guests. It’s a bit of a game-changer for modern wedding planning.
A wedding website becomes the single source of truth for your guests. It answers all their questions before they even have a chance to ask them, which drastically cuts down on those repetitive texts and phone calls about logistics. This frees you up to focus on the bigger picture and lets you share more of your story to get everyone excited.
What to Include on Your Website at This Stage
Don't feel pressured to have your entire wedding website perfectly polished when the save-the-dates go out. The real goal right now is to give your guests the essential details they need to start planning, especially if they’re travelling.
Here’s what you should aim to have live:
A Warm Welcome & Your Story: A short welcome message and a little background on you as a couple really helps guests feel connected to the celebration.
The Key Event Details: Just reiterate your names, the date, and the city or town. You don't need to have the specific venue locked in and announced, but confirming the general location is crucial.
Travel and Accommodation Advice: This is probably the most important part for out-of-towners. Suggest a few hotels (and mention any room blocks you've arranged), list the closest airports, and offer some tips for getting around.
A Simple FAQ Section: Start with the big questions you anticipate, like "Is there a dress code?" or "Can we bring our kids?". You can always add to this later as more queries come in.
The finer points—like the detailed schedule for the day, menu choices, and specific transport plans—can absolutely wait until you send the formal invitations. For now, it's all about providing just enough information to make things easy.
By directing guests to a central online hub, you streamline communication from day one. A wedding website paired with a QR code on your save the date cards empowers guests to find information independently, making their experience smoother and your planning process far more organised.
The Power of a Simple QR Code
QR codes have become the seamless bridge between your physical save-the-date and your digital wedding website. In fact, recent data shows that 38% of couples now include QR codes on their wedding stationery. It's a simple, effective tool that virtually everyone with a smartphone knows how to use.
With a quick scan, your guests get instant access to all the helpful information you've put together on your website. No more squinting to type out a long, complicated URL. They just point their camera, and they’re there.
It's all about making things easy for your guests, and a clean, user-friendly interface makes all the difference. When the time comes for your gift registry, you’ll see how a simple design can make the process smooth for everyone. You can learn more about how an online registry works to see just how seamless it can be.
Getting the Call-to-Action Right
Don't just slap a QR code on your card and call it a day! You need to give your guests a little nudge in the right direction. A clear, friendly call-to-action is key to getting them to actually scan it.
Keep the wording simple and direct. Something like:
"Scan for our wedding website and travel details!"
"For more info and to read our story, pop over to our website."
"Visit our wedding website for accommodation tips and more."
This tiny bit of text removes any confusion and encourages people to engage with your website straight away. It’s a small detail that makes a huge difference in keeping everyone in the loop and excited for your big day.
Your Save The Date Questions, Answered
Even with a perfect plan, you’re bound to have questions crop up when you get to the wedding stationery stage. We get it. Let’s walk through some of the most common queries we see, with clear answers to help you tick this off your list with confidence.
Do We Really Need to Send Save The Dates to Everyone?
Not necessarily, but it’s a very smart move for your most important people. Think of them as non-negotiable for anyone travelling from interstate or overseas, your immediate family, and your wedding party. These are the people who need a serious heads-up to book flights, sort out accommodation, and take time off work.
What about local guests? It’s a lovely gesture but less critical, especially if you have a shorter engagement.
Just remember the golden rule: anyone who gets a save the date must get a formal invitation later. This is a promise, so only send them to people you are 100% sure will be on your final guest list. There’s no taking it back.
What’s the Biggest Mistake Couples Make?
Hands down, the single biggest mistake is sending save the dates before the guest list is set in stone. It’s so tempting to get excited and send them out, but a save the date is a commitment to send an invitation. If you have to cut people later due to budget or venue limits, it creates hurt feelings and incredibly awkward conversations.
Another classic slip-up is putting way too much information on the card. Details about your gift registry, the exact ceremony time, or the dress code can all wait. Keep it clean and simple—save the nitty-gritty for the wedding website and the formal invitation.
The point of a save the date is to inform, not overwhelm. Keeping it simple and sending it only to a confirmed guest list sets a clear, considerate tone for your whole wedding experience.
Should We Ask for RSVPs on the Save The Date?
Definitely not. The whole point is just to give your guests a heads-up so they can block out the date. You're not asking for a firm commitment this far out. People’s plans change, and any RSVPs you collect now will be unreliable.
However, you can use it to get a soft headcount. A great way to do this is by adding a friendly note next to your wedding website details. Something like, "Head to our website for travel info and to let us know if you think you can make it!" This gives you a rough idea of numbers without pressuring anyone for a final answer. Save the formal RSVPs for the official invitations.
Is It Okay to Send Save The Dates by Email?
Absolutely! Digital save the dates are a fantastic, modern option. They’re eco-friendly, budget-conscious, and incredibly efficient—you save a bundle on printing and postage, and they’re delivered instantly. Plus, guests can click straight through to your wedding website.
The key is to know your audience. Older relatives, like grandparents, might not be as comfortable with digital invites and would probably cherish getting a physical card in the mail.
A hybrid approach is often the perfect solution. Many couples now:
Send beautiful paper cards to close family and older guests.
Email a stylish e-card to friends and younger relatives.
This way, everyone gets the news in a format that works for them. If you have more specific questions about how online wedding tools work, our team has put together a detailed list of answers to help with your planning. You can explore our own frequently asked questions for extra guidance.
Ready to streamline your gift-giving experience? With EasyRegistry, you can create a beautiful, user-friendly registry for your wedding, baby shower, or any special occasion. Give your guests the gift of choice and make your planning process simpler. Create your free registry today at https://www.easyregistry.com.au.
Giving money as a gift is often the most practical and desired option, yet it can feel impersonal. A crisp note tucked inside a generic card, while appreciated, rarely captures the celebratory spirit of a wedding, baby shower, or milestone birthday. The challenge is clear: how do we make a monetary gift feel as thoughtful and special as a hand-picked present? Fortunately, the days of the simple, uninspired cash-in-an-envelope gift are over. There are countless ways to transform a practical gesture into a memorable and engaging experience.
This guide is your comprehensive resource for innovative money gift ideas that add a personal touch and a bit of fun. We will move far beyond the basics, exploring creative presentation methods that make your gift a standout feature of the celebration. From intricate money origami and spectacular money cakes to interactive puzzle boxes and setting up a seamless cash fund, you'll discover actionable strategies for every occasion and budget.
We will cover everything you need to know, including step-by-step implementation details, guidance on appropriate amounts, and occasion-specific suggestions to ensure your gift is perfectly suited. You'll also find etiquette tips and sample wording to help you present your gift with grace. For those organising events, we'll delve into how registry platforms like EasyRegistry can streamline group contributions and cash funds, making the process effortless for both the giver and the recipient. Prepare to elevate your gift-giving and make your monetary present unforgettable.
1. Money Origami
Money origami, the Japanese art of paper folding (origami) using currency, transforms a simple cash gift into a memorable and artistic keepsake. Instead of just placing banknotes in an envelope, this method involves folding them into intricate shapes like flowers, animals, or hearts. This thoughtful presentation elevates the gift, showing an investment of time and creativity that recipients truly appreciate.
This approach is one of the most visually impressive money gift ideas, perfect for making a statement at a wedding, graduation, or milestone birthday. The final creation can be presented as a single, intricate piece, or multiple folded notes can be combined into a larger display, such as a bouquet or a decorative centrepiece.
Why It's a Great Choice
Money origami adds a significant personal touch to a monetary gift. It demonstrates effort and care, turning a practical present into a beautiful object that can be admired before being used. This method is particularly impactful at cultural celebrations, like a money lei for a 21st birthday or a bouquet of money roses for a wedding, blending tradition with a modern twist.
Key Insight: The true value of money origami lies in its dual nature. It's both a practical financial gift and a handcrafted piece of art, making the gesture feel more personal and less transactional.
How to Create a Money Origami Gift
Getting started with money origami is easier than it looks, with countless tutorials available for all skill levels.
Choose Crisp Notes: New, crisp banknotes are much easier to fold and hold their shape better. You can often ask for new notes at your bank.
Start Simple: Begin with basic designs like a heart or a simple flower before moving on to more complex shapes like butterflies or cranes.
Practice First: Use regular paper cut to the size of a banknote to practice your chosen design. This helps you get the folds right without creasing the actual currency.
Secure Subtly: Use small, removable glue dots or clear tape to hold complex folds in place without damaging the notes.
Enhance Your Presentation: Combine your origami creations with other elements. Arrange money flowers in a vase with silk leaves, attach origami butterflies to a wrapped gift, or place a folded animal inside a clear display box.
For a simple yet elegant design, a money heart is a fantastic starting point. This video tutorial provides easy-to-follow steps:
2. Money Cake or Dessert Display
A money cake is a tiered, decorative centrepiece crafted entirely from rolled banknotes, designed to mimic the appearance of a traditional celebration cake. This impressive display transforms cash into an unforgettable visual spectacle, using ribbons, toppers, and creative layering to build a stunning structure that serves as both a gift and a decoration.
This method is one of the most elaborate and eye-catching money gift ideas, making it a standout present at significant events like weddings, milestone birthdays, or a baby shower. The scale can be adapted, from a small "cupcake" made of a few notes to a grand, multi-tiered cake for a group gift, ensuring the wow-factor is always present.
Why It's a Great Choice
A money cake turns a practical gift into the centre of attention. Its grand presentation makes the recipient feel celebrated in a big way, and it often becomes a conversation piece at the event. This approach is particularly effective for group contributions, as it allows multiple givers to pool their money into one spectacular display that feels more unified and impactful than individual envelopes.
Key Insight: The money cake excels by turning a financial gift into a memorable event highlight. Its value is not just in the cash itself, but in the surprise and delight it creates, making the act of giving a celebration in its own right.
How to Create a Money Cake or Dessert Display
Building a money cake requires patience and a steady hand, but the final result is well worth the effort.
Build a Strong Foundation: Use sturdy cardboard cutouts or foam discs as the base for each tier. This provides the stability needed to hold the weight of the notes.
Roll Notes Uniformly: Tightly roll each banknote and secure it with a small, clear rubber band or a removable paper clip. Consistency in rolling is key to a neat and professional look.
Secure Tiers Together: Stack the foam or cardboard bases, securing them with a central dowel or hot glue. Arrange the rolled notes around the perimeter of each tier, holding them in place with a wide ribbon.
Decorate Thoughtfully: Add decorative elements that match the occasion. Use silk flowers, themed toppers with the recipient’s name, or ribbons in the event’s colour scheme to personalise the cake.
Consider a Hybrid Approach: For a fun surprise, place the money cake next to a real, edible cake, or create small "money cupcakes" to surround a central dessert.
3. Money Tree or Floral Arrangement
A money tree or floral arrangement is a stunning and decorative method for presenting a cash gift. This idea involves attaching banknotes to tree branches or incorporating them into a floral bouquet, transforming a practical gift into a beautiful centrepiece. The bills are folded or rolled and then secured with clips, pins, or ribbon, creating a "tree" that grows money or "flowers" with currency petals.
This presentation is one of the most memorable money gift ideas, ideal for occasions where the gift itself can double as decoration, such as a wedding wishing well table, a baby shower, or a significant birthday party. It’s a gift that makes a grand visual impact and serves as a conversation starter, showing considerable thought and effort.
" or a "voucher for that concert ticket you wanted." The recipient gets both the financial benefit and a memorable experience curated by you.
Why It's a Great Choice
A coupon book adds a deep layer of personal connection that cash in an envelope simply cannot match. It shows you’ve paid attention to the recipient's wants and needs, turning a financial gift into a promise of shared moments and support. This is particularly effective for parents gifting to children, partners celebrating anniversaries, or even as a unique wedding gift that provides experiences for the newlyweds.
Key Insight: The power of a coupon book lies in its ability to assign specific, joyful purposes to money. It frames the gift around experiences and memories rather than just a dollar amount, making it feel more intentional and less transactional.
How to Create a Personalized Coupon Book
Designing a coupon book is a creative process that can be as simple or elaborate as you like. The key is to make it feel special and well-thought-out.
Define the Vouchers: Decide on the experiences you want to gift. Examples include a coupon for a "movie night deluxe" (covering tickets and snacks), a voucher for a "weekend getaway contribution," or a simple "coffee date on me" coupon.
Use Quality Materials: Print your coupons on high-quality cardstock to give them a premium feel and ensure they last. A decorative cover page and binding with ribbon or staples completes the look.
Specify the Details: For clarity, include the monetary value or a clear description of what each coupon covers. It's also wise to add a "valid until" date to encourage prompt use.
Get Creative with Design: Use fun fonts, colours, and images that reflect the recipient's personality or the theme of the occasion. You can find many printable templates online to get you started.
Package it Thoughtfully: Present the coupon book in a beautiful gift box or wrap it with a ribbon. The presentation reinforces the idea that this is a special, handcrafted gift.
For those looking to gift newlyweds a series of experiences to enjoy in their first year of marriage, a coupon book can be one of the most unique wedding gift ideas.
6. Money Puzzle or Interactive Reveal
A money puzzle or interactive reveal transforms a cash gift from a simple handover into an exciting and memorable experience. Instead of just giving money, you present it as the prize at the end of a game, puzzle, or challenge that the recipient must solve. This method adds a layer of fun and personal engagement, making the gift feel more thoughtful and entertaining.
This approach is one of the most engaging money gift ideas, perfect for recipients who love a good challenge, like teenagers at a birthday, a partner on an anniversary, or even as a group activity at a baby shower. The reveal can be as simple as a puzzle box or as elaborate as a multi-step treasure hunt, tailored to the recipient's personality and the occasion.
Why It's a Great Choice
A money puzzle makes the act of receiving cash an event in itself. It shows creativity and a deep understanding of the recipient's interests, turning a practical gift into a fun-filled activity. This method is particularly effective for making a monetary gift feel more substantial and personal, as the focus shifts from the amount to the enjoyable experience of uncovering it.
Key Insight: The true value of an interactive reveal is the memory it creates. The recipient won't just remember the money; they'll remember the fun, the challenge, and the clever way you celebrated them.
How to Create a Money Puzzle Gift
Designing an interactive reveal is a creative process that can be customised for any skill level or occasion.
Match the Difficulty: Tailor the complexity of the puzzle to the recipient. A simple maze box is great for a child, while a multi-layered riddle or treasure hunt might be perfect for an adult who loves escape rooms.
Secure the Cash: Ensure the money is well-protected within the puzzle or at the final location. Use a sealed envelope or a small, secure box to prevent it from getting damaged or lost during the activity.
Consider a Treasure Hunt: Create a series of clues that lead the recipient around their home, garden, or a meaningful location. Each clue brings them closer to the final cash prize, building anticipation along the way.
Use Digital Puzzles: For a modern twist, create a QR code that links to an online riddle or a password-protected digital wallet. The answer to the riddle becomes the password to access their digital gift.
Present It Beautifully: Package the first clue or the puzzle box attractively. The initial presentation sets the stage for the fun that is about to unfold.
7. Investment Gift or Money Growth Certificate
An investment gift or money growth certificate is a forward-thinking approach that transforms a cash gift into a long-term financial asset. Instead of giving cash for immediate use, this method involves contributing to or setting up an investment vehicle on the recipient's behalf, such as a savings fund, shares, or a college plan. This gift not only provides monetary value but also fosters financial literacy and has the potential to grow significantly over time.
This approach is one of the most impactful money gift ideas for major life milestones, especially for children, students, or young adults just starting their careers. The gift is usually presented as a beautifully designed certificate or a formal letter detailing the investment, making a tangible and impressive statement about your commitment to the recipient’s future success.
Why It's a Great Choice
This type of gift offers lasting value that appreciates well beyond its initial amount. It's a powerful way to support a recipient’s long-term goals, like education, a first home deposit, or retirement. By providing a head start in investing, you’re giving a lesson in financial prudence and the power of compound interest, which is a gift in itself.
Key Insight: An investment gift shifts the focus from short-term spending to long-term wealth creation. It’s a meaningful gesture that invests in the recipient's future, offering security and opportunity that far outlasts a simple cash present.
How to Create an Investment Gift
Setting up an investment gift is a thoughtful process that requires some planning but creates a profound impact.
Align with Goals: Choose an investment that matches the recipient’s age and life stage. A 529 savings plan is ideal for a baby shower, while a contribution to a Roth IRA or an index fund is perfect for a recent graduate.
Provide Clear Documentation: Present the gift with all the necessary paperwork, account details, and a clear explanation of what it is and how it works.
Create a Presentation Certificate: Design a "Money Growth Certificate" or a formal letter to announce the gift. This makes the intangible investment feel more concrete and celebratory.
Educate and Empower: Include a simple note explaining the investment strategy and its potential. For those aiming to empower recipients, exploring realistic strategies for turning a money gift into significant growth can be incredibly inspiring.
Consider Ongoing Contributions: For a truly lasting impact, you could set up a small, recurring automatic contribution, demonstrating a continued investment in their future. Similar to contributing to a travel fund, this shows long-term support for a major goal. Learn more about how you can help fund long-term goals with a registry.
8. Money Lei or Hawaiian-Style Garland
A money lei, or Hawaiian-style garland, is a beautiful and culturally significant way to present a cash gift. This method involves artfully folding and stringing banknotes together, often interwoven with fresh flowers, beads, or ribbons, to create a wearable garland. It transforms a monetary gift into a festive and honourable adornment for the recipient to wear during their celebration.
This approach is one of the most celebratory money gift ideas, deeply rooted in the Hawaiian tradition of bestowing leis as a symbol of love, respect, and aloha. It is particularly popular for graduations, milestone birthdays, and weddings, where the lei serves as both a meaningful gift and a stunning accessory for photos.
Why It's a Great Choice
A money lei is a powerful gesture that combines financial support with a rich cultural tradition. It’s a very personal and hands-on gift that stands out, making the recipient feel truly special and celebrated. The visual impact is immense, and it provides a unique experience that goes far beyond a simple card and envelope.
Key Insight: The money lei is more than just a gift; it's a piece of ceremonial attire. It honours the recipient in a public and festive way, making the act of giving a memorable part of the event itself.
How to Create a Money Lei
Creating a money lei requires some patience and creativity, but the result is always worth the effort. There are many styles, from simple ribbon-and-cash designs to elaborate creations with fresh flowers.
Gather Your Materials: You will need crisp banknotes, a strong ribbon or monofilament line for the base, tape, and decorative elements like beads, silk flowers, or fresh flowers and greenery.
Fold the Banknotes: A popular method is the accordion or fan fold. Fold each note lengthwise into a small fan, then fold it in half to create a circular or bow-tie shape. Secure the middle with a small piece of tape or string.
String the Lei: Thread the folded banknotes onto your ribbon or line, alternating with beads, flowers, or other decorative elements to create a full and visually interesting pattern.
Add Fresh Elements (Optional): For a truly stunning lei, incorporate fresh flowers like orchids or plumeria. Use floral tape to secure them to the ribbon between the money sections. If using fresh flowers, keep the lei refrigerated until you present it.
Consider the Length: A standard lei is about 100 cm long, but you can adjust this based on the recipient's height and the desired look.
This video tutorial offers a clear, step-by-step guide to making a simple yet elegant ribbon money lei:
The journey through the world of creative money gift ideas reveals a powerful truth: the most memorable presents are not defined by their monetary value alone, but by the thought, intention, and personalisation woven into them. We've explored everything from the intricate folds of money origami and the celebratory spectacle of a money cake to the forward-thinking gift of an investment. Each approach transforms a practical cash gift into a memorable experience, demonstrating a genuine connection to the recipient and their special occasion.
The core takeaway is that giving money doesn't have to be impersonal or last-minute. By choosing a presentation method that aligns with the recipient's personality or the event's theme, you elevate the act of giving. A money puzzle for a friend who loves games, a money lei for a tropical-themed bridal shower, or a beautifully arranged money tree for a baby shower all add a layer of joy and surprise that a simple envelope cannot match. These methods show you've invested your time and creativity, making the recipient feel truly seen and celebrated.
Key Principles for Thoughtful Monetary Gifting
As you prepare for your next wedding, birthday, or milestone celebration, keep these central principles in mind to ensure your gift resonates deeply:
Personalisation is Paramount: Match the gift's presentation to the recipient’s interests. Is the couple saving for a honeymoon in Italy? Consider placing the cash inside a beautiful Italian travel guide. This small touch connects your gift directly to their dreams.
Context is Everything: The occasion dictates the tone. A whimsical money balloon might be perfect for a 21st birthday, while a more elegant contribution to a registered cash fund is often better suited for a formal wedding.
Clarity and Communication: When giving, especially for a specific purpose like a house deposit or a honeymoon, including a heartfelt note explaining your intentions adds immense value. It frames the gift as a contribution to their future, not just as currency.
Insight: The ultimate goal is to make your monetary contribution feel like a partnership in the recipient's joy and future aspirations. Whether it’s through creative flair or a contribution to a specific fund, your gift becomes part of their story.
Beyond Cash: Adding a Layer of Tradition and Luck
Sometimes, making a gift meaningful involves looking beyond standard currency. For those who appreciate history and symbolism, unique monetary-themed items can offer a wonderful alternative or addition to a cash gift. When aiming to make a monetary gift truly special, consider options beyond traditional cash, such as a historic British coin collection as a meaningful gift, often associated with good luck. This is particularly poignant for weddings, where a silver sixpence is a classic token for prosperity and happiness. It’s a beautiful way to honour tradition while still providing a gift of lasting value.
Ultimately, the best money gift ideas are those that successfully blend practicality with personal sentiment. You are not just handing over notes; you are providing the means for a new experience, helping to fund a major life goal, or simply offering a cushion for the future. By putting thought into the delivery, you ensure your gift is remembered not for the amount, but for the care and consideration behind it. This thoughtful approach turns a simple financial gesture into a lasting, positive memory for the people you care about most.
Ready to make group gifting and cash contributions effortless for your next big event? With EasyRegistry, you can create a beautiful, customisable registry page that allows guests to contribute to specific cash funds for your honeymoon, home deposit, or any other dream. Take the guesswork out of gifting by visiting EasyRegistry today to set up your free registry.
So, what exactly is a wedding shower? It’s one of the loveliest pre-wedding events, where friends and family come together to literally 'shower' the happy couple with gifts, helping them set up their new home and life together. It's less about the wild party (that's what hens and bucks nights are for!) and more about a warm, practical celebration of community support.
Your Quick Guide to Understanding a Wedding Shower
At its heart, a wedding shower is all about the gifts – but in the best way possible. It's a chance for the couple’s nearest and dearest to gather in a more laid-back setting than the actual wedding day and give presents that will genuinely help the couple start their next chapter.
You might have heard of a "bridal shower," which was traditionally an all-female event just for the bride. While those definitely still happen, modern Australian celebrations have evolved into something much more inclusive.
Key Aspects of a Modern Shower
These days, you’re far more likely to be invited to a co-ed or "couples' shower" that celebrates both partners at once. It’s a fantastic reflection of modern partnership and brings everyone together for one big, happy gathering. The goal is still the same – to help the couple get established – but the guest list has had a brilliant update.
A wedding shower isn’t just about the presents; it’s a tangible way for a community to show its love and support, helping a couple build their nest.
The main event usually revolves around the couple opening all their thoughtful gifts. To make sure they get what they actually need and love (and to avoid ending up with five toasters!), most couples set up a gift registry. Figuring out how a gift registry works is a game-changer for both the couple and their guests, making the whole experience seamless and fun.
How Wedding Showers Have Evolved in Australia
The Aussie wedding shower has come a long way. What started as a ladies-only "bridal shower," deeply rooted in old European dowry customs, has been completely transformed to fit modern relationships.
Let's be honest, the days of these parties being just for the bride and her circle of female friends and family are pretty much over. The trend now is all about inclusive, co-ed celebrations that put both partners in the spotlight. It's a shift that mirrors how we see marriage itself—as a genuine partnership between two people and the coming together of their communities.
The Rise of the Couples Shower
These days, the "couples shower" is the new norm here in Australia. These are joint events that bring everyone from both sides of the aisle together for one big celebration. It’s a move that’s not only more inclusive but also incredibly practical.
Think about it: hosting one party instead of two is a smart way to manage the budget and the planning effort, especially with the cost of weddings on the rise. Everyone gets to mingle and celebrate together. This modern approach feels much more authentic to what a wedding is really about: starting a shared life. Find out more about how Australian wedding traditions are getting a modern update.
A co-ed shower really sets a beautiful tone for the wedding itself. It’s all about unity and shared joy, sending a powerful message that two families and friendship groups are becoming one.
This evolution naturally changes the gift-giving game too. With both partners being celebrated, gift registries have expanded way beyond toasters and towels. Now, you’ll see couples asking for contributions towards shared experiences, their honeymoon, or a house deposit. That’s why flexible options like a wishing well registry have become so popular, giving guests a meaningful way to contribute. At its heart, the modern Aussie wedding shower is a true celebration of partnership.
Who Hosts and Who Should Be Invited?
Working out the social ins and outs of a wedding shower can feel a bit daunting, but the etiquette is actually pretty straightforward once you know it. Traditionally, the event is thrown by someone close to the couple—just not the couple themselves or their parents.
This long-standing custom is all about avoiding the awkwardness of the couple looking like they're asking for presents. Instead, the honour usually falls to members of the wedding party or dear friends who are genuinely excited to celebrate them.
Who Typically Plans the Shower?
More often than not, the hosting duties land with one or more of the following people:
The Maid of Honour and Bridesmaids: This is the classic choice. The bridal party is usually front and centre when it comes to planning pre-wedding events.
Close Friends of the Couple: For a co-ed shower, it’s common for a group of mates to team up, sharing the planning load and the costs.
A Close Family Member: An aunty, cousin, or godparent can also be a wonderful and perfectly appropriate host for the day.
Whoever takes on the role, their main job is to pull it all together—coordinating the date, locking in a venue, sending out invitations, and planning the activities. It’s all about creating a memorable day for the couple.
Crafting the Perfect Guest List
When it comes to deciding who to invite, there's one golden rule that you absolutely cannot break. It's a big one.
Every single person invited to the wedding shower must also be invited to the wedding.
There are no exceptions. Inviting someone to a gift-giving event but not the main celebration is considered a major faux pas.
The host should work hand-in-hand with the couple to get the guest list just right. This collaboration ensures no important friends or family members are forgotten and helps keep the numbers manageable for the venue. The couple provides the master list of names, and the host takes care of the rest.
When's the Best Time for a Wedding Shower?
When it comes to scheduling a wedding shower, timing really is key. The golden window is usually somewhere between three months and three weeks before the wedding day. There’s a good reason for this specific timeframe.
Holding the shower in this period builds a lovely sense of excitement for the big day, but it’s far enough out that it doesn’t add to the couple's last-minute stress. They get to take a breath and feel the love before that final, often chaotic, push of wedding prep. It also gives your guests a bit of financial breathing room, so they can comfortably budget for both a shower gift and a wedding present.
Pinpointing the Perfect Date
Nailing down the exact date is all about good communication. The first step for any host is to chat with the couple. Find out which weekends work for them and their immediate families—they’re the guests of honour, after all.
Once you have a few options, it’s a smart move to quietly check in with the absolute must-have guests, like the wedding party or close relatives, before you send out the invites. A quick text or call can make all the difference in ensuring everyone important can make it.
The best date for a wedding shower is one that builds anticipation, respects the couple's final wedding countdown, and lets everyone celebrate without any added pressure.
Here in Australia, this timing is pretty standard. It lets the couple actually enjoy the party before things get too hectic. Plus, from a practical standpoint, having the shower a few months beforehand often works well with how wedding costs are structured locally. Major expenses like venue and celebrant fees usually come due closer to the wedding, so it spreads out the financial commitments for everyone involved. For more on local etiquette, you can find some great Australian wedding planning timelines on Peppermint Press.
Mastering Gift-Giving and Wedding Registries
Gifts are a huge part of any wedding shower, but let's be honest—figuring out what to give or ask for can be a bit of a minefield. That’s where a wedding registry swoops in to save the day. It’s a game-changer for guests and the couple alike.
Think of it as the ultimate wish list for the couple’s new life together. It takes all the guesswork out of gift buying and, most importantly, saves the happy couple from unwrapping their third toaster. For something a bit different, personalised touches like Mr & Mrs wedding glass decals can add a lovely, unique flair to any gift or the event itself.
How to Create the Perfect Registry
Putting together a registry is one of the really fun parts of planning. Here in Australia, online platforms are incredibly popular. They let you mix and match items from all your favourite stores, set up cash funds for big-ticket items, or even ask for contributions towards your honeymoon. A great place to start is by exploring your options for an online wedding gift registry.
When you’re building your list, variety is key. Make sure to include gifts across a range of price points so everyone feels comfortable.
Household essentials: This is your chance to upgrade that mismatched linen or finally get a complete dinnerware set.
Hobby and lifestyle items: Love camping, entertaining, or gardening? Add things that you'll actually use and enjoy together.
Big-ticket items: For pricier things like a new couch, you can let guests chip in and contribute to a group gift.
Experience funds: Modern registries make it easy for guests to contribute to your honeymoon, a house deposit, or even a fancy cooking class.
The best registry is a genuine reflection of who you are as a couple. It should tell a bit of your story, making every gift feel thoughtful and truly personal.
So, how do you get the word out once it’s done? The most tasteful way is to let your host do the talking. They can pop a small card with the registry details into the shower invitation or simply share a link to your wedding website. It feels less like a demand and more like a helpful hint for guests who are keen to get you something you'll love.
Gift Etiquette for Guests
If you’re a guest, the registry is your new best friend. It shows you exactly what the couple wants and needs, making your shopping trip a breeze. A good rule of thumb is to spend a little less on the shower gift than you plan to spend on the wedding gift itself.
Feeling the pinch or spotted a high-ticket item you know they’d adore? Team up! A group gift is a brilliant way to give something really special without breaking the bank. It's a win-win for everyone involved.
Your Australian Wedding Shower Questions Answered
The moment the wedding shower invitations go out, the questions start popping up. It's totally normal, especially with so many different traditions floating around. Let's clear the air on some of the most common queries we hear from Aussies.
Is a Wedding Shower the Same as a Hens Party?
Not at all! Think of them as two completely different celebrations with their own unique vibe. A wedding shower is all about showering the couple with gifts and good wishes to help them set up their home together. It’s usually a more relaxed, family-friendly daytime affair.
A hens party (or bucks), on the other hand, is that famous "last hurrah" before married life begins. It’s a party thrown for the bride or groom by their closest mates, focused on fun, activities, and celebrating the end of an era – presents aren’t really the point here.
Do I Bring a Gift to Both the Shower and the Wedding?
If you're invited to both, then yes, the done thing in Australia is to bring a gift to each event. But don't panic – the gifts are usually quite different.
Shower Gift: This is typically a physical gift for the home. It’s often something practical and a bit more personal, usually picked from the couple's registry.
Wedding Gift: The wedding gift is often money for a wishing well or a contribution to a larger registry item.
The general rule of thumb is that your wedding gift will be the more substantial of the two.
Can We Have a Shower if We Already Live Together?
Of course! Let's be honest, most couples in Australia live together before they tie the knot. This doesn't make a shower any less special or necessary. These days, a shower isn't just about kitting out a first home; it's about celebrating a new chapter.
Many couples who are already set up use their shower as a chance to upgrade older items—think swapping out those mismatched uni plates for a beautiful dinner set. Others might create a registry for a home reno project or a honeymoon fund. It’s about what’s genuinely helpful for your life as a married couple.
What Is the Best Way to Share Registry Information?
The golden rule here is to be tactful. It should always be the host of the shower who shares the registry details, not the couple themselves. This little bit of etiquette keeps it from looking like you're asking for presents directly.
The best way to do this is for the host to pop a small, separate card with the registry info inside the invitation. Another great option is to include a link to the couple's wedding website, where guests can find everything they need. It frames the registry as a helpful guide for guests, not a demand.
Planning your special day? Make gift-giving effortless for you and your guests. With EasyRegistry, you can create a beautiful, all-in-one gift registry for anything you wish for, from household goods to honeymoon funds. Get started for free today at https://www.easyregistry.com.au.